
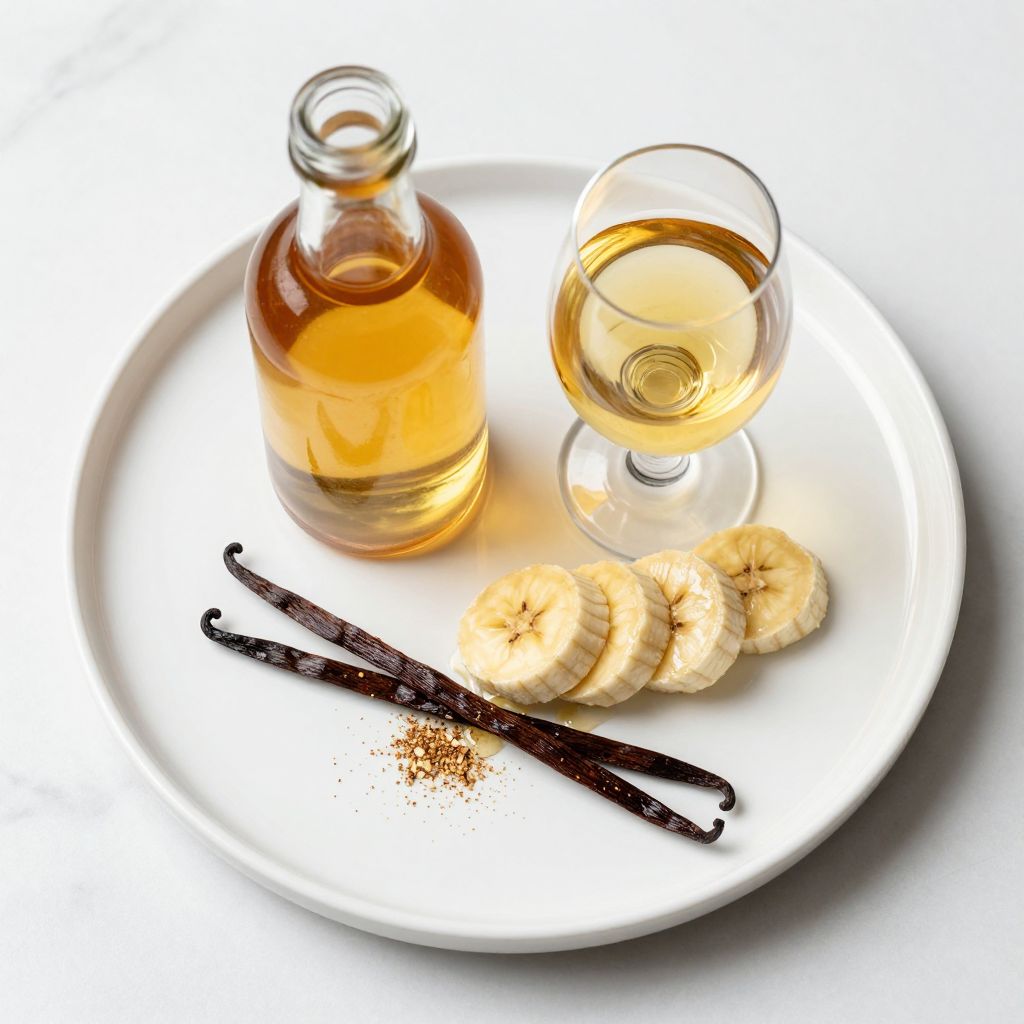
Picture yourself sipping a smooth, golden liqueur that tastes like summer in a glass, with the natural sweetness of ripe bananas singing through every drop. Banana liqueur is a homemade spirit that transforms simple fruit into something truly special, perfect for sipping neat, mixing into cocktails, or gifting to friends who appreciate craft spirits.
This recipe is special because you control every ingredient, skip the artificial flavors found in store-bought versions, and end up with a liqueur that tastes genuinely like real bananas. The process takes just minutes of hands-on work, though patience during infusion rewards you with a silky, complex spirit that improves with time.
Why You’ll Love This Recipe
Homemade banana liqueur beats commercial versions on taste, cost, and customization. You’ll create something shelf-stable that lasts for months and impresses every person who tries it.
- Simple ingredient list: bananas, vodka, sugar, and optional vanilla or spices
- No special equipment needed beyond a jar and strainer
- Ready to drink in as little as two weeks, though longer infusion deepens flavor
- Perfect for cocktails, cooking, or sipping straight from a chilled glass
- Makes an impressive homemade gift that costs pennies to produce
My Experience Making This Recipe
I first made banana liqueur on a whim after reading about infusion techniques, and I honestly didn’t expect much. Within three weeks, I had a liqueur that tasted like concentrated banana essence with a silky texture that seemed impossible to achieve at home.
The smell during infusion is intoxicating, filling your kitchen with sweet banana notes that grow more complex each day. I’ve since made it a quarterly project, experimenting with brown sugar for deeper caramel notes and adding a vanilla pod for extra dimension.
Friends have asked for bottles as gifts, and I’ve stopped buying commercial liqueurs altogether. The satisfaction of creating something shelf-stable and genuinely delicious from basic ingredients never gets old.
Recipe Overview
- Recipe Name: Homemade Banana Liqueur
- Servings: About 24 (1.5-ounce servings)
- Prep Time: 15 minutes
- Infusion Time: 14 to 30 days
- Total Time: 14 to 30 days plus 5 minutes for finishing
- Course: Liqueur / Digestif
- Cuisine: Homemade / International
- Calories per Serving: 120
Equipment You Will Need
- 1 quart glass jar with tight-fitting lid
- Cutting board and sharp knife
- Cheese cloth or fine mesh strainer
- Funnel (optional but helpful)
- Glass bottles for storage (clean, with lids)
- Measuring cups and spoons
- Wooden spoon or chopstick for stirring
Ingredients for Banana Liqueur
- 4 ripe but firm bananas (about 1.5 pounds)
- 750 milliliters vodka (80 proof, standard unflavored)
- 1.5 cups white granulated sugar
- 1 cup water
- 1 whole vanilla pod, split lengthwise (optional but recommended)
- 1/4 teaspoon sea salt
- Pinch of nutmeg (optional for depth)
Ingredient Notes and Substitutions
- Ripe bananas: Ripe but firm fruit delivers flavor without mushiness. If using very soft bananas, reduce infusion time by one week since they release flavor faster.
- Vodka: Higher proof vodka (100+ proof) extracts flavor more efficiently and creates a longer shelf life. Lower proof vodka works but may result in a slightly less intense final product.
- Sugar: White sugar creates a clean, neutral sweetness. You can swap up to half the white sugar for brown sugar to add caramel and molasses notes instead.
- Water: Filtered water prevents mineral flavors from interfering. Tap water works fine if that’s what you have.
- Vanilla pod: Adds creamy complexity, but you can omit it entirely or substitute with 1 teaspoon pure vanilla extract added at the end. Extract adds flavor faster but with less nuance.
How to Make Banana Liqueur
Step 1: Prepare the Bananas
Peel the bananas and slice them into thin rounds, about one-quarter inch thick. Thinner slices create more surface area, allowing the vodka to extract flavor faster and more thoroughly.
Step 2: Add Bananas to the Jar
Place the banana slices directly into your clean, dry quart jar. Pack them loosely without crushing them, as you want them to infuse rather than release juice.
Step 3: Pour the Vodka
Pour the entire bottle of vodka over the bananas, making sure all fruit is fully submerged. Vodka preserves the bananas and extracts their flavor compounds over time, creating the signature liqueur taste.
Step 4: Add the Vanilla Pod
Split the vanilla pod lengthwise and add both halves to the jar. The vanilla seeds and pod interior add creamy, sweet notes that complement banana naturally.
Step 5: Seal and Label
Screw the lid on tightly and label the jar with the date you started the infusion. This prevents confusion later and helps you track how long the liqueur has been steeping.
Step 6: Store in a Cool, Dark Place
Place the jar in a cabinet or pantry away from direct sunlight and heat. Light degrades the flavor and color of infusions, so avoid windowsills and warm countertops.
Step 7: Shake Daily for the First Week
Give the jar a gentle shake each day for seven days to help the vodka extract banana flavor evenly. You’ll notice the liquid gradually turning golden yellow as banana flavor releases into the vodka.
Step 8: Monitor and Taste After Two Weeks
After 14 days, open the jar and taste a small spoonful of the liqueur. If the banana flavor is rich and smooth, you’re ready to strain; if it tastes mild, let it infuse for another week or two.
Step 9: Strain the Liqueur
Line your fine mesh strainer with cheesecloth and carefully pour the liqueur through it into a bowl, leaving the banana solids behind. This removes all fruit particles and sediment, creating a clear, clean liqueur.
Step 10: Make the Sweetening Syrup
In a small saucepan, combine the water and sugar over medium heat, stirring until the sugar dissolves completely. This creates a simple syrup that sweetens and rounds out the liqueur without adding raw alcohol bite.
Step 11: Cool the Syrup
Let the syrup cool to room temperature before adding it to your strained liqueur. Hot syrup can crack glass bottles and creates an uneven blend with the vodka.
Step 12: Combine and Bottle
Pour the strained liqueur into a large clean glass container, add the cooled syrup, the salt, and a pinch of nutmeg if desired. Stir thoroughly, then divide into clean bottles with tight-fitting lids and seal.
Pro Tip: Let your finished liqueur rest for at least one week in the bottle before drinking it, as the flavors meld and mellow beautifully, creating a more balanced and sophisticated spirit.
Tips for the Best Banana Liqueur
- Use bananas that are golden yellow with a few brown speckles, not green or overly soft, as they contain more natural sugars and flavor compounds.
- Don’t skip the salt in the final step, as just one-quarter teaspoon enhances banana flavor and balances sweetness without making the liqueur taste salty.
- Save your vanilla pod to infuse sugar or make vanilla extract, getting double value from that single ingredient.
- Shake the bottle gently before pouring each time, as settling can occur during storage and you want even flavor distribution.
- Keep bottles in a cool cabinet, not the freezer, as freezing can separate the flavors and change the texture.
- If your liqueur crystallizes or becomes cloudy, gently warm the bottle in warm water (not hot) to clarify it before serving.
Common Mistakes to Avoid
- Using overripe or mushy bananas results in a thick, unpleasant texture and can introduce unwanted fermentation flavors if left too long.
- Skipping the cooling step for simple syrup causes hot liquid to warm the finished liqueur unevenly, creating flavor imbalances.
- Leaving the banana solids in too long (beyond four weeks) can introduce bitter or off-flavors from over-extraction.
- Using flavored vodka instead of plain vodka muddies the pure banana taste you worked to create.
- Storing bottles in warm places or direct sunlight fades the golden color and causes the flavor to flatten over time.
Serving Suggestions
Banana liqueur shines in many settings, from casual sipping to elegant cocktails. The natural sweetness and smooth texture make it versatile enough for nearly any occasion.
- Serve neat in a shot glass, chilled in the freezer for 30 minutes before pouring
- Mix one part banana liqueur with three parts rum and a splash of lime juice for a tropical banana daiquiri variation
- Layer it over vanilla ice cream for an instant dessert that tastes like bananas foster
- Add one-quarter ounce to champagne or prosecco for an elegant aperitif
- Combine with coffee liqueur and cream for a dessert cocktail with caramel and banana notes
Variations to Try
- Brown Sugar Banana Liqueur: Replace one cup of white sugar with brown sugar for deeper caramel and molasses notes that create a more complex, grown-up spirit.
- Spiced Banana Liqueur: Add one cinnamon stick, three whole cloves, and two star anise pods during infusion for warm spice that plays beautifully with banana sweetness.
- Rum-Based Banana Liqueur: Substitute rum for half the vodka to create a spirit with more depth and tropical character that works wonderfully in tiki cocktails.
- Lighter Version: Reduce the sugar to one cup if you prefer a less sweet liqueur that highlights banana flavor more prominently without cloying sweetness.
- Honey Banana Liqueur: Replace half the simple syrup with honey syrup for a rounder, slightly floral sweetness that adds complexity.
Dietary Adaptations
- Gluten-Free: This recipe is naturally gluten-free as written, with no ingredients containing gluten.
- Dairy-Free: The base recipe contains no dairy, though serving suggestions like ice cream cream require dairy-free substitutes.
- Vegan: This recipe is fully vegan, containing no animal products in the liqueur itself.
- Low-Carb/Keto: This recipe is high in sugar and not suitable for keto diets; consider it an occasional treat rather than a regular option.
- Lower Sugar Version: Reduce sugar to three-quarters cup for a less sweet liqueur that still balances well with the vodka.
Storage and Reheating
Refrigerator
Store sealed bottles in the refrigerator for up to six months, though the liqueur remains stable at room temperature. Chilling improves the drinking experience by smoothing flavors and creating a pleasant texture.
- Keep bottles tightly sealed to prevent oxidation
- Check occasionally for any crystallization or cloudiness
- Shake gently before serving to ensure even flavor distribution
Freezer
Frozen banana liqueur becomes thick and syrupy but remains drinkable for up to one year. The high alcohol content prevents true freezing, but the texture becomes less pleasant.
- Avoid freezing if possible, as cold temperatures can cause separation
- If frozen, thaw slowly at room temperature before serving
Reheating
This liqueur never requires reheating and is best served chilled or at room temperature. If crystallization occurs, gently warm the bottle in warm water without boiling.
- Never use a microwave to heat bottles
- Warm water should feel comfortable to touch, around 110 degrees Fahrenheit
Nutrition Information
| Nutrient | Amount |
|---|---|
| Calories | 120 |
| Total Fat | 0 grams |
| Saturated Fat | 0 grams |
| Carbohydrates | 12 grams |
| Fiber | 0 grams |
| Sugar | 10 grams |
| Protein | 0 grams |
| Sodium | 25 milligrams |
| Cholesterol | 0 milligrams |
Nutrition values are estimates based on a 1.5-ounce serving and account for the sugar added during preparation. Individual variations occur based on exact banana ripeness and infusion length.
Frequently Asked Questions
Can I use frozen bananas for this recipe?
Yes, frozen bananas work well and some bakers prefer them because freezing breaks down cell walls, speeding up extraction. Thaw them completely before adding to the vodka and expect to reduce infusion time by one week.
How long does homemade banana liqueur last?
Sealed bottles last indefinitely but are best consumed within 18 months when flavor and color are at their peak. The high alcohol content prevents spoilage, so old bottles remain safe to drink but may taste flat.
Can I make this recipe with rum instead of vodka?
Absolutely, and many people prefer it for deeper, more tropical notes. Use the same amount of rum and expect slightly different flavor development due to rum’s inherent sweetness and vanilla notes.
Why did my liqueur turn brown instead of golden yellow?
Brown coloring typically means your bananas were very ripe or the infusion lasted longer than 30 days. This doesn’t affect safety or taste significantly, though the flavor may be slightly more caramel-forward than typical banana liqueur.
Can I speed up the infusion process?
Slicing bananas thinner, using slightly warmer storage, and shaking the jar daily accelerates extraction, but patience still matters. Don’t reduce infusion below two weeks, as the liqueur needs time for flavors to meld and smooth out.
What should I do if my liqueur tastes too sweet?
Add a splash of plain vodka to dilute the sweetness and increase complexity. Alternatively, use the liqueur in cocktails where other spirits and mixers balance the sweetness instead of sipping it neat.
Is homemade liqueur legal to make?
Yes, in most countries and US states, you can legally make infused liqueurs at home for personal consumption. Check local laws in your area, as regulations vary by location.
Final Thoughts
Making banana liqueur at home proves that craft spirits don’t require fancy equipment or professional training. You need patience, basic ingredients, and the willingness to let time do the heavy lifting while you wait for magic to happen in a jar.
Try this recipe this month and taste the difference real bananas make compared to anything you’ll find in a bottle at the store. Your future self will thank you every time you enjoy a smooth, silky, golden pour.
Ready to explore more homemade spirit recipes and creative mixology ideas? Check out our collection of homemade liqueur techniques and craft cocktail guides to expand your home bar beyond banana liqueur. You might also enjoy learning about complementary recipes like an apple banana smoothie recipe for daytime refreshment or a cherry liqueur recipe to round out your homemade spirit collection.
Homemade Banana Liqueur
Ingredients
Equipment
Method
- Peel the bananas and slice into 1/4-inch thick rounds.
- Place the banana slices into the quart jar, packing them loosely.
- Pour the vodka over the bananas, ensuring all fruit is submerged.
- Add the split vanilla pod to the jar.
- Seal the jar tightly and label with the start date.
- Store in a cool, dark place and shake the jar gently once daily for the first 7 days.
- After 14 days, taste the infusion; continue steeping up to 30 days if a stronger banana flavor is desired.
- Line a fine mesh strainer with cheesecloth and strain the infused vodka into a bowl, leaving solids behind.
- In a small saucepan over medium heat, combine water and sugar; stir until the sugar dissolves completely to form a simple syrup.
- Remove the syrup from heat and let it cool to room temperature.
- Combine the strained liqueur, cooled syrup, sea salt, and nutmeg in a clean container and stir thoroughly.
- Use a funnel to bottle the liqueur into glass storage bottles and seal tightly.
- Let the bottled liqueur rest at least one week before serving to allow flavors to meld.