
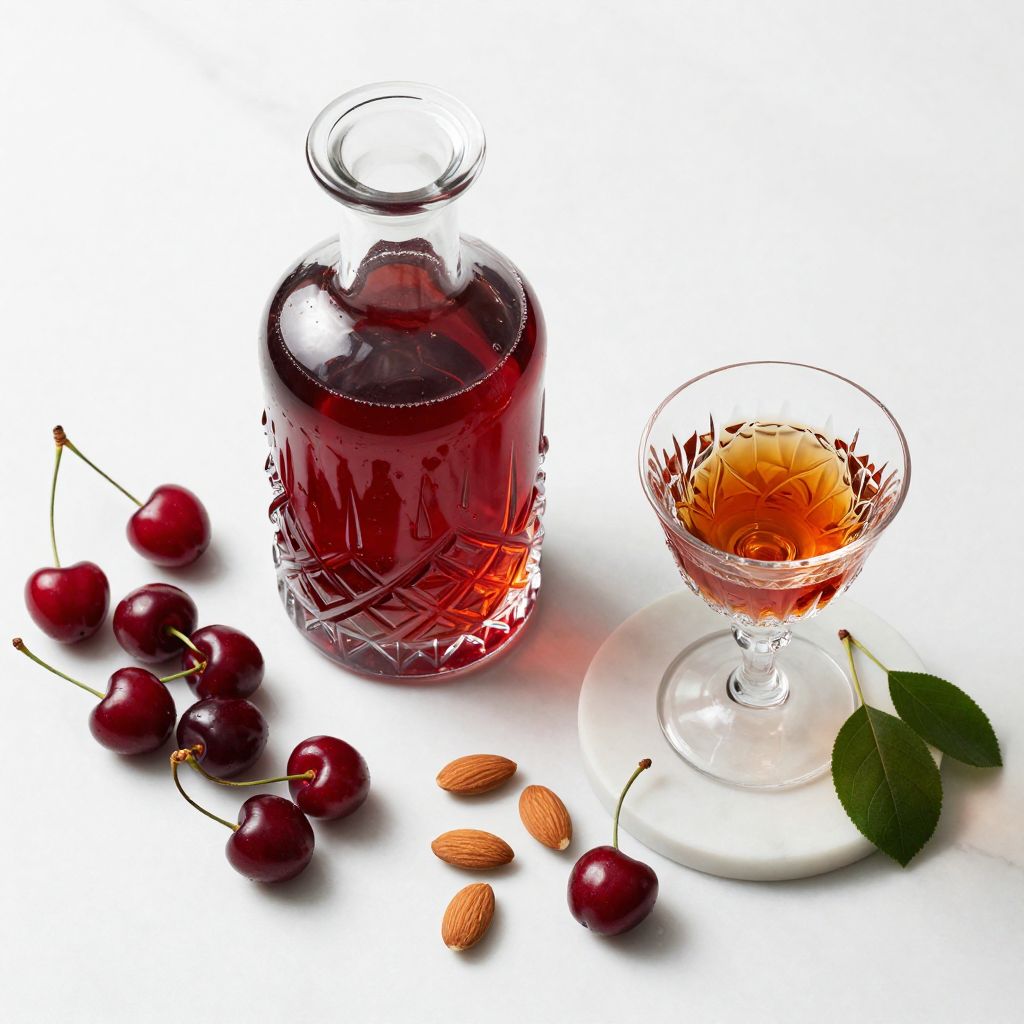
There’s something magical about opening a bottle of homemade cherry liqueur and catching that first whiff of deep fruit and subtle spice. This is the kind of project that transforms your kitchen into a small-batch distillery, and the payoff is a silky, jewel-toned spirit that tastes infinitely better than anything you’d find on a liquor store shelf.
Cherry liqueur is worth making because it’s surprisingly simple, requires just a few ingredients, and ages beautifully over a few months. The result is a sophisticated digestif, a cocktail base, or an elegant gift that proves you actually know your way around a bottle.
Why You’ll Love This Recipe
Homemade liqueur strips away the mystery and replaces it with complete control over flavor and sweetness. You’ll understand exactly what went into your bottle, and you’ll taste the difference immediately.
- Requires minimal hands-on time and just five core ingredients.
- Develops complexity and smoothness as it ages, rewarding patience.
- Works beautifully in cocktails, drizzled over desserts, or sipped neat as a digestif.
- Makes an impressive homemade gift that outlasts store-bought bottles.
- Flexible enough to adjust sweetness and alcohol content to your preference.
My Experience Making This Recipe
I made my first batch of cherry liqueur on a whim after a farmers market haul of gorgeous Bing cherries. The process felt almost too easy, and I kept waiting for something to go wrong, but it simply didn’t.
Three months later, I cracked open that first bottle and poured a small glass with zero expectations. What I got was smooth, naturally cherry-forward, with a hint of almond from the pits and a warmth that said “yes, this is real.” My friends have since asked for the recipe more than a hundred times.
The sensory experience is half the fun: crushing cherries by hand, watching the fruit slowly release its crimson juice into the vodka, and that moment when you strain it for the first time and realize you’ve actually made something shelf-worthy.
Recipe Overview
- Recipe Name: Homemade Cherry Liqueur
- Servings: Makes approximately 1 liter
- Prep Time: 20 minutes
- Infusion Time: 8 to 12 weeks
- Total Time: 8 to 12 weeks plus 30 minutes active time
- Course: Digestif, Cocktail Base
- Cuisine: European, Homemade Spirits
- Calories per Serving: 90 per 1-ounce serving
Equipment You Will Need
- One large glass jar or bottle with a tight-fitting lid, at least 1.5 liters
- Pitting tool or small sharp knife
- Fine-mesh strainer or cheesecloth
- Funnel
- Glass bottles for storage
- Measuring cups and spoons
- Labels for dating your bottles
Ingredients for Cherry Liqueur
- Fresh cherries, pitted: 2 pounds (about 800 grams)
- Vodka, 80 proof: 1 liter (1000 milliliters)
- Granulated sugar: 1 cup (200 grams)
- Water, filtered: 1/2 cup (120 milliliters)
- Whole almonds or cherry pits: 1/4 cup (optional but recommended)
Ingredient Notes and Substitutions
- Fresh cherries: Bing cherries offer rich, dark flavor and are ideal for liqueur. Substitute with sour cherries or frozen cherries if fresh ones are unavailable, though frozen may require slightly less time to infuse.
- Vodka: Vodka’s neutral base lets the cherry flavor shine and works best here. You can swap for a light brandy or cognac for a more complex spirit, though this will change the flavor profile noticeably.
- Granulated sugar: White sugar dissolves cleanly and doesn’t cloud the liqueur. Brown sugar or honey will deepen color and add molasses notes but may require longer straining.
- Whole almonds: These mimic the almond flavor naturally present in cherry pits and add subtle depth. You can skip them entirely, or use actual cherry pits if you’ve saved them from pitting.
How to Make Cherry Liqueur
Step 1: Prepare Your Cherries
Rinse your fresh cherries under cold water and pat them dry with a clean towel. Pit each cherry carefully, reserving a handful of pits if you want to skip the almonds later.
Step 2: Crush the Cherries
Place the pitted cherries in your large glass jar and crush them gently with the back of a wooden spoon or a clean mallet. You want to break the fruit open and release its juice, but you don’t need to turn them into paste.
Step 3: Add Almonds and Pits
Toss the whole almonds into the jar with the crushed cherries. The almonds add an almond extract quality that deepens the flavor complexity and mimics the subtle nuttiness that cherry pits would provide naturally.
Step 4: Pour in the Vodka
Measure out your vodka and pour it directly over the cherry mixture in the jar. The vodka will immediately begin extracting color and flavor from the fruit, turning pale as it mingles with the cherry juice.
Step 5: Seal and Label
Screw the lid on tightly and label your jar with the date you started the infusion. Tight sealing prevents evaporation and keeps airborne bacteria and dust out of your batch.
Step 6: Store in a Cool, Dark Place
Place the sealed jar in a cool, dark cabinet or closet where it won’t experience direct sunlight or temperature swings. Avoid the kitchen counter, where warmth and light will fade color and degrade flavor.
Step 7: Shake Weekly
Every five to seven days for the first four weeks, gently shake the jar to agitate the cherry solids and distribute the infusion evenly. After four weeks, you can reduce shaking to once every two weeks.
Step 8: Taste and Strain at Eight Weeks
After eight weeks, open the jar and taste a small amount by soaking a cherry in a spoon with a bit of the liquid. If the cherry flavor tastes rich and deep, it’s time to strain.
Step 9: Strain the Solids
Line a fine-mesh strainer with cheesecloth and carefully pour the liqueur through it into a clean bowl. Work slowly to avoid splashing, and don’t squeeze the cheesecloth, as this can push fine sediment into your final product.
Step 10: Make the Simple Syrup
Combine the sugar and filtered water in a small saucepan and heat over medium heat, stirring occasionally until the sugar dissolves completely. Remove from heat and let it cool to room temperature before adding it to your strained liqueur.
Step 11: Combine and Bottle
Pour the strained cherry infusion into a clean glass bottle or jar, then slowly add the cooled simple syrup while stirring gently. The syrup sweetens the liqueur and adds body, but stir carefully to avoid aerating the liquid.
Step 12: Final Aging
Seal your bottles and label them with the date of completion. Let the finished liqueur rest for another two to four weeks in a cool, dark spot to allow flavors to marry and smooth out.
Pro Tip: Reserve a few cherry pits before you pit your fruit; they contain natural amygdalin, which provides that subtle almond note and eliminates the need for whole almonds.
Tips for the Best Cherry Liqueur
- Use the freshest, ripest cherries you can find; they have more juice and deeper flavor than underripe fruit.
- Avoid washing cherries in advance and storing them wet; moisture encourages mold and spoils the batch.
- Taste your infusion at the eight-week mark, but don’t panic if it still tastes harsh; extended aging mellows rough edges significantly.
- Keep your jar away from direct sunlight at all times; UV light degrades color and can alter flavor compounds.
- Use filtered or distilled water for the simple syrup to prevent cloudiness in your final product.
- If you prefer a drier liqueur, reduce the sugar from one cup to three-quarters cup and adjust to taste after aging.
Common Mistakes to Avoid
- Straining too early before eight weeks pass: the infusion needs time to extract full cherry flavor and color from the fruit.
- Using overripe or moldy cherries: even one bad cherry can introduce off-flavors or contamination that ruins the entire batch.
- Squeezing the cheesecloth during straining: this pushes fine sediment into your liqueur and creates unwanted cloudiness.
- Adding hot simple syrup to the infusion: this can cause rapid oxidation and off-flavors; always cool the syrup first.
- Storing bottles in warm, bright kitchens: heat and light accelerate oxidation and fade the beautiful crimson color over time.
Serving Suggestions
Cherry liqueur is versatile enough to enjoy on its own or mixed into cocktails and desserts. Serve it chilled as an after-dinner drink, or build it into more complex drinks for entertaining.
- Pour neat into a small glass over a single large ice cube and sip slowly after dinner.
- Mix one part cherry liqueur with one part sparkling wine for a simple aperitif.
- Drizzle over vanilla ice cream or cheesecake for an instant dessert sauce.
- Combine with whiskey, lemon juice, and simple syrup to create a cherry whiskey sour.
- Stir into champagne or prosecco for an elegant holiday punch.
Variations to Try
- Dark Cherry Liqueur: Use sour cherries or black cherries instead of Bing cherries for a more tart, complex flavor; reduce sugar by one-quarter cup to balance acidity.
- Cherry Brandy Liqueur: Substitute brandy or cognac for vodka to create a richer, warmer spirit with deeper oak undertones; this version matures beautifully and tastes even better after a year.
- Spiced Cherry Liqueur: Add a cinnamon stick, two whole cloves, and a small piece of fresh ginger to the infusion jar for warmth and complexity that pairs beautifully with baked goods.
- Almond and Cherry Liqueur: Increase almonds to one-half cup and add one teaspoon of almond extract after straining for a more pronounced marzipan quality.
- Cherry Port Style: Replace half the vodka with red wine to create a lighter, wine-based version that tastes closer to fortified wine and costs less to make.
Dietary Adaptations
- Gluten-Free: This recipe is naturally gluten-free; use gluten-free vodka if you have celiac disease, though most standard vodkas are also naturally gluten-free.
- Dairy-Free: The recipe contains no dairy, so it works for all dairy restrictions without modification.
- Vegan and Vegetarian: This recipe is fully vegan and vegetarian since it contains only fruit, sugar, alcohol, and almonds.
- Lower Sugar Version: Reduce simple syrup sugar to one-half cup for a drier liqueur with 40 fewer calories per serving; taste after aging and add more if needed.
Storage and Reheating
Refrigerator
Store sealed bottles of cherry liqueur in a cool pantry or cabinet rather than the refrigerator, as consistent cool temperatures are more important than cold ones. Opened bottles keep for up to two years in a cool, dark spot.
- Keep the bottle upright and tightly sealed to prevent oxidation.
- Avoid storing near appliances that generate heat.
- Check the seal annually and refresh it if needed.
Freezer
Cherry liqueur does not freeze solid at standard freezer temperatures because of its alcohol content, so freezing is unnecessary and offers no benefit. The cool pantry is a better storage choice.
- Skip freezing entirely to avoid wasting space.
- Stick with room-temperature pantry storage for best results.
Reheating
Cherry liqueur does not require reheating at any point; serve it chilled or at room temperature straight from the bottle. If you use it in a hot cocktail or sauce, simply pour the desired amount into the warm mixture and stir gently.
- Chill bottles in the refrigerator for one hour before serving if you prefer it cold.
- Never heat liqueur directly; always add it to hot ingredients rather than heating it alone.
Nutrition Information
| Nutrient | Amount |
|---|---|
| Calories | 90 |
| Total Fat | 0 grams |
| Saturated Fat | 0 grams |
| Carbohydrates | 7 grams |
| Fiber | 0 grams |
| Sugar | 7 grams |
| Protein | 0 grams |
| Sodium | 0 milligrams |
| Cholesterol | 0 milligrams |
Nutrition values are estimates based on one 1-ounce serving and assume standard cherry varieties and vodka. Actual values vary based on cherry ripeness and sugar adjustments you make to the recipe.
Frequently Asked Questions
Can I use frozen cherries instead of fresh ones?
Yes, frozen cherries work well and sometimes infuse faster because freezing has already broken down cell walls. Thaw them completely before pitting and crushing to avoid excess liquid that dilutes the alcohol.
What if my liqueur looks cloudy after straining?
Cloudiness usually comes from fine sediment that passed through the cheesecloth. Let the bottle rest for a few weeks and the sediment will settle to the bottom; carefully pour off the clear liquid into a fresh bottle.
Can I make this with canned or jarred cherries?
Canned cherries lack the fresh fruit character and often contain added sugar and preservatives that throw off the balance. Stick with fresh or frozen fruit for the best results.
How long does homemade cherry liqueur last?
Unopened bottles last indefinitely in a cool, dark pantry, though flavors may slowly evolve over many years. Opened bottles keep for two to three years before oxidation starts to noticeably degrade color and flavor.
Can I adjust the sweetness after the liqueur is finished?
Yes, you can add more simple syrup or a touch of water to adjust sweetness or alcohol burn after the liqueur has fully aged. Make small adjustments, taste between each, and remember that flavors meld further over time.
What is the best time of year to make cherry liqueur?
Late spring and early summer, when fresh cherries flood farmers markets, is the ideal time. Making it then means your batch will be perfectly aged by late fall or winter for holiday gifting.
Can I use cherry juice instead of whole cherries?
Fresh juice lacks the solids that extract flavor and color, so the result will taste flat and thin. Always use whole fresh or frozen cherries for the richest, most complex final product.
Final Thoughts
Making cherry liqueur is one of those rare projects that rewards you immediately with success and continues rewarding you for years to come. The process teaches you something about patience, flavor development, and the magic of infusion, and it gives you a finished product that tastes unmistakably better than anything store-bought.
You’ve got this. Start with quality cherries, give it time to age properly, and resist the urge to rush the process. In a few months, you’ll open that first bottle and understand why people become obsessed with homemade spirits.
Homemade Cherry Liqueur
Ingredients
Equipment
Method
- Rinse your fresh cherries under cold water and pat them dry with a clean towel. Pit each cherry carefully, reserving a handful of pits if you want to skip the almonds later.
- Place the pitted cherries in your large glass jar and crush them gently with the back of a wooden spoon or a clean mallet. You want to break the fruit open and release its juice, but you don't need to turn them into paste.
- Toss the whole almonds into the jar with the crushed cherries. The almonds add an almond extract quality that deepens the flavor complexity and mimics the subtle nuttiness that cherry pits would provide naturally.
- Measure out your vodka and pour it directly over the cherry mixture in the jar. The vodka will immediately begin extracting color and flavor from the fruit, turning pale as it mingles with the cherry juice.
- Screw the lid on tightly and label your jar with the date you started the infusion. Tight sealing prevents evaporation and keeps airborne bacteria and dust out of your batch.
- Place the sealed jar in a cool, dark cabinet or closet where it won't experience direct sunlight or temperature swings. Avoid the kitchen counter, where warmth and light will fade color and degrade flavor.
- Every five to seven days for the first four weeks, gently shake the jar to agitate the cherry solids and distribute the infusion evenly. After four weeks, you can reduce shaking to once every two weeks.
- After eight weeks, open the jar and taste a small amount by soaking a cherry in a spoon with a bit of the liquid. If the cherry flavor tastes rich and deep, it's time to strain.
- Line a fine-mesh strainer with cheesecloth and carefully pour the liqueur through it into a clean bowl. Work slowly to avoid splashing, and don't squeeze the cheesecloth, as this can push fine sediment into your final product.
- Combine the sugar and filtered water in a small saucepan and heat over medium heat, stirring occasionally until the sugar dissolves completely. Remove from heat and let it cool to room temperature before adding it to your strained liqueur.
- Pour the strained cherry infusion into a clean glass bottle or jar, then slowly add the cooled simple syrup while stirring gently. The syrup sweetens the liqueur and adds body, but stir carefully to avoid aerating the liquid.
- Seal your bottles and label them with the date of completion. Let the finished liqueur rest for another two to four weeks in a cool, dark spot to allow flavors to marry and smooth out.