
There’s something magical about the whir of a Ninja blender transforming a handful of simple ingredients into a silky, cold glass of pure indulgence in under two minutes. A Ninja milkshake isn’t just any blended drink, it’s a creamy, perfectly textured treat that balances sweetness with richness, whether you’re fueling up in the morning or cooling down on a hot afternoon.
What sets this recipe apart is how the Ninja blender’s power creates an impossibly smooth texture that ordinary blenders struggle to achieve, while the flexibility to swap in your favorite flavors makes it endlessly customizable. You’ll love making this because it requires no special skills, minimal cleanup, and delivers cafe-quality results at home.
Why You’ll Love This Recipe
This milkshake hits all the right notes for anyone craving something cold, creamy, and ready in minutes.
- Lightning-fast preparation takes under five minutes from start to finish
- The Ninja blender creates an ultra-smooth, thick texture that feels indulgent
- Fully customizable with endless flavor combinations and mix-ins
- Perfect for breakfast, dessert, or an afternoon energy boost
- Requires just basic pantry staples and no cooking skills needed
My Experience Making This Recipe
I first made a Ninja milkshake on a sweltering July afternoon when my old blender finally gave up the ghost, and honestly, I was shocked at how much smoother and creamier the result turned out compared to anything I’d made before. The ice blended so seamlessly that I didn’t get those annoying icy chunks that usually hide at the bottom of the glass.
My teenage son took one sip and immediately asked if I could make these every weekend, which tells you everything you need to know about how good they taste. The speed of preparation means I can throw one together while still in my pajamas, which is exactly the kind of morning I prefer.
What really impressed me was how forgiving the recipe is, letting me swap in different ice cream flavors, fruits, and even protein powders without the whole thing falling apart. Once you nail the basic technique, you’ll find yourself experimenting with wild combinations that your family will beg for.
Recipe Overview
- Recipe Name: Ninja Milkshake
- Servings: 2
- Prep Time: 5 minutes
- Cook Time: 0 minutes
- Total Time: 5 minutes
- Course: Beverage, Dessert
- Cuisine: American
- Calories per Serving: 285
Equipment You Will Need
- Ninja blender with standard pitcher
- Measuring cups
- Measuring spoons
- Tall glasses for serving
- Spoon for stirring
- Cutting board if using fresh fruit
- Sharp knife for chopping ingredients
Ingredients for Ninja Milkshake
- Whole milk, 1 cup
- Vanilla ice cream, 2 cups (or any flavor you prefer)
- Granulated sugar, 2 tablespoons
- Ice cubes, 1 cup
- Vanilla extract, 1/2 teaspoon
- Whipped cream, for topping (optional)
- Chocolate syrup, for drizzling (optional)
Ingredient Notes and Substitutions
- Whole milk: Provides richness and creates the smooth base for your shake. You can substitute with 2% milk if watching calories, though you’ll lose some creaminess, or use almond milk for a lighter, dairy-free option.
- Vanilla ice cream: This is the star ingredient that gives the shake body and flavor. Swap in chocolate, strawberry, cookie dough, or any flavor you enjoy without changing the texture or method.
- Granulated sugar: Adds sweetness and helps balance flavors, especially if using tart fruits. You can reduce this to 1 tablespoon if your ice cream is very sweet, or skip it entirely if you prefer less sugar.
- Ice cubes: Creates the cold, thick consistency that makes the shake satisfying. Use fewer cubes if you want a thinner shake, or add more for an extra-thick texture.
- Vanilla extract: Amplifies the vanilla notes and adds depth to the flavor profile. Almond extract works as a substitute if you want to shift the flavor profile slightly.
How to Make Ninja Milkshake
Step 1: Add Milk to the Blender
Pour one cup of whole milk into your Ninja blender pitcher first. Starting with the liquid prevents the ice cream from sticking to the bottom and ensures even blending throughout the shake.
Step 2: Add the Ice Cream
Scoop two cups of vanilla ice cream directly into the blender on top of the milk. The cold temperature of the ice cream combined with the milk creates the perfect base for a thick, creamy shake.
Step 3: Add Sugar and Vanilla Extract
Sprinkle two tablespoons of granulated sugar over the ice cream, then add one-half teaspoon of vanilla extract. The sugar enhances sweetness while the vanilla adds complexity and depth to the flavor.
Step 4: Add Ice Cubes
Add one cup of ice cubes to the pitcher. The ice is what transforms your shake from creamy to that perfect thick consistency that takes longer to drink.
Step 5: Secure the Lid
Place the lid firmly on your Ninja blender pitcher and make sure it’s sealed properly. A secure seal prevents any splattering and keeps everything contained while the blender runs at high speed.
Step 6: Blend on High Speed
Select the high speed setting and blend for 45 to 60 seconds until the mixture is completely smooth with no visible ice chunks. The Ninja’s powerful motor breaks down the ice efficiently while keeping the shake cold.
Step 7: Check the Consistency
Remove the lid and inspect the shake by running a spoon through it. If you see any ice chunks, blend for another 15 seconds until completely smooth.
Step 8: Pour Into Glasses
Carefully pour the milkshake into two tall glasses, dividing evenly. The shake will be thick, so pour slowly to avoid overflow.
Step 9: Add Toppings and Serve
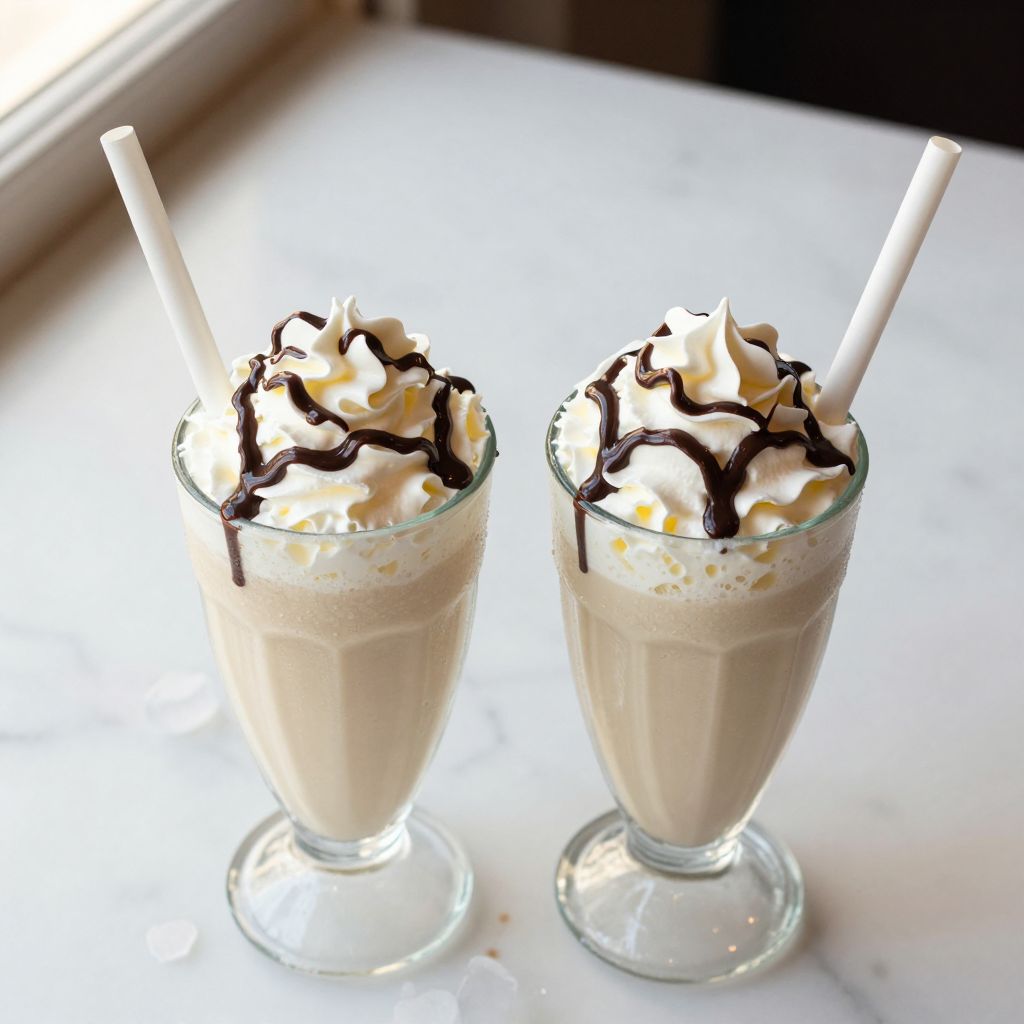
Top each shake with a dollop of whipped cream if desired, and drizzle with chocolate syrup for extra indulgence. Serve immediately while the shake is still cold and thick, using a wide straw or spoon.
Pro Tip: Chill your glasses in the freezer for 10 minutes before pouring to keep your shake extra cold and prevent it from melting too quickly.
Tips for the Best Ninja Milkshake
- Use ice cream that’s been stored in the freezer for at least 24 hours so it’s rock solid, which creates a thicker shake than soft ice cream.
- Don’t overload the blender pitcher past the maximum fill line, or the motor will struggle and the texture won’t be as smooth.
- If you want a thinner shake, add more milk, one tablespoon at a time, and re-blend for 10 seconds.
- Keep your Ninja pitcher in the freezer when not in use so cold ingredients blend faster and stay colder longer.
- Blend just before serving rather than making ahead, since milkshakes separate and melt quickly at room temperature.
- Taste your shake before serving and add a touch more sugar if needed, since some ice cream flavors are less sweet than others.
Common Mistakes to Avoid
- Using soft or partially melted ice cream results in a thin, watery shake rather than that satisfying thick texture you’re after.
- Blending for too long can actually warm up the shake and cause it to become thinner, so stick to 60 seconds max.
- Forgetting to secure the lid properly creates a messy disaster on your counter and defeats the purpose of owning a powerful blender.
- Adding ingredients in the wrong order (ice cream first) causes it to stick to the bottom and blend unevenly.
- Not chilling your glasses beforehand means your shake starts melting the moment it touches warm glass.
Serving Suggestions
A Ninja milkshake shines on its own, but pairing it with the right snacks or meals makes it feel like a complete treat. Serve it cold and thick for the best experience.
- Pair with warm chocolate chip cookies for a classic sweet combo that never disappoints
- Serve alongside a breakfast of toast and eggs for a surprisingly balanced start to your day
- Enjoy as an after-dinner dessert to satisfy sweet cravings without heavy indulgence
- Combine with fresh fruit on the side to add brightness and balance the richness
- Present at a summer gathering as a DIY milkshake bar where guests customize their own flavors
Variations to Try
- Strawberry Banana Shake: Replace vanilla ice cream with strawberry, add one frozen banana, and use strawberry yogurt instead of milk for tanginess and depth.
- Cookies and Cream: Use cookies and cream ice cream as your base, add five crushed chocolate sandwich cookies before blending, and top with more cookie crumbles for extra crunch.
- Chocolate Peanut Butter: Swap vanilla ice cream for chocolate, add two tablespoons of natural peanut butter to the blender, and blend until creamy with no peanut butter chunks visible.
- Coffee Shop Classic: Add one-half cup of cold brewed coffee to the milk, use vanilla ice cream, and top with whipped cream and a sprinkle of instant espresso powder for a cafe-style shake.
- Mango Tropical: Replace milk with coconut milk, use vanilla ice cream, add one cup of frozen mango chunks, and finish with a squeeze of lime juice for brightness.
Dietary Adaptations
- Dairy-Free: Use coconut ice cream and almond milk in place of dairy, though the texture will be slightly less creamy and rich than the traditional version.
- Vegan: Substitute with vegan ice cream and your choice of plant-based milk, then add one tablespoon of coconut oil for creaminess and richness.
- Low-Carb/Keto: Use sugar-free vanilla ice cream, replace milk with heavy cream, skip the added sugar, and reduce ice cubes to half a cup to stay within carb limits.
- Gluten-Free: This recipe is naturally gluten-free, but check ice cream labels for cross-contamination if you have celiac sensitivity.
Storage and Reheating
Refrigerator
Milkshakes don’t store well in the refrigerator because they separate and become thin within 30 minutes. If you must store one, cover it tightly with plastic wrap and drink it within 2 hours.
- Separate any whipped cream topping and store it in an airtight container for up to 24 hours
- If your shake separates, re-blend for 10 seconds with a splash more milk to restore texture
Freezer
You can freeze leftover shake in popsicle molds or small containers for up to one week. This turns it into a fun frozen treat similar to a popsicle or ice cream.
- Pour shake into popsicle molds and insert sticks before freezing
- Thaw at room temperature for 10 minutes before eating if frozen solid
Reheating
Milkshakes aren’t meant to be reheated, but you can refresh a separated shake by blending it again with fresh ice cubes. Never use a microwave, as heat ruins the texture completely.
- Add one or two fresh ice cubes and blend for 15 seconds to restore creaminess
- If too thin, add a scoop of fresh ice cream and blend again
Nutrition Information
| Nutrient | Amount |
|---|---|
| Calories | 285 |
| Total Fat | 12g |
| Saturated Fat | 7g |
| Carbohydrates | 38g |
| Fiber | 0g |
| Sugar | 33g |
| Protein | 5g |
| Sodium | 95mg |
| Cholesterol | 28mg |
These values are estimates based on standard ingredients and will vary based on the specific brands and quantities you use in your recipe.
Frequently Asked Questions
Can I make this shake without a Ninja blender?
Yes, you can use any high-powered blender, but the Ninja’s motor creates a noticeably smoother texture. A standard blender will work but may leave tiny ice crystals in the shake.
How do I make a protein-packed version?
Add one scoop of vanilla protein powder to the blender along with the other ingredients and blend as directed. The protein makes the shake more filling and adds nutritional value without changing the taste much.
Can I prepare ingredients ahead of time?
You can measure and freeze milk in ice cube trays, but it’s best to blend the shake fresh right before serving for optimal texture. Pre-mixing ingredients causes separation and loss of the thick consistency.
What if my shake comes out too thin?
Add another half cup of ice cream or more ice cubes and blend again for 15 seconds. The shake should be thick enough that a spoon stands up in it.
Can I use frozen fruit in this recipe?
Absolutely, frozen berries or mango work wonderfully and add nutrients plus flavor without making the shake watery. Add one-half to one cup of frozen fruit and reduce ice cubes by half to avoid over-diluting.
How thick should the shake actually be?
The shake should be thick enough that it takes effort to drink through a straw but still pourable into a glass. If it’s so thick you need a spoon, add a splash more milk and blend briefly.
Final Thoughts
Making a Ninja milkshake at home is one of those simple pleasures that feels indulgent without requiring any real cooking skill or fancy technique. Once you nail the basic recipe, you’ll find yourself reaching for your blender constantly to experiment with new flavor combinations and toppings.
The beauty of this recipe lies in its flexibility and speed, letting you create something that tastes like it came straight from your favorite ice cream shop. Give it a try this week and watch how quickly it becomes a favorite in your household.
Explore More Refreshing Recipes
If you loved making this creamy shake, you’ll want to explore more delicious blended beverages to expand your frozen drink repertoire.
Try making a Ninja frappe recipe for a fun coffee-based variation, or cool off with a Ninja Creami slushie recipe for an icy, fruity treat that’s perfect on hot days.
Ninja Milkshake
Ingredients
Equipment
Method
- Pour 1 cup of whole milk into the Ninja blender pitcher.
- Add 2 cups of vanilla ice cream on top of the milk.
- Sprinkle 2 tablespoons of granulated sugar and 1/2 teaspoon of vanilla extract over the ice cream.
- Add 1 cup of ice cubes to the pitcher.
- Secure the lid on the Ninja blender.
- Blend on high speed for 45 to 60 seconds until the mixture is completely smooth.
- Stop the blender and check the consistency; if any ice chunks remain, blend for an additional 15 seconds.
- Pour the milkshake evenly into two tall glasses.
- Top each glass with whipped cream and drizzle with chocolate syrup, then serve immediately.