
There’s something magical about the moment you first taste homemade sake, that subtle sweetness and clean finish hitting your palate with unexpected grace. Making sake at home is less about complicated chemistry and more about patience, cleanliness, and respecting a process that Japanese brewers have perfected over centuries.
What makes this recipe special is that it delivers authentic results without requiring specialized equipment or obscure ingredients you can’t find online. You’ll end up with a delicate, floral sake that rivals bottles costing three times the price at your local liquor store.
This recipe produces a smooth, slightly sweet sake with about 15% alcohol content that pairs beautifully with sushi, light seafood, or sipped on its own as an aperitif. The entire process takes about four weeks from start to finish, but your hands-on time is minimal.
Why You’ll Love This Recipe
Brewing sake at home feels like a genuine accomplishment without being pretentious or overly technical. You control every ingredient and skip the additives found in commercial bottles.
- Creates authentic, smooth sake with a delicate floral profile
- Costs about a quarter of what comparable bottles sell for
- Uses readily available ingredients from online retailers
- Minimal hands-on work despite the four-week timeline
- Impresses friends and becomes a conversation starter at dinner parties
My Experience Making This Recipe
I was honestly nervous the first time I attempted this recipe, convinced I’d create something that tasted like rubbing alcohol and regret. The moment I opened the fermenter on day twenty-one and smelled that clean, slightly fruity aroma, I knew I’d nailed it.
What struck me most was how forgiving the process actually is once you understand the basic principles. My friends tasted the final product blind against a commercial sake and couldn’t definitively pick out the homemade version.
The real reward comes from sipping something you created with your own hands, knowing exactly what went into it. That first chilled cup, poured into a small ceramic glass, tastes infinitely better than it has any right to.
Recipe Overview
- Recipe Name: Homemade Sake
- Servings: Yields approximately 1.5 liters (about 20 small servings)
- Prep Time: 30 minutes
- Cook Time: 0 minutes (fermentation time: 21-28 days)
- Total Time: 4 weeks
- Course: Beverage
- Cuisine: Japanese
- Alcohol Content Per Serving: Approximately 15%
Equipment You Will Need
- Glass carboy or large glass jar (minimum 2 liters)
- Airlock or S-shaped valve
- Rubber stopper to fit your carboy
- Thermometer (for monitoring fermentation temperature)
- Large stainless steel pot (at least 4 liters)
- Cheesecloth or fine mesh strainer
- Sanitizing solution (bleach or brewing sanitizer)
- Measuring cups and spoons
- Hydrometer (optional but helpful for tracking fermentation)
- Siphon tubing and racking cane
- Bottles for storage (dark glass preferred)
Ingredients for Homemade Sake
- Short-grain white rice: 1.5 kg (about 7.5 cups), sushi rice or sake rice preferred
- Koji spores (Aspergillus oryzae): 1 teaspoon dried koji starter
- Sake yeast (Saccharomyces cerevisiae or Lalvin EC-1118): 1 packet (5 grams)
- Filtered water: 3 liters
- Sea salt: 1/2 teaspoon (for yeast nutrient)
- Yeast nutrient (optional): 1/4 teaspoon
Ingredient Notes and Substitutions
- Short-grain white rice: This is your base ingredient, and using proper sushi or sake rice matters because the grain structure breaks down differently than long-grain varieties. If you can’t find sushi rice, standard short-grain white rice works, though the final flavor will be slightly less delicate.
- Koji spores: Koji is the mold that converts starches into sugars, making fermentation possible. You absolutely cannot skip this ingredient, but dried koji starter is readily available online and stays viable for years when stored cool and dry.
- Sake yeast: Wine yeast works as a substitute if you can’t find dedicated sake yeast, but sake yeast produces fewer off-flavors and cleaner results. Bread yeast will ferment but produces a harsh, unpleasant sake.
- Filtered water: Chlorinated tap water can inhibit fermentation, so filtering or boiling your water matters more than you might think. Spring water works perfectly if you prefer.
- Yeast nutrient: A small amount helps the yeast stay healthy and ferment cleanly, particularly if your water is very soft. You can omit it, but your sake may develop off-flavors.
How to Make Homemade Sake
Cleanliness separates successful sake from a bathtub of disappointment. Soak your carboy, airlock, stopper, and all utensils in a sanitizing solution for at least 30 minutes, then rinse thoroughly with filtered water.
Even tiny amounts of bacteria or wild yeast can compete with your koji and sake yeast, resulting in off-flavors or failed fermentation. This single step prevents 90% of homebrew disasters.
Step 1: Sanitize All Equipment
Measure 1 teaspoon of dried koji spores into a clean bowl and mix with 100 milliliters of warm filtered water (around 40 degrees Celsius or 104 degrees Fahrenheit). Let this mixture sit for 15 minutes to rehydrate and activate the spores.
You’re essentially waking up dormant mold cells so they can begin colonizing your rice. This gentle approach produces a more reliable koji culture than adding dry spores directly to the rice.
Step 2: Prepare the Koji Culture
Rinse your 1.5 kilograms of rice under cold running water until the water runs mostly clear, which removes excess starch. Add the rinsed rice to your large pot with 2 liters of filtered water and bring to a boil, then reduce heat and simmer for 20 minutes until the rice is fully cooked but still holds its shape.
Fully cooked rice allows koji to penetrate and colonize the grains evenly. Undercooked rice resists mold penetration, resulting in poor koji development.
Step 3: Cook the Rice
Spread the cooked rice on a clean sheet or in a shallow pan and let it cool to around 28 degrees Celsius (82 degrees Fahrenheit). This temperature is ideal for koji colonization and should take about 2 to 3 hours at room temperature.
Temperature control matters enormously for koji growth. Too hot and you kill the spores, too cool and growth stalls.
Step 4: Cool the Rice to Koji Temperature
Pour your prepared koji culture into the cooled rice and mix thoroughly to distribute the spores evenly. Transfer the entire mixture to your sanitized carboy.
Thorough mixing ensures every grain gets exposed to koji spores. Lumpy distribution creates uncolonized areas that won’t ferment properly.
Step 5: Inoculate the Rice with Koji
Cover the carboy loosely with cloth (not an airtight seal) and place it in a warm location around 25 to 28 degrees Celsius (77 to 82 degrees Fahrenheit). The koji will slowly colonize the rice, creating a sweet smell similar to chestnuts or honeydew melon.
You want humidity but not stagnant air, so ventilation matters. Check daily for white mold growth covering the rice grains, which indicates successful koji development.
Step 6: Incubate the Koji for 5-7 Days
Once your koji-colonized rice smells distinctly sweet and you see white mold coverage, add 1 liter of additional filtered water to the carboy and gently mix. Rehydrate your packet of sake yeast in 50 milliliters of warm water for 10 minutes, then add it to the carboy along with 1/4 teaspoon of yeast nutrient if using.
The koji has already converted much of the rice starch into fermentable sugars, and now yeast begins turning those sugars into alcohol. The additional water dilutes the mixture to the right gravity for clean fermentation.
Step 7: Add Water and Yeast to Start Fermentation
Insert your rubber stopper fitted with an airlock into the carboy opening. The airlock allows carbon dioxide produced by fermentation to escape while preventing oxygen and contaminants from entering.
You should see bubbling in the airlock within 12 to 24 hours as yeast becomes active. Maintain fermentation temperature around 18 to 22 degrees Celsius (64 to 72 degrees Fahrenheit) for the next 2 to 3 weeks.
Step 8: Fit the Airlock and Begin Primary Fermentation
Check your airlock daily to ensure steady bubbling. After 10 to 14 days, when primary fermentation slows noticeably, use a sanitized siphon to transfer the sake into a clean carboy, leaving sediment behind.
This racking process removes dead yeast and koji solids that can create off-flavors if left in contact too long. Secondary fermentation in the cleaner environment produces a cleaner final product.
Step 9: Monitor Fermentation and Secondary Fermentation
Let the sake sit in secondary fermentation for another 7 to 10 days until bubbling essentially stops. Siphon the clear sake into sanitized dark glass bottles, leaving any remaining sediment behind.
Dark bottles protect your sake from light degradation during storage. Proper bottling creates a shelf-stable product that improves slightly over the next few months.
Pro Tip: The koji development stage is the make-or-break moment for your entire batch, so don’t skip tasting a small amount of the koji-rice mixture around day five to confirm it tastes sweet, not musty or off. Sweet flavor means koji is working correctly.
Tips for the Best Homemade Sake
- Use filtered or boiled water rather than tap water, as chlorine and other minerals can interfere with both koji development and fermentation. This single change dramatically improves your final sake’s clarity and flavor.
- Maintain steady temperature throughout fermentation without wild swings. Even a 5 degree Celsius drop can stall fermentation or introduce unwanted flavors.
- Don’t open the carboy unnecessarily during fermentation, as exposure to air invites contamination and disrupts the yeast. Trust the airlock and let it do its job.
- Taste your koji-rice mixture at day five to confirm it smells and tastes sweet like honeydew. If it smells musty, sour, or off, contamination occurred and you should start over.
- Use a hydrometer if you have one to track gravity changes and confirm fermentation is actually progressing, particularly if you live in a cold climate where fermentation naturally slows.
- Store finished sake in a cool, dark place below 15 degrees Celsius if possible. Sake keeps for 6 to 12 months when properly bottled, though homemade batches typically get consumed well before then.
Common Mistakes to Avoid
- Using unfiltered tap water: Chlorine kills koji and yeast, resulting in stalled fermentation or complete batch failure. Always filter or boil your water first.
- Skipping sanitization: One wild yeast infection ruins your batch. Treat sanitization like non-negotiable insurance against disaster.
- Allowing koji temperature to drop below 20 degrees Celsius: Koji colonization dramatically slows in cool conditions, and your koji may never fully develop. Keep it warm.
- Opening the carboy repeatedly during fermentation: Each opening risks contamination and allows carbon dioxide to escape, disrupting the yeast colony. Resist the urge to peek.
- Using the wrong type of yeast: Bread yeast produces a harsh, unpleasant sake with off-flavors that never fully fade. Invest in proper sake or wine yeast.
Serving Suggestions
Chill your finished sake to 8 to 12 degrees Celsius and serve in small ceramic or glass cups for optimal flavor and experience. The subtle sweetness and clean finish shine brightest when served cold and in modest portions.
- Pair with sushi, sashimi, or fresh seafood where sake’s delicate profile won’t overwhelm delicate fish flavors
- Serve as an aperitif before a meal to cleanse the palate and stimulate appetite
- Enjoy with light appetizers like edamame, cucumber salad, or grilled scallops
- Use in cooking for deglazing pans or adding subtle sweetness to Asian-inspired dishes
- Serve chilled alongside mild cheeses and cured meats for an unexpected pairing experience
Variations to Try
- Fruit-infused sake: After bottling, add fresh lychee, yuzu, or plum to the bottle and age for 2 to 3 weeks to create a subtly flavored variation. The sake extracts delicate fruit notes without becoming overly sweet.
- Higher alcohol sake: Add an additional 500 milliliters of filtered water during the koji stage and adjust fermentation time to 4 to 5 weeks. This produces a drier, more potent sake around 18% alcohol.
- Cloudy sake (nigori): Skip the final racking and bottle the sake with some sediment still present for a creamy, textured variation. This creates a thicker mouthfeel and slightly earthier flavor.
- Drier sake: Reduce the amount of koji slightly or allow fermentation to continue an extra week to convert more sugars. This produces a crisp sake with less residual sweetness.
- Multiple koji additions: Add a second batch of koji-colonized rice at day seven of fermentation to convert more starch into sugar before yeast ferments it fully. This creates a richer, more complex final product.
Dietary Adaptations
- Gluten-free: Sake made from pure rice is naturally gluten-free, making it suitable for celiac diets. Verify your koji and yeast sources don’t contain gluten additives.
- Lower alcohol: Reduce fermentation time to 2 weeks to produce a sake around 10% alcohol that still maintains clean flavor. Earlier bottling prevents the yeast from converting all available sugars.
- Vegan and vegetarian: This recipe is already vegan and vegetarian, containing only rice, koji spores, and yeast. No animal products touch the process.
- Low-carb considerations: Sake from this recipe contains roughly 2 to 3 grams of carbohydrates per 30-milliliter serving after fermentation completes. Residual sugar remains minimal compared to fortified wines.
Storage and Reheating
Refrigerator
Properly bottled sake keeps in the refrigerator for 6 to 12 months without degradation. The cold temperature halts any remaining yeast activity and slows oxidation.
- Store in dark glass bottles to prevent light exposure
- Keep bottles upright to minimize surface area contact with air
- Check occasionally for any signs of sediment or cloudiness indicating renewed fermentation
Freezer
Sake doesn’t freeze solid until roughly negative 15 degrees Celsius, making standard freezer storage risky for glass bottles. The expansion can break bottles, and freezing damages the delicate flavor profile.
- Only use freezer for very short-term storage if refrigerator space is unavailable
- Use plastic bottles if freezing to avoid breakage
- Allow sake to return to refrigerator temperature slowly before opening
Reheating
Homemade sake can be served warm (around 40 to 50 degrees Celsius) to reveal different flavor notes and increase smoothness. Never boil sake, as high heat destroys delicate aromatics and develops harsh flavors.
- Warm sake gently in a ceramic vessel submerged in warm water rather than direct heat
- Use a thermometer to monitor temperature and prevent overheating
- Warm sake just before serving for optimal flavor, as cooling redevelops aromatic compounds
Nutrition Information
| Nutrient | Amount |
|---|---|
| Calories | 45 per 30 milliliters |
| Total Fat | 0 grams |
| Saturated Fat | 0 grams |
| Carbohydrates | 2.5 grams |
| Fiber | 0 grams |
| Sugar | 2 grams |
| Protein | 0 grams |
| Sodium | 5 milligrams |
| Cholesterol | 0 milligrams |
Nutritional values are approximate and based on standard homemade sake composition. Actual values vary slightly depending on fermentation completeness and final gravity.
Frequently Asked Questions
Can I make sake without koji spores?
No, koji is absolutely essential because it converts rice starches into fermentable sugars. Without it, yeast has nothing to ferment and your batch becomes expensive rice water with disappointment.
How do I know if my koji is contaminated?
Healthy koji smells sweet like honeydew or chestnuts and appears white or creamy. If you detect musty, vinegar, or rotten smells, contamination occurred and you should start over.
Can I speed up fermentation by raising the temperature?
Higher temperatures speed yeast activity but also encourage unwanted bacteria and wild yeast to flourish. Stick to the recommended 18 to 22 degrees Celsius for clean, reliable fermentation.
What does sediment at the bottom of my sake mean?
Sediment is dead yeast and koji solids that naturally settle out during fermentation. This is normal and harmless, though it creates a cloudier appearance if left in the bottle.
Is homemade sake safe to drink?
Yes, sake is safe when proper sanitization and temperature control are maintained throughout fermentation. The acidic environment and alcohol content prevent pathogenic bacteria from surviving.
Why does my sake taste vinegary?
Vinegary flavors indicate acetic acid bacteria contamination, typically from exposure to air during fermentation. Ensure your airlock stays properly sealed and never leave the carboy open to the environment.
Can I bottle my sake before fermentation fully completes?
Bottling too early risks bottle explosions as remaining yeast continues fermentation and builds pressure. Wait until bubbling stops for at least 5 days before bottling.
Final Thoughts
Making sake at home transforms you from a consumer into a creator, and that shift in perspective changes everything about how you experience the beverage. You stop seeing sake as an expensive Japanese luxury and start seeing it as something you crafted with patience and attention.
Your first batch probably won’t be perfect, and that’s completely fine. Every brewmaster started exactly where you are now, and the learning experience makes the eventual success taste infinitely sweeter.
Explore more Japanese fermentation traditions and discover how koji appears in amazake recipes for a completely different beverage. You might also enjoy hojicha latte recipe variations to round out your Japanese beverage repertoire and expand your kitchen skills in unexpected directions.
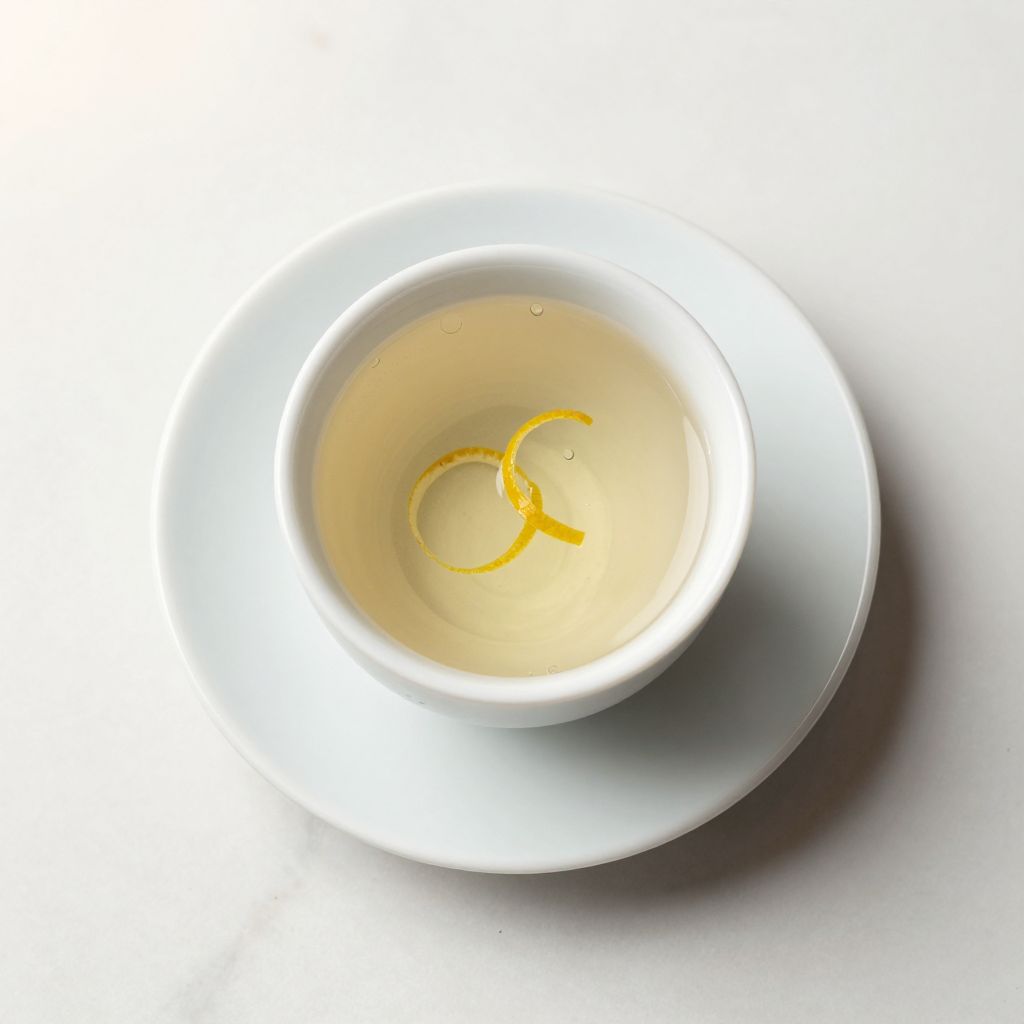
Homemade Sake
Ingredients
Equipment
Method
- Sanitize all equipment by soaking the carboy, airlock, stopper, and all utensils in a sanitizing solution for at least 30 minutes, then rinse thoroughly with filtered water.
- Mix 1 teaspoon of dried koji spores with 100 milliliters of warm (40°C/104°F) filtered water in a bowl and let sit for 15 minutes to rehydrate and activate the spores.
- Rinse 1.5 kilograms of rice under cold running water until the water runs mostly clear, then add the rice to a large pot with 2 liters of filtered water, bring to a boil, reduce heat, and simmer for 20 minutes until fully cooked but still holding its shape.
- Spread the cooked rice on a clean sheet or shallow pan and let it cool to around 28°C (82°F) over 2 to 3 hours at room temperature.
- Pour the prepared koji culture into the cooled rice, mix thoroughly to distribute the spores evenly, and transfer the mixture to the sanitized carboy.
- Cover the carboy loosely with a cloth and place it in a warm (25–28°C/77–82°F), ventilated area for 5–7 days, checking daily for white mold growth on the rice.
- Add 1 liter of additional filtered water to the carboy and gently mix; rehydrate the sake yeast in 50 milliliters of warm water for 10 minutes, then add the yeast and 1/4 teaspoon yeast nutrient (if using) to the carboy.
- Insert the rubber stopper fitted with an airlock into the carboy opening and maintain fermentation at 18–22°C (64–72°F) for 2 to 3 weeks, observing bubbling in the airlock within 12 to 24 hours.
- After 10–14 days, when primary fermentation slows, siphon the sake into a clean carboy, leaving sediment behind, to begin secondary fermentation.
- Let the sake sit for another 7–10 days in secondary fermentation until bubbling essentially stops, then siphon the clear sake into sanitized dark glass bottles, leaving any remaining sediment behind.