
There’s something magical about that first sip of a cold, creamy Starbucks iced latte on a warm afternoon, the kind that makes you close your eyes for just a moment. If you’ve ever wondered why your homemade version doesn’t quite match that cafe perfection, the secret isn’t hidden in some proprietary blend—it’s about technique, timing, and using quality ingredients. Making a Starbucks iced latte recipe at home is genuinely easier than you think, and once you nail it, you’ll save yourself a small fortune while enjoying that same silky-smooth experience whenever you want. This guide will walk you through every step to recreate that iconic drink in your own kitchen.
Why You’ll Love This Recipe
This recipe delivers the exact creamy texture and balanced coffee flavor you crave from Starbucks, without the markup or wait in line.
- Costs a fraction of what you’d pay at a cafe
- Ready in under five minutes
- Customizable to your preferred strength and sweetness
- Uses simple ingredients you likely have at home
- Perfect for busy mornings or afternoon pick-me-ups
My Experience Making This Recipe
I started experimenting with homemade iced lattes because I was spending more on coffee than on groceries. After trying dozens of variations, I realized the difference came down to the espresso-to-milk ratio and how I incorporated the ice.
The first time I nailed it, my roommate actually asked what cafe I’d bought it from, which felt like winning an award. That moment made me obsessed with perfecting every detail, from the temperature of the milk to the exact timing of the pour.
Now I make one almost every morning, and honestly, it tastes better than most of the ones I’ve ordered out. The creamy mouthfeel and that perfect coffee-to-milk balance keep me coming back to this exact method.
Recipe Overview
- Recipe Name: Starbucks Iced Latte
- Servings: 1
- Prep Time: 2 minutes
- Cook Time: 3 minutes
- Total Time: 5 minutes
- Course: Beverage
- Cuisine: Coffee Shop Classic
- Calories per Serving: 70
Equipment You Will Need
- Espresso machine or Moka pot
- Tall glass (16 oz minimum)
- Milk frother or small whisk
- Ice maker or ice tray
- Measuring cup or kitchen scale
- Long spoon for stirring
Ingredients for Starbucks Iced Latte
- Espresso: 2 shots (1 oz each)
- Whole milk: 10 oz
- Ice: 1 cup (8-10 cubes)
- Vanilla syrup (optional): 0.5 oz
- Sugar or sweetener (optional): to taste
Ingredient Notes and Substitutions
- Espresso: Freshly pulled espresso creates the bold coffee backbone that defines this drink. If you don’t have an espresso machine, use a double shot of very strong brewed coffee as a substitute, though the depth will be slightly less intense.
- Whole milk: Whole milk creates that signature creamy richness and froths beautifully. You can swap it for oat milk for a vegan option, though the texture will be slightly less velvety.
- Ice: Standard ice cubes work perfectly and keep the drink cold without watering it down too quickly. Crushed ice melts faster and will dilute your latte more rapidly.
- Vanilla syrup: This adds sweetness and a subtle vanilla note that mirrors Starbucks’ flavor profile. Honey or agave nectar works as an alternative, though vanilla provides the most authentic taste match.
How to Make Starbucks Iced Latte
Step 1: Pull Your Espresso Shots
Start by pulling two fresh espresso shots directly into a small cup or shot glass. You want them pulled quickly, within 25-30 seconds, to capture that rich crema and full-bodied flavor that defines a great espresso.
Step 2: Fill Your Glass With Ice
Take a tall 16 oz glass and fill it generously with ice cubes, stopping about an inch from the top. The ice acts as both a cooling agent and a barrier that prevents the espresso from diluting too quickly when you add the milk.
Step 3: Add the Espresso Over Ice
Pour your freshly pulled espresso shots directly over the ice in a slow, steady stream. This method cools the espresso gradually while maintaining its strength and preventing the hot liquid from making the ice crack unevenly.
Step 4: Add Vanilla Syrup (If Using)
If you want sweetness and that classic Starbucks vanilla note, add 0.5 oz of vanilla syrup to the glass. Stir well with a long spoon to distribute the syrup evenly throughout the espresso and ice.
Step 5: Pour the Milk Into a Frothing Pitcher
Pour 10 oz of cold whole milk into your frothing pitcher or a small container. Cold milk is essential because it won’t create a thick foam layer, instead giving you that silky microfoam that Starbucks uses.
Step 6: Froth the Milk Gently
Using a milk frother, run it through the milk for about 30-45 seconds until you see tiny bubbles form on the surface. You’re aiming for microfoam, not a thick layer of bubbles, which creates the smooth, creamy texture rather than a coffee shop cappuccino.
Step 7: Pour the Milk Into Your Glass
Pour the frothed milk slowly into your glass, holding back the microfoam with a spoon so the liquid pours first. Once the glass is nearly full, top it with a thin layer of the microfoam for that signature look.
Step 8: Stir and Taste
Give everything a good stir with your long spoon to combine the espresso, ice, milk, and syrup thoroughly. Take a sip and adjust the sweetness or strength by adding more syrup or espresso next time if needed.
Pro Tip: The key to nailing this recipe is using fresh espresso and cold milk, never heating it, which keeps the drink creamy and prevents the milk from separating from the espresso.
Tips for the Best Starbucks Iced Latte
- Use freshly pulled espresso shots within two minutes of extracting them for maximum flavor and crema retention. Stale espresso loses its punch and creates a flat-tasting latte.
- Keep your milk cold straight from the fridge, and don’t over-froth it or you’ll end up with a cappuccino instead of a latte. Microfoam should be thin and silky, not thick and airy.
- Pour the espresso over ice while it’s still hot so the ice chills it properly without shocking the flavor. Letting espresso cool before adding it creates a less vibrant taste.
- Invest in a small handheld milk frother if you don’t have an espresso machine with a steam wand. They’re inexpensive and make a huge difference in texture.
- Measure your ingredients at first until you find your perfect ratio, then you can eyeball it going forward. Most people prefer a 1:4 ratio of espresso to milk for that balanced Starbucks-style drink.
- Use filtered water for your espresso machine to avoid mineral buildup and off-flavors that would ruin your latte.
Common Mistakes to Avoid
- Using old, pre-made espresso from your fridge instead of fresh shots will result in a flat, bitter drink that tastes nothing like Starbucks. Fresh is absolutely non-negotiable here.
- Adding hot milk to cold espresso over ice causes the ice to melt too quickly and dilutes your drink into a watered-down mess. Cold milk keeps the temperature stable.
- Over-frothing the milk creates a cappuccino texture instead of the smooth, creamy iced latte you’re aiming for. You want microfoam, not a thick foam cap.
- Skipping the vanilla syrup and expecting the drink to taste exactly like Starbucks will disappoint you. That vanilla note is part of their signature, so include it unless you prefer it plain.
- Using skim milk or low-fat milk makes the drink taste thin and watery instead of rich and creamy like the original. Whole milk is worth it.
Serving Suggestions
This iced latte is perfect on its own, but you can pair it with breakfast items or afternoon snacks to make it a mini cafe experience at home. Try it alongside a pastry, bagel, or cookie for an authentic cafe vibe.
- Pair with a croissant or butter croissant for a classic French cafe feel
- Serve alongside a blueberry muffin or banana bread for a morning combo
- Match with a chocolate chip cookie for an afternoon pick-me-up
- Enjoy with a breakfast sandwich for a full morning meal
- Sip alongside a biscotti or Italian cookie for dunking
Variations to Try
- Caramel Iced Latte: Swap vanilla syrup for caramel syrup to get that sweet, buttery flavor that’s incredibly popular at Starbucks. The caramel creates a deeper sweetness that plays beautifully with the espresso.
- Hazelnut Iced Latte: Use hazelnut syrup instead of vanilla for a nuttier, more sophisticated flavor profile. Hazelnut pairs wonderfully with coffee and adds complexity to the drink.
- Strong and Black Iced Latte: Skip the syrup entirely and use three espresso shots with just 8 oz of milk for a bold, coffee-forward drink. This version appeals to serious coffee lovers who want less sweetness.
- Iced White Mocha: Add 1 oz of white chocolate mocha syrup along with the vanilla for a richer, creamier version. This transforms the drink into something dessert-like and indulgent.
- Iced Latte with Cinnamon: Sprinkle a pinch of cinnamon on top of the microfoam for a spiced twist. The cinnamon adds warmth and complexity that complements the coffee beautifully.
Dietary Adaptations
- Dairy-Free: Replace whole milk with oat milk or almond milk, though the texture will be less creamy and you may need to add a splash more milk to compensate for the lack of richness.
- Vegan: Use plant-based milk and confirm your vanilla syrup contains no animal products, making the entire drink plant-based without sacrificing much flavor or texture.
- Low-Carb/Keto: Skip the vanilla syrup and sweeten with a few drops of stevia or monk fruit sweetener instead to keep carbs minimal while maintaining sweetness.
- Sugar-Free: Use sugar-free vanilla syrup or omit syrup entirely and add a touch of honey or monk fruit to control the sweetness without refined sugar.
Storage and Reheating
Refrigerator
Iced lattes are best consumed immediately, but if you need to store one, keep it in a sealed container in the fridge for up to 8 hours. The ice will melt and dilute the drink, so expect the flavor to become slightly weaker over time.
- Store in an airtight container to prevent flavor transfer from other foods
- The drink will separate slightly as the milk settles, so stir before drinking
- Taste may become slightly flat after 4-6 hours
Freezer
Freezing an iced latte isn’t recommended because the milk will separate when thawed and the texture becomes grainy. If you want a frozen coffee drink, make a fresh batch and freeze just the espresso to use later.
- Espresso cubes can be frozen for up to two weeks and used in future iced lattes
- The milk component doesn’t freeze well and will split when thawed
Reheating
There’s no true reheating method for an iced latte since it’s meant to be cold, but you can pour it into a blender with a handful of ice and a splash of milk to refresh it. Alternatively, simply make a fresh batch for the best experience.
- Blend with ice and milk to create a refreshed version if the original has become diluted
- Don’t heat an iced latte in the microwave as it will taste flat and bitter
Nutrition Information
| Nutrient | Amount |
|---|---|
| Calories | 70 |
| Total Fat | 3.5g |
| Saturated Fat | 2.2g |
| Carbohydrates | 5g |
| Fiber | 0g |
| Sugar | 4g |
| Protein | 4g |
| Sodium | 55mg |
| Cholesterol | 12mg |
This nutritional information is based on a plain iced latte with whole milk and no added syrup. Adding vanilla syrup will increase calories and sugar content by approximately 25-30 calories and 5-6 grams of sugar per serving.
Frequently Asked Questions
Can I Use Regular Coffee Instead of Espresso?
You can use strong brewed coffee if you don’t have an espresso machine, but the flavor will be thinner and less bold than the original. Brew it extra strong and use about 3-4 oz to compensate for the lack of intensity that espresso provides.
What’s the Difference Between an Iced Latte and an Iced Americano?
An iced latte has a much higher milk-to-espresso ratio, making it creamy and smooth, while an iced Americano has more espresso and less milk, creating a stronger, more coffee-forward drink. A latte is dessert-like, and an Americano is closer to a regular black coffee.
How Do I Make This Recipe Without a Milk Frother?
Pour cold milk into a jar with a tight-fitting lid and shake vigorously for 30-45 seconds to create microfoam. You can also use a whisk to whip the milk gently until small bubbles form on the surface.
Why Does My Homemade Iced Latte Taste Different From Starbucks?
The most common reasons are using stale espresso, heating the milk, or using the wrong milk-to-espresso ratio. Make sure your espresso is fresh, keep your milk cold, and stick to the 1:4 espresso-to-milk ratio for that authentic Starbucks taste.
Can I Make This Recipe in Advance for My Commute?
You can prepare it up to one hour in advance and keep it in an insulated tumbler with a lid, though the ice will start to melt and dilute it. For best quality, make it right before you leave or use ice cubes made from frozen espresso to prevent dilution.
What’s the Best Type of Milk for Frothing in an Iced Latte?
Whole milk creates the best microfoam and richest taste, but 2% milk works well too. Skim milk froths but produces less creamy results, while plant-based milks like oat milk can froth nicely but add their own flavors.
Final Thoughts
Making your own Starbucks iced latte at home is genuinely one of the easiest ways to save money without sacrificing quality. Once you nail this recipe, you’ll wonder why you ever paid cafe prices.
Give this a shot tomorrow morning, and let yourself enjoy that moment of coffee shop perfection from your own kitchen. Your wallet and your taste buds will thank you.
Explore More Coffee Recipes
Ready to expand your at-home coffee game beyond the basic iced latte? Check out our collection of cafe-inspired drinks and discover how to recreate your other favorite Starbucks orders.
Try making an iced white mocha recipe for a sweeter, creamier treat, or explore our coffee latte recipe for hot versions of these classic cafe drinks.
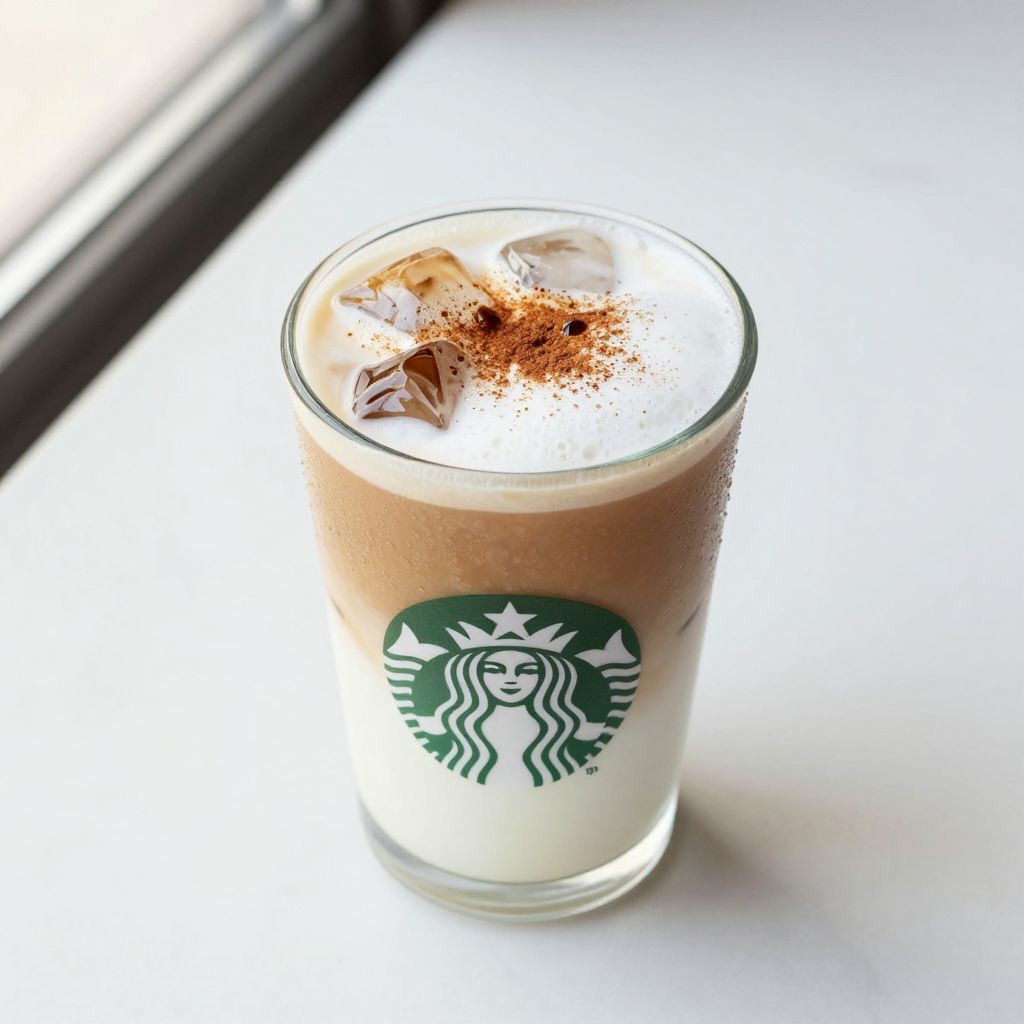
Starbucks Iced Latte
Ingredients
Equipment
Method
- Pull two fresh espresso shots within 25-30 seconds into a small cup or shot glass.
- Fill a 16 oz tall glass with ice cubes, stopping about an inch from the top.
- Pour the espresso over the ice slowly and steadily to cool it gradually.
- Add 0.5 oz vanilla syrup if using and stir well with a long spoon.
- Pour 10 oz cold whole milk into a frothing pitcher or small container.
- Froth the milk gently for 30-45 seconds until microfoam forms on the surface.
- Pour the frothed milk into the glass, holding back the foam, then top with a thin layer of microfoam.
- Stir thoroughly and taste, adjusting sweetness or strength as needed.