
There’s something magical about that first sip of green apple juice on a crisp morning, when the tart brightness hits your palate and wakes up every taste bud at once. This recipe delivers that crisp, refreshing punch without any added sugar or mysterious ingredients, just pure green apple goodness with a hint of natural sweetness and a squeeze of lemon to balance the sharpness. What makes this juice special is how simple it is to make at home while tasting infinitely better than anything you’ll find in a bottle, and it works as a morning energizer, a post-workout refresher, or even a base for cocktails.
Why You’ll Love This Recipe
This juice is quick to make, requires minimal prep, and delivers maximum flavor with just a handful of ingredients. You control the sweetness and tartness, making it perfect for your taste preferences.
- Fresh, vibrant taste that beats store-bought by miles
- Takes under 10 minutes from apple to glass
- Works with any juicer, blender, or even a food processor
- No added sugars, preservatives, or weird chemicals
- Naturally energizing and packed with nutrients your body actually recognizes
My Experience Making This Recipe
I started making this juice when I realized how much money I was spending on bottled versions that tasted like apple-flavored water. The first time I juiced fresh Granny Smiths with a squeeze of lemon, I literally stopped what I was doing to just enjoy the moment.
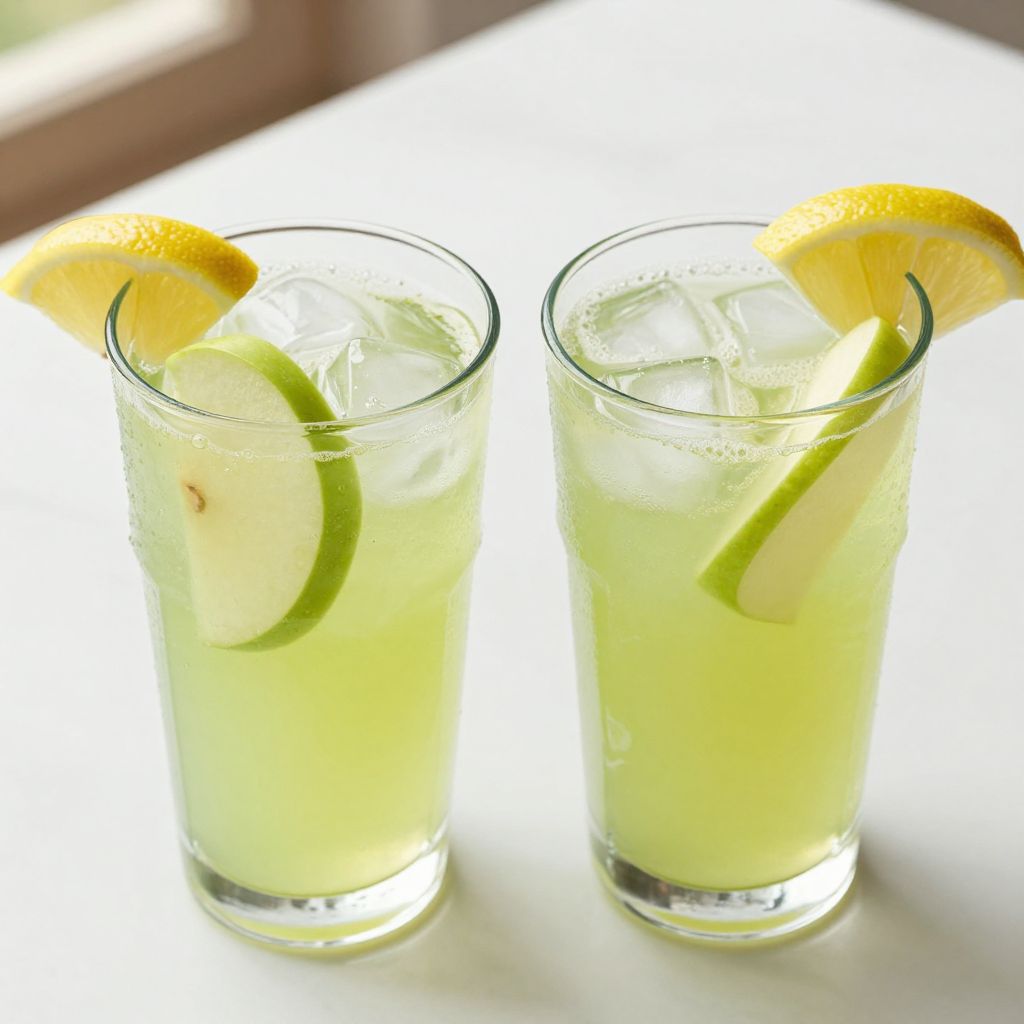
My kitchen smelled like an orchard, and the juice came out this gorgeous pale green color that looked almost too pretty to drink. That first taste confirmed it: homemade green apple juice hits different, sharper and more alive than anything commercial.
Now I make it at least twice a week, and I’ve noticed my afternoon energy dip disappeared almost immediately. Friends who’ve tried it keep asking me to make it when they visit, which is the highest compliment a recipe can get.
Recipe Overview
- Recipe Name: Fresh Green Apple Juice
- Servings: 2 servings
- Prep Time: 5 minutes
- Cook Time: 0 minutes
- Total Time: 5 minutes
- Course: Beverage
- Cuisine: Modern Healthy
- Calories per Serving: 95
Equipment You Will Need
- Cold-press juicer or centrifugal juicer
- Blender (as an alternative to juicer)
- Fine-mesh strainer or nut milk bag
- Sharp knife and cutting board
- Citrus juicer or reamer
- Glass pitcher or serving glasses
- Spoon for stirring
Ingredients for Green Apple Juice
- 6 medium Granny Smith apples, washed and quartered (about 2 pounds)
- 1 lemon, halved
- Optional: 1/4 teaspoon fresh ginger root, peeled, for a warming kick
- Optional: 1/4 teaspoon turmeric powder for anti-inflammatory benefits
- Ice cubes for serving
Ingredient Notes and Substitutions
- Granny Smith apples: These tart, crisp apples provide the backbone of the juice with natural acidity and minimal sweetness. You can substitute with Honeycrisp or Pink Lady apples if you prefer a sweeter juice, though the brightness will be less intense.
- Lemon: Fresh lemon juice cuts the apple’s natural sugars and adds complexity to the flavor profile. Lime works as a substitute for a more tropical twist, but use about the same amount.
- Ginger: This adds warmth and a slight spice that pairs beautifully with green apple. Skip it if you prefer pure apple flavor, or substitute with a tiny pinch of cayenne pepper for heat instead.
- Turmeric: This brings earthy undertones and known wellness benefits to the juice. Omit it entirely if you want a cleaner apple taste, as it will add color and flavor.
How to Make Green Apple Juice
Step 1: Wash and Prepare Your Apples
Rinse all your apples under cool running water and scrub them gently with your hands to remove any dirt or debris. You want clean produce going into your juice since you’re not peeling these apples if you’re using a cold-press juicer, which extracts every bit of nutrition from the skin.
Step 2: Cut Apples Into Juicer-Friendly Pieces
Cut each apple into quarters, removing the stem and blossom end, but leave the skin on for maximum nutrient extraction. Your juicer will tell you the ideal chunk size for your specific machine, so check your manual before diving in.
Step 3: Prep Your Lemon
Cut your lemon in half and set it aside near your juicer for easy access. Having your lemon ready means you can add it while the juice is still fresh and the flavors will meld together beautifully.
Step 4: Start Juicing the Apples
Turn on your juicer and slowly feed in the apple quarters, applying gentle pressure if you’re using a centrifugal juicer. The juice should flow into your pitcher in that gorgeous pale green color, and you’ll see the pulp collect in the designated waste compartment.
Step 5: Add the Lemon Juice
Once you’ve processed all your apples, cut your lemon halves in half again to fit your juicer, or simply juice them by hand using a citrus reamer. The fresh lemon juice will add brightness and prevent the apple juice from oxidizing too quickly, keeping it fresher longer.
Step 6: Stir in Optional Ingredients
If you’re using ginger or turmeric, add these now and stir well to combine evenly throughout the juice. The fresh juice will help dissolve any powder ingredients, creating a smooth, consistent drink.
Step 7: Taste and Adjust
Take a sip and see if the tartness level suits you, or if you’d like more lemon brightness. This is your chance to tweak it before serving, so don’t hold back from making adjustments.
Step 8: Strain if Desired
If you prefer a completely smooth juice with zero pulp, pour it through a fine-mesh strainer into a clean pitcher. Some people love a little pulp for extra fiber, so this step is totally optional depending on your preference.
Step 9: Serve Immediately
Pour the juice into glasses filled with ice cubes and serve right away for the best flavor and highest nutrient retention. Fresh juice oxidizes quickly, so drinking it within minutes of making it gives you the full experience.
Pro Tip: A cold-press juicer yields more juice and preserves more nutrients than a centrifugal juicer, but a high-powered blender works great too if you strain the pulp afterward.
Tips for the Best Green Apple Juice
- Use apples that are firm and crisp, not soft or bruised, since mushy apples will produce less juice and taste mealy rather than bright. Granny Smiths from the refrigerated section at your grocery store tend to be the freshest and most consistent choice.
- Chill your glasses in the freezer for 10 minutes before serving to keep the juice cold longer without diluting it too much with melting ice.
- Make your juice within 15 minutes of eating a heavy meal, as the tart acidity can upset your stomach if your digestive system is already working hard.
- Store any leftover juice in an airtight glass container in the back of your fridge, and try to drink it within 24 hours for the best flavor and nutritional value.
- If your apples aren’t producing much juice, they might be older or lower in water content, so swap in a couple of Fuji or Honeycrisp apples for better yield without sacrificing flavor too much.
- Use organic apples if you can afford them, since you’re not peeling the skin and you want to minimize pesticide exposure from conventional farming.
Common Mistakes to Avoid
- Using sweet apple varieties like Gala or Fuji as your base will create juice that tastes more like dessert than a refreshing morning drink. Stick with tart varieties for that bright, clean flavor that wakes you up.
- Adding the lemon juice after the juice sits for a few minutes means oxidation will have already started, dulling the bright green color and fresh taste. Add citrus while the juice is still warm to maximize preservation.
- Skipping the lemon entirely creates a juice that tastes flat and one-dimensional, even though the apples themselves are delicious. Lemon amplifies everything and balances the sweetness perfectly.
- Overloading the juicer at once by stuffing too many apples in simultaneously can jam the machine or produce juice that’s too pulpy. Feed apples in steadily for smooth, consistent extraction.
Serving Suggestions
This juice shines on its own, but you can also use it as a base for creative drinks and healthy additions. Serve it ice-cold for maximum refreshment, or at room temperature if you’re drinking it for digestive benefits.
- Mix with sparkling water and a splash of honey for a healthier take on green apple soda
- Combine with fresh mint leaves and a tiny pinch of salt for a spa-like wellness drink
- Add to smoothie bowls with yogurt, granola, and berries for extra liquid and tartness
- Use as a base for cocktails by mixing with vodka, gin, or rum plus fresh herbs
- Blend with coconut milk for a creamy, tropical variation that softens the tartness
Variations to Try
- Ginger Green Apple Juice: Add 1 teaspoon of fresh ginger root to the juicer for a warming, spicy kick that aids digestion and adds complexity to the flavor profile.
- Turmeric Green Apple Juice: Whisk in 1/2 teaspoon of turmeric powder and a tiny pinch of black pepper for a golden-hued juice loaded with anti-inflammatory compounds.
- Cucumber Green Apple Juice: Substitute 2 apples with 2 medium cucumbers for a lighter, more hydrating juice that’s perfect for hot summer days and feels incredibly refreshing.
- Green Apple and Celery Juice: Add 3 stalks of fresh celery to the apples for a mineral-rich juice that’s beloved by wellness enthusiasts and tastes surprisingly smooth and savory.
- Sweet Green Apple Juice: Throw in 1 pear or 1 carrot to add natural sweetness and depth if you find straight green apple juice too tart for your palate.
Dietary Adaptations
- Gluten-Free: This juice is naturally gluten-free with no special adjustments needed, making it safe for anyone with celiac disease or gluten sensitivity.
- Dairy-Free: Completely dairy-free as written, so enjoy it as is without any modifications or concerns about hidden milk products.
- Vegan: This recipe is 100 percent vegan with no animal products involved, perfect for plant-based eating styles and anyone avoiding animal byproducts.
- Low-Carb/Keto: One serving contains about 23 grams of carbs from natural fruit sugars, which may be higher than strict keto guidelines allow, so enjoy in moderation or dilute with sparkling water to reduce carb content per serving.
Storage and Reheating
Refrigerator
Fresh juice keeps best in an airtight glass container on the coldest shelf of your fridge, where it stays fresh for 24 to 48 hours before flavor and nutrient quality decline noticeably. The longer it sits, the more oxidation occurs, turning the juice brown and slightly bitter.
- Use glass containers instead of plastic, which can absorb flavors and leach chemicals into your juice
- Fill the container all the way to the top to minimize air exposure and slow oxidation
- Shake well before drinking, as natural separation may occur during storage
Freezer
You can freeze green apple juice in ice cube trays for up to 3 months, perfect for adding to smoothies or blending into frozen drinks without diluting them with regular ice. Thaw in the refrigerator overnight if you want to drink the juice straight, though the flavor will be slightly muted after freezing.
- Pour juice into silicone ice cube trays for easy removal and storage
- Label your frozen cubes with the date so you know when they were made
- Transfer frozen cubes to a freezer bag once solid to save space
Reheating
This juice is meant to be served cold and doesn’t need reheating, but you can thaw frozen cubes at room temperature for 15 to 20 minutes or use them directly in cold beverages. Never heat fresh apple juice since heat destroys the delicate nutrients and enzymes that make fresh juice special.
- Add frozen cubes directly to smoothies for extra chill and tartness
- Thaw in the fridge overnight for the best flavor preservation
- Avoid microwaving, which damages nutrients and changes the flavor negatively
Nutrition Information
| Nutrient | Amount |
|---|---|
| Calories | 95 |
| Total Fat | 0.3g |
| Saturated Fat | 0.05g |
| Carbohydrates | 23g |
| Fiber | 0.5g |
| Sugar | 17g |
| Protein | 0.2g |
| Sodium | 2mg |
| Cholesterol | 0mg |
The sugar content comes entirely from natural fruit sugars and requires no added sweeteners, making this a cleaner option than commercial juices. Nutritional values are approximate and may vary slightly depending on apple variety and size.
Frequently Asked Questions
Can I use a blender instead of a juicer to make this juice?
Absolutely, though you’ll need to strain the result through a fine-mesh strainer or nut milk bag to remove the pulp and get that smooth juice texture. Blend the apples and lemon with a tiny splash of water, then strain through cheesecloth for the clearest result.
Why does my juice turn brown after a few hours?
Oxidation happens naturally when fresh juice is exposed to air, turning the juice brown and slightly bitter over time. Adding lemon juice slows this process, and storing in an airtight container in the coldest part of your fridge minimizes browning significantly.
Is the apple skin safe to juice?
Yes, apple skin is completely safe and contains most of the fiber and nutrients, so leaving it on is actually ideal when juicing. Organic apples are safer than conventional varieties if you’re concerned about pesticide residue.
How much juice do 6 apples actually make?
Six medium Granny Smith apples typically yield about 16 to 20 ounces of juice, which makes 2 generous servings or 3 smaller ones. Juice yield varies with apple freshness and water content, so expect slight variations each time you make it.
Can I add sweetener to this juice if it’s too tart?
You can add a small drizzle of honey or agave nectar if you prefer, but start with just a teaspoon and taste first since the apples already contain natural sugars. Adding sweeter apple varieties like Fuji or Honeycrisp to your mix is a better approach for balancing tartness without adding refined sugar.
What’s the difference between cold-press and centrifugal juicers?
Cold-press juicers work slowly and produce less heat, preserving more nutrients and enzymes, while centrifugal juicers spin fast and produce slightly more foam and oxidation. Cold-press juice lasts longer in the fridge and has a richer flavor, but centrifugal juicers are cheaper and faster if you’re in a hurry.
Final Thoughts
Making your own green apple juice takes just a few minutes and tastes infinitely fresher than anything you can buy in a bottle. Once you experience that first tart, bright sip of homemade juice, store-bought versions will feel disappointingly flat and artificial by comparison.
Give this recipe a try this week, and I bet you’ll be making it regularly from then on. Your taste buds and your wallet will both thank you.
Interested in exploring other fresh beverage recipes? Check out this refreshing apple cider mocktail recipe for a warming fall twist, or try this lovely fresh cranberry juice recipe for a tart, festive option that pairs beautifully with the green apple juice in mixed drinks.
Fresh Green Apple Juice
Ingredients
Equipment
Method
- Rinse all apples under cool running water and scrub gently to remove any dirt.
- Cut each apple into quarters, removing stems and blossom ends but keeping the skin on.
- Cut the lemon in half and set aside near the juicer.
- Turn on the juicer and slowly feed in the apple quarters until all apples are juiced.
- Juice the lemon halves using the juicer or a citrus reamer and add the lemon juice to the apple juice.
- If using ginger or turmeric, add them now and stir well to combine.
- Taste the juice and adjust tartness by adding more lemon if desired.
- If a smoother texture is preferred, pour the juice through a fine-mesh strainer to remove pulp.
- Pour the juice into glasses filled with ice cubes and serve immediately for best flavor.