The rich, malty aroma of a freshly poured doppelbock fills the air with hints of caramel, chocolate, and a subtle warmth that promises comfort in a glass. This doppelbock recipe brings the German brewing tradition right into your home kitchen, giving you the chance to craft a beer that rivals what you’d find in a Bavarian beer hall.
A doppelbock is a double bock style lager that’s bold, smooth, and deeply satisfying without being overly aggressive. It’s the kind of beer that rewards patience and precision, making it perfect for home brewers who want to level up their skills.
Why You’ll Love This Recipe
This doppelbock recipe delivers a complex, rewarding beer that tastes like you spent months perfecting your craft. The process teaches you fundamental brewing techniques while producing something genuinely impressive to share with friends.
- Rich malt complexity with notes of caramel, bread, and subtle chocolate
- Smooth, warming finish that feels polished and refined
- Higher alcohol content (around 7.5%) that adds body without harsh burn
- Classic German lager character that improves with proper cold conditioning
- Scalable recipe works for 5-gallon or 10-gallon batches
My Experience Making This Recipe
I first brewed a doppelbock on a cold January morning, and the transformation from grain to glass took weeks of patience. Watching the dark amber liquid develop that signature creamy head during fermentation felt like witnessing something magical happen in my basement.
The first tasting, after proper cold conditioning, revealed layers of flavor I hadn’t expected. My brewing friends immediately asked for the recipe, and several have now made it their signature beer.
The key moment came when I stopped rushing the cold conditioning phase. Giving the beer that full eight weeks at near-freezing temperatures separated my homemade version from mediocre attempts I’d made before.
Recipe Overview
- Recipe Name: Traditional German Doppelbock
- Servings: 48 (5-gallon batch, 12 oz servings)
- Prep Time: 2 hours
- Brew Day Time: 5 hours
- Fermentation Time: 4 weeks primary, 8 weeks cold conditioning
- Total Time: 12 weeks
- Course: Beverage
- Cuisine: German
- Alcohol Content: 7.5% ABV
- Calories per Serving: 210
Equipment You Will Need
- 10-gallon brew kettle
- Mashing vessel (cooler or insulated pot)
- Thermometer (0-220F range)
- Long-handled stirring spoon
- Grain mill
- Immersion chiller or wort chiller
- 5-gallon glass carboy or PET plastic carboy
- Airlock and rubber bung
- Hydrometer and test jar
- Large funnel
- Sanitizer (StarSan or similar)
- Siphon and bottling cane
- Bottle capper and crown caps
- 12 oz beer bottles (48 count)
Ingredients for Traditional German Doppelbock
For the Grain Bill (Mash)
- German Pilsner Malt: 8 lbs
- Munich Malt: 4 lbs
- Melanoidin Malt: 1 lb
- Caramunich Malt (60L): 0.75 lbs
- Chocolate Malt: 0.5 lbs
For the Hops and Flavoring
- Noble Hops (Hallertau or Saaz): 1.25 oz (60-minute boil)
- German Tradition Hops: 0.5 oz (30-minute addition)
- Brewing Water: 6 gallons (for mashing and sparging)
For Fermentation
- Wyeast 2308 Munich Lager or White Labs WLP838 Southern German Lager: one vial, starter recommended
- Calcium Sulfate (Gypsum): 1 tsp (water adjustment)
- Priming Sugar (Dextrose): 0.75 cups (bottling)
Ingredient Notes and Substitutions
- Munich Malt: This malt provides the signature bread and caramel backbone of the style. If unavailable, substitute with Vienna malt, though you’ll lose some of that classic Bavarian richness.
- Melanoidin Malt: Adds complexity and color depth without heavy roast. Use Special B malt as a backup, but use only 0.5 lbs to avoid overpowering the beer.
- Noble Hops: Hallertau is traditional, but Saaz or Tettnang work equally well for that noble bitterness. Avoid American hops, which clash with the malt character.
- Lager Yeast Strain: Munich and Southern German strains are ideal. If using Bavarian lager yeast, expect slightly higher esters and a softer finish.
- Brewing Water: Use filtered water if your tap water is heavily chlorinated. If your water is very soft, the gypsum addition helps with malt extraction and clarity.
How to Make Traditional German Doppelbock
Step 1: Prepare Your Ingredients and Equipment
Mill your grains to a consistency that exposes the starch inside without pulverizing the husk. Sanitize every piece of equipment that will touch your wort or beer with a no-rinse sanitizer, letting it sit for at least 30 seconds per surface.
This prep work eliminates variables and ensures infections don’t compromise your 12-week investment. Set aside your yeast starter if using liquid yeast; it should be ready and at room temperature before you begin.
Step 2: Start Your Mash
Heat 2.5 gallons of water to 165F, then mix in your milled grains, stirring well to avoid clumps. The mixture should settle at around 152F, which is the ideal temperature for converting starches to fermentable sugars over the next 60 minutes.
This temperature range, called the saccharification rest, allows enzymes in the malt to break down complex carbohydrates. Keep the mash insulated during this hour to maintain temperature stability.
Step 3: Monitor and Mash Out
After 60 minutes, slowly raise the temperature to 170F over 10 minutes while gently stirring. This mash out step denatures the enzymes and stops the conversion process, making the wort easier to sparge.
The slower temperature rise prevents shocking the grain bed and clogging your sparge. You’ll notice the wort becoming slightly thinner and easier to run off.
Step 4: Sparge and Collect Your Wort
Slowly run off your wort into your kettle, collecting about 5.5 gallons total. Rinse the grain bed with 170F water, pouring it gently over the grain to extract remaining sugars without oversaturating the bed.
This gentle sparging extracts maximum sugar while avoiding tannin extraction, which happens when water gets too hot or moves too quickly through the grains. Stop collecting when you reach your 5.5-gallon target.
Step 5: Heat and Begin the Boil
Bring your wort to a rolling boil, skimming any foam or grain debris from the surface during the first few minutes. Once the wort is clear and boiling steadily, add your calcium sulfate if using, then immediately add your bittering hops.
A strong, rolling boil drives off unwanted volatile compounds and allows hop bitterness to integrate smoothly. The boil should last exactly 90 minutes for a doppelbock.
Step 6: Add Flavor Hops and Complete the Boil
At 30 minutes remaining in the boil, add your flavor hops and allow them to contribute subtle herbal notes. At the 5-minute mark, remove from heat and let the wort sit undisturbed for 10 minutes to allow particles to settle.
This settling period improves clarity in your finished beer by letting grain particles and hop debris drop to the bottom of the kettle, where they stay during transfer.
Step 7: Cool the Wort Rapidly
Run cold water through your immersion chiller or use a wort chiller to bring the temperature down to 55F as quickly as possible. Rapid cooling reduces the risk of infection and produces cleaner flavors in the finished beer.
This step typically takes 20-30 minutes depending on your chiller design. Once you reach 55F, you’re ready to transfer to your fermentation vessel.
Step 8: Transfer and Aerate
Siphon the cooled wort into your sanitized carboy, leaving the sediment behind in the kettle. Splash the wort as it enters the carboy to incorporate oxygen, which your yeast needs to reproduce during fermentation.
Vigorous aeration at this stage is not only allowed but encouraged. Avoid aerating after you pitch the yeast, as this can introduce unwanted flavors.
Step 9: Pitch the Yeast and Begin Fermentation
Add your prepared yeast starter or liquid yeast culture to the carboy, seal with an airlock filled with sanitizer solution, and place in a temperature-controlled environment at 50F. Lager yeast ferments much slower and at colder temperatures than ale yeast, requiring patience and proper temperature control.
Maintain this 50F temperature as closely as possible for the entire 4-week primary fermentation. Temperature fluctuations confuse the yeast and can produce off-flavors that take weeks to fade.
Step 10: Monitor Fermentation Progress
Check your airlock daily for activity over the first week. Active fermentation produces a layer of foam called krausen on top of the wort; you’ll see bubbles rising through the airlock until about day 10-14.
Once activity slows, resist the urge to disturb the carboy. Lagers work quietly compared to ales, so the reduced activity is normal and expected.
Step 11: Transition to Cold Conditioning
After 4 weeks of primary fermentation, slowly lower the temperature to 32F over the course of one week, dropping by 2-3F per day. This diacetyl rest and cold conditioning phase lasts 8 weeks and is what separates excellent doppelbock from merely good beer.
The cold conditioning allows flavors to meld, remaining yeast to clean up any off-flavors, and the beer to clarify beautifully. This patience is non-negotiable for the style.
Step 12: Bottle and Condition
After cold conditioning, dissolve your priming sugar in 2 cups of water, boil briefly to sanitize, then cool to room temperature. Siphon the beer into bottles, leaving approximately 1 inch of headspace, then cap each bottle securely.
Store the capped bottles at 65-70F for 2-3 weeks to allow carbonation to develop. This bottle conditioning period allows yeast to consume the priming sugar and create CO2, giving you a properly carbonated finished beer.
Pro Tip: Temperature control during the lager fermentation is more important than any other variable in this recipe; investing in a fermentation chamber or temperature-controlled fridge eliminates more problems than anything else you can do.
Tips for the Best Traditional German Doppelbock
- Make a yeast starter 24 hours before brewing using dried malt extract and water, shaking it occasionally to aerate it. This gives you millions of active yeast cells ready to ferment immediately, resulting in faster, cleaner fermentation with fewer off-flavors.
- Take a gravity reading with your hydrometer before pitching yeast and again after fermentation to verify you hit your target alcohol content. This simple check tells you if your efficiency is on track and helps you adjust future batches.
- Keep a detailed log of your brew day including water temperature, strike temperature, grain temperatures, and fermentation timeline. These notes reveal patterns in your brewing and help you troubleshoot if something goes wrong.
- Use a blow-off tube instead of an airlock during the first week if you prefer, routing the tube into a cup of sanitizer solution to allow pressure release without risk of suck-back. This prevents overflow if fermentation gets vigorous, which can happen with high-gravity beers.
- Taste the beer at bottle conditioning week 3 and again at week 6 to experience how the flavors evolve as carbonation integrates. Most doppelbocks improve noticeably from week 2 to week 8 of conditioning.
- Store your finished bottles in a cool, dark place and plan to drink them within 12 months for peak flavor. This beer actually improves over the first 4-6 months as flavors marry and integrate.
Common Mistakes to Avoid
- Fermenting too warm: Temperatures above 55F cause ester production that makes the beer taste fruity instead of clean and refined. Lagers demand cold, stable conditions; skipping a fermentation chamber is a false economy.
- Skipping cold conditioning: Rushing to bottle after 2-3 weeks results in beer with harsh diacetyl flavors and poor clarity. The 8-week conditioning phase is part of the recipe, not optional.
- Over-sparging your grain: Running too much water through the grain bed extracts tannins that create astringency and harsh bitterness. Stop when you hit your target volume and accept slightly lower efficiency as the cost of cleaner flavor.
- Pitching yeast while the wort is still warm: Yeast pitched into wort warmer than 62F can produce fusel alcohols and rough bitterness. Always cool to 55F before adding yeast.
- Inconsistent yeast health: Using old liquid yeast without making a starter, or reusing yeast from a previous batch without verification of viability, leads to stuck fermentation or multiple off-flavors. Fresh yeast or a proper starter is cheap insurance.
Serving Suggestions
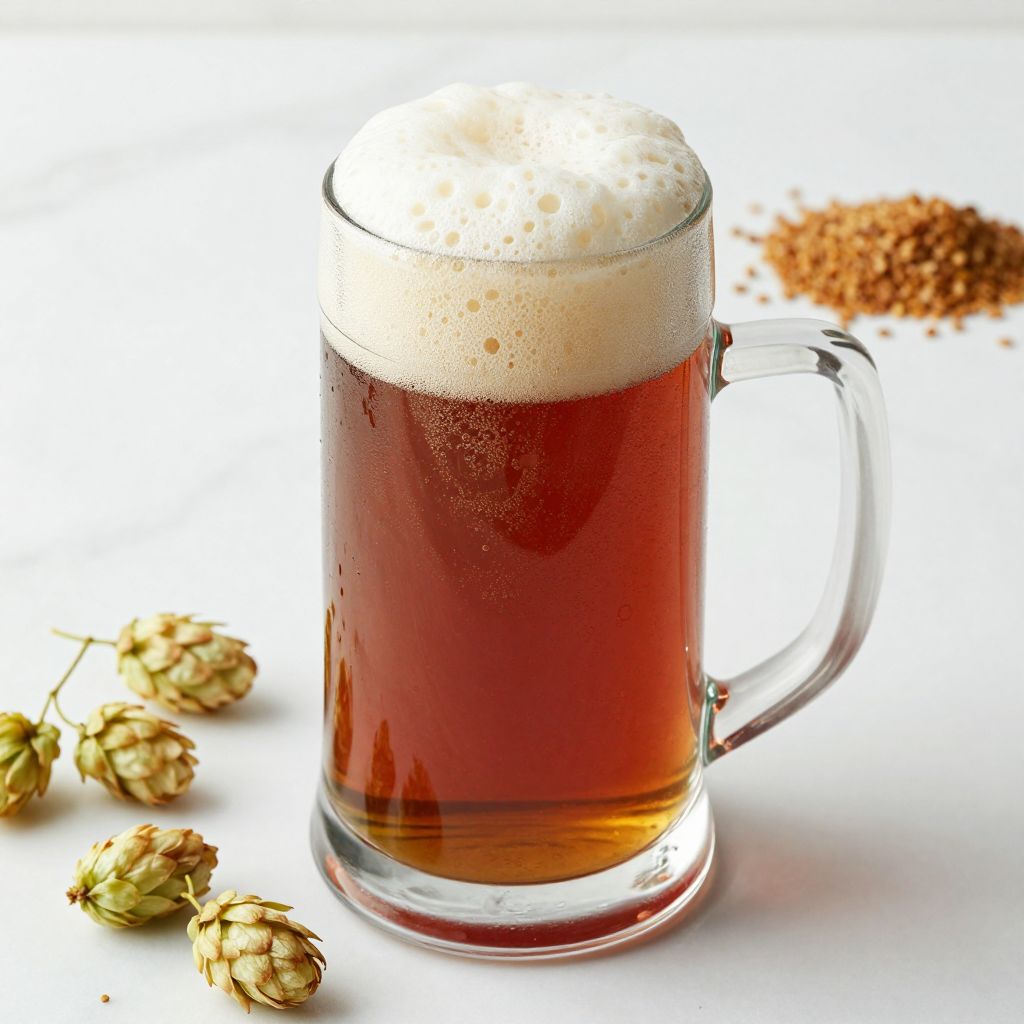
A doppelbock shines in a proper pint glass or nonic glass that shows off its deep amber clarity and creamy head. The beer’s richness and warmth make it perfect alongside hearty foods on cool evenings.
- Pair with roasted meats, particularly beef or pork with root vegetable sides
- Serve alongside aged cheeses and cured meats on a charcuterie board
- Enjoy with German-style braised dishes or hearty stews
- Complement chocolate-based desserts or caramel tarts for an unexpected pairing
- Drink slowly and thoughtfully, allowing the beer to warm slightly as you sip to reveal deeper flavors
Variations to Try
- Eisbock (Ice Bock): Concentrate your doppelbock by freezing the finished beer and removing ice crystals to increase alcohol content to 10-12% ABV. The resulting beer becomes richer and more warming with a pronounced malt sweetness.
- Bourbon Barrel Doppelbock: Age your finished doppelbock in a bourbon barrel for 4-6 weeks to add vanilla, oak, and slight bourbon notes. This variation transforms the beer into something approaching an imperial stout in complexity while maintaining the lager character.
- Coffee Doppelbock: Add 1-2 oz of cold-steeped espresso or finely ground coffee in the final week of conditioning for subtle coffee notes. The cold steep prevents harsh flavors that hot coffee extraction can create.
- Smoked Doppelbock (Rauchbock): Replace 15-20% of your Munich malt with smoked malt to introduce subtle bacon and wood smoke notes. Start with less smoked malt and increase in future batches based on your preference for smoke intensity.
- Honey Doppelbock: Add 1 lb of honey in the final 5 minutes of the boil for added body and subtle floral notes. The honey ferments completely, adding alcohol and smoothness without residual sweetness.
Dietary Adaptations
- Gluten-Free: Replace all grains with a gluten-free brewing malt blend and add a bit of diastatic enzyme powder to ensure proper conversion. The finished beer will be slightly lighter in body and may need 10-15% more grain to hit your target gravity.
- Lower Alcohol (5.5% ABV instead of 7.5%): Reduce your grain bill by 20-25%, using approximately 10 lbs total grain instead of 14.25 lbs. The beer will be lighter-bodied but retain the malt complexity if you maintain your malt ratios.
- Higher Alcohol/Imperial Doppelbock (10% ABV): Increase your grain bill to 18-19 lbs total, adding extra Munich malt to maintain the style character. Expect fermentation to take 5-6 weeks instead of 4 weeks due to the higher gravity.
- Vegan Friendly: Standard doppelbock recipes are naturally vegan, as neither traditional recipes nor modern versions require animal products. Simply verify your yeast and any additives don’t contain animal-derived ingredients if strict vegan verification matters to you.
Storage and Reheating
Refrigerator
Store unopened bottles in a dedicated beer fridge at 45-50F away from direct sunlight. Doppelbock keeps well for 12 months in cool storage, though flavors peak around 4-6 months after bottling.
- Keep bottles upright to minimize contact between beer and cap
- Avoid temperature fluctuations, which can cause oxidation
- Check bottles periodically for leaks or cap separation
Freezer
Freezing beer is not recommended for long-term storage, as it damages flavor
Traditional German Doppelbock
Ingredients
Equipment
Method
- Mill your grains to a consistency that exposes the starch inside without pulverizing the husk. Sanitize every piece of equipment that will touch your wort or beer with a no-rinse sanitizer, letting it sit for at least 30 seconds per surface.
- Heat 2.5 gallons of water to 165F, then mix in your milled grains, stirring well to avoid clumps. The mixture should settle at around 152F. Maintain this temperature for 60 minutes.
- After 60 minutes, slowly raise the temperature to 170F over 10 minutes while gently stirring to complete the mash out.
- Slowly run off your wort into your kettle, collecting about 5.5 gallons total. Rinse the grain bed with 170F water, pouring it gently over the grain to extract remaining sugars.
- Bring your wort to a rolling boil, skimming any foam or grain debris from the surface. Add calcium sulfate if using, then immediately add your 1.25 oz bittering hops. Boil for 90 minutes total.
- At 30 minutes remaining in the boil, add your 0.5 oz flavor hops. At the 5-minute mark, remove from heat and let the wort sit undisturbed for 10 minutes.
- Cool the wort rapidly to 55F using your immersion chiller or wort chiller, which typically takes 20-30 minutes.
- Siphon the cooled wort into your sanitized carboy, leaving the sediment behind in the kettle. Splash the wort as it enters the carboy to incorporate oxygen.
- Add your prepared yeast starter or liquid yeast culture to the carboy, seal with an airlock filled with sanitizer solution, and place in a temperature-controlled environment at 50F. Maintain this temperature for 4 weeks of primary fermentation.
- Check your airlock daily for activity over the first week. Monitor fermentation progress without disturbing the carboy.
- After 4 weeks of primary fermentation, slowly lower the temperature to 32F over the course of one week, dropping by 2-3F per day. Hold at 32F for 8 weeks for cold conditioning.
- After cold conditioning, dissolve your 0.75 cups priming sugar in 2 cups of water, boil briefly to sanitize, then cool to room temperature. Siphon the beer into bottles, leaving approximately 1 inch of headspace, then cap each bottle securely.
- Store the capped bottles at 65-70F for 2-3 weeks to allow carbonation to develop through bottle conditioning.