
That first sip of a cold, creamy coffee milkshake on a warm afternoon is pure bliss, like drinking a fancy coffee shop treat right from your kitchen.
This coffee milkshake recipe delivers café-quality flavor without the price tag, and it’s ready in under five minutes. The combination of strong brewed coffee, creamy milk, and a touch of sweetness creates a perfectly balanced drink that tastes indulgent but feels refreshingly light.
Whether you need a quick breakfast boost, an afternoon pick-me-up, or a dessert that doubles as caffeine, this recipe works for everyone. Best of all, you can customize it endlessly, swap ingredients based on what you have on hand, and make it as simple or elaborate as you want.
Why You’ll Love This Recipe
This milkshake delivers smooth, creamy coffee flavor with zero fuss and maximum satisfaction. You’ll appreciate how versatile and forgiving it is, plus how fast it comes together.
- Ready in under 5 minutes with zero cooking required
- Packed with real coffee flavor, not watery or weak
- Naturally sweet with room for customization
- Works for breakfast, snacks, or dessert
- Budget-friendly compared to coffee shop versions
My Experience Making This Recipe
I first made this milkshake one summer when I was tired of paying six dollars for iced coffee drinks that tasted like sugar with a hint of coffee flavor. I grabbed some leftover cold brew from my fridge, threw it in the blender with milk and ice, and was shocked at how creamy and satisfying it turned out.
Since then, I’ve made it dozens of times, often swapping the milk type, adjusting sweetness levels, or adding unexpected flavors like cinnamon or a splash of vanilla. My friends have started asking me for the recipe, and I love seeing how each person tweaks it to match their taste.
The texture is what really sold me: thick enough to feel indulgent but smooth enough to sip easily through a straw. Every batch reminds me that sometimes the simplest recipes are the most rewarding.
Recipe Overview
- Recipe Name: Coffee Milkshake
- Servings: 2
- Prep Time: 3 minutes
- Cook Time: 0 minutes
- Total Time: 3 minutes
- Course: Beverage or Dessert
- Cuisine: American
- Calories per Serving: 185
Equipment You Will Need
- Blender or immersion blender with jug
- Measuring cups and spoons
- Tall glasses
- Drinking straws
- Ice cube tray or access to ice
Ingredients for Coffee Milkshake
- Strong brewed coffee, 1 cup, cooled
- Whole milk, 1 cup
- Ice cubes, 1 cup packed
- Sweetener, 2 tablespoons (sugar, honey, or maple syrup)
- Vanilla extract, 1/2 teaspoon
- Whipped cream for topping, optional
- Cocoa powder or cinnamon for garnish, optional
Ingredient Notes and Substitutions
- Strong brewed coffee: You need bold, concentrated coffee flavor so the drink doesn’t taste diluted or watery. Cold brew, espresso shots, or extra-strong drip coffee all work perfectly.
- Whole milk: Whole milk creates the creamiest texture and richest mouthfeel. Oat milk, almond milk, or 2% milk work fine if you prefer lighter versions, though the drink will be slightly less creamy.
- Ice cubes: Ice creates that thick, frosty texture that makes this drink satisfying. Frozen coffee cubes prevent dilution if you’re making this ahead.
- Sweetener: Sugar dissolves fastest, but honey and maple syrup add subtle depth. Agave nectar, stevia, or brown sugar all work; adjust to your sweetness preference.
- Vanilla extract: Vanilla rounds out the coffee flavor and adds warmth without being obvious. Almond extract or a pinch of sea salt work as alternatives if you want something different.
How to Make Coffee Milkshake
Step 1: Brew and Cool Your Coffee
Make strong brewed coffee using your preferred method, then let it cool to room temperature or chill it in the refrigerator. Cold coffee blends smoothly and prevents the ice from melting too quickly, which keeps your milkshake thick and creamy.
Step 2: Gather Your Blender and Glasses
Set up your blender on a flat, stable surface and place two tall glasses nearby. Having everything ready means you can blend and serve immediately while the drink is coldest.
Step 3: Add Coffee to the Blender
Pour the cooled coffee into your blender first. Starting with liquid at the bottom helps the blades engage smoothly and prevents ice from getting stuck.
Step 4: Pour in the Milk
Add one cup of whole milk or your milk of choice to the blender with the coffee. Milk creates the creamy texture and balances the coffee’s bitterness.
Step 5: Measure and Add Sweetener
Add two tablespoons of your chosen sweetener to the blender. This amount creates a balanced sweetness; taste and adjust upward if you prefer something sweeter, or reduce it if you like less sugar.
Step 6: Add Vanilla Extract
Pour in one half teaspoon of vanilla extract and stir gently with a spoon to distribute it. Vanilla complements coffee naturally and adds subtle warmth without making the drink taste like vanilla.
Step 7: Add Ice Cubes
Add one cup of packed ice cubes to the blender on top of the liquid ingredients. Layering ice on top helps the blender process everything evenly and creates a thicker final texture.
Step 8: Blend Until Smooth and Thick
Secure the blender lid and blend on high speed for 45 to 60 seconds until the mixture is smooth, thick, and creamy with no visible ice chunks. Stop and shake the blender gently if ice is stuck to the sides, then blend again briefly.
Step 9: Pour Into Glasses
Pour the milkshake evenly into two tall glasses, working quickly so the drink stays cold. The thickness should make it easy to pour without running off the sides.
Step 10: Top and Serve
Add a dollop of whipped cream on top if desired, and sprinkle with cocoa powder or cinnamon for a finishing touch. Serve immediately with a straw and enjoy while it’s coldest.
Pro Tip: Freeze your coffee in ice cube trays the night before, then blend those coffee cubes with milk and sweetener for an even more intense coffee flavor with zero dilution.
Tips for the Best Coffee Milkshake
- Use cold coffee, not hot, so the blender doesn’t struggle and your drink stays properly chilled. Hot coffee melts ice too quickly and creates a weak, watery result.
- Blend for exactly 45 to 60 seconds; blending too long heats the mixture from friction and melts the ice. Underblending leaves icy chunks that feel gritty on your tongue.
- Pack your ice cup firmly so you get a full cup’s worth; loose ice leaves you with a thinner drink. More ice equals a thicker, more satisfying texture.
- Taste the blended mixture before serving and adjust sweetness if needed; every coffee tastes slightly different. A splash of maple syrup adds richness that plain sugar cannot match.
- Serve immediately in chilled glasses to keep the milkshake thick longer. Warm glasses melt the shake faster and ruin the texture.
- Use a wide straw so you can actually drink the thick shake without exhausting your jaw. Regular straws clog with ice particles.
Common Mistakes to Avoid
- Using weak or lukewarm coffee: Your milkshake will taste watered down and disappointing, not like coffee at all. Always brew strong and always chill before blending.
- Skipping ice or using too little: The drink becomes more like coffee with milk than a true milkshake. You need enough ice to create that signature thick, frosty texture.
- Blending too long: Friction heats the mixture and melts your ice, turning your thick shake into a thin drink. Stop blending as soon as everything looks smooth.
- Using hot coffee: Hot coffee melts ice instantly, and your drink separates into layers instead of staying creamy and blended. Always chill your coffee first.
- Adding sweetener to hot coffee then blending: The hot liquid breaks down before it blends, creating an uneven sweetness. Dissolve sweetener in cooled coffee first if you’re worried about texture.
Serving Suggestions
Serve this milkshake cold and thick in tall glasses with a straw, ideally right after blending. Pair it with light foods so the richness feels like a treat, not a meal.
- Alongside a plain bagel or croissant for a satisfying breakfast combo
- After lunch with a small cookie or brownie for a dessert moment
- As a standalone afternoon pick-me-up when you need energy and sugar
- With a scoop of vanilla ice cream on the side for extra indulgence
- Frozen in popsicle molds for coffee-flavored pops on hot days
Variations to Try
- Mocha Shake: Add two tablespoons of chocolate syrup or cocoa powder to the blender for a chocolatey coffee flavor that feels like a dessert. The chocolate mellows the coffee’s acidity and adds richness.
- Caramel Shake: Replace regular sweetener with caramel syrup and skip the vanilla for a buttery, indulgent twist. Caramel and coffee are a classic pairing that tastes upscale.
- Spiced Shake: Add one quarter teaspoon of cinnamon, a pinch of nutmeg, and a dash of cardamom for a warm, cozy flavor. These spices feel fancy but don’t overpower the coffee.
- Protein Shake: Add one scoop of vanilla protein powder to turn this into a post-workout drink that tastes like dessert. The protein keeps you fuller longer.
- Cold Brew Concentrate Shake: Use homemade cold brew concentrate instead of regular coffee for an ultra-strong, smooth version. Cold brew tastes naturally sweeter and less acidic than hot brewed coffee.
Dietary Adaptations
- Dairy-free: Swap whole milk for oat milk or coconut milk and use vegan whipped cream if topping. You lose a tiny bit of creaminess but gain a nuttier or tropical flavor.
- Vegan: Use plant-based milk and skip the whipped cream, or use coconut whipped cream instead. The shake remains satisfying and delicious.
- Low-carb/Keto: Use unsweetened almond milk and replace sugar with erythritol or stevia for zero-carb sweetness. Skip the whipped cream or use heavy cream whipped with sweetener for a richer texture.
- Gluten-free: This recipe is naturally gluten-free as written; just verify your coffee and milk are certified gluten-free if you have celiac disease. All standard ingredients contain no gluten.
- Sugar-free: Replace sweetener with allulose or monk fruit sweetener for the same sweetness with fewer calories and no aftertaste. These substitutes blend smoothly without grittiness.
Storage and Reheating
Refrigerator
Enjoy your milkshake immediately after blending for the best texture and temperature. You can store leftover shake in a sealed container for up to one day, though it separates slightly.
- Pour into an airtight container and seal tightly
- Store for up to 24 hours
- Shake well before drinking; it may have separated
Freezer
Freeze individual portions as coffee popsicles or in containers for a future frozen treat. This works best if you plan ahead.
- Pour into popsicle molds or freezer containers
- Freeze for up to two months
- Let thaw slightly before eating if frozen solid
Reheating
This drink is meant to be cold and frozen, so traditional reheating does not apply. If your shake has warmed or separated, blend it again with fresh ice for best results.
- Do not microwave or heat this drink
- Re-blend with fresh ice if texture is compromised
- Serve immediately after blending
Nutrition Information
| Nutrient | Amount |
|---|---|
| Calories | 185 |
| Total Fat | 7g |
| Saturated Fat | 4g |
| Carbohydrates | 24g |
| Fiber | 0g |
| Sugar | 22g |
| Protein | 8g |
| Sodium | 120mg |
| Cholesterol | 25mg |
These values are estimates based on standard whole milk and two tablespoons of granulated sugar. Actual nutrition varies based on your coffee brand, milk type, and sweetener choice.
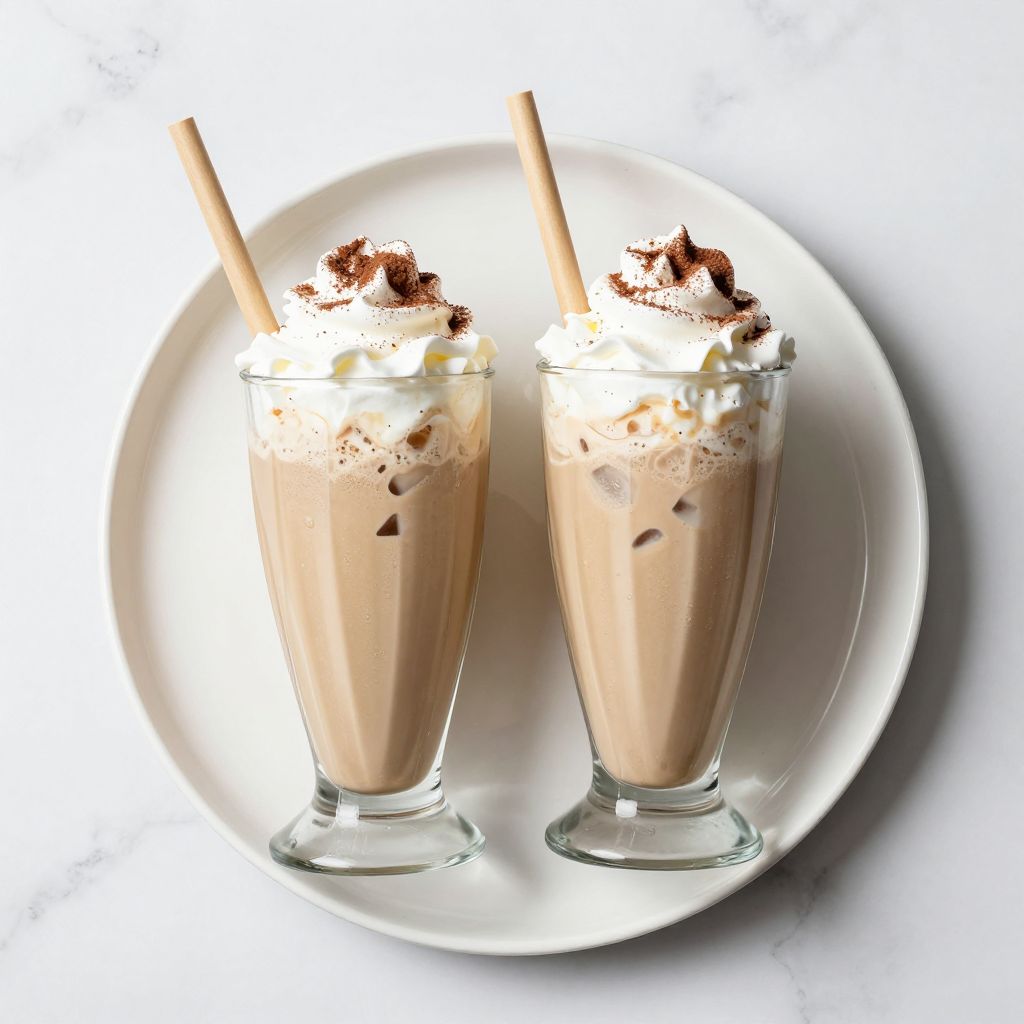
Coffee Milkshake
Ingredients
Equipment
Method
- Make 1 cup of strong brewed coffee using your preferred method, then let it cool to room temperature or chill in the refrigerator.
- Place the blender on a stable surface and set out two tall glasses.
- Pour the cooled coffee into the blender first.
- Add 1 cup of whole milk to the blender.
- Add 2 tablespoons of your chosen sweetener to the blender.
- Add 1/2 teaspoon of vanilla extract to the blender.
- Add 1 cup of packed ice cubes on top of the liquid ingredients.
- Secure the lid and blend on high speed for 45 to 60 seconds, stopping to shake the blender if needed, until smooth and thick.
- Pour the milkshake evenly into two tall glasses.
- Top with whipped cream and sprinkle with cocoa powder or cinnamon if desired, then serve immediately.
Notes
Frequently Asked Questions
Can I make this coffee milkshake without a blender?
Yes, use an immersion blender with a tall jug or container. Pour all ingredients into the jug, submerge the blender stick, and blend for one minute until smooth.
What if my coffee is still hot when I want to make this?
Let it cool to room temperature on the counter, or place the cup in an ice bath for five minutes. Hot coffee melts ice too quickly and ruins the thick texture.
Can I make a larger batch for a party?
Yes, multiply all ingredients by the number of servings you need. Blend in batches if your blender is small to avoid overflow.
Why does my milkshake taste watery?
Your coffee was too weak, you used too little ice, or you blended too long. Use strong coffee, pack your ice cup fully, and blend for no more than 60 seconds.
Can I add alcohol to this milkshake?
Yes, add one quarter cup of vodka, Kahlua, or Irish cream for an adult version. Add it with the milk and reduce blending time slightly since alcohol does not need to be blended as much.
What’s the difference between this and a coffee smoothie?
A milkshake is thicker, creamier, and more dessert-like, while smoothies often contain fruit and are lighter. This recipe prioritizes cream and coffee flavor over health ingredients.
Can I prep ingredients the night before?
Yes, brew your coffee, chill it, and measure sweetener and vanilla into a small bowl. Blend everything fresh in the morning for best texture.
Final Thoughts
This coffee milkshake recipe proves you don’t need fancy equipment or complicated techniques to make a café-quality drink at home. The simplicity is actually the point; with just six ingredients and three minutes, you get something creamy, flavorful, and infinitely better than what you’d pay for at a coffee shop.
Try it this week and start experimenting with your own flavor tweaks. Whether you stick to the classic version or venture into mocha and caramel territory, you’ll appreciate how quick and satisfying this drink really is.
Explore More Coffee Recipes
If you loved this milkshake, expand your cold coffee collection with other refreshing options that deliver flavor and convenience for any time of day.
Check out our blended ice coffee recipe for another creamy coffee drink that rivals coffee shop versions. You can also try our coffee slushie recipe for a lighter, icier take on cold coffee that’s perfect for hot summer days.