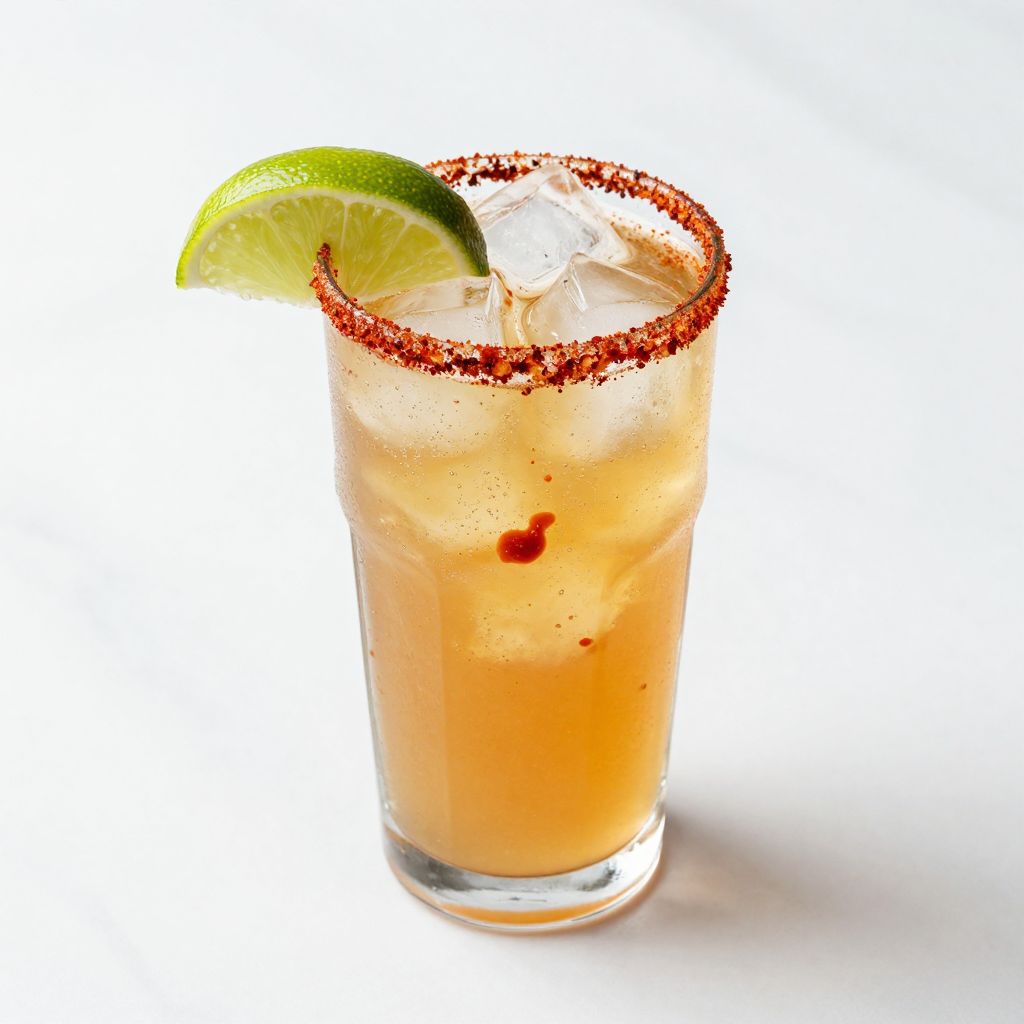
Picture yourself on a hot afternoon, cold beer in hand, with a rim of chili powder and lime waiting to transform a simple drink into something craveable. A chelada is Mexico’s answer to the perfect thirst quencher, combining ice-cold beer with zesty citrus, savory spices, and a touch of hot sauce that makes you reach for another sip immediately.
This recipe takes just five minutes to pull together, requires minimal ingredients you probably have at home, and tastes like you ordered it from a beachside cantina. The beauty of a chelada lies in its balance: cold, spicy, tangy, and refreshing all at once.
Why You’ll Love This Recipe
A chelada delivers maximum flavor with zero fuss, making it perfect for hot days, gatherings, or when you want to feel fancy without actually cooking anything.
- Ready in under five minutes from start to first sip
- Uses affordable ingredients and any light lager or Mexican beer
- Completely customizable based on your spice and flavor preferences
- Impresses guests without requiring any real culinary skills
- Naturally refreshing and lower in calories than most cocktails
My Experience Making This Recipe
I first tried a chelada at a small taco stand in San Diego, and I was instantly hooked by how simple yet sophisticated it tasted. The bartender worked with practiced speed, rimming the glass and layering the ingredients like he’d done it a thousand times before.
When I recreated it at home, I realized the magic isn’t in any fancy technique but in using quality ingredients and respecting the proportions. My friends now request cheladas at every summer gathering, which tells me this recipe hits the mark.
The best part? You can adjust the heat and tanginess to match your crew’s preferences, so nobody leaves disappointed.
Recipe Overview
- Recipe Name: Chelada
- Servings: 1
- Prep Time: 3 minutes
- Cook Time: 0 minutes
- Total Time: 3 minutes
- Course: Beverage
- Cuisine: Mexican
- Calories per Serving: 145
Equipment You Will Need
- 12-ounce beer glass or tall glass
- Small shallow dish or plate (for the rim)
- Cocktail spoon or bar spoon (optional but helpful)
- Knife for cutting lime
- Ice maker or ice bucket
Ingredients for Chelada
- 1 bottle (12 ounces) light lager or Mexican beer, chilled
- Juice of 1/2 fresh lime (about 0.5 ounces)
- 1/4 teaspoon chili powder, preferably Tajín or chamoy powder
- 2 dashes hot sauce, such as Tabasco or Valentina
- 1/4 teaspoon soy sauce or Worcestershire sauce (optional)
- Ice cubes
- Lime wedge, for garnish and rimming
Ingredient Notes and Substitutions
- Mexican Beer: Light lagers like Corona or Modelo work best because they won’t overpower the spice and citrus. You can use any pilsner in a pinch, though the flavor profile changes slightly.
- Fresh Lime Juice: Fresh lime juice provides brightness that bottled juice cannot match; bottled is acceptable only if you have no fresh limes available, and use half the amount because it’s more concentrated.
- Tajín or Chamoy Powder: This chili-lime blend is iconic for cheladas and found in most grocery stores now. Regular chili powder mixed with a pinch of salt works, but you lose the signature tangy-spicy balance.
- Hot Sauce: Valentina and Tabasco are traditional; Cholula or Frank’s RedHot deliver milder heat and different flavor notes.
- Soy or Worcestershire Sauce: These add umami depth and are optional, but I recommend them if you like savory drinks.
How to Make Chelada
Step 1: Chill Your Glass
Place your beer glass in the freezer for at least five minutes before you start, or fill it with ice while you prepare the rim. A cold glass keeps your chelada cold longer and makes the first sip absolutely perfect.
Step 2: Prepare the Rim
Pour chili powder (Tajín is ideal) onto a small shallow dish. Rub the cut side of your lime wedge around the entire top rim of the glass, making sure the rim is moist but not dripping wet.
Step 3: Rim the Glass
Press the moistened rim gently into the chili powder, rotating the glass slowly to coat evenly all the way around. The goal is a thin, even coating that sticks to the lime juice and looks appetizing, not a thick crust.
Step 4: Fill with Ice
Dump the ice from the chilling step (if you used that method) or add fresh ice cubes to the rimmed glass until it’s about three-quarters full. Crushed ice melts faster and dilutes the drink, so stick with regular cubes.
Step 5: Add the Lime Juice
Squeeze the juice from your lime wedge directly into the glass, catching any seeds with your finger or a small strainer. Fresh lime juice is tangy and bright; use the full amount unless you prefer less acidity.
Step 6: Add the Hot Sauce and Seasonings
Add two to three dashes of your hot sauce and the optional soy or Worcestershire sauce if you’re using it. These ingredients add depth and heat without making the drink taste like straight condiment.
Step 7: Pour the Beer Carefully
Open your cold beer bottle and pour it slowly down the side of the tilted glass to minimize foam and prevent the drink from becoming a puffy mess. Pour until the glass is nearly full, leaving about half an inch of headroom.
Step 8: Stir and Taste
Give the drink a gentle stir with a bar spoon or regular spoon to blend the flavors throughout. Take a sip and adjust the heat or tang to your liking by adding more hot sauce or lime juice if needed.
Pro Tip: Serve your chelada immediately after making it; the longer it sits, the more the ice melts and the more diluted your drink becomes. The first five minutes are when it tastes its absolute best.
Tips for the Best Chelada
- Chill everything ahead of time, including the beer and glass, so your drink stays ice-cold from the first sip to the last.
- Use fresh lime juice whenever possible; it makes a noticeable difference in brightness and flavor that bottled juice simply cannot replicate.
- Don’t go overboard with the hot sauce or spices; you want the flavors to complement the beer, not overpower it and mask what makes it drinkable.
- Experiment with different beers until you find your favorite; a crisp pilsner tastes different from a light lager, and personal preference matters most.
- Make it a ritual by preparing the rim and ingredients in advance so you can assemble the drink in seconds when you’re ready.
- Taste as you build the drink so you can adjust the heat and tang to match your mood and tolerance level.
Common Mistakes to Avoid
- Using warm beer defeats the entire purpose of a chelada, which relies on its refreshing chill to shine. Always start with a properly chilled bottle straight from the fridge.
- Oversalting the rim or using too much chili powder can make the drink taste like you’re eating spice rather than sipping a balanced beverage. Less is always more here.
- Pouring the beer too quickly creates excessive foam that wastes liquid and disrupts the flavor layers you’ve carefully built up. Slow and steady wins this race.
- Forgetting to chill the glass means your drink starts warming up immediately, and by the halfway point you’re drinking something closer to room temperature.
- Using bottled lime juice or pre-made lime cordial robs the chelada of its fresh, zesty character that makes it so craveable on hot days.
Serving Suggestions
A chelada stands beautifully on its own, but a few simple sides make the experience even better. Think of it as a beverage that pairs naturally with Mexican food and spicy snacks.
- Serve alongside fresh ceviche or fish tacos for a complete beach-inspired meal
- Pair with elote or Mexican street corn covered in cotija cheese and chili powder
- Offer with warm tortilla chips and guacamole or salsa for a casual gathering
- Enjoy after a spicy meal like chile rellenos or enchiladas verdes
- Set out with fresh fruit like watermelon or mango to balance the savory and spicy elements
Variations to Try
- Michelada Style: Add a splash of maggi or soy sauce along with the hot sauce for extra umami depth that makes the drink feel more like a savory cocktail than just beer and spices.
- Spicy Kick Version: Double the hot sauce and add a tiny pinch of cayenne pepper to the rim for a version that’ll wake up anyone who loves real heat.
- Fruity Chelada: Add a half-ounce of fresh orange juice or a splash of pineapple juice along with the lime for brightness and a subtle sweetness.
- Agua Fresca Style: Mix in a small splash of mineral water or club soda to lighten the drink and make it even more refreshing on scorching days.
- Clam Juice Version: Pour in a quarter-ounce of clam juice before the beer for a drink that tastes like a spicy Bloody Mary’s beer-loving cousin.
Dietary Adaptations
- Gluten-Free: Use any certified gluten-free beer, and all other ingredients are naturally gluten-free, making the entire chelada safe for celiac diets.
- Dairy-Free: Cheladas contain no dairy by default, so this drink works perfectly for anyone avoiding milk or cheese products.
- Vegan/Vegetarian: Most beers and all the other ingredients are plant-based, though you should verify your specific beer brand doesn’t use animal products in processing.
- Low-Carb or Keto: Choose a low-carb beer option and skip any juice additions; stick with just the spices and hot sauce for a drink that fits strict carb limits.
Storage and Reheating
Refrigerator
Cheladas don’t really store because they’re meant to be consumed immediately after mixing. If you must make one ahead, store the prepared rim mixture and lime juice separately in the fridge and assemble within 30 minutes of serving.
- Keep beer bottles in the coldest part of your fridge for at least two hours before making the drink
- Store lime juice in an airtight container for up to three days
- Keep chili powder and hot sauce in a cool, dark cabinet away from heat
Freezer
Don’t freeze prepared cheladas because the carbonation will escape and the flavors will separate as it thaws. You can freeze glasses ahead of time to speed up the chilling process.
- Place empty glasses in the freezer for at least 30 minutes before serving
- Keep beer bottles away from freezing temperatures as this damages the flavor and can cause glass breakage
Reheating
Reheating doesn’t apply to cheladas since they’re cold beverages meant to be enjoyed fresh. If your drink warms up, simply add fresh ice and remix the seasonings quickly.
- Consume immediately after making for the best taste and temperature
- Add more ice if the original cubes have melted significantly
Nutrition Information
| Nutrient | Amount |
|---|---|
| Calories | 145 |
| Total Fat | 0 g |
| Saturated Fat | 0 g |
| Carbohydrates | 4 g |
| Fiber | 0 g |
| Sugar | 1 g |
| Protein | 1 g |
| Sodium | 85 mg |
| Cholesterol | 0 mg |
These values are approximate and based on a standard 12-ounce Mexican lager beer with lime juice and spices. Exact nutrition varies by beer brand and the amount of hot sauce used.
Frequently Asked Questions
Can I make a chelada without beer?
Not really, because beer is the foundation of the drink and what makes it unique. You could make a similar spicy lime water, but it wouldn’t be a true chelada and would lose the subtle malty sweetness that balances the spice.
What’s the difference between a chelada and a michelada?
A michelada typically includes more ingredients like Maggi sauce, soy sauce, and sometimes hot pepper sauce or Worcestershire, making it savory and more complex. A chelada stays simpler with just chili powder, lime, and hot sauce, letting the beer shine through.
How far ahead can I prep the rim?
You can coat the rim up to 30 minutes before pouring the beer, but any longer and the chili powder starts to slide off as the lime juice dries. I recommend rimming the glass right before you pour for the best presentation.
Why does my chelada taste flat?
This usually happens if the beer wasn’t cold enough when you started or if you poured it too quickly and lost carbonation. Opening a fresh cold bottle immediately before serving and pouring slowly down the glass side solves this problem.
Can I batch make cheladas for a party?
Not effectively, because carbonation and ice melt quickly, making each drink taste different. Instead, prep all your rim supplies and lime juice ahead, then assemble each drink individually so every guest gets a properly chilled, fizzy drink.
What beer works best for cheladas?
Light lagers like Corona, Modelo, or Tecate are traditional, but any clean, crisp pilsner or pale lager works. Avoid dark beers or IPAs as their bold flavors fight with the spice and citrus instead of complementing them.
Final Thoughts
A chelada proves you don’t need complicated recipes or fancy techniques to create something truly delicious and memorable. This five-minute drink delivers the kind of refreshment that makes you forget hot weather exists, at least for a little while.
Mix one up tonight and taste what all the fuss is about, then expect your friends to start requesting them at every gathering. Trust me, once you nail this simple recipe, you’ll be making cheladas all summer long.
Chelada
Ingredients
Equipment
Method
- Place your beer glass in the freezer for at least five minutes before you start, or fill it with ice while you prepare the rim.
- Pour chili powder (Tajín is ideal) onto a small shallow dish. Rub the cut side of your lime wedge around the entire top rim of the glass, making sure the rim is moist but not dripping wet.
- Press the moistened rim gently into the chili powder, rotating the glass slowly to coat evenly all the way around.
- Add ice cubes to the rimmed glass until it's about three-quarters full.
- Squeeze the juice from your lime wedge directly into the glass, catching any seeds with your finger or a small strainer.
- Add two to three dashes of your hot sauce and the optional soy or Worcestershire sauce if you're using it.
- Open your cold beer bottle and pour it slowly down the side of the tilted glass to minimize foam. Pour until the glass is nearly full, leaving about half an inch of headroom.
- Give the drink a gentle stir with a bar spoon to blend the flavors throughout. Take a sip and adjust the heat or tang to your liking by adding more hot sauce or lime juice if needed.
- Serve immediately and enjoy.