
That first sip of coffee with homemade creamer is a small luxury that costs just pennies and takes five minutes to make. Brown sugar coffee creamer transforms your morning cup from ordinary to genuinely crave-worthy, with warm caramel notes and a silky texture that store-bought versions simply cannot match.
This recipe is special because it skips the mysterious additives and stabilizers found in commercial creamers, letting you control exactly what goes into your coffee. You get real ingredients, real flavor, and the satisfaction of knowing you made something better than what sits on the grocery store shelf.
The best part? This creamer stays fresh in your fridge for weeks, costs a fraction of specialty coffee shop drinks, and makes your home smell absolutely incredible while it simmers. Whether you are a busy parent rushing through mornings or a coffee lover who appreciates the details, this one is for you.
Why You’ll Love This Recipe
This creamer hits differently because it combines simplicity with serious flavor payoff.
- Ready in under 10 minutes with zero fussy techniques
- Uses just 4 simple ingredients you probably have on hand
- Smooth, creamy texture that dissolves instantly into hot coffee
- Makes about 2 cups, so one batch lasts most of the week
- Costs roughly one-third the price of specialty coffee shop creamers
My Experience Making This Recipe
I made this creamer for the first time on a random Tuesday when I ran out of my usual store brand and refused to pay six dollars for a new bottle. I threw together brown sugar, heavy cream, and vanilla at 6 AM, and by the time I poured my first cup, I was honestly shocked at how much better it tasted than anything I had bought before.
My partner actually asked what I changed about my coffee that morning, which never happens. That reaction told me everything I needed to know about scaling up this recipe and making it a permanent fixture in our kitchen.
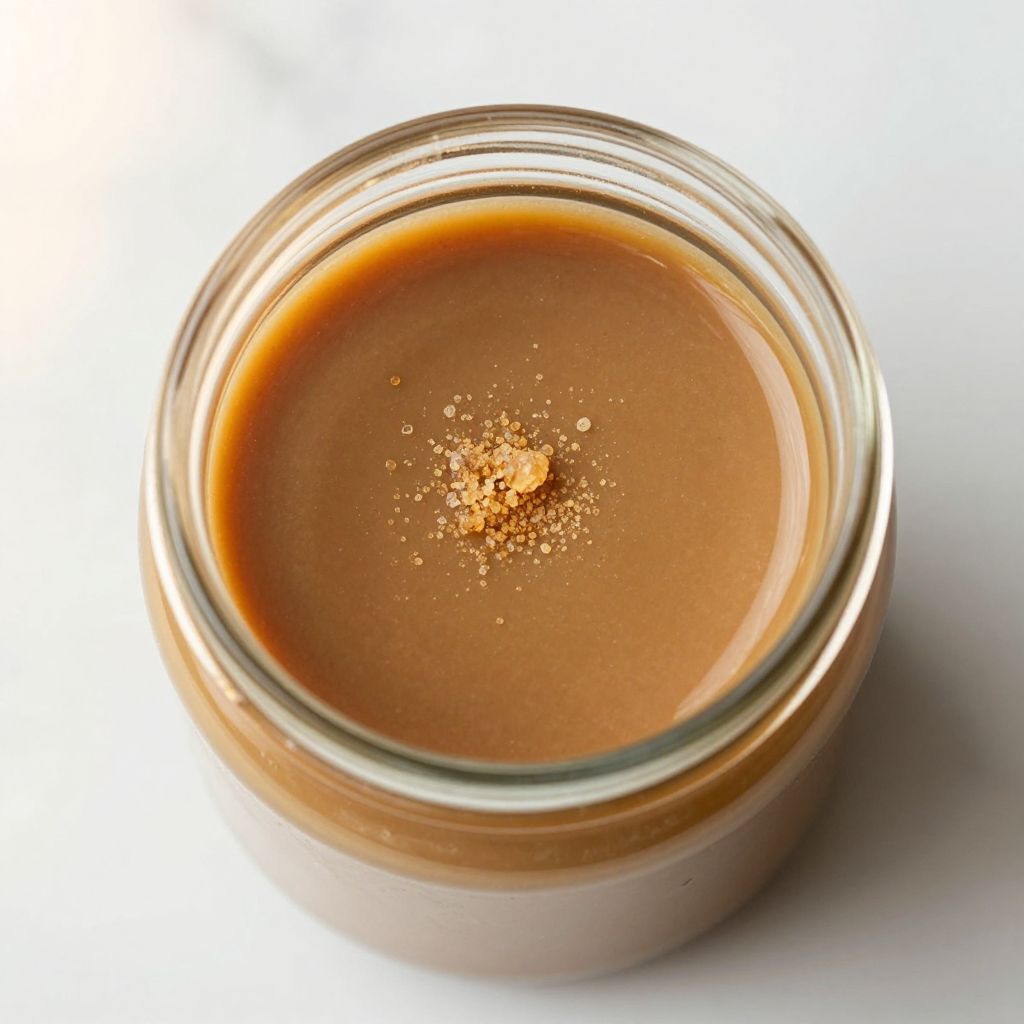
The sensory experience is half the fun. Your kitchen fills with this toasty, caramel-like aroma while the mixture simmers, and you get this gorgeous amber liquid that looks almost like maple syrup. Once it cools, it transforms into a pourable creamer that behaves exactly like the fancy stuff, except better.
Recipe Overview
- Recipe Name: Brown Sugar Coffee Creamer
- Servings: Makes about 2 cups (16 tablespoons per serving)
- Prep Time: 5 minutes
- Cook Time: 5 minutes
- Total Time: 15 minutes (includes cooling)
- Course: Beverage Condiment
- Cuisine: American
- Calories per Serving: 52
Equipment You Will Need
- Small saucepan
- Wooden spoon or silicone spatula
- Measuring cups and spoons
- Glass jar with tight-fitting lid for storage
- Fine mesh strainer (optional, for removing any lumps)
- Whisk (optional, for extra smoothness)
Ingredients for Brown Sugar Coffee Creamer
- 1 cup heavy cream
- 1 cup whole milk
- 1/2 cup packed brown sugar
- 1 teaspoon vanilla extract
Ingredient Notes and Substitutions
- Heavy Cream: This is the star ingredient that gives the creamer its luxurious body and mouthfeel. If you want a lighter version, swap it for half-and-half, though the texture will be thinner and less rich.
- Whole Milk: Whole milk balances the richness of the cream and helps the creamer pour smoothly without becoming too thick. Low-fat milk works in a pinch, but you will lose some of that creamy quality that makes this recipe shine.
- Brown Sugar: Brown sugar brings molasses notes and a deeper caramel flavor than white sugar would deliver. If you only have white sugar on hand, use it in equal amounts, though the flavor will be less complex and warm.
- Vanilla Extract: Vanilla adds subtle warmth and complexity that rounds out the brown sugar sweetness. Almond extract creates a different flavor profile if you want to experiment, though it shifts the creamer’s character entirely.
How to Make Brown Sugar Coffee Creamer
Step 1: Combine the Cream and Milk
Pour the heavy cream and whole milk into your small saucepan and stir them together gently. This base creates the creamy foundation that will hold all your flavor.
Step 2: Add the Brown Sugar
Sprinkle the packed brown sugar into the cream and milk mixture, stirring constantly with a wooden spoon. The brown sugar needs direct contact with the liquid to dissolve properly and infuse its caramel flavor throughout.
Step 3: Heat Over Medium-Low Heat
Place the saucepan over medium-low heat, never going higher because high heat can cause the cream to break or separate. Stir occasionally as the mixture warms, watching for steam to start rising from the surface.
Step 4: Stir Until Sugar Dissolves Completely
Keep stirring gently for about 4 to 5 minutes until every grain of brown sugar has dissolved into the liquid and the mixture looks uniform and glossy. You should see no sugar crystals at the bottom of the pan, and the creamer should have a light caramel color.
Step 5: Watch for Steam, Not Boiling
The mixture should steam gently but never actually boil, which would alter the cream’s texture and potentially curdle it. If bubbles start to form around the edges, reduce the heat even further immediately.
Step 6: Remove from Heat
Once the sugar is completely dissolved and the mixture is hot throughout, turn off the heat and remove the pan from the stove. This is the right time to add your vanilla extract.
Step 7: Stir in the Vanilla Extract
Add the vanilla extract and stir well to combine it evenly throughout the creamer. The warmth of the mixture helps the vanilla flavor distribute and blend seamlessly.
Step 8: Cool Completely Before Storing
Let the creamer cool to room temperature at least partially, about 10 to 15 minutes, before transferring it to your storage jar. Pouring hot liquid into a cold glass container can cause it to crack, and storing it while hot encourages bacterial growth.
Step 9: Transfer to Storage Jar
Carefully pour the cooled creamer into your glass jar with a tight-fitting lid, leaving a tiny bit of headspace at the top. Seal it securely and refrigerate until you are ready to use it.
Pro Tip: Make a double batch and keep one jar in the fridge while another sits in the pantry, so you never run out of your favorite creamer.
Tips for the Best Brown Sugar Coffee Creamer
- Stir the creamer well before each use because brown sugar can settle slightly at the bottom over a few days in the fridge. A gentle shake in the jar usually does the trick.
- Use a candy or instant-read thermometer to hit around 160 to 170 degrees Fahrenheit if you want to be precise about avoiding overheating. This temperature is hot enough to fully dissolve the sugar but gentle enough to preserve the cream’s structure.
- Pack your brown sugar firmly when measuring to avoid airy pockets that would throw off the sweetness level. A packed 1/2 cup gives you consistent results every time.
- Taste your creamer before serving and adjust sweetness by stirring in a touch more vanilla or a tiny pinch of salt to balance flavors. Personal preference matters here, so do not be shy about tweaking it to your liking.
- If you prefer an ultra-smooth creamer with zero graininess, pour the finished product through a fine mesh strainer before storing. This step is optional but creates an almost silky texture.
- Make this creamer at night and let it chill overnight for the best flavor development. The cold time lets all the flavors marry and become more pronounced.
Common Mistakes to Avoid
- Using too high heat causes the cream to separate and develop a grainy texture instead of staying silky smooth. Keep that flame low and patient.
- Not stirring the brown sugar enough during heating leaves undissolved granules that make the creamer gritty and unpleasant. Constant gentle stirring is your friend here.
- Adding vanilla extract before the mixture cools slightly can cause some of its delicate flavor compounds to evaporate into steam. Wait until step seven when the heat is gone.
- Storing the creamer in a jar without a tight seal allows it to absorb odors from your fridge and shortens its shelf life. Invest in one good glass jar with a proper seal.
- Skipping the cooling step and storing the creamer while still hot makes it go bad faster because the heat promotes bacterial growth and condensation in the jar. Always let it cool first.
Serving Suggestions
This creamer shines in any coffee drink you love, from simple black coffee to elaborate lattes. Shake the jar well before pouring, then add a generous splash to your cup.
- Classic black coffee or americano, where the creamer becomes the star of the show
- Espresso shots for a sweet, creamy finish that softens the bold espresso bite
- Oatmeal or grain-based coffee drinks that benefit from extra caramel warmth
- Cold brew concentrate mixed with this creamer over ice for an iced coffee that rivals coffee shops
- Hot chocolate as a swap for regular cream, adding brown sugar depth to cocoa
Variations to Try
- Cinnamon Brown Sugar Creamer: Add 1/4 teaspoon ground cinnamon during heating for warm spice notes that pair beautifully with brown sugar and work wonderfully in fall drinks.
- Maple Brown Sugar Creamer: Replace 2 tablespoons of the brown sugar with pure maple syrup for a more complex sweetness that leans into autumn flavors.
- Salted Brown Sugar Creamer: Stir in a tiny pinch of sea salt after heating to heighten the caramel notes and add sophistication to the overall flavor profile.
- Bourbon or Rum Brown Sugar Creamer: Add 1/2 teaspoon of bourbon or dark rum extract after heating for an adult version that tastes like dessert in a coffee cup.
- Coconut Brown Sugar Creamer: Swap half the whole milk for coconut milk and use vanilla extract to create a tropical spin that still honors the brown sugar base.
Dietary Adaptations
- Dairy-Free: Use full-fat coconut cream and unsweetened oat milk in place of heavy cream and whole milk. The coconut cream provides richness, though the final texture will be slightly less creamy than the original.
- Vegan: Choose plant-based heavy cream such as coconut cream or cashew cream combined with unsweetened almond milk, keeping all other ingredients the same. The vanilla and brown sugar work perfectly with dairy-free bases.
- Low-Carb or Keto: Replace brown sugar with erythritol or monk fruit sweetener in equal amounts and use heavy cream and whole milk as written. The flavor profile shifts slightly because sugar substitutes taste different, but the creamer remains low in carbs.
- Gluten-Free: This recipe is naturally gluten-free, so no substitutions needed. Always verify that your vanilla extract is certified gluten-free if you have celiac disease or severe gluten sensitivity.
Storage and Reheating
Refrigerator
Store your brown sugar creamer in a tightly sealed glass jar on a refrigerator shelf away from the door for maximum freshness. Properly stored creamer keeps well for up to 2 weeks, though it tastes best within the first week.
- Check the jar before each use for any off odors or visible separation
- Shake well to redistribute any settled brown sugar
- Use a clean spoon every time you scoop or pour to prevent contamination
Freezer
You can freeze this creamer for up to 3 months in a freezer-safe container, though it works best if you freeze it in ice cube trays first. Once frozen solid, pop the cubes into a freezer bag for easy portioning.
- Thaw frozen cubes in the refrigerator overnight before using
- Do not refreeze thawed creamer
- Frozen creamer may separate slightly upon thawing, so shake or stir well before serving
Reheating
If your creamer has been in the fridge and you prefer it warm, gently heat it in the microwave for 20 to 30 seconds or in a small saucepan over low heat. Never boil it, as high heat can damage the cream’s texture and flavor.
- Stir well after heating to ensure even temperature distribution
- Use warm creamer in hot coffee right away for the best experience
Nutrition Information
| Nutrient | Amount |
|---|---|
| Calories | 52 |
| Total Fat | 4.2 grams |
| Saturated Fat | 2.6 grams |
| Carbohydrates | 4.1 grams |
| Fiber | 0 grams |
| Sugar | 4 grams |
| Protein | 0.8 grams |
| Sodium | 15 milligrams |
| Cholesterol | 15 milligrams |
These values are approximate and calculated per tablespoon serving (the typical amount added to a single cup of coffee). Nutritional content can vary slightly based on the exact brands and types of cream and milk you use.
Frequently Asked Questions
Can I make this creamer without heavy cream?
Yes, you can use half-and-half or even whole milk only, though the texture will be thinner and less luxurious. The creamer will still taste good, but it will not have that signature silky richness that makes this recipe special.
How long does homemade creamer actually last?
Properly stored in a sealed jar in the refrigerator, this creamer stays fresh for up to 2 weeks. If it smells sour or looks separated beyond normal settling, it is time to toss it and make a fresh batch.
Can I use this creamer in cold brew coffee?
Absolutely, and it works beautifully because the brown sugar dissolves easily into cold coffee. Shake the creamer jar well first to ensure the brown sugar is evenly distributed throughout.
What if my creamer looks separated or grainy?
Separation is normal after a few days in the fridge and simply means the brown sugar has settled. A good shake usually fixes it, but if it looks truly curdled with visible particles that do not dissolve, the batch has gone bad and should be discarded.
Can I use light brown sugar instead of dark brown sugar?
Yes, light brown sugar works fine and will give you a slightly milder caramel flavor compared to dark brown sugar. The texture and results remain the same, so use whichever you have on hand.
Is this creamer safe for people with lactose intolerance?
No, this recipe contains regular dairy milk and cream, so it is not suitable for people with lactose intolerance. You can make a dairy-free version using coconut cream and oat milk as noted in the dietary adaptations section.
Final Thoughts
Making your own brown sugar coffee creamer is one of those small kitchen wins that pays dividends every single morning. You get to skip the grocery store expense, avoid mystery ingredients, and feel genuinely proud each time you pour that silky caramel goodness into your cup.
Try this recipe this week and notice how it transforms your daily coffee ritual into something that feels a little more special. Once you taste the difference, you will never go back to buying creamer again.
If you love homemade coffee additions, explore more delicious options in your kitchen. Try a brown sugar latte recipe for a fancier coffee drink, or dive into the richness of a mocha coffee creamer recipe to expand your creamer collection and keep mornings exciting.
Brown Sugar Coffee Creamer
Ingredients
Equipment
Method
- Pour the heavy cream and whole milk into a small saucepan and stir gently to combine.
- Sprinkle the packed brown sugar into the liquid and stir constantly until the sugar begins to dissolve.
- Place the saucepan over medium-low heat and warm for 4 to 5 minutes, stirring occasionally, until the mixture steams and the sugar is fully dissolved without boiling.
- Remove the pan from heat once the creamer is uniform, glossy, and free of sugar crystals.
- Stir in the vanilla extract until evenly incorporated.
- Let the creamer cool at room temperature for 10 to 15 minutes before transferring.
- Pour the cooled creamer into a glass jar with a tight-fitting lid, leaving a small headspace, then seal and refrigerate.