
There’s something almost meditative about pressing hot water through coffee grounds with an AeroPress, watching the rich brew emerge in seconds flat. The AeroPress latte delivers café-quality espresso-style coffee at home without the price tag or the intimidating machine, making it perfect for coffee lovers who crave that velvety crema and bold flavor.
This recipe combines the AeroPress’s intense brewing power with steamed or frothed milk to create a smooth, creamy latte that rivals anything you’d order downtown. The beauty lies in its speed and simplicity: fresh beans, hot water, and milk, combined in under five minutes with minimal fuss.
Whether you’re a busy mornings person or someone who enjoys a ritualistic coffee experience, this method transforms your kitchen into a proper espresso bar. Let me walk you through exactly how to build your perfect cup.
Why You’ll Love This Recipe
The AeroPress latte gives you third-wave coffee quality without the expense or space commitment of an espresso machine. The speed alone makes this a game-changer for weekday mornings.
- Creates smooth, crema-topped coffee in under five minutes
- No expensive equipment required beyond the AeroPress itself
- Produces espresso-strength coffee with bold, concentrated flavor
- Works beautifully with any quality coffee bean and milk type
- Highly customizable for different milk textures and drink ratios
My Experience Making This Recipe
I started using the AeroPress about three years ago after watching a barista make one at a specialty coffee shop in Portland. I was skeptical that such a simple device could compete with my old espresso machine, but the first cup converted me instantly.
The ritual of it hooked me hardest of all: heating water, grinding beans fresh, the satisfying press, and that beautiful moment when the coffee hits the warm milk and blooms into a latte. My mornings shifted from rushing to actually enjoying the process.
What surprised me most was consistency. Every cup tastes nearly identical when you follow the steps precisely, which means no more bad shots ruining your whole morning. My friends now ask for AeroPress lattes when they visit, and I’ve stopped apologizing that it’s not from a commercial espresso machine.
Recipe Overview
- Recipe Name: AeroPress Latte
- Servings: 1
- Prep Time: 2 minutes
- Brew Time: 3 minutes
- Total Time: 5 minutes
- Course: Beverage
- Cuisine: American Specialty Coffee
- Calories per Serving: 95 (with 2% milk)
Equipment You Will Need
- AeroPress coffee maker (original or Go model)
- Burr grinder for fresh beans
- Gooseneck kettle with thermometer
- Milk frother or steam wand
- Filtered water for brewing
- Kitchen scale (optional but recommended)
- Coffee mugs or tall glasses
- Stirring spoon
Ingredients for AeroPress Latte
- Fresh coffee beans: 18 to 20 grams, medium-fine grind
- Filtered water: 200 milliliters at 195 to 205 degrees Fahrenheit
- Whole milk (or milk alternative): 120 to 150 milliliters, frothed or steamed
- Salt: 1 small pinch (optional, enhances sweetness)
Ingredient Notes and Substitutions
- Fresh coffee beans: Medium roasts work best for balanced flavor and don’t easily over-extract like darker roasts can. Substitute with any specialty-grade single-origin or blend you enjoy, adjusting grind size slightly if the shot tastes sour or bitter.
- Filtered water: Chlorine and minerals in tap water mute coffee flavor and affect extraction consistency. If you lack a filter, bottled water works in a pinch, though you’ll taste a difference.
- Whole milk: Whole milk froths richly and adds sweetness naturally. Oat milk froths beautifully too with a similar texture, while almond milk stays thinner, and coconut milk adds tropical notes.
- Salt: One tiny pinch cuts bitterness and brightens sweetness without adding obvious saltiness. Skip it if you prefer traditional coffee flavor.
How to Make AeroPress Latte
Step 1: Heat Your Water
Fill your kettle with filtered water and heat it to 195 to 205 degrees Fahrenheit, which is hot enough to extract coffee fully without burning it. If you lack a thermometer, wait about 30 seconds after the kettle clicks off, as boiling water cools quickly to the ideal range.
Step 2: Grind Your Coffee Beans
Grind 18 to 20 grams of fresh beans to a medium-fine consistency, similar to table salt but with some texture. Grinding fresh right before brewing locks in the oils and aromatics that stale pre-ground coffee loses within hours.
Step 3: Assemble the AeroPress
Insert the plunger into the chamber about one inch, then set the assembled AeroPress on top of your mug or pitcher with the spout facing down. This creates a seal that lets you add hot water without it immediately draining through.
Step 4: Add Ground Coffee
Pour the freshly ground coffee into the AeroPress chamber and give it a gentle shake to level the grounds evenly. Even distribution helps water extract the coffee uniformly, preventing over-extraction in some spots and under-extraction in others.
Step 5: Bloom the Coffee
Pour just enough hot water to wet all the grounds (about 50 milliliters) and wait 30 to 45 seconds without pressing. This blooming phase releases carbon dioxide trapped in the beans, which improves extraction and brings out the coffee’s full flavor potential.
Step 6: Pour the Remaining Water
Slowly pour the rest of your hot water into the AeroPress, filling it to just below the top of the chamber. Pour in a circular motion to keep the grounds submerged and ensure even contact with water throughout the brew.
Step 7: Press Slowly
Wait 30 seconds for the water and grounds to mingle, then press down steadily over 30 to 40 seconds using gentle, even pressure. Pressing slowly yields a smoother cup with better body; rushing creates astringent flavors from over-extraction.
Step 8: Froth Your Milk
While the coffee brews, pour 120 to 150 milliliters of cold milk into a metal pitcher and froth it with a steam wand or electric frother until it reaches about 150 degrees and holds a thin layer of micro-foam. If you lack a frother, you can shake milk vigorously in a sealed jar, though the texture won’t be quite as velvety.
Step 9: Combine and Serve
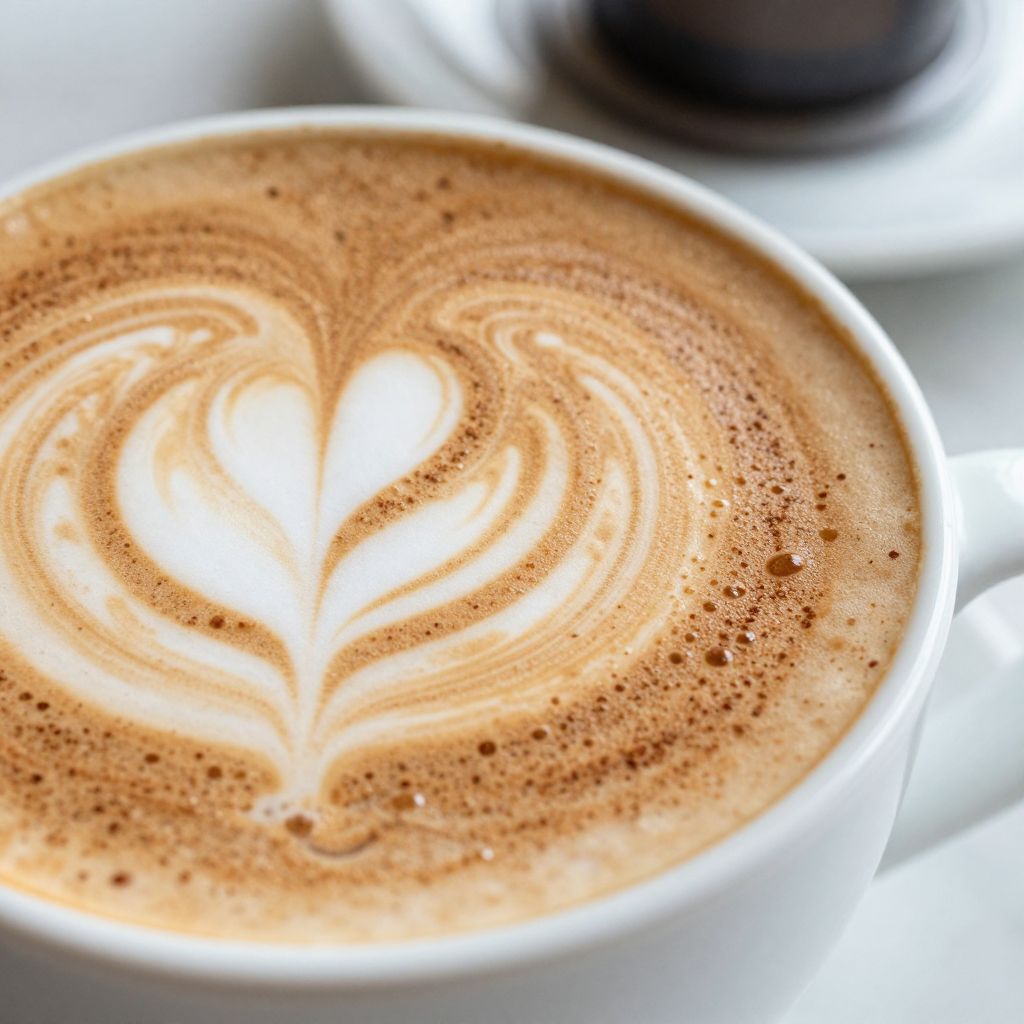
Pour the hot AeroPress coffee into your serving mug, then add the frothed milk by pouring slowly from high to low, tilting your mug to create a gentle whirlpool that mixes the coffee and milk smoothly. Top with a thin layer of micro-foam for that café look.
Pro Tip: Grind your beans right before brewing and keep your AeroPress and mug warm by running hot water through them beforehand; this small detail prevents temperature drop and keeps your final latte hot longer than five minutes after pressing.
Tips for the Best AeroPress Latte
- Use a burr grinder instead of a blade grinder, which creates inconsistent particle sizes that muddy extraction. Burr grinders cost more upfront but pay for themselves in better coffee within weeks.
- Keep your beans in an airtight container away from light and heat, and use them within two weeks of the roast date printed on the bag. Older beans lose their bright flavor and aromatics, making your latte taste flat.
- Weigh your coffee and water on a kitchen scale rather than eyeballing measurements. Consistency builds muscle memory and helps you dial in your ideal ratio.
- Experiment with water temperature between 190 and 210 degrees to find your sweet spot. Hotter water pulls out more bitter compounds, while cooler water leaves the coffee tasting sour and under-extracted.
- Clean your AeroPress immediately after brewing by rinsing the chamber and plunger, which prevents stale coffee oils from affecting future cups. A quick rinse takes 20 seconds and extends the life of your equipment.
- Pre-warm your mug with hot water before pouring in the brewed coffee. This keeps your latte hot longer and ensures a more pleasant sipping experience.
Common Mistakes to Avoid
- Using boiling water straight from the kettle burns the coffee and creates harsh, bitter flavors that milk can’t mask. Always wait 30 seconds after boiling or use a thermometer to hit your target temperature.
- Pressing too fast or too hard extracts the coffee unevenly and over-extracts some particles, leaving your latte tasting astringent and muddy. Slow, steady pressure over 30 to 40 seconds makes all the difference.
- Grinding coffee too coarsely or too finely throws off extraction timing and either under-extracts sour flavors or pulls out bitter compounds. Medium-fine consistency, similar to table salt, works best for most beans.
- Skipping the bloom phase wastes the coffee’s potential by allowing trapped carbon dioxide to interfere with water absorption. Those 30 to 45 seconds unlock deeper, more complex flavors.
- Using stale beans older than three weeks produces flat, dull coffee that neither the AeroPress nor milk can rescue. Fresh beans cost nearly the same as stale ones, so buy smaller quantities more often.
Serving Suggestions
The AeroPress latte shines on its own, but pairing it with the right food transforms it into a complete morning ritual. Rich coffee pairs beautifully with both sweet and savory breakfast items that complement its bold flavor.
- Buttered croissants or pastries add flaky texture and richness that mirrors the latte’s creamy body
- Oatmeal with cinnamon and honey soothes and balances the coffee’s intensity
- Scrambled eggs or avocado toast provides protein and savory depth that grounds the sweetness of frothed milk
- Homemade cookies or brownies satisfy sweet cravings while the coffee cuts through richness
- Fresh fruit like berries or bananas offers brightness that prevents the meal from feeling too heavy
Variations to Try
- Honey AeroPress Latte: Stir one teaspoon of honey into the hot AeroPress coffee before adding milk, which adds floral sweetness and body that complements darker roasts especially well.
- Cinnamon or Cardamom Latte: Add a pinch of cinnamon or cardamom to the coffee grounds before brewing, which infuses warm spice notes that make the latte feel more indulgent without added sugar.
- Vanilla or Almond Extract Latte: Add two drops of pure vanilla or almond extract to the hot coffee, which brightens the latte and adds a subtle flavor dimension that feels restaurant-quality.
- Cold AeroPress Latte: Brew the AeroPress into cold milk instead of hot, skip the steaming step, and add ice if desired for a refreshing summer version that still delivers bold coffee flavor.
- Cortado Style: Use equal parts AeroPress coffee and steamed milk instead of the typical latte ratio, creating a stronger, less milky drink that highlights the coffee’s individual character.
Dietary Adaptations
- Dairy-Free: Swap whole milk for oat, soy, or coconut milk, which froth beautifully and create equally creamy lattes with no sacrificed texture, though they add subtle flavor notes you may or may not prefer.
- Vegan: Use plant-based milk and skip any honey, ensuring all ingredients align with vegan values without compromising the latte’s quality or enjoyment.
- Low-Lactose: Use lactose-free whole milk or lactose-free cream, which tastes nearly identical to regular milk while removing digestive discomfort for sensitive individuals.
- Keto or Low-Carb: Use heavy cream or butter added to the AeroPress coffee for a bulletproof-style drink that keeps carbs minimal while adding rich, satisfying fats.
Storage and Reheating
Refrigerator
Store leftover brewed AeroPress coffee in an airtight container for up to 48 hours, though flavor quality declines noticeably after 24 hours. Cold brew tastes smoother than reheated coffee since heat doesn’t reactivate stale flavors.
- Keep in an airtight glass container to prevent absorption of fridge odors
- Use within 24 hours for best flavor
- Reheat gently in a saucepan rather than a microwave, which can scorch the coffee
Freezer
AeroPress coffee doesn’t freeze particularly well since thawing disrupts the delicate flavor compounds, making it taste dull and flat. Better to brew fresh each time rather than freezing.
- Freezing is not recommended for best quality
- If you must freeze, use ice cube trays and thaw in the refrigerator overnight
- Frozen coffee works better for iced lattes where dilution from melting ice is expected
Reheating
Reheat leftover AeroPress coffee slowly in a saucepan over low heat, stirring occasionally to distribute warmth evenly. Never use a microwave, which heats unevenly and can scorch the coffee, intensifying bitterness.
- Pour into a saucepan and warm over low heat, stirring occasionally
- Stop heating once steam rises; overcooking damages remaining flavor compounds
- Consider making fresh coffee instead, which takes only five minutes and tastes infinitely better
Nutrition Information
| Nutrient | Amount |
|---|---|
| Calories | 95 |
| Total Fat | 5 grams |
| Saturated Fat | 3 grams |
| Carbohydrates | 7 grams |
| Fiber | 0 grams |
| Sugar | 7 grams |
| Protein | 4 grams |
| Sodium | 65 milligrams |
| Cholesterol | 15 milligrams |
Nutrition values are calculated for one AeroPress latte made with whole milk and no added sweetener. Values vary slightly depending on milk type and any added ingredients like honey or syrups.

Frequently Asked Questions
Can I use instant coffee in the AeroPress?
Technically yes, but instant coffee produces a flat, one-dimensional latte that misses the point of using an AeroPress. Fresh beans ground moments before brewing taste dramatically better and cost about the same.
How fine should the coffee grind be?
Aim for medium-fine, similar to table salt but with some visible particles. If your latte tastes sour, grind finer next time; if it tastes bitter, grind coarser.
What’s the difference between an AeroPress latte and a regular espresso latte?
The AeroPress brews under pressure but at lower temperatures than true espresso machines, creating a slightly less intense cup but with better clarity and less bitterness. Both taste delicious; the AeroPress just costs a fraction of the price.
Can I make multiple servings at once?
The standard AeroPress brews about one cup at a time, but you can brew two consecutive batches in about eight minutes total. For larger quantities, consider a French press or pour-over method instead.
Is the inverted method better than the standard method?
The inverted AeroPress method (plunger on top) allows longer steeping and less channeling, producing slightly richer coffee, but the difference is subtle. Either method works beautifully; choose whichever feels more comfortable.
What water temperature should I use?
Aim for 195 to 205 degrees Fahrenheit, which extracts coffee fully without burning it. If you lack a thermometer, wait about 30 seconds after your kettle boils.
Final Thoughts
The AeroPress latte sits perfectly at the intersection of convenience and quality, delivering café-worthy coffee in under five minutes without the cost or space of an espresso machine. Once you dial in your ratios and technique, you’ll find yourself brewing this drink almost daily because it beats anything you can buy down the street.
The best part is how satisfying the ritual becomes: fresh beans, precise pressing, and that moment when milk blooms into the coffee and transforms into something greater than its parts. Try this recipe this week, and I bet you’ll be making AeroPress lattes every morning within a month.
Explore More Coffee Recipes
If you loved making an AeroPress latte, you might enjoy exploring other coffee recipes that bring café quality into your home.
Try our classic latte recipe for traditional espresso machine techniques, or experiment with our oat milk latte recipe for a creamy, dairy-free take on this beloved drink.

AeroPress Latte
Ingredients
Equipment
Method
- Heat 200 ml filtered water in a gooseneck kettle to 195-205 °F (90-96 °C), about 2 minutes.
- Grind 18-20 g fresh coffee beans to a medium-fine consistency, similar to table salt.
- Insert the plunger into the AeroPress chamber about 1 inch and place the AeroPress upside down on your cup.
- Add the ground coffee to the chamber and gently shake to level the grounds.
- Pour 50 ml hot water over the grounds to bloom and wait 30-45 seconds without pressing.
- Slowly add the remaining hot water (about 150 ml) in a circular motion up to the top of the chamber.
- After 30 seconds, press down steadily over 30-40 seconds until all coffee is filtered into the cup.
- While brewing, froth 120-150 ml cold milk to about 150 °F (65 °C) until microfoam forms, about 1 minute.
- Pour the brewed coffee into a pre-warmed mug, then add the frothed milk, pouring slowly and topping with foam.