
There’s something almost magical about the sound of a jar filling with bubbling brine, a gentle hiss of fermentation that tells you something alive and delicious is happening right before your eyes. Sauerkraut is one of those rare recipes where minimal effort yields maximum flavor, and the payoff goes far beyond a tangy side dish.
This recipe transforms humble cabbage into a probiotic powerhouse that improves with age, costs pennies to make, and tastes infinitely better than anything you’ll find in a jar at the supermarket. The beauty lies in its simplicity: just cabbage, salt, and time do all the heavy lifting while you go about your life.
Whether you’re drawn to fermentation as a food preservation method, a gut-health boost, or simply because homemade sauerkraut tastes incredible on everything from hot dogs to salads, this guide walks you through every step so you nail it on your first try. Let’s get fermenting.
Why You’ll Love This Recipe
Homemade sauerkraut beats store-bought in every meaningful way: flavor depth, living probiotics, and the pride of making it yourself. This recipe is foolproof, budget-friendly, and requires almost zero active cooking time.
- Living probiotics that support digestive health and gut bacteria
- Costs less than a dollar per large jar to make
- Ready in as little as three days, but improves for weeks
- One simple ingredient list: cabbage and salt, nothing else needed
- Pairs with everything from breakfast eggs to dinner sandwiches
My Experience Making This Recipe
I started fermenting sauerkraut on a whim after tasting a friend’s batch at a potluck, and I’ve been hooked ever since. The first jar took exactly eight minutes of hands-on time, and the results made me question why I’d ever bought the shelf-stable stuff.
What surprised me most was how interactive the process feels. You watch the cabbage transform daily, taste it as it develops, and stop fermenting exactly when you like it best. My kitchen always smelled like a farmers market for the first week, which was an unexpected bonus.
Now I keep jars going on a rolling basis so I always have fresh batches at different fermentation stages. My family fights over the crispier, less-sour batches while my adventurous friends go for the funky, deeply fermented versions that taste almost wine-like.
Recipe Overview
- Recipe Name: Homemade Sauerkraut
- Servings: Makes one 1-quart jar (about 16 servings)
- Prep Time: 10 minutes
- Cook Time: 0 minutes (fermentation time: 3 to 8 weeks)
- Total Time: 10 minutes active, plus fermentation
- Course: Side Dish, Condiment
- Cuisine: German, European
- Calories per Serving: 12
Equipment You Will Need
- One 1-quart glass jar (or larger)
- Sharp knife or mandoline slicer
- Large cutting board
- Large mixing bowl
- Kitchen scale (optional but helpful)
- Wooden spoon or clean hands
- Cloth or coffee filter to cover jar opening
- Rubber band or jar ring to secure cloth
- Plate or small jar that fits inside the opening to weight down cabbage
Ingredients for Homemade Sauerkraut
- 2 pounds green or red cabbage (about one medium head)
- 2 teaspoons fine sea salt (not iodized)
Ingredient Notes and Substitutions
- Green cabbage creates the classic sauerkraut flavor we all expect. Red cabbage ferments equally well and produces a beautiful magenta color plus slightly fruitier notes. Both work perfectly in this recipe.
- Fine sea salt dissolves easily and distributes evenly throughout the cabbage. Kosher salt works if you measure by weight and adjust slightly for density differences. Never use iodized table salt, which can make the brine cloudy and inhibit fermentation.
How to Make Homemade Sauerkraut
Step 1: Choose and Prepare Your Cabbage
Select a firm, heavy cabbage free of brown spots or damage. Rinse the head under cold water and pat it dry, then cut it in half from top to root end and lay the flat side down on your cutting board for stability.
Step 2: Remove and Reserve the Outer Leaves
Carefully peel away two or three unblemished outer leaves from one cabbage half and set them aside. You’ll use these later to tuck over the top of your jar and keep shredded cabbage submerged under the brine.
Step 3: Slice the Cabbage Thinly
Cut your cabbage halves into thin shreds, about the thickness of a coin, using a sharp knife or mandoline. Thinner pieces expose more surface area to salt and release their liquid faster, which speeds fermentation and creates a crisper final texture.
Step 4: Combine Cabbage and Salt
Place all your shredded cabbage in a large bowl and sprinkle the salt evenly over the top. The salt triggers osmosis, drawing water from the cabbage cells and creating a brine that will preserve and ferment the vegetable.
Step 5: Massage and Extract the Brine
Use your hands or a wooden spoon to massage the cabbage for five to ten minutes, working vigorously until liquid pools at the bottom of the bowl. You should end up with at least half a cup of clear brine, which means the salt has done its job perfectly.
Step 6: Pack the Jar
Transfer the cabbage and all its brine into your clean glass jar, packing it down firmly with your fist or spoon so the cabbage is tightly compressed. The brine should rise at least one inch above the shredded cabbage; if it doesn’t, make extra brine by dissolving a pinch of salt in cool water and add it to the jar.
Step 7: Keep Cabbage Submerged
Lay one of your reserved cabbage leaves flat over the shredded cabbage inside the jar, tucking it down under the brine to act as a barrier. Place a small plate or a smaller jar on top of this leaf to weigh down the cabbage and keep it fully submerged, which prevents mold and ensures even fermentation.
Step 8: Cover and Begin Fermentation
Drape a clean cloth or coffee filter over the jar opening to keep dust and insects out while allowing gases to escape. Secure it with a rubber band around the jar neck, then place the jar somewhere at room temperature, out of direct sunlight.
Step 9: Monitor and Taste
After three days, start tasting a small spoonful of sauerkraut each day. The flavor sharpens daily as lactic acid builds, so ferment until it reaches your preferred level of tanginess, anywhere from one week to eight weeks total.
Pro Tip: The longer sauerkraut ferments, the tangier and funkier it becomes; stop fermenting when you love the taste, then move the jar to the fridge where fermentation slows dramatically and flavor stays locked in.
Tips for the Best Homemade Sauerkraut
- Keep your jar at room temperature between 65 and 72 degrees for steady, reliable fermentation. Warmer kitchens speed things up but can create mushy texture, while colder spaces slow fermentation considerably.
- Taste your sauerkraut starting on day three so you catch the exact flavor stage you prefer. Write down the number of days it takes so you can repeat it next batch.
- Never touch the fermenting cabbage with unwashed hands or dirty spoons, as contamination can introduce mold. Always use a clean utensil whenever you sample or check on your jar.
- If white foam or bubbles appear on top, that’s normal yeast activity and tastes fine. Only throw out the batch if you spot fuzzy mold, which indicates contamination.
- Use non-iodized salt exclusively; iodine inhibits fermentation and creates off flavors. Kosher salt and sea salt both work beautifully.
- Taste sauerkraut at different fermentation stages to discover your favorite. Some people love the mild, slightly salty crunch of a one-week batch, while others crave the deep, wine-like complexity of a six-week ferment.
Common Mistakes to Avoid
- Using iodized table salt prevents proper fermentation by killing beneficial bacteria. Stick with fine sea salt or kosher salt for reliable results.
- Leaving cabbage exposed above the brine invites mold growth and spoilage. Always weigh down your cabbage so it stays fully submerged throughout fermentation.
- Fermenting in a sealed, airtight jar traps gases and can cause the jar to burst. Use a cloth cover instead so carbon dioxide escapes naturally.
- Moving the jar around or opening it constantly disturbs the fermentation process and can introduce contaminants. Set it in one quiet spot and resist the urge to fiddle with it daily.
- Using too much salt creates overly salty sauerkraut that tastes like a briny pickle. Stick to two teaspoons per two pounds of cabbage.
Serving Suggestions
Sauerkraut pairs brilliantly with rich, fatty foods where its acidity and crunch cut through heaviness and refresh your palate. The fermented tang makes it versatile enough to work at breakfast, lunch, or dinner.
- Top fried or scrambled eggs for a bright, crunchy breakfast with probiotic benefits
- Pile onto bratwurst or hot dogs with mustard for a classic pairing
- Mix into grain bowls with roasted vegetables, beans, and a creamy dressing
- Layer into sandwiches and wraps where it adds texture and prevents sogginess
- Serve alongside roasted pork, duck, or fatty fish to balance richness with acidity
Variations to Try
- Red Cabbage Sauerkraut: Use red cabbage instead of green for a stunning purple color and subtly sweeter, fruitier fermented flavor. Fermentation times remain identical.
- Caraway Seed Sauerkraut: Add one tablespoon of caraway seeds to the cabbage before packing the jar for a warmer, slightly peppery note that pairs beautifully with pork and potatoes.
- Ginger and Turmeric Sauerkraut: Stir in one tablespoon of grated fresh ginger and one teaspoon of turmeric with the salt for an anti-inflammatory twist with warm, slightly spicy undertones.
- Apple and Juniper Sauerkraut: Add one grated apple and one teaspoon of crushed juniper berries for a brighter, slightly fruity ferment that works beautifully with game meats.
- Garlic and Dill Sauerkraut: Include four minced garlic cloves and two tablespoons of fresh dill fronds mixed in with the cabbage for a herbaceous version perfect alongside seafood.
Dietary Adaptations
- Gluten-free: Sauerkraut is naturally gluten-free and requires no modifications whatsoever. All ingredients are whole foods with zero added processing.
- Dairy-free: This recipe contains zero dairy products and works perfectly for vegan and dairy-free diets. Fermentation requires no animal products.
- Low-carb and keto: Sauerkraut is extremely low in carbs with only three grams per one-cup serving, making it ideal for ketogenic eating patterns.
- Low-sodium: Use half the salt listed and ferment at room temperature to compensate for slower fermentation. The resulting batch will be milder and less salty.
Storage and Reheating
Refrigerator
Transfer finished sauerkraut to an airtight container and store it in the coldest part of your fridge for up to four months. Cold temperature nearly stops fermentation, locking in your preferred flavor profile while beneficial bacteria remain dormant but viable.
- Store in an airtight jar or container to prevent it from absorbing fridge odors
- Keep away from the fridge door where temperature fluctuates most
- Check for signs of spoilage before eating: fuzzy mold means discard, but white yeast films are harmless
Freezer
While freezing sauerkraut preserves it indefinitely, it kills the beneficial bacteria that make fermented foods special. Use freezing only if you’ve made far more than you can eat and want to prevent waste.
- Freeze in ice cube trays for portion-controlled servings
- Transfer frozen cubes to freezer bags once solid for compact storage
- Thawed sauerkraut becomes softer in texture but retains tangy flavor
Reheating
Sauerkraut is best served cold or at room temperature to preserve the living probiotics and crisp texture. If you choose to heat it for cooking, add it after cooking finishes rather than cooking it directly.
- Serve cold straight from the jar as a condiment or side
- Warm gently in a low oven if you must heat it, never boil it
- Add sauerkraut at the very end of cooked dishes to preserve beneficial bacteria
Nutrition Information
| Nutrient | Amount |
|---|---|
| Calories | 12 |
| Total Fat | 0.1 g |
| Saturated Fat | 0 g |
| Carbohydrates | 2.7 g |
| Fiber | 0.5 g |
| Sugar | 0.2 g |
| Protein | 0.8 g |
| Sodium | 428 mg |
| Cholesterol | 0 mg |
These values represent one quarter-cup serving of finished sauerkraut. Actual nutrition varies slightly based on fermentation length and salt adjustments.
Frequently Asked Questions
Can I use a different type of cabbage?
Yes, Napa cabbage, savoy cabbage, and even purple cabbage all ferment beautifully with the same method and salt ratio. Fermentation times stay roughly the same, though milder varieties may reach your preferred tanginess one day faster.
How do I know if my sauerkraut has gone bad?
Good signs of fermentation include bubbles, white yeast sediment, and a pleasant sour smell. Bad signs include pink or black fuzzy mold, a rotten smell, or slime coating the top; throw out any batch showing these signs.
Can I use tap water to make extra brine?
Chlorine in tap water can interfere with fermentation, so use filtered or distilled water if you need to add more brine. Boil tap water and let it cool first if that’s your only option.
Why is my sauerkraut too salty?
You likely used iodized salt or measured incorrectly. Next batch, measure by weight if possible and verify you’re using non-iodized sea salt or kosher salt with your two-pound cabbage head.
How long can I ferment sauerkraut safely?
Sauerkraut improves for up to eight weeks on the counter before refrigeration slows things down. After that, it stays safe for months in the fridge, though flavors may begin to mellow slightly.
Do I need special equipment to ferment sauerkraut?
No, a basic glass jar, cloth, and weight are all you need. Fancy fermentation crocks and airlocks are nice but completely unnecessary for excellent results.
Final Thoughts
Making sauerkraut at home transforms you from a passive condiment consumer into an active participant in real food fermentation. After one successful batch, you’ll wonder why you ever paid for the shelf-stable version.
Start your first jar this week, taste it daily, and adjust your fermentation time to match your flavor preferences. Once you crack the code on your perfect sauerkraut, you’ll make batch after batch to keep your fridge stocked with tangy, probiotic gold.
If you love fermented flavors, explore our pickle lemonade recipe for a refreshing twist on preserved flavors. For something with a kick, try our pickle back shot recipe that transforms humble brines into memorable drinks.
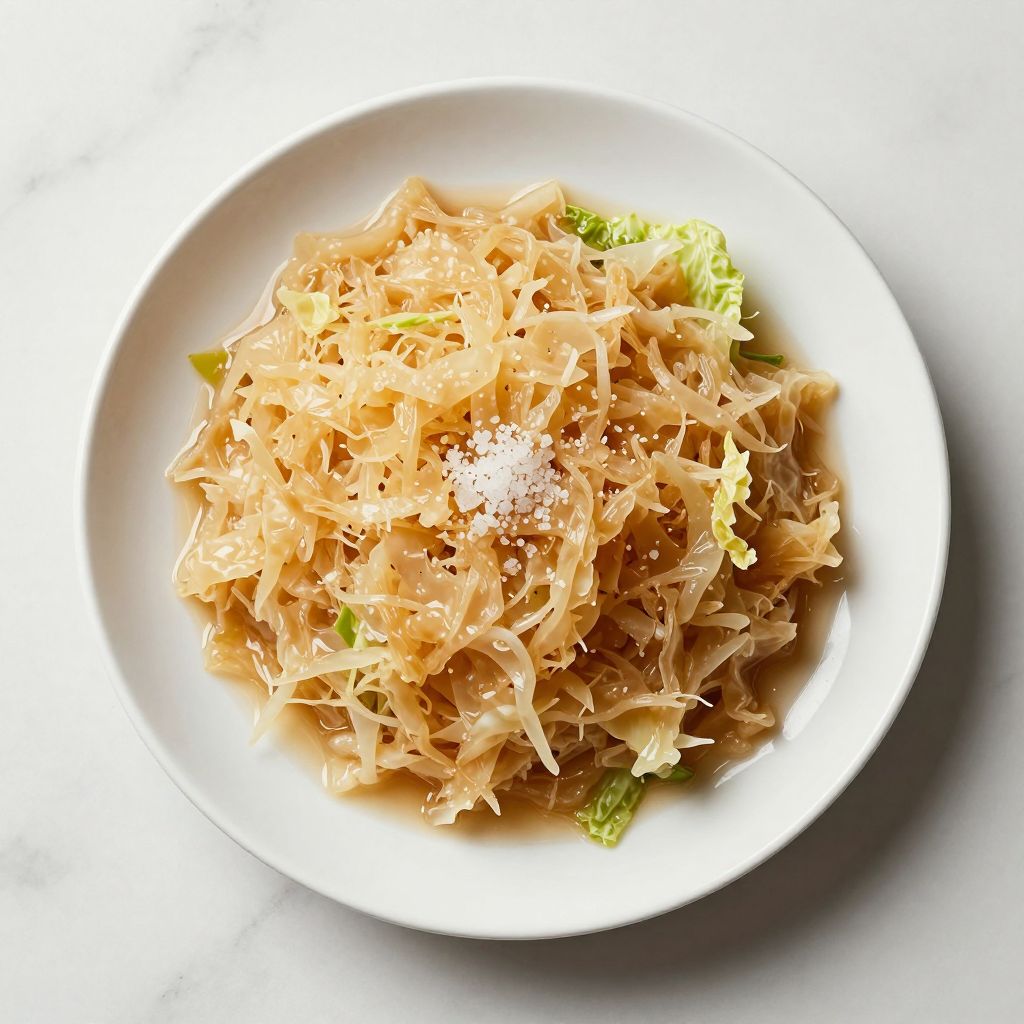
Homemade Sauerkraut
Ingredients
Equipment
Method
- Rinse and pat dry 2 pounds of cabbage, then cut in half and reserve 2 outer leaves for later.
- Slice the cabbage halves into thin shreds using a sharp knife or mandoline slicer.
- Place shredded cabbage in a large mixing bowl and sprinkle 2 teaspoons of fine sea salt evenly over the top.
- Massage the cabbage with clean hands or a wooden spoon for 5 to 10 minutes until it releases at least half a cup of brine.
- Pack the cabbage and its brine into the glass jar, pressing firmly so the brine rises at least 1 inch above the cabbage; add extra brine if needed.
- Lay a reserved cabbage leaf over the shredded cabbage and place a small plate or jar on top to weigh it down and keep it submerged.
- Cover the jar opening with a cloth or coffee filter secured with a rubber band to allow gases to escape.
- Ferment the sauerkraut at room temperature (65-72°F) away from direct sunlight for 3 to 8 weeks, tasting daily after day 3 until desired tanginess is reached.