
Imagine the rich aroma of homemade liqueur filling your kitchen, a project that feels fancy but requires just a handful of ingredients and patience. Making your own liqueur at home transforms simple spirits and flavorings into something deeply personal that you cannot buy in any store.
Homemade liqueur is special because you control every element, from the sweetness level to the intensity of flavor, and the process teaches you something about how spirits work. Whether you are crafting a gift, stocking your home bar, or simply exploring the chemistry of infusion, this guide walks you through creating a smooth, delicious liqueur that tastes like you spent hours perfecting it.
Why You’ll Love This Recipe
Making liqueur at home rewards you with a product that tastes fresher and more vibrant than commercial versions, costs a fraction of the price, and impresses everyone who tries it.
- Simple ingredient list: just quality spirits, sugar, water, and flavorings.
- Customizable sweetness and strength to match your taste perfectly.
- Beautiful presentation in glass bottles makes an excellent homemade gift.
- Requires minimal active time, mostly just waiting and shaking.
- Works in cocktails, desserts, coffee, or enjoyed neat.
My Experience Making This Recipe
The first time I made liqueur, I was surprised by how little effort the actual process demanded. I simply combined ingredients, sealed a jar, and waited while the magic happened on its own.
What struck me most was tasting the result after four weeks. The flavors had melded beautifully, creating something so smooth and balanced that my friends assumed I had purchased an expensive bottle.
Now I make liqueur seasonally, experimenting with whatever fruits and spices inspire me. The satisfaction of sharing a bottle I created myself never gets old, and the cost savings add up quickly when you make multiple batches.
Recipe Overview
- Recipe Name: Homemade Liqueur
- Servings: 12 to 16 servings (about 25 ounces total)
- Prep Time: 15 minutes
- Infusion Time: 4 weeks
- Total Time: 4 weeks plus 15 minutes
- Course: Beverage, After-Dinner Drink
- Cuisine: International
- Calories per Serving: 95
Equipment You Will Need
- Glass jar with tight-fitting lid (at least 1 quart capacity)
- Measuring cups and spoons
- Spoon for stirring
- Fine-mesh strainer or cheesecloth
- Funnel
- Glass bottles for storage
- Labels for dating and naming
- Coffee filters (optional, for extra clarity)
Ingredients for Homemade Liqueur
- 2 cups high-proof vodka or neutral spirit (80 to 100 proof)
- 1 cup fresh fruit, berries, or dried spices (depending on flavor choice)
- 3/4 cup sugar
- 1/2 cup water
- 1/4 teaspoon salt
Optional Flavor Additions
- Fresh berries: strawberries, raspberries, blackberries, blueberries
- Citrus zest: lemon, lime, orange, or grapefruit peel
- Whole spices: cinnamon sticks, vanilla beans, star anise, cloves
- Dried fruit: apricots, cranberries, cherries, figs
- Herbs: fresh mint, basil, rosemary, thyme
Ingredient Notes and Substitutions
- Vodka: Vodka works best because its neutral flavor lets your chosen ingredients shine without competing. You can substitute with gin for a botanical twist, though the juniper notes will come through.
- Fresh fruit: Berries and citrus add bright, fresh flavors and natural sugars that support fermentation. Frozen fruit works in a pinch but yields less vibrant color.
- Sugar: Regular white sugar dissolves cleanly and ferments predictably. Brown sugar or honey adds complexity but darkens the final color slightly.
- Water: Filtered or distilled water prevents any off-flavors from tap water minerals. Tap water works fine if your supply is clean.
- Salt: A tiny pinch enhances flavors without making the liqueur taste salty. Omit if you prefer.
How to Make Homemade Liqueur
Step 1: Prepare Your Ingredients
Clean your glass jar thoroughly and dry it completely to prevent mold and ensure a sterile environment. If using fresh fruit, rinse it and remove any damaged pieces, then chop larger pieces into smaller chunks to increase surface area and speed infusion.
Step 2: Combine Spirits and Flavoring
Pour your vodka into the clean jar, then add your chosen fruit, spices, or herbs. The alcohol acts as a preservative and extraction medium, pulling out flavors and color from your ingredients over time.
Step 3: Seal and Label
Seal the jar tightly with its lid and place a label with today’s date on it. You want an airtight seal so no air enters or the alcohol evaporates during the infusion period.
Step 4: Store in a Cool, Dark Place
Place the sealed jar in a cupboard, pantry, or dark corner away from direct sunlight and extreme heat. A consistent, cool temperature between 60 to 70 degrees Fahrenheit speeds up extraction without cooking off delicate flavors.
Step 5: Shake Daily for the First Week
Every day for seven days, shake the jar vigorously for about 30 seconds to agitate the ingredients and promote even extraction. This daily action redistributes the flavoring particles and prevents them from settling in one spot.
Step 6: Let It Rest for Remaining Time
After the first week, shake the jar only once per week for the remaining three weeks. The slow infusion process allows flavors to meld and intensify without becoming bitter or over-extracted.
Step 7: Test the Flavor at Week Four
At the four-week mark, open the jar and carefully pour a small sample into a glass to taste. The liquid should be fragrant, flavorful, and smooth, with no harsh alcohol burn dominating the palate.
Step 8: Strain Out Solids
Set a fine-mesh strainer over a clean bowl and carefully pour the contents through it, catching all liquid. Use the back of a spoon to gently press the fruit or spices to extract any remaining liquid, being careful not to force sediment through.
Step 9: Prepare the Simple Syrup
In a small saucepan, combine the sugar, water, and salt and bring to a boil over medium heat. Stir occasionally until the sugar dissolves completely, which takes about two to three minutes, then remove from heat and let it cool to room temperature.
Step 10: Combine Strained Liqueur and Syrup
Once the syrup has cooled, pour it into the strained liqueur and stir well to combine evenly. The syrup sweetens the liqueur, rounds out harsh edges, and gives it the smooth mouthfeel you expect from a finished product.
Step 11: Fine Strain Through Cheesecloth
Line your strainer with cheesecloth and pour the combined liquid through it slowly to catch any remaining particles. This step creates crystal clarity and removes any cloudiness from the finished liqueur.
Step 12: Bottle and Age
Using a funnel, pour the finished liqueur into clean glass bottles and seal tightly. Allow the bottled liqueur to rest for one to two weeks before drinking, which lets flavors marry and develop further complexity.
Pro Tip: Always taste your infusion at the three-week mark to catch it at peak flavor, since over-infusion can turn pleasantly bold into unpleasantly bitter or harsh.
Tips for the Best Homemade Liqueur
- Start with quality spirits, since the base liquor makes up the bulk of your finished product and cheap spirits yield cheap-tasting results.
- Keep detailed notes on what you infused, when you started, and how the flavor evolved so you can replicate your favorite batches.
- Avoid metal containers, which can react with alcohol and compromise flavor. Glass is always the safest choice.
- Do not skip the simple syrup step, as it balances the raw intensity of the infusion and creates the smooth drinking experience you want.
- Store finished bottles in a cool, dark place just like the infusion, since light and heat degrade color and flavor over months of storage.
- If your liqueur turns cloudy after bottling, run it through a coffee filter one more time for absolute clarity.
Common Mistakes to Avoid
- Using wet equipment or ingredients introduces water that dilutes your liqueur and can promote mold growth. Dry everything thoroughly before starting.
- Infusing for too long transforms appealing flavors into bitter, harsh ones that taste over-steeped and unpleasant. Stop at four weeks and taste before deciding to extend.
- Forgetting to shake during the first week slows extraction significantly and can leave your liqueur tasting weak or incomplete after the full time period.
- Adding too much sugar creates a syrupy product that feels cloying and masks the delicate flavors you worked to extract. Start with the suggested amount and adjust down if needed.
- Storing in clear bottles on a bright shelf fades color and degrades flavors quickly. Keep finished liqueur in opaque or dark glass away from light.
Serving Suggestions
Homemade liqueur shines when served ice-cold as an after-dinner digestif, but it adapts beautifully to cocktails, desserts, and even culinary applications. The smooth, balanced flavor you created works in any situation where you would use a commercial liqueur.
- Pour over vanilla ice cream or into whipped cream for a decadent dessert topping.
- Mix into cocktails such as martinis, sours, or creative mixed drinks featuring your chosen flavor.
- Drizzle over fresh fruit, cakes, or baked goods for added richness and moisture.
- Serve neat in a small glass, chilled or at room temperature, as an elegant digestif after dinner.
- Stir into coffee, hot chocolate, or tea for a warming, boozy treat on cold days.
Variations to Try
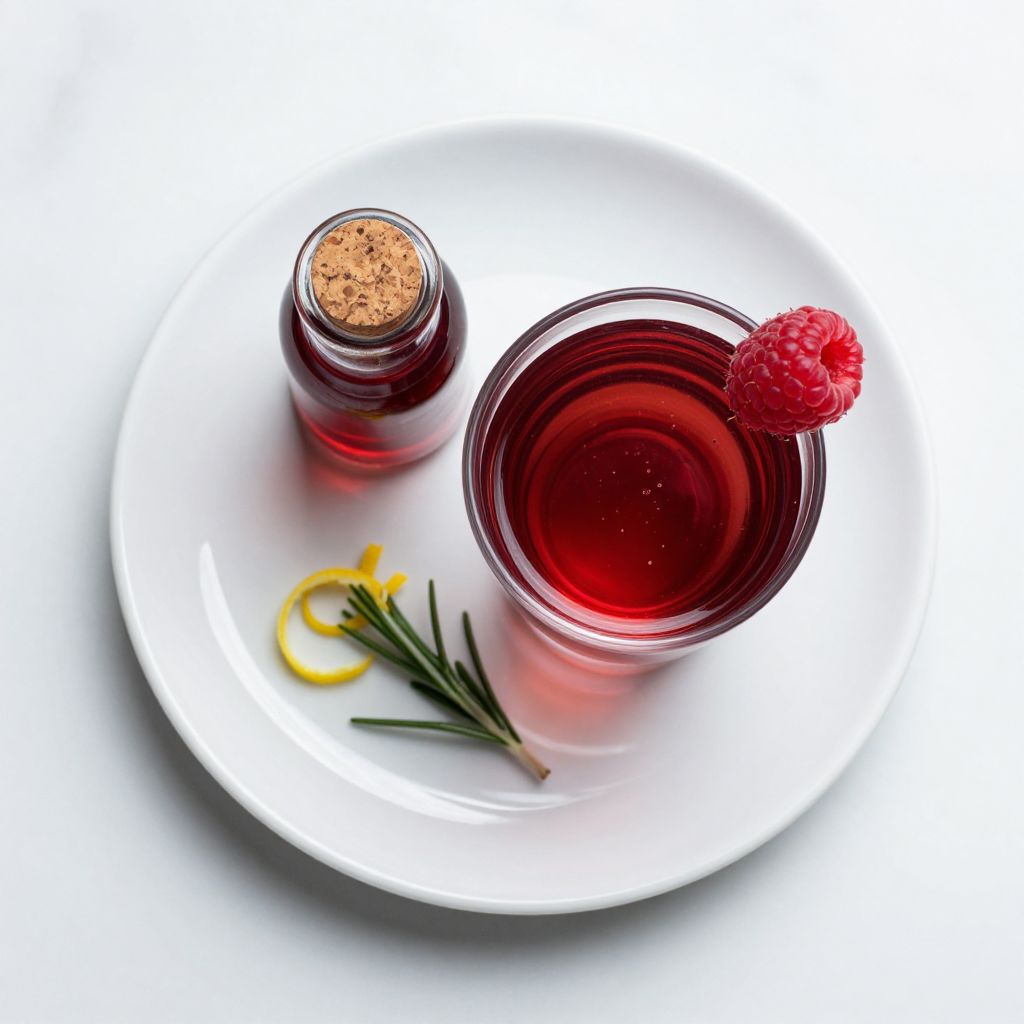
- Berry liqueur: Use fresh strawberries, raspberries, or blackberries for a bright, fruity version that works beautifully in cocktails and over desserts.
- Citrus liqueur: Infuse with lemon, lime, or orange zest for a fresh, aromatic liqueur that adds zing to mixed drinks and pairs well with seafood.
- Spiced liqueur: Combine cinnamon sticks, cloves, vanilla beans, and star anise for a warming, complex spirit that feels luxurious and sophisticated.
- Herbal liqueur: Use fresh mint, basil, or rosemary for a botanical twist that tastes herbaceous and slightly savory, perfect for adventurous cocktails.
- Coffee liqueur: Infuse with whole coffee beans or coarsely ground coffee for a rich, energizing liqueur that pairs perfectly with vanilla ice cream or espresso.
Dietary Adaptations
- Lower sugar version: Reduce the sugar in the simple syrup by half and taste, adding back gradually until balanced. The trade-off is less sweetness and mouthfeel, but the spirit flavors come forward more.
- Keto or low-carb: Replace sugar with erythritol or monk fruit sweetener in equal measure. Alcohol has no carbs, so your liqueur remains keto-friendly as long as you sweeten minimally.
- Vegan: All ingredients are naturally vegan since the recipe uses no animal products. Just confirm your chosen vodka brand does not use animal-derived processing aids.
- Gluten-free: Most vodkas are gluten-free, but check your bottle to confirm, since some brands process through grains. All other ingredients are naturally gluten-free.
Storage and Reheating
Refrigerator
Store finished liqueur in sealed glass bottles on a cool pantry shelf or in the refrigerator. Properly stored liqueur lasts for years without degradation.
- Keep bottles sealed tightly to prevent evaporation and oxidation.
- Store away from direct sunlight and heat sources.
- Check bottles occasionally for any visible mold or cloudiness.
Freezer
Liqueur freezes solid at home freezer temperatures due to its high alcohol content, which concentrates flavors beautifully. Frozen liqueur makes a delicious sipper on its own or slightly thawed in a cocktail.
- Store in freezer-safe glass bottles to prevent cracking from expansion.
- Leave a half-inch of headspace in the bottle to allow for expansion.
- Frozen liqueur keeps indefinitely with no flavor loss.
Reheating
Liqueur does not require reheating, but you can gently warm it in a small saucepan over low heat if you prefer it warm. Never boil liqueur, as high heat burns off delicate flavors and alcohol.
- Warm in a saucepan over very low heat while stirring occasionally.
- Pour warm liqueur into heat-safe glasses to serve.
- Serve warm liqueur with dessert or as an after-dinner drink.
Nutrition Information
| Nutrient | Amount |
|---|---|
| Calories | 95 |
| Total Fat | 0g |
| Saturated Fat | 0g |
| Carbohydrates | 7g |
| Fiber | 0g |
| Sugar | 6g |
| Protein | 0g |
| Sodium | 35mg |
| Cholesterol | 0mg |
Nutrition values are estimates based on a standard berry liqueur recipe and may vary depending on your specific ingredients and infusion method. Alcohol content varies based on the base spirit used.
Frequently Asked Questions
Can I use a different type of alcohol besides vodka?
Yes, you can use gin, rum, whiskey, or brandy, though each brings its own flavor profile to the final product. Keep in mind that flavored spirits may compete with your chosen infusion ingredients, so choose complementary combinations.
How long does homemade liqueur keep after bottling?
Properly sealed and stored liqueur lasts for years, sometimes improving with age as flavors meld further. The high alcohol content and sugar act as natural preservatives, so you need not worry about spoilage.
What if my liqueur tastes too strong or harsh?
Add a bit more simple syrup to soften the alcohol burn and round out rough edges. You can also extend the liqueur with a small amount of water if it feels too intense.
Can I reuse the same jar for multiple batches?
Absolutely, just clean and dry it thoroughly between uses to prevent flavor carryover from the previous batch. A quick rinse with hot water and complete air-drying prevents any lingering tastes from interfering.
Why did my liqueur turn cloudy instead of staying clear?
Cloudiness usually comes from fine particles that passed through the strainer or from sediment that settled during storage. Run it through a coffee filter one more time for absolute clarity, or accept the rustic look as part of the homemade charm.
Can I give homemade liqueur as a gift before the one to two week aging period?
Yes, you can gift it immediately after bottling, though it will taste even better if you let it age those extra weeks first. Add a handwritten note explaining that it will continue to develop in flavor, turning it into part of the gift experience.
Final Thoughts
Making liqueur at home demystifies a process that sounds complicated but turns out to be surprisingly straightforward and rewarding. Your patience over four weeks yields something far superior to commercial options at a fraction of the cost.
Start with a single batch using your favorite fruit or spice, and you will quickly understand why people become liqueur makers. The joy of sharing something you created with your own hands never gets old.
Explore More Liqueur Recipes
Now that you have mastered the basic liqueur-making process, expand your repertoire by exploring specialty flavors and techniques. Check out how to make a cherry liqueur recipe for a classic fruit-forward option, or try your hand at crafting a banana liqueur recipe for something more unexpected and tropical.
Homemade Liqueur
Ingredients
Equipment
Method
- Clean and dry a glass jar with a tight-fitting lid thoroughly, rinse and chop any fresh fruit into small pieces.
- Pour vodka into the clean jar and add your chosen fruit, spices, or herbs.
- Seal the jar tightly and label with the start date to ensure an airtight infusion.
- Store the jar in a cool, dark place at a consistent temperature between 60 and 70°F.
- Shake the jar vigorously for 30 seconds once daily during the first week to agitate ingredients.
- After the first week, shake the jar once per week for the remaining three weeks to allow flavors to meld.
- At the four-week mark, open the jar and taste a small sample to check for smooth, balanced flavor.
- Strain the infused liquid through a fine-mesh strainer, pressing solids gently with a spoon to extract any remaining liquid.
- In a small saucepan over medium heat, combine sugar, water, and salt; bring to a boil and stir until the sugar dissolves, about 2–3 minutes, then remove from heat and cool.
- Pour the cooled simple syrup into the strained liqueur and stir well to combine.
- Line a strainer with cheesecloth and fine strain the combined liqueur to remove any remaining particles.
- Using a funnel, bottle the liqueur in clean glass bottles, seal tightly, and rest for 1–2 weeks before serving.