
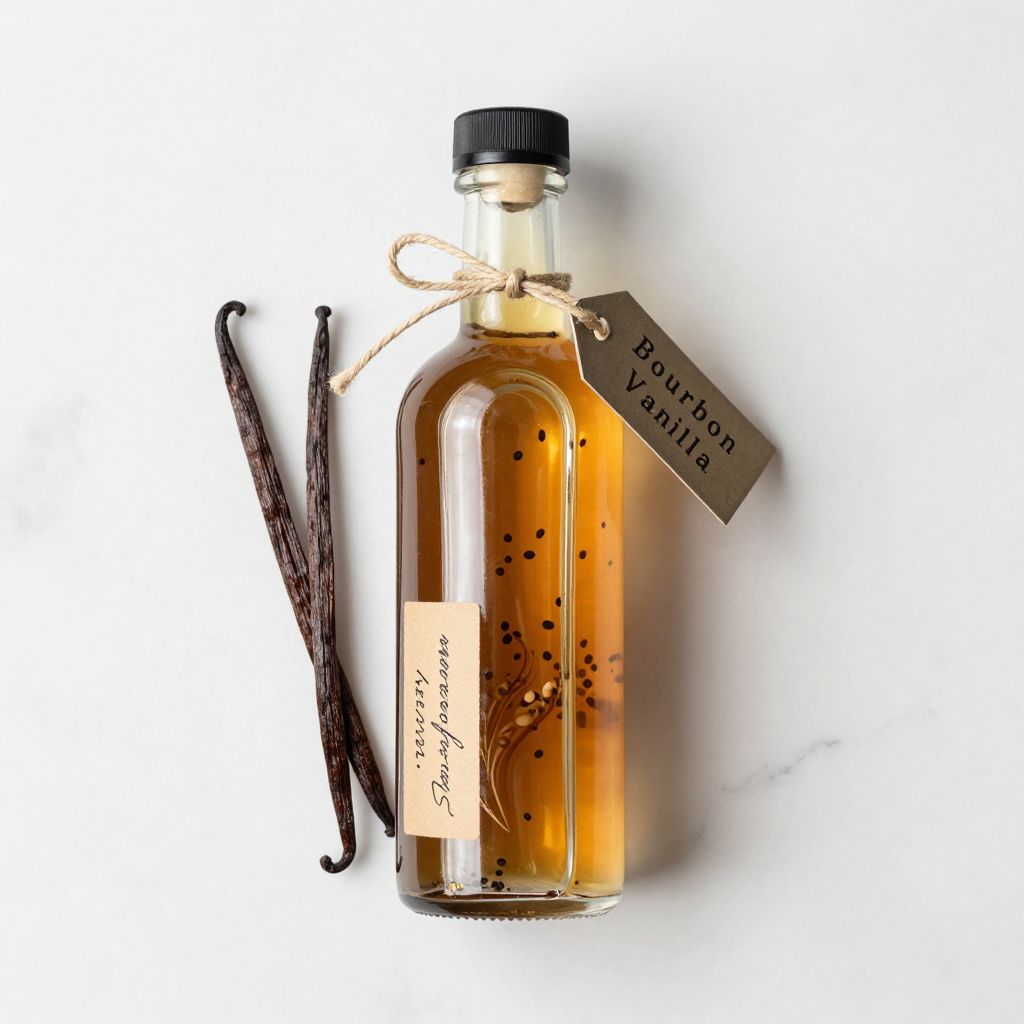
There’s something almost magical about watching vanilla beans steep in bourbon, transforming into liquid gold that smells like a vanilla dream.
Homemade bourbon vanilla extract is easier to make than you’d think, and the flavor depth you’ll get beats any store-bought version by a mile. This recipe takes patience rather than skill, making it perfect for anyone who wants to impress their kitchen skills or gift something truly special. In about six weeks, you’ll have pure, complex vanilla extract that costs a fraction of what you’d pay at specialty stores.
Why You’ll Love This Recipe
Homemade vanilla extract offers results that justify the minimal effort required. Here’s what makes this worth your time:
- Creates a product superior in flavor to commercial extracts at a fraction of the cost
- Makes an impressive gift that feels personal and thoughtful
- Uses just two simple ingredients with no complicated techniques
- Yields extract you can use in baking, cooking, and beverages for months
- Teaches you how basic infusion actually works in your own kitchen
My Experience Making This Recipe
I started making vanilla extract on a whim during a particularly boring January, mostly out of curiosity about whether homemade could really taste better. I grabbed some decent bourbon and split vanilla beans, tossed them in a jar, and honestly forgot about them for weeks.
When I finally checked on the jar six weeks later, the kitchen smelled incredible from just opening the cabinet. The liquid had transformed from clear to a beautiful amber color, and one tiny taste on my finger told me I’d struck gold. The vanilla flavor was bold, complex, and somehow smoother than anything I’d bought before.
Since then, I’ve made several batches for friends, and everyone’s reaction is the same: surprise that something so good comes from such a simple process. People ask me for the secret, and there really isn’t one beyond patience and decent ingredients.
Recipe Overview
- Recipe Name: Homemade Bourbon Vanilla Extract
- Servings: Makes about 8 ounces of extract
- Prep Time: 10 minutes
- Cook Time: 0 minutes (steeping time: 6 weeks)
- Total Time: 6 weeks plus 10 minutes active time
- Course: Pantry staple
- Cuisine: American
- Calories per Serving: 0 calories per teaspoon (minimal to negligible)
Equipment You Will Need
- Glass jar with a tight-fitting lid (8-ounce or larger)
- Sharp knife for splitting vanilla beans
- Measuring cups
- Measuring spoons
- Cutting board
- Small funnel (optional but helpful)
- Strainer or cheesecloth (for final filtering, optional)
Ingredients for Homemade Bourbon Vanilla Extract
- Vanilla beans: 4 to 6 beans (Grade B or Grade A, about 5 to 7 inches long)
- Bourbon whiskey: 1 cup (use something you wouldn’t mind drinking straight)
Ingredient Notes and Substitutions
- Vanilla beans are the star, and their quality directly impacts your final extract. Grade B beans work perfectly here and cost less than Grade A; they’re slightly less pretty but just as flavorful. If you can’t find vanilla beans locally, buy them online from reputable spice suppliers to ensure freshness.
- Bourbon provides a smooth, warm base that complements vanilla beautifully. You can substitute with vodka for a cleaner vanilla flavor, rum for something sweeter, or even brandy for sophistication, though each will shift the final taste in different directions.
How to Make Homemade Bourbon Vanilla Extract
Step 1: Choose Your Jar and Sterilize It
Select a clean glass jar with a tight-fitting lid that holds at least 8 ounces. Rinse it thoroughly with hot water and let it air dry completely, or wash it in the dishwasher to ensure no bacteria or residue interferes with your steeping process.
Step 2: Inspect Your Vanilla Beans
Look at each vanilla bean carefully and reject any that are brittle, moldy, or dried out on the surface. The beans should feel slightly flexible and smell fragrant; this tells you they’re fresh enough to extract properly.
Step 3: Split the Vanilla Beans Lengthwise
Place each vanilla bean on a cutting board and use a sharp knife to slice it lengthwise down the middle, cutting about three-quarters of the way through so the bean opens like a book. Splitting the beans increases surface area, which speeds up infusion and releases the flavor compounds more effectively.
Step 4: Scrape Out the Seeds (Optional)
Using the flat edge of your knife or a small spoon, scrape out the tiny black seeds from inside each split bean and set them aside if you like. You can add these seeds directly to your extract jar for visual appeal and a slight texture boost, though this step is purely for preference and doesn’t affect the final flavor.
Step 5: Add Beans to Your Jar
Place all four to six split vanilla beans into your clean glass jar. If you scraped out seeds, add them now as well, distributing them evenly throughout the jar.
Step 6: Pour in the Bourbon
Pour one cup of bourbon over the vanilla beans until they’re completely submerged. The liquid should cover all the beans fully so they steep evenly; if they’re sticking above the surface, gently push them down with a spoon.
Step 7: Seal and Label Your Jar
Screw the lid on tightly and label the jar with the date you started the infusion. Store the jar in a cool, dark place like a pantry or kitchen cabinet away from direct sunlight, which can degrade the flavor compounds.
Step 8: Shake and Wait
Shake the jar gently every few days during the first two weeks to help distribute the vanilla flavor and speed up extraction. After two weeks, you can shake it less frequently, though any occasional shake helps. Let the mixture steep for a full six weeks before using; patience at this stage rewards you with deeper, more complex flavor.
Step 9: Strain and Bottle (Optional)
After six weeks, if you prefer a clear extract without the bean pieces, pour the mixture through a fine strainer or cheesecloth into a fresh bottle. You can leave the beans in the jar if you don’t mind them, and actually, they’ll continue to release flavor for months longer.
Pro Tip: Don’t throw away the spent vanilla beans after straining; you can dry them out and use them to flavor sugar, coffee, or even add them to a new batch of extract for extended steeping.
Tips for the Best Homemade Bourbon Vanilla Extract
- Buy your vanilla beans from a trusted source and check the smell and flexibility; older beans won’t extract as effectively no matter how long you wait. A fresh bean should bend slightly without cracking and smell powerfully of vanilla.
- Store your jar away from heat and light in a cool pantry or cabinet, as these factors can damage the developing extract and fade its color over time. A dark corner beats a bright kitchen counter every single time.
- Use bourbon you actually enjoy drinking, since the quality of your base spirit directly influences the complexity of your final extract. Cheap, harsh bourbon will make cheap-tasting extract; mid-range bourbon produces excellent results.
- Don’t rush the six-week steeping period even if the extract looks dark after two weeks; the flavors continue developing and deepening throughout the full timeframe. Patience genuinely does pay off here in noticeable flavor improvements.
- Keep the jar sealed tightly during steeping to prevent evaporation and contamination, and avoid opening it too frequently to check progress. Every time you open it, you disturb the infusion and release volatile flavor compounds into your kitchen air.
Common Mistakes to Avoid
- Using stale or low-quality vanilla beans will result in weak, disappointing extract no matter how long you wait. Always buy from reputable sources and smell the beans before committing.
- Leaving your extract jar in sunlight or a warm spot causes the alcohol to evaporate and the vanilla compounds to degrade faster. Keep it consistently cool and dark for optimal results.
- Starting with cheap or harsh whiskey thinking it doesn’t matter because it’s just an extract base. The bourbon’s character significantly impacts your final product, so spend a few dollars more for better quality.
- Opening the jar constantly to check on progress disrupts the steeping process and releases alcohol vapors unnecessarily. Resist the urge and trust that it’s working even when you can’t see it.
- Straining the extract too early before the full six weeks have passed means you’re settling for weaker flavor when you’re so close to excellence. Mark your calendar and wait the full time.
Serving Suggestions
Use your homemade vanilla extract anywhere you’d normally use store-bought vanilla, and enjoy the superior flavor you’ve created. It works beautifully in both sweet and savory applications.
- Stir a teaspoon into morning coffee or tea for a subtle vanilla warmth
- Add to baked goods like cookies, cakes, brownies, and pastries for enhanced vanilla depth
- Mix into cocktails and mixed drinks for a sophisticated vanilla note
- Drizzle over ice cream, yogurt, or whipped cream for simple dessert enhancement
- Flavor homemade vanilla sugar, vanilla syrup, or vanilla-infused cream for pastry work
Variations to Try
- Madagascar Vanilla Extract: Use only Madagascar vanilla beans for a classic, creamy vanilla character; these produce the most traditional vanilla flavor profile many bakers expect.
- Tahitian Vanilla Extract: Substitute Tahitian beans for a floral, almost cherry-like vanilla note that’s wonderful in desserts and beverages; the flavor is distinctly different and lighter than bourbon vanilla.
- Double Vanilla Extract: Split the bourbon amount and add equal parts vodka to the jar for a cleaner vanilla flavor with more intensity; this technique is sometimes called “clear vanilla extract.”
- Spiced Vanilla Extract: Add a cinnamon stick, two or three cloves, and a small piece of fresh ginger to the jar alongside the vanilla beans for a warm, spiced complexity.
- Mexican Vanilla Extract: Use Mexican vanilla beans combined with a small piece of ancho chile to create a subtle heat and depth; this version pairs wonderfully with chocolate desserts.
Dietary Adaptations
- Gluten-Free: Bourbon vanilla extract is naturally gluten-free, and the finished product contains no gluten as long as your bourbon is gluten-free (which virtually all bourbon is by U.S. law).
- Dairy-Free: This extract is completely dairy-free with no hidden dairy ingredients, making it perfect for anyone avoiding milk products.
- Vegan: The extract itself is fully vegan, though some may question consuming alcohol; substitute with vegetable glycerin if avoiding alcohol entirely, though the flavor profile will be noticeably different.
- Low-Carb and Keto: Vanilla extract contains negligible carbohydrates and fits perfectly into low-carb and keto diets, with essentially zero impact on macros.
Storage and Reheating
Refrigerator
Store your finished extract in a cool pantry or cabinet at room temperature rather than refrigerating it, as the steady, cool temperature of a dark cupboard is ideal. The extract will maintain quality for years if kept sealed and away from heat and light.
- Keep the jar sealed tightly to prevent evaporation
- Store in a dark cabinet away from direct sunlight
- Check occasionally for any signs of mold or off-smells
Freezer
Freezing vanilla extract is generally unnecessary and not recommended, as alcohol prevents freezing at normal freezer temperatures and the extract won’t benefit from frozen storage. Your pantry is genuinely the best long-term storage option.
- No freezing needed due to alcohol content
- Pantry storage is superior for maintaining flavor
Reheating
Vanilla extract doesn’t require reheating since you’ll use it at room temperature in recipes, cocktails, and beverages. Simply shake the jar before use if the vanilla beans have settled, and measure out what you need.
- Use directly from the jar without heating
- Shake gently before use to redistribute beans and flavor
- Measure carefully; extract is potent and a little goes a long way
Nutrition Information
| Nutrient | Amount |
|---|---|
| Calories | 0 |
| Total Fat | 0g |
| Saturated Fat | 0g |
| Carbohydrates | 0g |
| Fiber | 0g |
| Sugar | 0g |
| Protein | 0g |
| Sodium | 0mg |
| Cholesterol | 0mg |
Nutrition information is provided per teaspoon of extract. The extract itself contains only vanilla compounds and bourbon alcohol, with no nutritional content in the typical sense.
Frequently Asked Questions
Can I use vodka instead of bourbon?
Yes, vodka works perfectly and will produce a cleaner, crisper vanilla extract with fewer background flavors. The choice comes down to whether you want the warm spice notes bourbon adds or prefer pure vanilla character.
How long will homemade vanilla extract last?
Properly stored in a cool, dark pantry, your extract will last for several years without any quality loss. The alcohol content preserves it indefinitely, so you can make a large batch and use it slowly.
Can I use the beans again after straining?
Absolutely, you can add the strained beans to sugar to make vanilla sugar, or even place them in a fresh bottle of alcohol to continue extracting. They’ll keep releasing flavor for months if you want to squeeze every bit of value from them.
Why is my extract still clear after a week?
Vanilla extract takes time to develop its amber color; a week is still very early in the process. The color will gradually deepen over the six weeks as the vanilla compounds infuse into the alcohol.
Do I need to filter out the vanilla beans before using the extract?
No, leaving the beans in the jar is perfectly fine and they’ll continue flavoring the extract longer. If you prefer a clear extract without visible bean pieces, you can strain it at any point after the initial steeping.
Final Thoughts
Making your own bourbon vanilla extract proves that the best ingredients often come from patience and simplicity rather than complicated techniques. You’re not just creating a pantry staple; you’re discovering how infusion actually works in your own kitchen, one jar at a time.
Start a batch this week and let it quietly work its magic in your cabinet while you go about your life. In six weeks, you’ll have extract so good you’ll wonder why you ever bought the commercial version, and honestly, you might never go back again.
Homemade Bourbon Vanilla Extract
Ingredients
Equipment
Method
- Select a clean glass jar with a tight-fitting lid that holds at least 8 ounces. Rinse it thoroughly with hot water and let it air dry completely, or wash it in the dishwasher to ensure no bacteria or residue interferes with your steeping process.
- Look at each vanilla bean carefully and reject any that are brittle, moldy, or dried out on the surface. The beans should feel slightly flexible and smell fragrant.
- Place each vanilla bean on a cutting board and use a sharp knife to slice it lengthwise down the middle, cutting about three-quarters of the way through so the bean opens like a book.
- Optional: Using the flat edge of your knife or a small spoon, scrape out the tiny black seeds from inside each split bean and set them aside. You can add these seeds directly to your extract jar for visual appeal.
- Place all split vanilla beans into your clean glass jar. If you scraped out seeds, add them now as well, distributing them evenly throughout the jar.
- Pour one cup of bourbon over the vanilla beans until they're completely submerged. The liquid should cover all the beans fully so they steep evenly; if they're sticking above the surface, gently push them down with a spoon.
- Screw the lid on tightly and label the jar with the date you started the infusion. Store the jar in a cool, dark place like a pantry or kitchen cabinet away from direct sunlight.
- Shake the jar gently every few days during the first two weeks to help distribute the vanilla flavor and speed up extraction. After two weeks, shake it less frequently. Let the mixture steep for a full six weeks before using.
- Optional: After six weeks, if you prefer a clear extract without the bean pieces, pour the mixture through a fine strainer or cheesecloth into a fresh bottle. You can leave the beans in the jar if you don't mind them, and they'll continue to release flavor for months longer.