
The sharp tang of homemade red wine vinegar transforms ordinary dishes into something memorable, and making it yourself costs almost nothing. I still remember the first time I tasted vinegar I’d fermented in a kitchen corner, realizing that this liquid gold had been sitting there quietly for weeks, becoming more complex and valuable than anything I could buy.
This recipe teaches you the magic of vinegar making: how time and air turn leftover wine into a pantry staple that elevates salads, sauces, and braises. You’ll need patience, a jar, and some wine, but the results are worth every day of waiting.
Why You’ll Love This Recipe
Homemade red wine vinegar offers depth and character you won’t find in most store-bought bottles. Making it yourself costs pennies and fills your kitchen with purpose.
- Deep, complex flavor that improves with age
- Costs a fraction of premium vinegars
- Uses up wine that’s turned or slightly oxidized
- Perfect gift for food lovers and cooks
- Minimal hands-on work, mostly passive fermentation
My Experience Making This Recipe
I started my first batch almost by accident, pouring a half-empty bottle of cheap Cabernet into a jar and covering it loosely with cheesecloth. By week three, the aroma shifted from wine-like to vinegary, and I knew the magic was happening.
The waiting was the hardest part, honestly. I’d peek at that jar every few days, wondering if anything was actually occurring, until one morning the smell hit me like a friendly slap. By week eight, I had something genuinely wonderful that made my vinaigrettes sing.
My friends couldn’t believe I’d made it myself, and the fact that it cost almost nothing made it even better. Now I keep a rotation going: one batch brewing while another ages, creating a supply that’s always ready.
Recipe Overview
- Recipe Name: Homemade Red Wine Vinegar
- Servings: Makes approximately 3 cups
- Prep Time: 10 minutes
- Fermentation Time: 8 to 12 weeks
- Total Time: 8 to 12 weeks
- Course: Pantry Staple
- Cuisine: French
- Per Tablespoon: 3 calories
Equipment You Will Need
- Glass jar (at least 2-quart capacity)
- Cheesecloth or coffee filter
- Rubber band or kitchen twine
- Wooden spoon or non-metal stirrer
- Funnel (optional but helpful)
- Fine mesh strainer
- Bottles for storage
- pH strips or thermometer (optional)
Ingredients for Red Wine Vinegar
- Red wine (4 cups): Use any red wine you wouldn’t drink straight. Pinot Noir, Cabernet, or Merlot work beautifully.
- Raw or unpasteurized apple cider vinegar (1 cup): This contains the live cultures that start the fermentation. Without these bacteria, your batch won’t convert properly.
- Filtered water (1 cup, optional): Dilutes the wine slightly if it’s very high alcohol, making fermentation easier.
Ingredient Notes and Substitutions
- Red wine: Any red wine works, even one that’s turned slightly or tastes off. Acidity levels vary, but fermentation bacteria don’t care about quality. Substitute with leftover wine you’ve been saving or buy the cheapest bottle available.
- Raw apple cider vinegar: This contains living bacteria (the “mother”) that converts wine into vinegar. Pasteurized vinegar won’t work because heat kills the cultures. Substitute with kombucha starter liquid or raw vinegar from another batch if you have one.
- Filtered water: Chlorine in tap water can inhibit fermentation. If your wine is very high alcohol (over 14 percent), water helps bacteria thrive. Substitute with any non-chlorinated water or skip if your wine is already dilute.
How to Make Red Wine Vinegar
Step 1: Choose Your Container Wisely
Select a clean glass jar large enough to hold all your liquid with several inches of headspace. Never use plastic or metal containers because vinegar bacteria react with non-glass materials and can affect flavor or create unwanted compounds.
Step 2: Combine Wine and Starter Culture
Pour 4 cups of red wine into your jar, then add 1 cup of raw, unpasteurized apple cider vinegar. Stir gently with a wooden spoon to distribute the living cultures throughout the wine, which jump-starts the fermentation process.
Step 3: Cover Loosely to Allow Airflow
Drape cheesecloth or a coffee filter over the jar opening and secure it with a rubber band or twine. This lets oxygen reach the liquid (bacteria need air to convert wine to vinegar) while keeping dust and insects out.
Step 4: Find the Right Fermentation Spot
Place your jar in a warm, dark corner of your kitchen, pantry, or basement where the temperature stays between 60 and 75 degrees Fahrenheit. Heat speeds fermentation, while cold slows it dramatically, so avoid the refrigerator and direct sunlight.
Step 5: Smell and Observe Daily
By day three or four, you’ll notice the aroma shifting from winy to slightly acidic, which means fermentation has begun. This smell intensifies over the coming weeks, which is exactly what you want to see happening.
Step 6: Stir Gently Every Few Days
Use a wooden spoon to stir the mixture gently every three to five days for the first month. This distributes nutrients evenly and helps the bacteria work efficiently throughout the batch.
Step 7: Watch for the Mother Formation
Around week three or four, a cloudy film may form on the surface, called the “mother.” This living culture of acetic acid bacteria is exactly what you want and a sign that fermentation is progressing beautifully.
Step 8: Taste After Eight Weeks
Dip a clean spoon into the vinegar and taste it carefully after eight weeks of fermentation. It should taste sharp and acidic with complexity, not just sour. If it still tastes slightly winy, let it ferment another two to four weeks.
Step 9: Strain and Bottle Your Vinegar
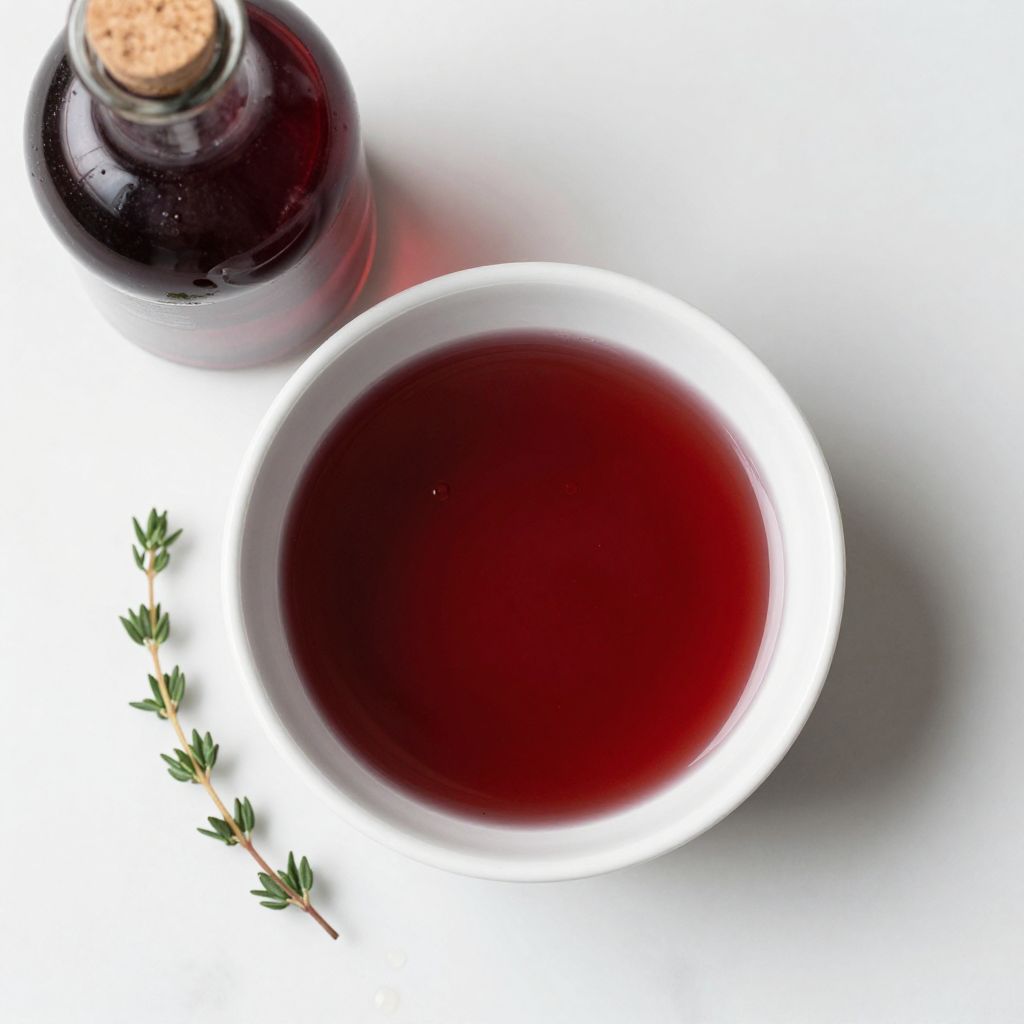
Once your vinegar tastes right, line a fine mesh strainer with cheesecloth and pour the entire batch through it slowly into a clean bowl. This removes sediment and any visible mother culture, leaving you with clear vinegar ready for storage.
Step 10: Store for Long-Term Keeping
Pour your finished vinegar into clean glass bottles and cap them tightly, then store in a cool, dark place. Properly stored vinegar lasts indefinitely and actually improves with age as flavors mellow and deepen.
Pro Tip: Save some of the mother culture from your first batch to speed up future batches. Submerge it in a clean jar with a bit of your finished vinegar and store it in a cool place; it stays viable for months and cuts fermentation time in half for your next batch.
Tips for the Best Red Wine Vinegar
- Use glass containers exclusively and never stir with metal spoons, as metal reacts with acid and affects flavor.
- Keep your fermentation jar away from direct sunlight and heat sources to maintain steady temperatures and prevent premature spoilage.
- Don’t panic if white mold appears on top; skim it off carefully, but if you see pink or orange mold, discard the entire batch as these are harmful contaminants.
- Taste-test every few weeks after week six to catch the perfect moment when it reaches your preferred level of sharpness.
- Label your jar with the start date so you remember exactly how long it’s been fermenting and can plan for bottling.
Common Mistakes to Avoid
- Using pasteurized vinegar or vinegar from a heated bottle kills the active cultures that do all the work, leaving you with plain wine instead of vinegar.
- Covering the jar too tightly traps carbon dioxide and prevents oxygen from reaching the bacteria, which stops fermentation cold.
- Placing your jar in a cold location slows fermentation to a crawl, potentially taking six months instead of two or three.
- Stirring with metal utensils or storing in plastic containers allows the acidic liquid to react with non-glass materials, ruining flavor and safety.
- Rushing the process and bottling before fermentation completes leaves you with wine-vinegar hybrid that tastes off and won’t age well.
Serving Suggestions
Your homemade vinegar deserves to shine in recipes where it becomes the star, not just a supporting player. Use it anywhere you’d use store-bought vinegar, but with the confidence that you made something genuinely special.
- Whisk into vinaigrettes for salads with sharp, complex depth that bottled versions can’t match
- Add a splash to beef stews and braises to brighten flavors and tenderize meat
- Deglaze pans after searing meat to capture flavorful browned bits with acidic lift
- Mix into pickling liquids for vegetables, berries, or eggs for preservation and tangy crunch
- Sip a small glass diluted with water as a digestive tonic, a practice dating back centuries
Variations to Try
- Herb-Infused Version: After fermentation finishes, strain out the sediment and add fresh herbs like thyme or rosemary to the bottled vinegar for two weeks before using, creating vinegar with herbal aromatics.
- Garlic and Chili Version: Slice garlic cloves and dried chili peppers into your finished vinegar for a spicy, aromatic condiment perfect for drizzling over finished dishes.
- Longer Fermentation: Instead of bottling after twelve weeks, leave the vinegar fermenting for six months or longer in its original jar, which creates deeper, more mellow complexity that rivals expensive aged vinegars.
- Blended Wine Version: Mix red and white wine in your initial batch to create vinegar with lighter body and more delicate fruit notes than pure red wine vinegar.
- Starting Without Vinegar Starter: If you have a mother culture from a previous batch, use only that with wine and filtered water, skipping the apple cider vinegar step entirely.
Dietary Adaptations
- Gluten-Free: Red wine vinegar made from wine and vinegar starter is naturally gluten-free, making it safe for anyone avoiding gluten without any modifications needed.
- Dairy-Free: This recipe contains no dairy products at any stage, so it works perfectly for anyone following a dairy-free diet.
- Vegan and Vegetarian: Vinegar fermentation requires no animal products, making homemade red wine vinegar suitable for all plant-based diets.
- Low-Carb and Keto: At 3 calories and essentially zero carbs per tablespoon, red wine vinegar fits any low-carb or ketogenic eating plan.
Storage and Reheating
Refrigerator
Store finished vinegar in tightly capped glass bottles in a cool, dark cupboard or refrigerator. Properly stored vinegar lasts indefinitely and can age for years.
- Keep bottles sealed to prevent oxidation and flavor loss
- Store away from light, heat, and strong cooking odors
- Check periodically for any signs of mold or sediment buildup
Freezer
Vinegar doesn’t freeze solid due to its high acidity, but cold storage slows any remaining fermentation to a halt. Freezing isn’t necessary for preservation, but cold temperatures do pause the aging process.
- Freezing works if you want to pause aging temporarily
- Allow bottles to reach room temperature before opening to prevent condensation
Reheating
Red wine vinegar never requires heating and should never be heated, as heat destroys the delicate flavors you’ve spent weeks developing. Use it cold straight from the bottle for best results.
- Add to hot dishes just before serving for maximum flavor impact
- Whisk into dressings and sauces at room temperature
Nutrition Information
| Nutrient | Amount |
|---|---|
| Calories | 3 |
| Total Fat | 0 g |
| Saturated Fat | 0 g |
| Carbohydrates | 0.1 g |
| Fiber | 0 g |
| Sugar | 0 g |
| Protein | 0 g |
| Sodium | 5 mg |
| Cholesterol | 0 mg |
Nutritional values are approximate and based on standard fermented red wine vinegar analysis. Values may vary slightly depending on the wine used and fermentation length.
Frequently Asked Questions
Can I use wine that’s already turned to vinegar?
Absolutely, and it’s honestly the best use for wine that’s oxidized or tastes off. Wine that’s already heading toward vinegar ferments faster and more reliably than fresh wine.
What if my batch smells terrible or has mold?
White mold is normal and harmless; skim it off gently and continue fermenting. Pink, orange, or fuzzy mold means contamination, so discard the entire batch and start fresh with a clean jar.
How long does it really take to ferment?
Most batches reach usable vinegar stage in 8 to 12 weeks, though the exact timeline depends on temperature and your starter culture quality. Colder temperatures stretch fermentation to 6 months or longer, while warmer kitchens speed things up.
Can I accelerate the fermentation process?
Keeping your jar at a steady 70 to 75 degrees Fahrenheit speeds fermentation noticeably compared to cooler temperatures. Stir more frequently and use a larger proportion of starter culture, though even with these tricks you’re still looking at several weeks.
Is the mother culture really necessary?
The mother isn’t necessary if you use raw, unpasteurized vinegar as your starter, but if you’re working with a culture from a previous batch, saving it makes your next batch ferment twice as fast.
Can I drink this vinegar straight?
Small sips of undiluted vinegar are fine, but swallowing large amounts straight can damage tooth enamel and upset your stomach. Most people dilute a tablespoon in water or juice for drinking.
Final Thoughts
Making red wine vinegar at home transforms waste into something worth bragging about, proving that the best pantry staples often require nothing but time and patience. You’ve learned that fermentation isn’t complicated or intimidating, just a quiet process happening in a jar while you get on with your life.
Start your first batch this week and taste the difference real vinegar makes in your cooking. In eight weeks, you’ll wonder why you ever bought the commercial stuff.
Now that you’ve mastered vinegar making, explore more recipes that highlight this ingredient’s potential. Check out our wine cooler recipe for refreshing drinks that pair beautifully with vinegar-based sauces, or try our strawberry sangria recipe to use up wine that might otherwise become vinegar in your next batch.
Homemade Red Wine Vinegar
Ingredients
Equipment
Method
- Select a clean glass jar large enough to hold all liquid with several inches of headspace.
- Pour 4 cups red wine into the jar and add 1 cup raw unpasteurized apple cider vinegar, then stir gently with a wooden spoon to distribute the cultures.
- Cover the jar opening with cheesecloth or a coffee filter and secure it with a rubber band or twine to allow airflow while keeping out dust.
- Place the jar in a warm, dark spot maintaining a temperature of 60 to 75°F and let it ferment undisturbed for 8 to 12 weeks.
- From day 3 onward, smell the mixture daily to observe the aroma shift from wine-like to acidic, indicating fermentation has begun.
- Stir the mixture gently every 3 to 5 days for the first month using a wooden spoon to evenly distribute nutrients.
- Around week 3 or 4, watch for a cloudy film (the mother) forming on the surface as a sign of progressing fermentation.
- After at least 8 weeks, taste the vinegar; if it still tastes winey, continue fermenting for up to 12 weeks until it reaches desired sharpness.
- Line a fine mesh strainer with cheesecloth and pour the vinegar through it into a clean bowl to remove sediment and any visible mother.
- Transfer the strained vinegar into clean glass bottles, cap tightly, and store in a cool, dark place; it will improve with age.