
Picture a late summer afternoon when plums are at their sweetest, and you decide to capture that fleeting season in a bottle. Plum liqueur is one of those homemade spirits that feels like pure magic: you start with simple fruit and time, and weeks later, you have a silky, jewel-toned liqueur that tastes like summer itself.
This recipe is special because it requires almost no cooking skill, just patience and good ingredients. The result is a sophisticated digestif that impresses guests, makes stunning gifts, and costs a fraction of store-bought versions.
What makes this liqueur so rewarding is how the plums slowly infuse into the alcohol, creating a complex sweetness that deepens over time. You’ll also appreciate how versatile it is: sip it neat over ice, mix it into cocktails, or drizzle it over desserts.
Why You’ll Love This Recipe
Plum liqueur delivers sophisticated flavor with zero fuss, and the process is genuinely forgiving for beginners. Here’s what makes it a winner:
- Minimal hands-on time, maximum flavor impact
- Creates a beautiful gift that looks and tastes premium
- Uses affordable ingredients you likely have on hand
- Naturally sweetens and clarifies over time with no filtering required
- Tastes better after a few weeks of aging, rewarding patience
My Experience Making This Recipe
I made my first batch of plum liqueur on a whim after buying too many plums at the farmer’s market. I honestly wasn’t sure what to expect, but I followed the basic method of combining fruit, sugar, and vodka in a glass jar.
The transformation was remarkable. After just two weeks, the mixture turned a gorgeous deep ruby color, and the aroma coming from the jar smelled like concentrated plum jam mixed with vanilla. I strained it at the four-week mark and tasted something that tasted nothing like commercial plum liqueurs I’d tried.
My friends loved it so much that I now make three bottles every late summer without fail. The best part? It gets better as it sits, so aging it an extra month or two only improves the smoothness and depth.
Recipe Overview
- Recipe Name: Homemade Plum Liqueur
- Servings: Makes approximately 1 liter
- Prep Time: 20 minutes
- Infusion Time: 4 to 8 weeks
- Total Time: 4 to 8 weeks plus 20 minutes active work
- Course: Digestif or Cocktail Base
- Cuisine: European
- Calories per Serving: 120 calories per 1.5-ounce shot
Equipment You Will Need
- One 2-liter glass jar with a tight-fitting lid
- Cutting board and sharp knife
- Measuring cups and spoons
- Wooden spoon for stirring
- Fine-mesh strainer or cheesecloth
- Funnel
- Bottles for storing finished liqueur
- Labels for marking dates and contents
Ingredients for Plum Liqueur
- Fresh plums: 2 pounds, halved and pitted
- Granulated sugar: 1.5 cups
- Vodka: 1 liter (80 proof or higher)
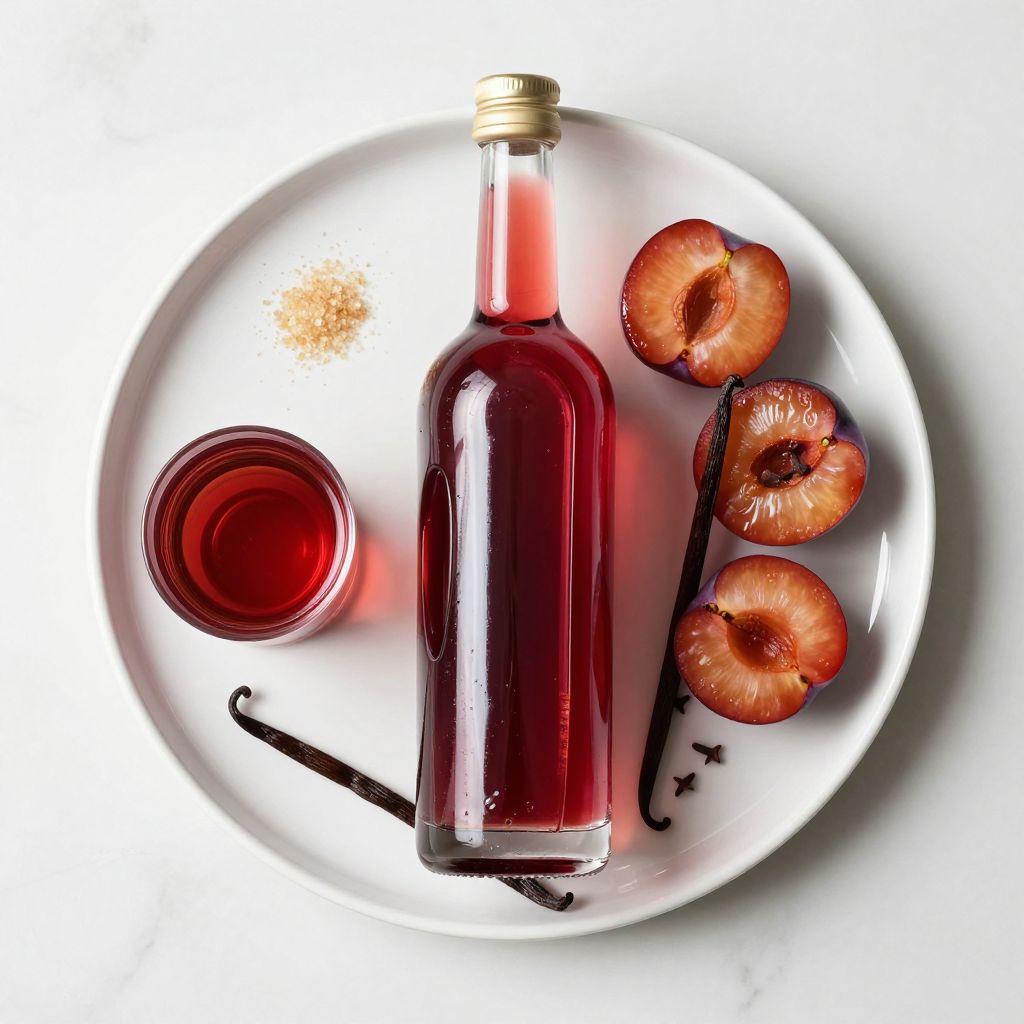
- Optional vanilla bean: 1 whole bean, split lengthwise
- Optional whole cloves: 3 to 4 cloves
Ingredient Notes and Substitutions
- Fresh plums: Ripe plums with deep color contribute maximum flavor and natural sugars to the infusion. Substitute with dried plums if fresh ones aren’t available, though the result will be slightly more concentrated and less bright.
- Granulated sugar: Sugar preserves the plums and balances their natural tartness while feeding the infusion process. You can use turbinado or demerara sugar for a slightly molasses-forward note, though it will darken the liqueur.
- Vodka: Neutral vodka serves as a clean base that doesn’t compete with plum flavor. You can substitute with brandy for a richer, warmer finish, or white rum for a tropical twist.
- Vanilla bean: A split vanilla bean adds creamy, subtle complexity to the plum base. Omit it entirely if you prefer a pure plum profile, or swap it for a cinnamon stick for spiced warmth.
- Whole cloves: These add a gentle spice note that complements plum’s natural earthiness. Leave them out if you prefer a sweeter, simpler liqueur.
How to Make Plum Liqueur
Step 1: Select and Prepare Your Plums
Choose plums that are ripe but still firm, as overripe fruit can turn mushy and cloud your liqueur. Wash them well under cool running water, then halve each one and remove the pit.
Step 2: Layer Plums and Sugar in Your Jar
Add about half of the plum halves to your clean glass jar, then sprinkle half of the sugar over them. This layering method encourages the fruit to release its juices without requiring you to macerate it separately.
Step 3: Add the Remaining Plums and Sugar
Layer the remaining plums on top, then finish with the rest of the sugar. The sugar will draw moisture from the plums over the first few days, creating a natural syrup.
Step 4: Add Vanilla Bean and Spices
If using vanilla and cloves, add them now by nestling them between the plum pieces. These aromatics will infuse slowly and add complexity without overpowering the delicate plum flavor.
Step 5: Pour in the Vodka
Slowly pour the vodka over the plum and sugar mixture until everything is submerged. The alcohol will blend with the fruit juices to create your infusion base.
Step 6: Seal and Label Your Jar
Screw the lid on tightly and attach a label noting the start date and contents. Store the jar in a cool, dark place like a pantry or basement where the temperature stays relatively stable.
Step 7: Shake Weekly and Monitor Progress
Every three to four days, gently shake the jar for about 30 seconds to redistribute the ingredients and encourage even infusion. You’ll notice the mixture getting darker and more aromatic as the weeks pass, which means it’s working perfectly.
Step 8: Strain When Ready
After four to six weeks, taste a small amount to check the flavor depth. When the liqueur tastes rich and balanced, set a fine-mesh strainer lined with cheesecloth over a clean bowl and pour the entire contents through.
Step 9: Bottle and Age Further
Use a funnel to pour the strained liqueur into clean bottles, then seal them tightly. Let the bottled liqueur sit for another two to four weeks to allow flavors to mellow and marry together for optimal smoothness.
Pro Tip: The longer you wait to drink your plum liqueur, the better it becomes, so don’t rush to open that bottle immediately after straining.
Tips for the Best Plum Liqueur
- Use ripe but firm plums with deep purple or red skin, as these contain more natural sugars and pigment than lighter varieties. Avoid soft or overripe fruit that will break down during infusion.
- Keep your jar in a consistently cool place; temperature fluctuations can speed fermentation or cause unwanted changes in flavor.
- Don’t remove the jar’s lid until it’s time to strain, as consistent sealing prevents oxidation and bacterial contamination.
- For a clearer final product, let the liqueur settle in the bottle for a week after straining before decanting, which allows any remaining particles to settle to the bottom.
- Taste the mixture at the two-week mark to gauge progress, but wait until week four before deciding whether to strain or leave it longer.
- Save the strained plum solids to make a compote or jam, adding just a bit of sugar and simmering until thick.
Common Mistakes to Avoid
- Using unripe plums: Green or firm plums lack the sugar and flavor needed for a balanced liqueur, resulting in a thin, overly tart final product.
- Opening the jar too often: Every time you open it, you expose the infusion to air and bacteria, which slows the process and can introduce off-flavors.
- Straining too early: Many people rush to bottle their liqueur after two weeks, missing out on the complex depth that develops during weeks three and four.
- Using low-proof alcohol: Anything below 80 proof won’t preserve the fruit and sugar properly, risking spoilage over time.
- Storing in direct sunlight: UV light degrades the color and flavor compounds, turning your beautiful ruby liqueur pale and flat-tasting.
Serving Suggestions
Plum liqueur shines when served thoughtfully, whether as a standalone digestif or mixed into cocktails. Here are my favorite ways to enjoy it:
- Pour over vanilla ice cream with a drizzle of honey for an elegant dessert
- Serve as a chilled shot in small glasses as an after-dinner drink
- Mix with sparkling wine to create a simple but sophisticated aperitif
- Combine with gin and fresh lemon juice for a plum-forward cocktail
- Stir into chocolate mousse or cheesecake batter for added depth
Variations to Try
- Honey-Sweetened Plum Liqueur: Replace half the granulated sugar with honey for a richer, more complex sweetness with subtle floral notes. The result tastes smoother and less sharp than traditional versions.
- Spiced Plum Liqueur: Add a cinnamon stick, one star anise, and a few cardamom pods to your infusion for warm spice notes. This variation pairs beautifully with desserts and creates a more autumnal flavor profile.
- Brandy-Based Plum Liqueur: Substitute half the vodka with good-quality brandy to create a richer, more sophisticated spirit. The brandy adds oakiness and depth that complements plum’s natural earthiness.
- Mixed Stone Fruit Liqueur: Combine plums with nectarines, peaches, and apricots in equal parts for a more complex fruit flavor. This blend tastes less intense than pure plum and works well in mixed drinks.
- Boozy Plum Liqueur: Use 150-proof vodka or Everclear instead of standard vodka for a stronger, higher-alcohol final product that ages beautifully. This version requires longer infusion time but develops remarkable complexity after several months.
Dietary Adaptations
- Gluten-Free: All standard ingredients are naturally gluten-free, so this recipe requires no adaptation at all.
- Dairy-Free: This recipe contains zero dairy, making it suitable for anyone avoiding milk or cream products.
- Vegan: The recipe is completely vegan, using only fruit, sugar, and alcohol with no animal-derived ingredients.
- Low-Sugar Option: Replace half the sugar with a low-calorie sweetener like erythritol, though this will reduce the natural preservation qualities and require shorter storage time.
Storage and Reheating
Refrigerator
Sealed bottles of finished plum liqueur keep perfectly in a cool pantry or cupboard for up to two years without refrigeration. If you open a bottle and want to preserve it longer, store it in the refrigerator after opening.
- Opened bottles last six to twelve months in the fridge before flavor deteriorates
- Keep the cap sealed tightly between pours to prevent oxidation
Freezer
Plum liqueur can freeze solid in a standard freezer due to its high alcohol content and sugar. This actually works beautifully if you want to serve it as a frozen shot or slushie-like drink.
- The liqueur thaws within minutes at room temperature
- Freezing doesn’t damage flavor or quality
Room Temperature Storage
Store sealed bottles in a cool, dark pantry or cabinet away from direct sunlight and heat. This is actually the ideal storage method for long-term aging.
- Keep away from direct sunlight to preserve color
- Avoid areas near heat sources like ovens or radiators
- Check seals periodically to ensure caps remain tight
Nutrition Information
| Nutrient | Amount |
|---|---|
| Calories | 120 |
| Total Fat | 0 grams |
| Saturated Fat | 0 grams |
| Carbohydrates | 10 grams |
| Fiber | 0 grams |
| Sugar | 9 grams |
| Protein | 0 grams |
| Sodium | 2 milligrams |
| Cholesterol | 0 milligrams |
These values represent a standard 1.5-ounce serving of finished plum liqueur and assume ingredients as listed in the recipe. Actual values may vary slightly based on plum variety and exact brand of vodka used.
Frequently Asked Questions
Can I use frozen plums instead of fresh ones?
Yes, frozen plums work well and often infuse faster because their cell walls have already broken down during freezing. Thaw them completely before using and expect slightly shorter infusion time, around three to four weeks instead of four to six.
What if my liqueur tastes too strong or tastes like pure alcohol?
This usually means the infusion time was too short or the plums weren’t ripe enough to contribute sufficient flavor. Try mixing it half-and-half with simple syrup to balance the alcohol burn, or let unopened bottles age for several more months.
Can I make this with a lower-proof alcohol like wine or beer?
Wine works but produces a less stable product that won’t keep as long, while beer’s carbonation creates problems during infusion. Stick with 80-proof vodka or higher for reliable preservation and the best results.
How do I know if my plum liqueur has gone bad?
Signs of spoilage include visible mold, cloudy appearance that doesn’t clear after settling, or off smells like vinegar or nail polish. Properly sealed bottles stored in cool, dark places rarely spoil, but always trust your nose and discard anything that smells wrong.
Can I reuse the plums after straining to make a second batch?
The plums will be mostly flavor-depleted, so a second infusion would be weak and disappointing. Instead, simmer the strained plums with a bit of sugar to create a delicious compote or jam that pairs beautifully with cheese and desserts.
What’s the difference between plum liqueur and plum brandy?
Plum liqueur uses vodka as a base and is sweetened with sugar, while plum brandy typically uses brandy as a base with less added sweetness. Liqueur is generally softer and more dessert-like, while brandy tastes drier and more complex.
Should I strain out the vanilla bean and cloves before bottling?
Yes, remove them during straining to prevent their flavors from becoming overpowering or bitter as they sit in the liqueur over time. You can fish them out as you pour through the strainer.
Final Thoughts
Making plum liqueur at home is one of those rare kitchen projects that rewards patience with something genuinely impressive. You’ll feel proud serving it to friends, and the cost is a fraction of what you’d pay for a bottle at a specialty store.
Start a batch this week and mark your calendar for four weeks out, then taste the magic of summer captured in a glass. Whether you drink it alone, mix it into cocktails, or gift it to someone special, homemade plum liqueur creates memories that last far longer than the bottle itself.
If you love making fruit-infused spirits, you might also enjoy exploring our cherry liqueur recipe for a tart-sweet alternative, or experimenting with our ginger brandy recipe for something with warm, spiced character. Each homemade liqueur builds your confidence and expands your home bar in delicious ways.
Homemade Plum Liqueur
Ingredients
Equipment
Method
- Wash plums under cool running water, halve them, and remove pits.
- Add half of the plum halves to the glass jar and sprinkle with half of the sugar.
- Layer the remaining plums on top and add the rest of the sugar.
- Nestle the split vanilla bean and whole cloves between the plum pieces, if using.
- Pour vodka over the fruit and sugar mixture until fully submerged.
- Seal the jar tightly, label with the start date, and store in a cool, dark place.
- Gently shake the jar every 3 to 4 days for 4 to 6 weeks to encourage even infusion.
- After 4 to 6 weeks, taste the infusion; when balanced, strain through a fine-mesh strainer lined with cheesecloth.
- Use a funnel to pour the strained liqueur into clean bottles and seal tightly.
- Age the bottled liqueur for an additional 2 to 4 weeks before serving for optimal smoothness.