Picture yourself on a quiet morning, pouring that first cup of coffee and reaching for the creamer only to find the store-bought bottle is empty. That’s when I discovered making mocha coffee creamer at home changes everything.
This recipe gives you café-quality creamer in minutes, with rich chocolate and coffee flavor that transforms ordinary coffee into something special. It’s cheaper than buying fancy creamers, takes just five minutes to make, and lasts two weeks in your fridge.
Why You’ll Love This Recipe
Homemade mocha creamer tastes infinitely better than the artificial stuff on grocery store shelves. You control every ingredient, skip the weird additives, and customize the sweetness and coffee intensity to your exact preference.
- Ready in under five minutes with just five simple ingredients
- Costs a fraction of specialty coffee creamers
- No weird additives, preservatives, or mystery ingredients
- Customizable sweetness and chocolate intensity
- Makes your morning coffee taste like a professional café drink
My Experience Making This Recipe
I’ve been making this creamer for two years now, and it completely changed how I approach my daily coffee routine. The first time I made it, I was skeptical that something so simple could taste so good, but those first five minutes in the blender completely won me over.
My mornings now start with genuine excitement about my coffee instead of resignation about another cup of bitter mediocrity. My partner actually started stealing spoonfuls straight from the jar, which tells you everything you need to know about how delicious this stuff is.
What surprised me most was how much better the creamer tastes when it’s fresh, and how ridiculously cheap it is to make. Now I feel a little smug every time I walk past the expensive creamer aisle at the grocery store.
Recipe Overview
- Recipe Name: Mocha Coffee Creamer
- Servings: Makes about 1.5 cups
- Prep Time: 5 minutes
- Cook Time: 0 minutes
- Total Time: 5 minutes
- Course: Beverage
- Cuisine: American
- Calories per Serving: 45 calories per tablespoon
Equipment You Will Need
- Blender or immersion blender
- Measuring cups
- Measuring spoons
- Glass jar with a tight-fitting lid for storage
- Spoon or whisk for manual mixing (optional alternative)
Ingredients for Mocha Coffee Creamer
- Heavy cream, 1 cup
- Sweetened condensed milk, 1/2 cup
- Cocoa powder, 3 tablespoons unsweetened
- Instant coffee, 2 tablespoons
- Vanilla extract, 1 teaspoon
Ingredient Notes and Substitutions
- Heavy cream: This is the base that gives your creamer its rich, smooth texture and allows it to blend seamlessly into hot coffee. You can substitute with half-and-half for a lighter version, though the creamer will be less rich.
- Sweetened condensed milk: This ingredient adds sweetness and helps create that silky texture you get from fancy creamers. If you prefer less sugar, use sweetened coconut milk instead, which reduces sweetness by about 30 percent.
- Cocoa powder: Unsweetened cocoa powder gives you pure chocolate flavor without extra sugar. Dutch-processed cocoa works beautifully and creates a slightly smoother taste than natural cocoa.
- Instant coffee: This dissolves instantly and provides intense coffee flavor without any grittiness. Espresso powder works even better if you can find it, as it delivers bolder coffee notes.
- Vanilla extract: Vanilla rounds out the chocolate and coffee flavors with subtle warmth. Pure vanilla extract tastes noticeably better than imitation, though imitation works in a pinch.
How to Make Mocha Coffee Creamer
Step 1: Gather All Your Ingredients
Pull out your heavy cream, sweetened condensed milk, cocoa powder, instant coffee, and vanilla extract and set them on the counter in front of you. Taking thirty seconds to organize prevents you from frantically searching mid-blend for that elusive ingredient.
Step 2: Pour Heavy Cream Into Your Blender
Add the full cup of heavy cream to your blender first, giving you a liquid base to blend everything smoothly. Starting with the liquid ingredient prevents dry powder from clumping at the bottom of the blender.
Step 3: Add Sweetened Condensed Milk
Pour in the 1/2 cup of sweetened condensed milk directly into the blender with the heavy cream. The condensed milk will add richness and sweetness while helping emulsify the mixture into a silky texture.
Step 4: Add Cocoa Powder
Sprinkle the 3 tablespoons of unsweetened cocoa powder into the blender carefully to avoid creating a chocolate dust cloud. Cocoa powder can be stubborn about dissolving, so adding it now gives the blender time to fully incorporate it.
Step 5: Add Instant Coffee
Add your 2 tablespoons of instant coffee to the blender, which will dissolve completely and provide deep coffee flavor throughout. Instant coffee granules are small enough to blend smoothly without any grittiness in your final creamer.
Step 6: Add Vanilla Extract
Pour in the 1 teaspoon of vanilla extract, which adds a subtle warmth and helps tie all the flavors together. Vanilla is what makes this taste like a professional café drink instead of just chocolate milk with coffee.
Step 7: Blend Until Completely Smooth
Blend on high speed for about 30 to 45 seconds until the mixture is completely smooth and homogeneous with no visible cocoa powder specks. You should see no brown streaks or powder residue when you stop blending and look at the mixture.
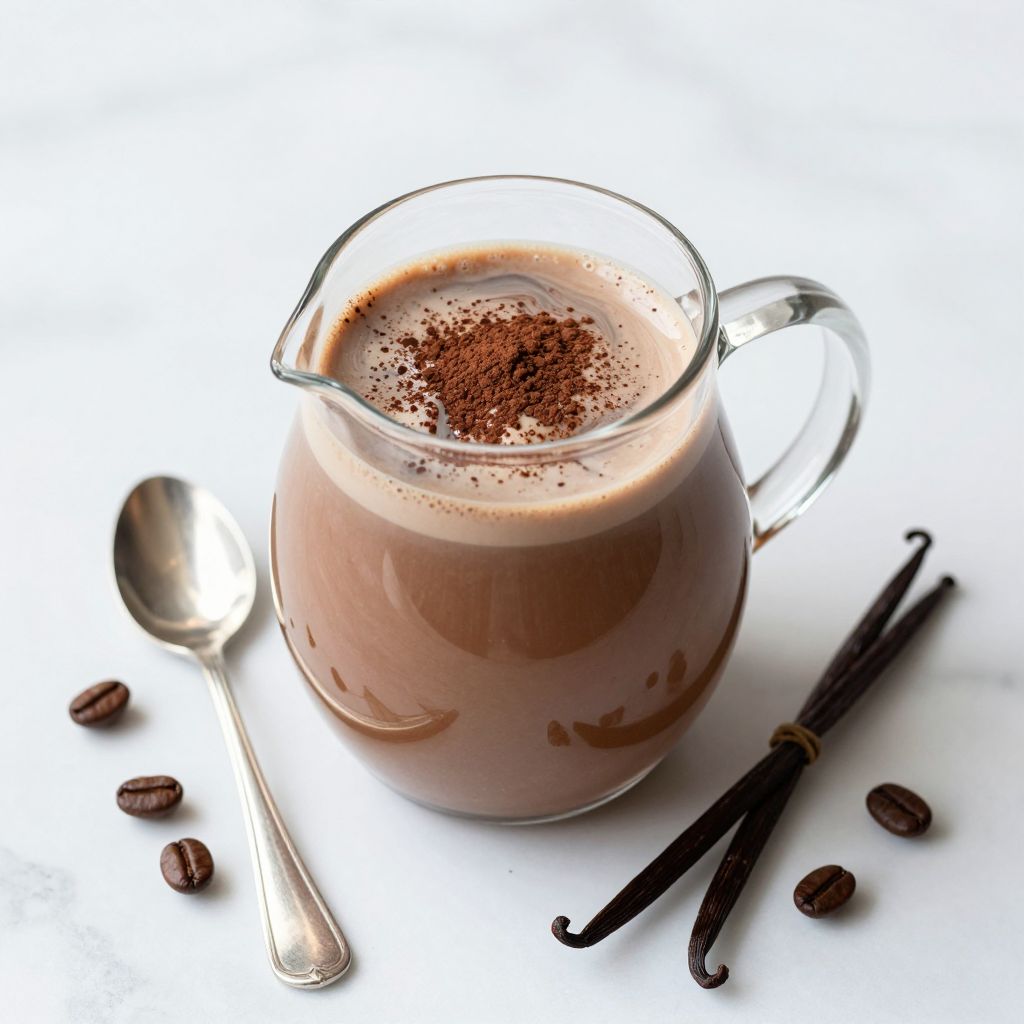
Step 8: Pour Into Your Storage Jar
Carefully pour the creamy mocha mixture into a clean glass jar with a tight-fitting lid. Glass jars preserve flavor better than plastic and let you see exactly how much creamer you have left.
Step 9: Seal and Refrigerate
Screw the lid on tightly and refrigerate immediately until you’re ready to use it. Your homemade mocha creamer is now ready to transform your morning coffee.
Pro Tip: Always shake your creamer vigorously before use because the cocoa powder and coffee can settle at the bottom over time, even though the emulsion is pretty stable thanks to the condensed milk.
Tips for the Best Mocha Coffee Creamer
- Blend longer rather than shorter if you notice any cocoa powder specks lingering, as this prevents grittiness when you add the creamer to hot coffee.
- Use a high-quality cocoa powder if possible, as it makes a noticeable difference in final flavor compared to the cheap stuff.
- Add a tiny pinch of sea salt to your blender before mixing, which enhances both the chocolate and coffee flavors without making the creamer taste salty.
- Store your creamer in glass jars rather than plastic, as glass doesn’t absorb flavors and keeps your creamer tasting fresh longer.
- Make this recipe in small batches every week or two instead of making a huge batch at once, ensuring maximum freshness and flavor.
- If you want a thinner creamer for iced coffee, simply add a splash of milk and blend briefly before storing.
Common Mistakes to Avoid
- Using hot ingredients: Never use hot cream or warm condensed milk, as heat can separate the emulsion and create a grainy texture instead of silky smoothness.
- Skipping the blender: Whisking by hand leaves tiny cocoa powder lumps that never fully dissolve, creating a gritty mouthfeel when you pour it into coffee.
- Using sweetened cocoa mix instead of pure cocoa powder: Sweetened cocoa mix contains sugar and additives that throw off your flavor balance and add unnecessary sweetness.
- Overfilling your jar: Leaving no headspace prevents proper mixing when you shake before use and can cause the lid to pop off messily.
- Forgetting to refrigerate immediately: Leaving this creamer at room temperature for even a few hours can cause separation, so chill it right away after blending.
Serving Suggestions
Pour one to two tablespoons into your morning coffee and watch it transform into a rich, creamy café drink. This creamer works beautifully in hot coffee, iced coffee, lattes, cappuccinos, and even hot chocolate.
- Stir into a fresh cup of hot black coffee for an instant mocha latte experience
- Add to cold brew coffee over ice for a delicious iced mocha creamer drink
- Mix into hot chocolate to intensify the chocolate flavor and add coffee notes
- Blend into smoothies for extra chocolate and coffee flavor with creamy texture
- Swirl into plain yogurt or oatmeal for a mocha-flavored breakfast boost
Variations to Try
- Double Chocolate Mocha: Add 1 tablespoon of chocolate syrup along with the cocoa powder for deeper chocolate intensity and extra richness that makes every sip feel indulgent.
- Mint Mocha: Add 1/4 teaspoon of peppermint extract instead of the full teaspoon of vanilla, creating a refreshing chocolate mint flavor that tastes like an after-dinner mint in your coffee.
- Salted Caramel Mocha: Replace the vanilla with 1 teaspoon of caramel extract and add a tiny pinch of sea salt, which creates a sophisticated sweet and salty coffee creamer.
- Spiced Mocha: Add 1/4 teaspoon each of cinnamon and nutmeg to the original recipe, giving your creamer warm spice notes that pair beautifully with dark roast coffee.
- Lighter Version: Substitute half-and-half for heavy cream and reduce condensed milk to 1/4 cup for a less rich creamer with fewer calories that still tastes delicious.
Dietary Adaptations
- Dairy-Free: Replace heavy cream with full-fat coconut cream and use dairy-free sweetened condensed milk substitute, though the texture will be slightly thinner.
- Vegan: Use coconut cream and vegan sweetened condensed milk, checking that your vanilla extract and cocoa powder are vegan certified.
- Low-Carb/Keto: Swap condensed milk for heavy cream mixed with erythritol or monk fruit sweetener in equal parts, reducing total carbs significantly.
- Sugar-Free: Replace sweetened condensed milk with unsweetened coconut milk plus your choice of sugar-free sweetener like stevia or erythritol to taste.
Storage and Reheating
Refrigerator
Store your mocha creamer in a sealed glass jar on a shelf in your refrigerator, not in the door where temperature fluctuates. Your creamer stays fresh and delicious for up to two weeks.
- Always shake vigorously before each use to redistribute any settled ingredients
- Check for any off smells or odd texture before use, though properly made creamer rarely spoils
Freezer
You can freeze mocha creamer in ice cube trays for up to three months, which creates convenient portions for travel or backup supply. Thaw frozen cubes in the refrigerator overnight, or pop them directly into hot coffee to thaw and blend together.
- Label your frozen creamer with the date so you remember when it was made
- Thawed creamer may separate slightly, so shake well before using
Reheating
You don’t need to reheat creamer since you add it directly to hot or cold coffee, where it warms and mixes instantly. If you’ve frozen it, simply thaw in the refrigerator or add frozen cubes directly to your coffee.
- Never microwave creamer in a sealed container, as pressure can build and cause the lid to pop
- Adding frozen cubes to hot coffee creates a quick cooling effect that works perfectly for immediate drinking
Nutrition Information
| Nutrient | Amount |
|---|---|
| Calories | 45 |
| Total Fat | 3.5 grams |
| Saturated Fat | 2.2 grams |
| Carbohydrates | 4.2 grams |
| Fiber | 0.3 grams |
| Sugar | 3.8 grams |
| Protein | 0.5 grams |
| Sodium | 18 milligrams |
| Cholesterol | 12 milligrams |
Nutritional values are approximate and based on one tablespoon serving size using standard ingredient brands. Your actual nutrition may vary slightly based on specific products and portion sizes used.
Frequently Asked Questions
Can I make this creamer without a blender?
Yes, you can whisk everything together by hand, but you’ll need to whisk for at least three minutes and you may end up with tiny cocoa powder specks in the final creamer. For the smoothest results, an immersion blender works almost as well as a full blender and is quieter.
How long does mocha creamer actually last in the fridge?
Your creamer stays fresh for two weeks in a sealed glass jar in the refrigerator. Toss it out if you notice any strange smell, mold, or separation that doesn’t remix when you shake.
Can I use this creamer in cold brew or iced coffee?
Absolutely, and it works beautifully in cold coffee since it’s already emulsified and blends smoothly without clumping. You might want to make it slightly thinner by adding a splash of milk if you prefer a lighter cold coffee drink.
What if my creamer separates in the jar?
Separation happens sometimes, especially if you didn’t blend long enough or if the temperature fluctuated wildly. Shake the jar vigorously for about 30 seconds and it should remix completely, though if it stays grainy you may need to reblend it.
Can I adjust the sweetness to my preference?
Absolutely, and you should experiment until you find your perfect balance. If you like it sweeter, add more condensed milk in small amounts and reblend, or if you prefer less sweet, reduce the condensed milk and add more heavy cream instead.
Is this cheaper than buying creamer at the store?
Yes, significantly cheaper, costing roughly one-third to one-half the price of specialty coffee creamers depending on your local prices. The investment in a blender pays for itself in a few weeks if you make coffee at home regularly.
Final Thoughts
Making your own mocha coffee creamer is genuinely one of those small kitchen wins that pays dividends every single morning. You’ll save money, drink better coffee, and feel a little smug knowing exactly what’s going into your cup.
Try this recipe this week and watch your morning coffee routine transform from something mundane into something you actually look forward to. Your taste buds and your wallet will thank you.
Mocha Coffee Creamer
Ingredients
Equipment
Method
- Gather all your ingredients: heavy cream, sweetened condensed milk, cocoa powder, instant coffee, and vanilla extract and set them on the counter.
- Pour the 1 cup of heavy cream into your blender first, giving you a liquid base to blend everything smoothly.
- Add the 1/2 cup of sweetened condensed milk directly into the blender with the heavy cream.
- Sprinkle the 3 tablespoons of unsweetened cocoa powder into the blender carefully to avoid creating a chocolate dust cloud.
- Add the 2 tablespoons of instant coffee to the blender.
- Pour in the 1 teaspoon of vanilla extract.
- Blend on high speed for 30 to 45 seconds until the mixture is completely smooth and homogeneous with no visible cocoa powder specks.
- Carefully pour the creamy mocha mixture into a clean glass jar with a tight-fitting lid.
- Screw the lid on tightly and refrigerate immediately until ready to use. Always shake vigorously before each use.