There’s something magical about that first sip of a cold, creamy blended ice coffee on a warm afternoon, especially when you realize you just made it at home for a fraction of what a coffee shop charges. Blended ice coffee hits that perfect sweet spot between a refreshing drink and a dessert, with a silky texture that feels indulgent without requiring any fancy equipment or barista skills.
This recipe delivers cafe-quality results in under five minutes, making it perfect for busy mornings or afternoon pick-me-ups when you need something cold and delicious. The combination of strong coffee, creamy milk, and ice creates a drink that’s smooth, satisfying, and endlessly customizable to match your taste preferences.
Why You’ll Love This Recipe
This blended ice coffee checks all the boxes: it’s quick, affordable, and tastes better than what you’ll find at most coffee shops.
- Ready in under five minutes with zero complicated steps
- Uses pantry staples you probably already have at home
- Customizable to match your preferred sweetness and strength
- Costs a fraction of what you’d pay at a coffee chain
- Perfect for any time of day, from breakfast through dinner
My Experience Making This Recipe
I started making blended ice coffee at home after my local cafe raised prices again, and I haven’t looked back since. The first time I blended it, I was amazed at how the ice created that perfect smooth texture while keeping the coffee bold and present.
My roommate tried one and immediately asked for the recipe, which told me everything I needed to know about how good this actually tastes. Now I make a pitcher of strong cold brew on weekends specifically so I can whip up one of these whenever the craving hits.
The sensory experience is pure comfort: the blender whirring, the aroma of coffee and milk mixing, and that first creamy sip that somehow manages to be both energizing and cozy at once. My friends have started asking me to make these instead of going out, which feels like the highest compliment a home cook can receive.
Recipe Overview
- Recipe Name: Blended Ice Coffee
- Servings: 1
- Prep Time: 2 minutes
- Cook Time: 0 minutes
- Total Time: 2 minutes
- Course: Beverage
- Cuisine: American
- Calories per Serving: 85
Equipment You Will Need
- Blender (standard size works perfectly)
- Measuring cups
- Measuring spoons
- Tall glass
- Spoon for stirring
- Ice cube tray or access to ice
Ingredients for Blended Ice Coffee
- Brewed coffee (cooled), 1 cup
- Whole milk (or milk of choice), 1/2 cup
- Sugar, 1 to 2 tablespoons (adjust to taste)
- Ice cubes, 1 cup
- Vanilla extract (optional), 1/2 teaspoon
- Whipped cream for topping (optional)
Ingredient Notes and Substitutions
- Brewed coffee: Strong, cooled coffee creates the bold coffee flavor that defines this drink. You can use leftover coffee from this morning, instant coffee mixed with hot water and cooled, or cold brew concentrate diluted with water.
- Whole milk: This creates the creamiest texture and richest flavor. If you prefer something lighter, use 2% milk, or swap for almond milk, oat milk, or coconut milk for a dairy-free version, though the drink will be slightly less creamy.
- Sugar: Granulated sugar dissolves easily and sweetens the drink without changing the texture. You can substitute with simple syrup for even faster dissolving, or use honey for a different flavor profile.
- Ice cubes: Regular ice cubes work fine, but crushed ice blends more smoothly into the drink. Freeze strong coffee in ice cube trays to intensify the coffee flavor and prevent dilution.
- Vanilla extract: This optional ingredient adds subtle depth and rounds out the coffee flavor. Almond extract or a pinch of cinnamon can replace it for variation.
How to Make Blended Ice Coffee
Step 1: Brew and Cool Your Coffee
Make a fresh cup of strong coffee using your preferred brewing method and let it cool to room temperature. Using cooled coffee instead of hot prevents the ice from melting too quickly and diluting your drink.
Step 2: Gather Your Blender Ingredients
Pour the cooled coffee into your blender first, then add the milk and sugar. Starting with liquid prevents the ice from flying around when you first turn on the blender.
Step 3: Add the Ice
Pour one cup of ice cubes into the blender on top of your liquid ingredients. Piling the ice last helps it distribute evenly and blend more smoothly when you start mixing.
Step 4: Include Optional Flavoring
Add vanilla extract or any other flavoring you’re using at this point. Optional ingredients blend in better when mixed with the ice than if added separately.
Step 5: Blend Until Smooth
Cover your blender and blend on high speed for 30 to 45 seconds until the mixture is smooth and creamy with no visible ice chunks. Blending longer than this can warm up the drink and create an overly thin texture.
Step 6: Check the Consistency
Stop and look at your blended coffee through the blender jar to make sure it looks creamy and smooth throughout. If you see large ice chunks remaining, blend for another 10 to 15 seconds.
Step 7: Pour Into Your Glass
Carefully pour the blended coffee from the blender into your tall glass, leaving about half an inch of space at the top. Pouring carefully prevents splashing and helps preserve that beautiful creamy texture.
Step 8: Top and Serve Immediately
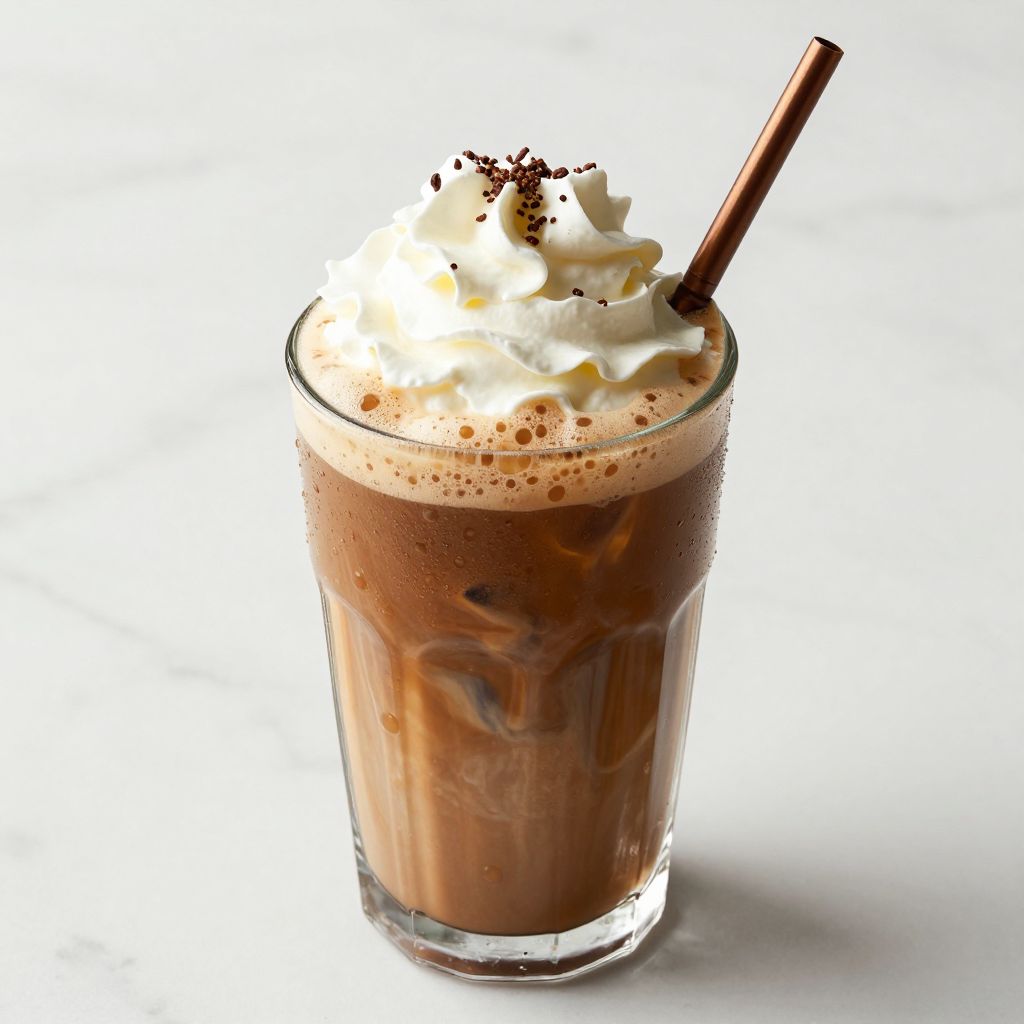
Add whipped cream on top if desired, or simply serve as is with a straw or spoon. Serving immediately keeps the drink cold and prevents the ice from continuing to melt and dilute your coffee.
Pro Tip: Freeze strong brewed coffee in ice cube trays the night before, then use those coffee ice cubes instead of regular ice cubes to prevent your drink from becoming watered down as the ice melts.
Tips for the Best Blended Ice Coffee
- Make sure your coffee is completely cooled before blending; warm coffee melts ice too quickly and creates a thinner drink than you want.
- Use strong coffee rather than regular strength, since blending and ice dilute the flavor slightly as they mix together.
- Chill your glass in the freezer for five minutes before pouring to keep your drink cold longer and enhance that icy mouthfeel.
- Blend for just 30 to 45 seconds; over-blending creates a watery consistency and can warm the drink through friction.
- Measure your ice by volume rather than guessing; too little ice creates a thin drink, while too much ice prevents proper blending.
- Add sweetener to the liquid before blending rather than after, so it dissolves completely and distributes evenly throughout the drink.
Common Mistakes to Avoid
- Using hot coffee instead of cooled coffee causes the ice to melt immediately, resulting in a weak, diluted drink that tastes more like warm coffee with a few ice chips.
- Adding too much ice creates a texture that won’t blend smoothly and often leaves you with slushy, chunky consistency instead of the creamy blend you’re after.
- Blending for too long heats up the mixture through friction and creates an overly thin, almost soup-like consistency that tastes nothing like what you intended.
- Forgetting to measure ingredients means you either end up with a drink that’s too sweet or too bitter, with no middle ground to find your preference.
- Using low-fat milk instead of whole milk creates a thinner, less satisfying texture that lacks the creamy mouthfeel that makes this drink special.
Serving Suggestions
This blended ice coffee works beautifully on its own, but pairing it with the right food elevates the whole experience. Serve it alongside breakfast, brunch, or afternoon snacks for the best flavor combinations.
- With a fresh croissant or pastry for a quick breakfast that feels indulgent
- After a light lunch as a refreshing afternoon pick-me-up
- With a slice of chocolate cake or brownie for a coffee and chocolate pairing
- Alongside fresh berries and yogurt for a lighter morning option
- On its own as an afternoon treat when you need an energy boost
Variations to Try
- Mocha Blended Ice Coffee: Add one tablespoon of cocoa powder and an extra half tablespoon of sugar to the blender for a chocolate-coffee fusion that tastes like a fancy mocha.
- Caramel Blended Ice Coffee: Replace sugar with two tablespoons of caramel sauce for a richer, more indulgent sweetness that coats your mouth beautifully.
- Iced Vanilla Latte Style: Increase milk to three-quarters cup and add one full teaspoon of vanilla extract for a drink that tastes more like a traditional latte.
- Coconut Blended Ice Coffee: Use coconut milk instead of regular milk and add one tablespoon of shredded coconut for a tropical twist that feels like a vacation in a glass.
- Spiced Blended Ice Coffee: Add a tiny pinch of cinnamon, nutmeg, and cardamom for a warming spice blend that complements the coffee beautifully.
Dietary Adaptations
- Gluten-Free: This recipe is naturally gluten-free since it contains only coffee, milk, sugar, and ice; simply verify that any flavoring extracts you use are certified gluten-free.
- Dairy-Free: Replace whole milk with oat milk, almond milk, or cashew milk in equal amounts; oat milk creates the closest texture to dairy milk.
- Vegan: Use dairy-free milk and replace any honey with agave nectar or maple syrup for a fully plant-based drink.
- Low-Carb/Keto: Replace sugar with erythritol or monk fruit sweetener at a one-to-one ratio, and use unsweetened almond milk to keep carbs minimal.
- Lower Calorie: Use skim milk instead of whole milk and reduce sugar to one tablespoon, cutting calories significantly without sacrificing too much creaminess.
Storage and Reheating
Refrigerator
Blended ice coffee is best consumed immediately after making, but you can store leftover brewed coffee in the refrigerator for up to five days in an airtight container. The prepared blended drink will separate and lose its texture if stored.
- Keep cooled coffee in a sealed jar to prevent it from absorbing odors
- Store at the back of the fridge where it stays coldest
Freezer
Freeze strong brewed coffee in ice cube trays for use in future blended ice coffees, which prevents dilution and maintains bold coffee flavor. Frozen coffee cubes last up to three months in the freezer.
- Pop frozen coffee cubes into a freezer bag once solid for easy storage
- Label your bag with the freeze date so you know how long they’ve been stored
Reheating
This recipe is meant to be served cold, so reheating is not applicable. If you have leftover brewed coffee, you can reheat it gently in a saucepan or microwave for hot coffee, though quality may diminish slightly.
- Use a microwave for 30 to 60 seconds to warm leftover cooled coffee
- Avoid boiling, which creates a bitter, unpleasant taste
Nutrition Information
| Nutrient | Amount |
|---|---|
| Calories | 85 |
| Total Fat | 4g |
| Saturated Fat | 2.5g |
| Carbohydrates | 12g |
| Fiber | 0g |
| Sugar | 12g |
| Protein | 2g |
| Sodium | 35mg |
| Cholesterol | 15mg |
These values are based on using whole milk and two tablespoons of sugar; adjusting sweetener or milk type will change the nutritional profile.
Frequently Asked Questions
Can I make this recipe without a blender?
A blender is really the best tool for this drink, but you could try vigorously shaking everything in a sealed jar with ice, though the texture won’t be as smooth or creamy. A food processor might work as a backup option if you’re in a pinch.
How far ahead can I prepare the ingredients?
You can brew and cool your coffee up to five days in advance and store it in the refrigerator. Assemble and blend everything together just before serving for the best texture and temperature.
What’s the difference between this and iced coffee?
Blended ice coffee is whipped with ice until creamy and smooth, while iced coffee is simply coffee poured over ice cubes. The blending creates a dessert-like consistency and silky texture that regular iced coffee doesn’t have.
Why is my blended coffee separating?
This happens when the drink sits too long after blending and the ice melts, or when you haven’t blended long enough for proper mixing. Always serve immediately and make sure you blend for at least 30 seconds.
Can I use instant coffee instead of brewed coffee?
Yes, absolutely; mix one to two tablespoons of instant coffee with a tablespoon of hot water until dissolved, then cool it completely before blending. This method actually works great when you’re in a hurry and don’t have brewed coffee on hand.
What type of milk creates the creamiest texture?
Whole milk creates the richest, creamiest result, but oat milk is an excellent dairy-free alternative that mimics that creamy texture very closely. Almond milk and coconut milk work too, though they’re slightly thinner.
Final Thoughts
This blended ice coffee recipe proves that cafe-quality drinks don’t require expensive equipment, special training, or a trip outside your home. Once you make it once, you’ll wonder why you ever paid so much for coffee at a coffee shop.
The beauty of this recipe lies in its simplicity and how easily you can make it your own through different milk choices, sweeteners, and flavor additions. Try making a batch this week and see why so many people have traded their coffee shop habit for homemade versions.
Blended Ice Coffee
Ingredients
Equipment
Method
- Make a fresh cup of strong coffee using your preferred brewing method and let it cool to room temperature.
- Pour the cooled coffee into your blender first, then add the milk and sugar.
- Pour 1 cup of ice cubes into the blender on top of your liquid ingredients.
- Add vanilla extract or any other flavoring you're using at this point.
- Cover your blender and blend on high speed for 30 to 45 seconds until the mixture is smooth and creamy with no visible ice chunks.
- Stop and look at your blended coffee through the blender jar to make sure it looks creamy and smooth throughout. If you see large ice chunks remaining, blend for another 10 to 15 seconds.
- Carefully pour the blended coffee from the blender into your tall glass, leaving about half an inch of space at the top.
- Add whipped cream on top if desired, or simply serve as is with a straw or spoon. Serve immediately.