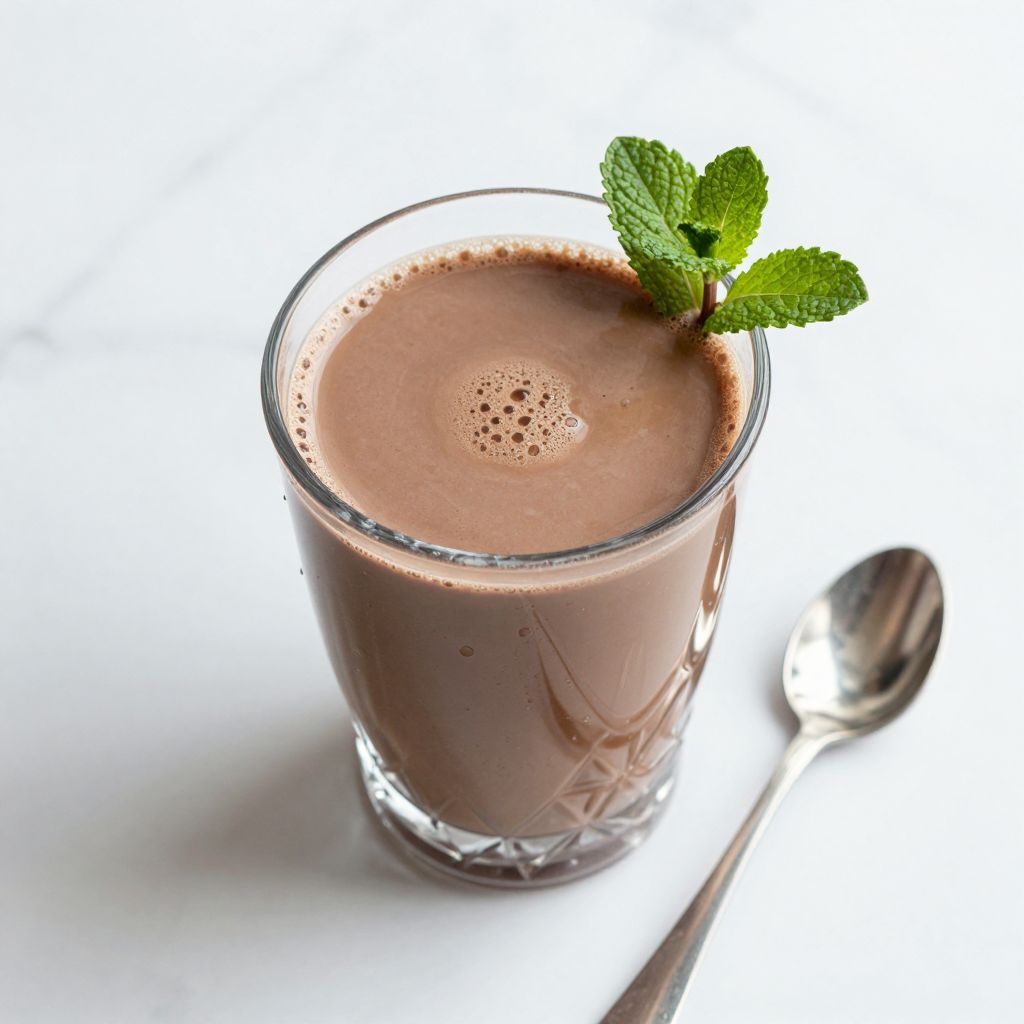
There’s something almost magical about recreating that chocolatey, creamy Yoo-hoo taste at home, isn’t there? This homemade Yoo-hoo recipe captures that nostalgic chocolate milk magic without the preservatives and artificial ingredients lurking in the store-bought version.
What makes this recipe special is how incredibly simple it is to whip up, yet it tastes just like the real thing, with that smooth, rich chocolate flavor and silky texture. You’ll have a batch ready in under five minutes, perfect for lunchboxes, afternoon snacks, or satisfying a childhood craving on the spot.
Why You’ll Love This Recipe
This homemade version gives you full control over sweetness and chocolate intensity while keeping prep time embarrassingly short. You probably have most ingredients in your kitchen right now.
- Ready in under 5 minutes with zero cooking required
- Uses simple, recognizable ingredients you can actually pronounce
- Tastes remarkably close to the original but fresher and smoother
- Infinitely customizable for chocolate lovers and those who prefer less sweetness
- A fraction of the cost compared to buying individual bottles
My Experience Making This Recipe
I first made this on a lazy Saturday morning when my kids begged for Yoo-hoos and I realized I’d forgotten to grab them at the store. I threw together what I had on hand, not expecting much, and was genuinely shocked at how close it tasted to the real thing.
The kids actually preferred it to the bottled version, which honestly surprised me more than finding extra cash in a jacket pocket. What really sold me was watching them enjoy something that tasted indulgent but was actually made from real cocoa and milk.
Now we make big batches and keep them in glass bottles in the fridge for grab-and-go breakfasts and snacks. It’s become a staple in our house, and honestly, I find myself enjoying a glass alongside them.
Recipe Overview
- Recipe Name: Homemade Yoo-hoo Chocolate Milk
- Servings: 4 (1 cup each)
- Prep Time: 5 minutes
- Cook Time: 0 minutes
- Total Time: 5 minutes
- Course: Beverage
- Cuisine: American
- Calories per Serving: 180
Equipment You Will Need
- Blender or whisk
- Measuring cups and spoons
- A large mixing bowl or pitcher
- A spoon for stirring
- Storage bottles or glasses
- Strainer (optional, for extra smoothness)
Ingredients for Yoo-hoo Recipe
- 3 1/2 cups whole milk
- 3 tablespoons unsweetened cocoa powder
- 2 tablespoons granulated sugar
- 2 tablespoons corn syrup (or honey for a different sweetness)
- 1/2 teaspoon vanilla extract
- Pinch of salt
- 1/4 teaspoon instant chocolate pudding mix (optional, for extra creaminess)
Ingredient Notes and Substitutions
- Unsweetened cocoa powder gives authentic chocolate flavor without added sugar. You can swap in Dutch-process cocoa for a richer, deeper taste, though the color will be darker.
- Whole milk creates that creamy, full-bodied texture Yoo-hoo is known for. Two-percent milk works fine if you prefer lighter, and oat milk creates a surprisingly similar mouthfeel for dairy-free versions.
- Corn syrup adds glossy smoothness and prevents crystallization. Honey or agave nectar work as substitutes, though they’ll slightly change the flavor profile.
- Vanilla extract brightens chocolate flavor and adds subtle depth. Almond extract creates an interesting twist if you’re experimenting.
- Instant chocolate pudding mix intensifies chocolate flavor and adds creaminess without graininess. This is optional but highly recommended for the closest match to store-bought Yoo-hoo.
How to Make Yoo-hoo Recipe
Step 1: Gather and Measure Your Ingredients
Measure out all your ingredients before you start blending. Having everything ready prevents lumps from forming and ensures smooth, even mixing when you combine everything together.
Step 2: Pour Milk Into Your Blender
Add the milk to your blender first, which gives you a good liquid base for the other ingredients. This helps the dry ingredients blend smoothly without clumping.
Step 3: Add Cocoa Powder and Sugar
Sprinkle the unsweetened cocoa powder and granulated sugar directly into the milk. These dry ingredients need liquid to blend properly, so adding them on top of the milk ensures they’ll incorporate without forming stubborn lumps.
Step 4: Add Corn Syrup and Vanilla Extract
Pour in the corn syrup and vanilla extract, which help create that signature smooth, creamy texture. The syrup acts as both sweetener and texture enhancer, which is why it’s worth including even if you’re not usually a corn syrup fan.
Step 5: Add the Optional Pudding Mix
If you’re using instant chocolate pudding mix, add it now along with the pinch of salt. The pudding mix makes a noticeable difference in achieving that thick, creamy Yoo-hoo consistency and deeper chocolate flavor.
Step 6: Blend on High Speed
Blend on high speed for about 45 seconds to one minute, until everything is fully combined and smooth. You’ll notice the mixture become darker and creamier as the cocoa powder fully dissolves.
Step 7: Taste and Adjust Sweetness
Take a quick taste to see if you want it sweeter or more chocolatey. Add extra sugar or cocoa powder one teaspoon at a time and blend briefly if you want to tweak it.
Step 8: Strain for Extra Smoothness (Optional)
Pour the mixture through a fine-mesh strainer into a pitcher if you want absolutely silky texture with zero graininess. This step isn’t necessary but catches any cocoa particles that didn’t fully blend.
Step 9: Chill and Serve
Pour into glasses and serve immediately, or refrigerate in bottles for up to five days. Cold is the way to go with this drink, as it’s most satisfying when properly chilled.
Pro Tip: If you find your homemade Yoo-hoo separates after sitting overnight, just shake it vigorously before serving or give it a quick blend to recombine everything.
Tips for the Best Yoo-hoo Recipe
- Use whole milk for that signature creamy mouthfeel that makes homemade Yoo-hoo taste so indulgent. Skim milk will taste thinner and less satisfying, even if you add more sweetener.
- A high-powered blender creates the smoothest texture, but a regular blender works fine, and you can even whisk by hand if you’re patient with getting the cocoa powder fully dissolved.
- Chill your glasses in the freezer for 10 minutes before serving for a more authentic ice-cold experience that mimics the bottled version. The colder the drink, the more it tastes like the real deal.
- Make a big batch at the beginning of the week and store in glass bottles in the fridge for easy grab-and-go breakfasts. It stays fresh and tasty for up to five days.
- Don’t skip the instant pudding mix if you want to match the store-bought texture exactly, as it adds creaminess and prevents any grittiness from cocoa powder settling.
- If the drink seems too thick after chilling, add a splash more milk and blend briefly to thin it back out. Consistency changes slightly when cold, so this is normal.
Common Mistakes to Avoid
- Using low-fat or skim milk will make your homemade Yoo-hoo taste watery and thin compared to the original’s full, creamy body. Whole milk is worth the extra calories here.
- Forgetting to blend thoroughly leaves cocoa powder particles floating around, creating a gritty texture instead of smooth chocolate milk. Blend for at least 45 seconds at high speed.
- Adding cocoa powder directly to cold milk without blending first will clump it into stubborn little balls that refuse to dissolve. Always blend the wet and dry ingredients together properly.
- Skipping the corn syrup and trying to replace it with just sugar changes the texture noticeably, making the drink less creamy and glossy. Corn syrup serves a texture purpose beyond just sweetness.
- Storing in clear plastic bottles in bright sunlight causes the chocolate flavor to fade and the drink to taste flat after a few days. Opaque bottles or glass bottles in the fridge keep it fresher longer.
Serving Suggestions
This homemade Yoo-hoo is fantastic on its own, but it pairs beautifully with so many breakfast and snack options. Serve it ice-cold in tall glasses for maximum nostalgia and enjoyment.
- Chocolate chip pancakes or waffles for a decadent chocolate-on-chocolate breakfast
- Peanut butter sandwiches for the classic lunchbox combination
- Warm cookies or brownies for dunking (yes, really, it works)
- Breakfast pastries like croissants or Danish for an elevated snack pairing
- On its own as an afternoon pick-me-up or post-dinner treat
Variations to Try
- Double Chocolate: Add one tablespoon of chocolate syrup along with the cocoa powder for an even richer, more indulgent flavor that tastes like liquid chocolate candy.
- Mocha Version: Stir in 1/2 teaspoon of instant coffee powder to add subtle depth and sophistication without making it taste like coffee.
- Strawberry Yoo-hoo: Blend in 1/2 cup of fresh or frozen strawberries for a strawberry chocolate twist that’s surprisingly delicious and Instagram-worthy.
- Malted Chocolate Milk: Add 1 tablespoon of malted milk powder for a vintage, slightly sweet flavor reminiscent of classic malt shakes.
- Spiced Chocolate: Add a tiny pinch of cayenne pepper or cinnamon for unexpected warmth that makes the chocolate taste more complex and grown-up.
Dietary Adaptations
- Gluten-free: This recipe is naturally gluten-free as written, but check your instant pudding mix label if using one, as some brands contain gluten.
- Dairy-free: Swap whole milk for unsweetened oat milk or cashew milk, which create remarkably similar creamy texture without any dairy products.
- Vegan: Use plant-based milk and ensure your instant pudding mix (if using) is vegan certified, as most are but some contain animal-derived ingredients.
- Low-sugar: Replace corn syrup with erythritol or monk fruit sweetener and reduce sugar to one tablespoon, though the texture will be slightly less creamy without the corn syrup’s contribution.
Storage and Reheating
Refrigerator
Store your homemade Yoo-hoo in an airtight glass bottle or container in the coldest part of your fridge. It stays fresh and delicious for up to five days, though the flavor tastes best within the first three days.
- Keep bottles in the back of the fridge where it’s coldest
- Shake vigorously before drinking if separation occurs
- Use within five days for the best taste
Freezer
You can freeze homemade Yoo-hoo for up to two months, though the texture may separate slightly when thawed. Pour into freezer-safe bottles, leaving about an inch of headspace for expansion.
- Leave one inch of space at the top of bottles for expansion
- Thaw in the refrigerator overnight before serving
- Shake well after thawing to recombine any separated ingredients
Reheating
This is a cold drink, so traditional reheating isn’t recommended. If you want warm chocolate milk, gently heat it in a saucepan over low heat, stirring occasionally, until warm to the touch.
- Heat slowly over low heat to avoid scorching the milk
- Stir frequently to keep ingredients combined
- Serve immediately while still warm
Nutrition Information
| Nutrient | Amount |
|---|---|
| Calories | 180 |
| Total Fat | 7g |
| Saturated Fat | 4.5g |
| Carbohydrates | 28g |
| Fiber | 1g |
| Sugar | 24g |
| Protein | 8g |
| Sodium | 105mg |
| Cholesterol | 24mg |
These values are approximate and can vary based on specific brands and exact measurements used. If you make substitutions like plant-based milk, the nutritional content will change accordingly.
Frequently Asked Questions
Can I make this without a blender?
Absolutely, though it takes a bit more elbow grease. Whisk the cocoa powder, sugar, and pudding mix with a small amount of warm milk first to create a smooth paste, then whisk in the remaining cold milk and other ingredients until smooth.
Why does my homemade Yoo-hoo taste different than store-bought?
Store-bought Yoo-hoo contains additional stabilizers, emulsifiers, and preservatives that create a specific texture and shelf-stable flavor. Your homemade version tastes fresher and cleaner, which some people actually prefer once they adjust to the real cocoa taste.
How long can I store this in bottles?
Keep it refrigerated in glass bottles for up to five days maximum. After five days, the flavor starts to fade and separation becomes more noticeable, so it’s better to make smaller batches more frequently.
What if my drink is too grainy or gritty?
This usually means the cocoa powder didn’t fully dissolve during blending. Strain the mixture through a fine-mesh strainer into a new pitcher, or blend it again for another 30 seconds at high speed to break down any remaining particles.
Can I heat this and serve it as hot chocolate?
Yes, gently warm it over low heat in a saucepan while stirring occasionally. It works great as hot chocolate, though the flavor profile is slightly different than traditional hot cocoa mixes because you’re working with already-combined ingredients.
Does this recipe work with chocolate milk powder?
It does, though it changes the flavor profile a bit since chocolate milk powder often includes sugar and other additives. If you go this route, reduce or eliminate the sugar and corn syrup to avoid making it too sweet.
Final Thoughts
Making your own Yoo-hoo at home is one of those simple kitchen wins that feels like cheating because it’s so easy and tastes so good. You’ll save money, know exactly what’s in it, and honestly have a product that tastes fresher than anything you’d buy in a bottle.
Your family is going to love having this on hand for quick breakfasts and afternoon snacks, and you’ll feel good about serving something homemade instead of shelf-stable packaged drinks. Give it a try this week and watch how fast those glasses empty.
Homemade Yoo-hoo Chocolate Milk
Ingredients
Equipment
Method
- Measure out all your ingredients before you start blending to prevent lumps from forming and ensure smooth, even mixing.
- Add the milk to your blender first, which gives you a good liquid base for the other ingredients.
- Sprinkle the unsweetened cocoa powder and granulated sugar directly into the milk.
- Pour in the corn syrup and vanilla extract to help create that signature smooth, creamy texture.
- If using instant chocolate pudding mix, add it now along with the pinch of salt.
- Blend on high speed for about 45 seconds to one minute, until everything is fully combined and smooth.
- Take a quick taste to see if you want it sweeter or more chocolatey. Add extra sugar or cocoa powder one teaspoon at a time and blend briefly if needed.
- Optional: Pour the mixture through a fine-mesh strainer into a pitcher for absolutely silky texture with zero graininess.
- Pour into glasses and serve immediately, or refrigerate in bottles for up to five days. Serve cold for best taste.