
There’s something almost magical about watching pears transform into liquid gold in a glass carboy, sunlight streaming through the airlock as wild yeasts do their patient work. Pear wine is one of those underrated homemade beverages that tastes far more complex than its ingredient list suggests, delivering floral notes and subtle sweetness that can rival commercial fruit wines.
This recipe works beautifully for both beginners and experienced winemakers because pears have natural sugars and acidity that balance themselves almost effortlessly. You’ll end up with a smooth, drinkable wine in about three to four months that you can proudly serve to friends or simply enjoy on a quiet evening.
Why You’ll Love This Recipe
Pear wine offers a unique flavor profile that sits between white wine and dessert wine, making it wildly versatile for any occasion. The entire process teaches you solid winemaking fundamentals without requiring expensive equipment or intimidating ingredients.
- Creates a naturally balanced wine with subtle floral and fruity character
- Uses only four core ingredients, making it budget-friendly and straightforward
- Produces drinkable results in under four months from start to finish
- Scales easily, whether you’re making one gallon or five
- Teaches you transferable skills for making other fruit wines
My Experience Making This Recipe
I made my first batch of pear wine on a whim during autumn when local pears were at their peak, and I honestly didn’t expect much beyond a pleasant experiment. What surprised me was how quickly the wine developed complexity, moving from harsh and raw in month one to genuinely smooth and drinkable by month three.
The aroma during fermentation was something I didn’t anticipate either: those first few weeks smell almost like bread baking mixed with orchard air, then gradually shift to something more wine-like and elegant. My friends were skeptical until they tasted it, and now I make bigger batches every year.
The hands-on time is minimal, which appeals to my lazy side, but the waiting and watching builds genuine anticipation. You’re not constantly stirring or adjusting; you’re mostly just being patient and letting nature handle the heavy lifting.
Recipe Overview
- Recipe Name: Homemade Pear Wine
- Servings: Approximately 30 glasses (one gallon batch)
- Prep Time: 30 minutes
- Fermentation Time: 10 to 14 days (primary), 6 to 8 weeks (secondary)
- Total Time: 12 to 16 weeks from start to drinking
- Course: Beverage
- Cuisine: American/European homemade
- Alcohol Content: Approximately 10 to 12% ABV
Equipment You Will Need
- One-gallon glass carboy or demijohn
- Airlock and rubber stopper (solid rubber with airlock hole)
- Sanitizing solution (no-rinse type like Star San)
- Large stainless steel pot (at least 2 gallons capacity)
- Long-handled wooden or plastic spoon
- Hydrometer (optional but helpful for tracking fermentation)
- Siphon tubing and racking cane for transferring wine
- Funnel (plastic to avoid chipping glass carboys)
- Clean cheesecloth or straining bag
- Glass bottles for storage (wine bottles work perfectly)
- Bottle caps or corks and corking equipment
Ingredients for Pear Wine
- Fresh pears: 3 to 4 pounds (about 10 to 12 medium pears), washed and chopped roughly
- Granulated sugar: 2.5 pounds
- Wine yeast: 1 packet (Champagne yeast or Lalvin EC-1118 preferred)
- Water: 1 gallon of filtered or boiled water (cooled before use)
- Yeast nutrient: 1 teaspoon (optional but recommended)
- Acid blend (citric acid, malic acid, tartaric acid): 1/2 teaspoon (optional, to balance acidity)
Ingredient Notes and Substitutions
- Fresh pears: You need them for natural pectin, sugars, and flavor; never use canned pears as they lack the structure and wild microbes that start fermentation. If fresh pears aren’t available, use frozen pears (thawed) or increase to 4.5 pounds of pears to boost flavor intensity.
- Granulated sugar: This feeds the yeast and raises alcohol content evenly. You can substitute honey (use slightly less, around 2 pounds) for a subtly different character, though the wine may ferment slower.
- Wine yeast: Champagne yeast is forgiving and produces dry or off-dry results; you need it instead of baker’s yeast to create proper wine fermentation. If you can’t find Champagne yeast, use any wine yeast from a homebrew shop, though results may vary slightly in flavor and speed.
- Water: Boiling and cooling removes chlorine and kills wild microbes, giving your chosen yeast a cleaner start. Tap water works if you can’t boil it, though filtered water is safest.
- Yeast nutrient: It helps yeast multiply and ferment faster, avoiding stuck fermentations and off flavors. Skip it if you can’t find it, but fermentation may take longer and taste harsher.
How to Make Pear Wine
Step 1: Sanitize All Equipment
Before anything touches your pears, sanitize every piece of equipment that will contact your wine, including the carboy, airlocks, rubber stopper, spoon, and funnel. Mix your no-rinse sanitizing solution (like Star San) with water according to package directions, soak all items for at least one minute, and allow them to air dry on clean paper towels.
Step 2: Prepare the Pears
Wash your pears thoroughly under running water to remove dirt and any surface bacteria you don’t want. Chop them roughly into chunks (no need to peel or remove seeds) and place them in your sanitized pot.
Step 3: Heat and Cool the Water
Bring your water to a boil, then remove it from heat and let it cool to room temperature (around 70 to 75 degrees Fahrenheit). Boiling removes chlorine and kills unwanted microbes, giving your wine yeast the cleanest environment to work.
Step 4: Create Your Must (Fermenting Mixture)
Pour the cooled water into your pot with the chopped pears, add your 2.5 pounds of sugar, and stir well for a minute or two until the sugar dissolves mostly. Add the yeast nutrient and acid blend at this point if you’re using them, stirring gently to combine everything evenly.
Step 5: Add the Yeast
Sprinkle your packet of wine yeast directly over the surface of your pear must and let it sit for one minute to hydrate. Stir it in gently using your sanitized spoon, making sure the yeast is fully incorporated throughout the liquid.
Step 6: Transfer to the Carboy for Primary Fermentation
Pour your must carefully into the sanitized carboy using your funnel to prevent spills and the loss of precious liquid. You’ll notice the chopped pear pieces floating at the top, which is completely normal and actually helps protect the fermenting wine from unwanted oxidation.
Step 7: Install the Airlock and Monitor Fermentation
Insert your rubber stopper fitted with an airlock into the top of the carboy, filling the airlock with water to the fill line. Place the carboy in a cool, dark spot (around 65 to 70 degrees Fahrenheit) where it won’t be disturbed, and watch for active fermentation to begin within 24 to 48 hours as bubbles push through the airlock.
Primary fermentation typically runs for 10 to 14 days, and you’ll notice the airlock bubbling vigorously at first, then slowing down. This is your yeast consuming the sugar and converting it to alcohol, and it’s beautiful to witness.
Step 8: Rack the Wine Off the Fruit Solids
Once primary fermentation slows dramatically (airlocks bubble only every 30 seconds or so), it’s time to separate the wine from the pear solids. Using a siphon and racking cane, carefully draw the clear liquid from the top of the carboy into a clean, sanitized secondary carboy, leaving behind the fruit pulp and sediment at the bottom.
This racking step removes the pear solids and prevents the wine from developing harsh, vegetal flavors as it sits on dead yeast cells. You’ll lose a small amount of wine, but what remains will be clearer and cleaner-tasting.
Step 9: Begin Secondary Fermentation
Install a fresh airlock on your secondary carboy and place it back in your cool, dark location for six to eight weeks of slow, steady fermentation. The airlocks will bubble much more slowly now (perhaps once every minute or two), and this gentle phase is where the wine gains complexity and smoothness.
Step 10: Bottle Your Finished Wine
After six to eight weeks of secondary fermentation, when the airlock barely bubbles at all, your wine is ready to bottle. Siphon it carefully into sanitized wine bottles, leaving about an inch of headspace at the top, then cap or cork each bottle securely.
Store your bottles upright in a cool, dark place for at least two more weeks before opening, though they’ll improve even more if you wait a month or two. The flavors continue to marry and develop even in the bottle, so patience pays off.
Pro Tip: Keep your fermentation temperature steady between 65 and 72 degrees Fahrenheit, as temperature swings can stress your yeast and create off-flavors; a basement or cool closet works far better than a kitchen counter near an oven.
Tips for the Best Pear Wine
- Choose pears that are ripe but still firm, as overripe pears create mushy, less structured wine; underripe pears produce harsh, thin results. Medium ripeness gives you the best balance of sugar, acidity, and flavor.
- Don’t skip sanitization just to save time; even a tiny bit of unwanted bacteria can ruin an entire gallon of wine by introducing off flavors or turning it vinegary. The five minutes you invest pays dividends in quality.
- Use a hydrometer to track your fermentation progress if you’re curious about alcohol content and how much sugar remains; it takes the guesswork out of knowing when fermentation is truly complete.
- Avoid stirring the wine during secondary fermentation, as introducing oxygen at this stage can lead to oxidation and browning. The wine needs to settle undisturbed to develop its clearest appearance and brightest flavors.
- Taste your wine after bottling in small amounts before serving larger quantities; homemade wines vary slightly depending on pear variety and fermentation conditions, so you’ll want to know what you’re serving.
- Keep one bottle aside unseal-opened for at least six months to a year; pear wine develops surprising depth over time, and you might be amazed by how much it improves when revisited later.
Common Mistakes to Avoid
- Using baker’s yeast instead of wine yeast creates harsh, bready flavors and ferments unpredictably; wine yeast is specifically engineered for alcohol production and clean fermentation.
- Adding too much sugar (more than 3 pounds) produces overly sweet wine that ferments sluggishly or incompletely, leaving you with a cloying result. Stick to 2.5 pounds for balanced, drinkable pear wine.
- Fermenting in direct sunlight or warm kitchens above 75 degrees accelerates fermentation too quickly, creating hot, unpleasant flavors. Steady coolness is your friend here.
- Bottling too early (before fermentation truly finishes) causes bottles to explode or pop their corks as residual fermentation builds pressure; wait until the airlock barely bubbles before bottling.
- Exposing the wine to air during racking or bottling introduces oxygen that browns the wine and creates stale, flat flavors; work efficiently and minimize splashing whenever possible.
Serving Suggestions
Pear wine drinks beautifully as an aperitif on its own, lightly chilled to around 50 to 55 degrees Fahrenheit, letting its floral notes shine without being masked by cold. You can also serve it alongside light cheeses, desserts, or even as an ingredient in cocktails if you’re feeling creative.
- Pair with soft cheeses like brie or chvre and crackers for an elegant afternoon gathering
- Serve alongside light fruit desserts, panna cotta, or vanilla panna cotta for complementary sweetness
- Chill and mix into a simple cocktail with sparkling water and fresh mint for a refreshing spritz
- Enjoy as an after-dinner sipper in small wine glasses to appreciate its subtle aromatics
- Use as a base for mulled fruit wine by gently warming it with cinnamon and cloves on chilly evenings
Variations to Try
- Spiced Pear Wine: Add a cinnamon stick, two or three cloves, and a small piece of fresh ginger to your must during primary fermentation, then strain them out before racking; this creates warm, complex flavors that feel almost like a spiced dessert wine.
- Pear and Honey Wine: Replace 1 pound of the sugar with 1 pound of honey for a richer, more floral character with a subtle waxy texture. Honey ferments slightly slower than sugar, so expect primary fermentation to take 14 to 18 days.
- Dry Pear Wine: If you prefer bone-dry results, use less sugar (around 2 pounds instead of 2.5) and ensure fermentation runs to completion until the airlock shows almost no activity for two full weeks. The yeast will consume nearly all available sugar.
- Pear and Apple Blend: Mix two pounds of pears with one pound of chopped apples for added complexity and tannin structure; apples contribute subtle astringency that makes the wine feel more wine-like and less simple.
- Pear and White Grape Juice Wine: Replace one pound of water with one pound of white grape juice concentrate to add body and depth; this creates a wine that feels fuller and more sophisticated on the palate.
Dietary Adaptations
- Gluten-Free: This recipe is naturally gluten-free as written; pears, sugar, water, and wine yeast contain no gluten, making it safe for anyone avoiding gluten.
- Dairy-Free: Pear wine contains no dairy ingredients, so it’s completely safe for anyone following a dairy-free diet without any modifications needed.
- Vegan: Wine yeast and all ingredients are vegan-friendly, though some winemakers use animal-derived clarifying agents; this basic recipe avoids them entirely, making the wine fully vegan.
- Low-Carb or Keto: Pear wine contains residual sugar even after fermentation, making it unsuitable for strict keto diets; however, a completely dry pear wine (using minimal sugar) would contain fewer carbs than sweet wine.
Storage and Reheating
Refrigerator
Opened bottles of pear wine stay fresh in the refrigerator for about one to two weeks if sealed tightly with a cork or wine bottle stopper. The cold slows oxidation, preserving the wine’s fresh qualities longer than leaving it on a shelf.
- Always re-cork the bottle immediately after pouring
- Store upright to minimize the wine’s contact with air
- Keep away from direct light, even in the fridge
Freezer
You can freeze pear wine for several months in wine bottles (leaving headspace so the liquid doesn’t crack the bottle), though freezing slightly alters the flavor profile. It works well for cooking or making wine-based slushes, though it’s less ideal for sipping straight.
- Leave at least one inch of headspace to accommodate expansion
- Thaw in the refrigerator before opening to prevent shattering
- Use frozen wine within six months for best flavor
Reheating
Don’t heat pear wine aggressively or you’ll boil off the delicate aromatics; instead, warm it gently over low heat if you’re making mulled wine. Add spices and fruit just before serving to maintain flavor integrity.
- Heat slowly in a pot on the stovetop over low heat, never allowing it to boil
- Add warming spices like cinnamon and cloves once the wine reaches about 140 degrees Fahrenheit
- Serve immediately in mugs or heat-safe glasses
Nutrition Information
| Nutrient | Amount |
|---|---|
| Calories | 105 |
| Total Fat | 0g |
| Saturated Fat | 0g |
| Carbohydrates | 3g |
| Fiber | 0g |
| Sugar | 2g |
| Protein | 0g |
| Sodium | 5mg |
| Cholesterol | 0mg |
Nutritional values represent one five-ounce glass of finished pear wine and are approximate, varying slightly based on fermentation completion and residual sugar content. Wine’s primary value comes from its sensory pleasure and social role rather than its nutritional profile.
Frequently Asked Questions
Can I use pear juice instead of fresh pears?
Pear juice lacks the complexity and wild microbes that fresh pears provide, and it ferments less reliably with commercial yeast. Stick with fresh pears for the most authentic, complex wine.
What if my wine stops fermenting halfway through?
A stuck fermentation usually means your yeast ran out of nutrients or the temperature dropped too low; gently warm your carboy to 70 degrees and add more yeast nutrient, then wait several days. If nothing happens, consider it a learning experience and plan better for your next batch.
Can I make this recipe in five-gallon batches?
Absolutely, simply multiply all ingredients by five and use a five-gallon carboy with appropriately sized airlocks and racking equipment. Fermentation times remain roughly the same since you’re scaling proportionally.
Why is my wine cloudy after bottling?
Cloudiness usually comes from residual yeast particles that settle over time; simply letting bottles stand upright for a few weeks allows the sediment to sink to the bottom. If you’re bottle-aging, cloudiness typically clears completely within two to three months.
Can I use wild fermentation instead of adding wine yeast?
You can attempt wild fermentation using natural yeasts on the pear skins, but results are unpredictable and you risk spoilage; commercial wine yeast gives you consistency and reliability that wild fermentation cannot guarantee.
How do I know when fermentation is truly complete?
An airlock that goes 24 to 48 hours with no bubbling and a hydrometer reading that remains constant over several days both indicate completion; if you lack a hydrometer, simply wait until bubbling nearly stops for at least two weeks before racking.
Final Thoughts
Making pear wine at home transforms a humble fruit into something genuinely special, and the process itself becomes part of the reward. You’ll find yourself checking on your carboy with the same curiosity you’d show a beloved project, watching transformation happen in real time.
Don’t let the fermentation process intimidate you; this recipe guides you through it step by step, and even if your first batch isn’t perfect, you’ll learn invaluable lessons that make your second batch noticeably better. Give it a try, stay patient, and soon you’ll be pouring glasses of your own homemade pear wine with genuine pride.
Explore More Pear Beverages
Now that you’ve mastered pear wine, you might enjoy exploring other pear-based drinks that showcase this wonderful fruit in different ways. Check out our collection of pear cocktails and mixology recipes for fresh inspiration.
If you love the smooth, sophisticated character of pear wine, try making a peartini recipe for an elegant cocktail that highlights pear’s natural charm. You can also experiment with an easy pear martini recipe that takes just minutes to prepare once you have quality pear liqueur or your own pear wine on hand.
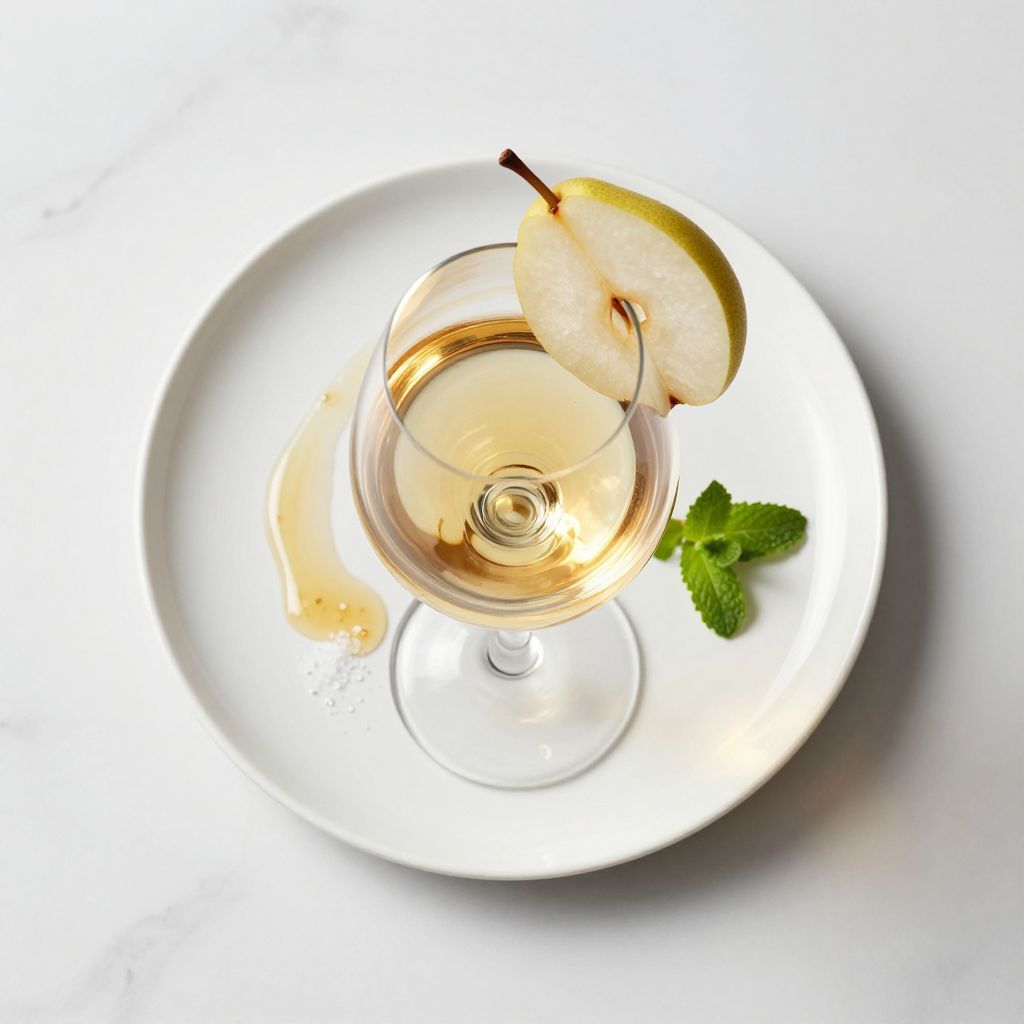
Homemade Pear Wine
Ingredients
Equipment
Method
- Sanitize all equipment by soaking in no-rinse sanitizing solution for at least 1 minute, then air dry.
- Wash and chop pears into rough chunks, about 10 minutes of prep.
- Bring 1 gallon of water to a boil, then remove from heat and cool to 70 to 75°F, about 30 minutes.
- Combine cooled water, chopped pears, and sugar in the pot, stirring until the sugar is mostly dissolved.
- Stir in yeast nutrient and acid blend if using, then sprinkle wine yeast on top and let hydrate for 1 minute before gently stirring in.
- Transfer the mixture to the sanitized carboy using a funnel, install the airlock, and ferment at 65 to 70°F for 10 to 14 days.
- When primary fermentation slows, siphon the wine off the pear solids into a clean secondary carboy, install the airlock, and ferment at 65 to 70°F for 6 to 8 weeks.
- After secondary fermentation is complete and bubbling has nearly stopped, siphon the clear wine into sanitized bottles, leaving 1 inch of headspace, then cork or cap.
- Store bottles in a cool, dark place and age for at least 2 weeks before serving.