
There’s something almost magical about biting into a pillowy soft mochi and discovering that delicate green tea flavor melting on your tongue. Green tea mochi bridges the gap between a traditional Japanese sweet and a modern dessert that feels both comforting and sophisticated.
This recipe is special because it requires minimal ingredients yet delivers restaurant-quality results in under an hour. The combination of earthy matcha powder, chewy mochi texture, and subtle sweetness makes these little gems impossible to resist.
What sets homemade green tea mochi apart is the control you have over flavor intensity and texture. You can enjoy them fresh and fluffy or chill them for a firmer bite, making them endlessly adaptable to your preference.
Why You’ll Love This Recipe
Green tea mochi offers a beautiful balance of simplicity and elegance that works for any occasion. Whether you’re craving a light afternoon snack or an impressive dessert to share, this recipe delivers.
- Quick to make with only 30 minutes of hands-on time
- Naturally vegetarian and gluten-free when made with quality ingredients
- Impressive enough to serve guests but easy enough for beginners
- Stores well and tastes even better the next day
- Customizable sweetness and matcha intensity to suit your taste
My Experience Making This Recipe
I first made green tea mochi after a disappointing batch from a local bakery left me wondering if I could do better at home. The answer was a resounding yes, and I was shocked at how straightforward the process turned out to be.
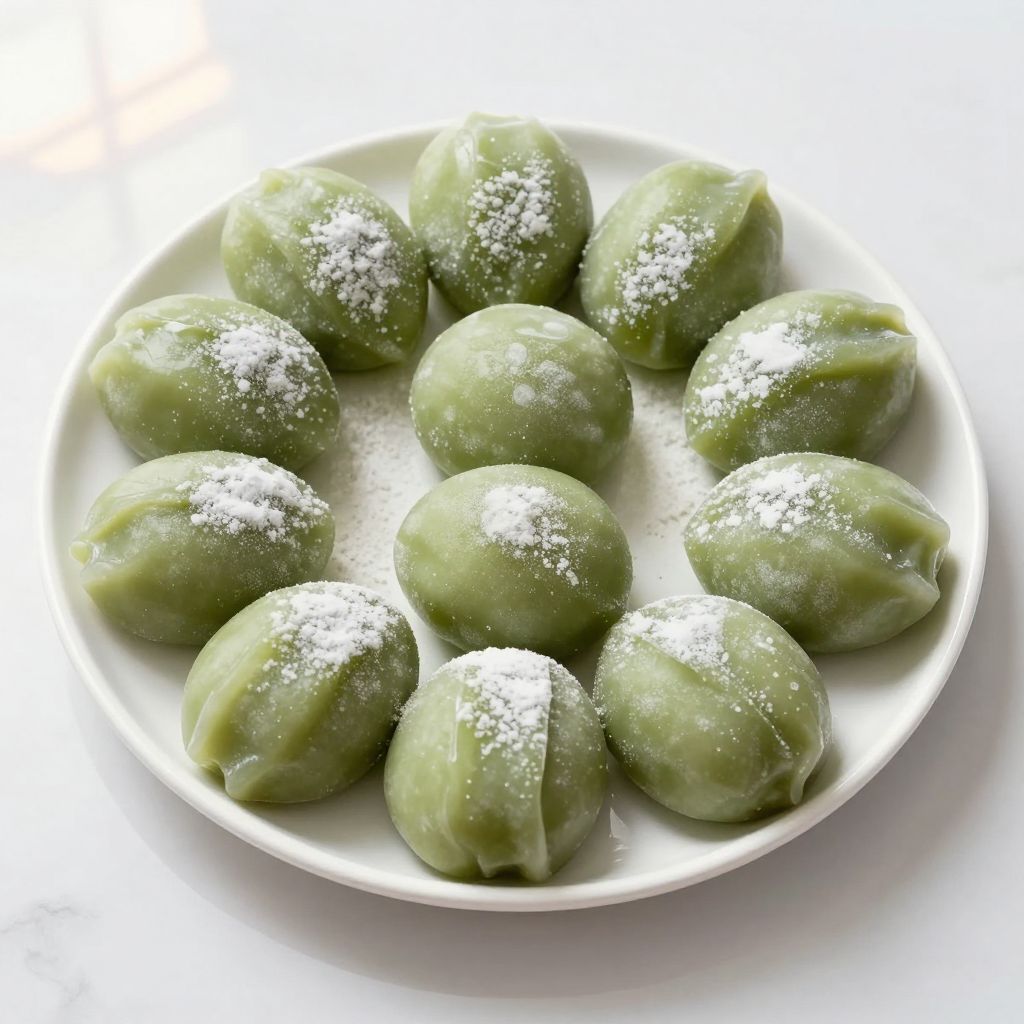
The moment I folded the matcha-infused dough, the aroma filled my kitchen with this grassy, slightly sweet scent that instantly transported me to a peaceful tea ceremony. My family gathered around as I dusted the finished mochi with powdered sugar, and they devoured the entire batch within minutes.
What struck me most was how the texture transformed over time: pillowy soft when fresh, then gradually firmer after refrigeration. This flexibility meant I could make a batch on Sunday and enjoy them throughout the week without them losing their charm.
Recipe Overview
- Recipe Name: Green Tea Mochi
- Servings: 12 mochi pieces
- Prep Time: 15 minutes
- Cook Time: 15 minutes
- Total Time: 30 minutes plus 2 hours chilling
- Course: Dessert
- Cuisine: Japanese
- Calories per Serving: 85 calories
Equipment You Will Need
- Microwave-safe mixing bowl
- Whisk or fork
- Measuring cups and spoons
- Rubber spatula
- Parchment paper
- Baking sheet
- Small sifter or fine-mesh strainer
- Knife or small cookie scoop
- Shallow dish for coating
Ingredients for Green Tea Mochi
- Mochiko (sweet rice flour): 1 cup
- Matcha powder: 2 tablespoons
- Granulated sugar: 3/4 cup
- Water: 3/4 cup
- Cornstarch (for dusting): 2 tablespoons
- Powdered sugar (for coating): 1/4 cup
- Coconut oil (optional): 1 teaspoon, for moisture
Ingredient Notes and Substitutions
- Mochiko flour: This sweet rice flour creates the signature chewy texture that makes mochi mochi. You can substitute with glutinous rice flour, though the texture may be slightly less tender.
- Matcha powder: Quality culinary-grade matcha delivers authentic green tea flavor without bitterness. If unavailable, green tea powder works as a backup, though matcha gives superior color and taste.
- Granulated sugar: Regular white sugar balances the earthiness of matcha perfectly. Honey or agave nectar can replace it in equal amounts for a different sweetness profile.
- Water: Tap water works fine, but using filtered water prevents any chlorine taste. Coconut milk adds richness if you want a creamier texture.
- Cornstarch: This prevents sticking during handling and cuts through sweetness. Potato starch or arrowroot powder work as alternatives with nearly identical results.
How to Make Green Tea Mochi
Step 1: Sift Together Dry Ingredients
In a microwave-safe bowl, whisk together the mochiko flour, matcha powder, and granulated sugar. Sifting these dry ingredients separately first ensures the matcha distributes evenly and prevents lumps in your final mochi.
Step 2: Add Water and Mix
Pour the water into the dry mixture and stir vigorously with a rubber spatula until you achieve a smooth, lump-free batter. The consistency should resemble thick pancake batter, smooth and pourable but not runny.
Step 3: Microwave the Mixture
Microwave the bowl uncovered on high for 1.5 to 2 minutes, stopping halfway through to stir. The mixture will transform from opaque to slightly translucent and will become very thick and sticky, which is exactly what you want.
Step 4: Cool Briefly
Let the cooked mochi dough rest in the bowl for 2 to 3 minutes, allowing it to cool just enough to handle. It will continue to set slightly as it cools, making it easier to work with without burning your hands.
Step 5: Prepare Dusting Surfaces
While the mochi rests, place cornstarch on parchment paper and in a shallow dish for coating your finished pieces. Having everything prepped prevents the sticky dough from hardening before you shape it.
Step 6: Transfer and Dust
Use a damp spatula to turn the mochi dough onto the cornstarch-dusted parchment paper. Dust the top generously with cornstarch as well to prevent sticking during cutting and shaping.
Step 7: Cool and Cut
Allow the mochi to cool for 15 to 20 minutes until it firms up enough to handle but remains flexible. Cut into 12 equal pieces using a lightly oiled knife or small cookie scoop, wiping the blade between cuts.
Step 8: Shape and Coat
Gently roll each piece between your palms to create smooth, rounded balls, working quickly before the dough cools too much. Roll each ball in the cornstarch dish to coat all sides, then transfer to a clean surface or storage container.
Step 9: Final Dusting
Once all pieces are shaped and cooled completely, dust them generously with powdered sugar for a beautiful finish and subtle sweetness boost. This also helps prevent sticking if you’re stacking them for storage.
Pro Tip: Keep a bowl of water nearby while shaping your mochi; dipping your fingers occasionally prevents the sticky dough from clinging to your hands and makes the entire process far less frustrating.
Tips for the Best Green Tea Mochi
- Use high-quality matcha powder from a trusted source; fresh matcha tastes noticeably more vibrant and less bitter than stale powder that’s been sitting in a pantry.
- Don’t skip the cornstarch coating during preparation; it’s the difference between smooth, easy shaping and a frustrating sticky mess.
- Microwave in short bursts rather than one long interval to avoid overheating the mixture, which can make the mochi tough and rubbery.
- If your dough seems too thick after microwaving, stir in water one teaspoon at a time until you reach the right consistency for shaping.
- Chill finished mochi for at least 2 hours before serving; this firms them up slightly and makes the texture more pleasant to bite through.
- Store in an airtight container with parchment paper between layers to prevent them from sticking together.
Common Mistakes to Avoid
- Overheating the mixture: Microwaving too long creates tough, dense mochi instead of chewy and tender; stick to the recommended time and stir halfway through.
- Skipping the cornstarch dust: This step isn’t just for appearance; it prevents the sticky dough from becoming impossible to handle and cuts the stickiness dramatically.
- Not letting mochi cool properly: Shaping the dough while too hot causes it to tear and creates uneven pieces; patience here pays off.
- Using stale or low-quality matcha: Cheap matcha tastes bitter and dull; investing in good matcha makes the flavor sing in every bite.
- Storing without separation: Stacking warm mochi directly together causes them to fuse into one blob; cool completely and separate with parchment.
Serving Suggestions
Green tea mochi shines on its own as a light, satisfying dessert, but it pairs beautifully with complementary flavors and drinks. Serve them chilled or at room temperature depending on your texture preference.
- Alongside hot jasmine tea or traditional matcha for an authentic Japanese pairing
- With a scoop of vanilla or black sesame ice cream for a temperature contrast
- On a dessert platter with fresh berries and dark chocolate for visual appeal
- As a petit four at the end of an elegant dinner party
- With coffee for a modern twist that bridges Eastern and Western dessert traditions
Variations to Try
- White Chocolate Filled Mochi: Before coating with powdered sugar, insert a small piece of white chocolate into each mochi; it melts slightly when bitten, adding richness and creaminess.
- Strawberry Matcha Mochi: Replace half the water with fresh strawberry puree for a fruity twist that softens the matcha’s earthiness while creating a gorgeous pink hue.
- Sesame Matcha Mochi: Add 1 tablespoon of black sesame paste to the batter for a nutty depth that complements green tea beautifully.
- Mochi with Red Bean Filling: Wrap a small spoonful of sweetened red bean paste in the center of each mochi before the final cooling stage for traditional Japanese flavor.
- Honey Sweetened Mochi: Replace granulated sugar with honey for a more complex sweetness and slightly different mouthfeel that some prefer.
Dietary Adaptations
- Gluten-Free: This recipe is naturally gluten-free when using certified gluten-free mochiko flour; verify all ingredients are certified to avoid cross-contamination.
- Dairy-Free: The basic recipe contains no dairy, making it naturally suitable for dairy-free diets without any substitutions needed.
- Vegan: All ingredients are plant-based by default; confirm your matcha powder and sugar sources if strict vegan certification matters to you.
- Low-Carb/Keto: This recipe doesn’t adapt well to low-carb because mochiko is primarily starch; allulose can replace sugar but won’t improve the carb count significantly.
Storage and Reheating
Refrigerator
Store green tea mochi in an airtight container with parchment paper between layers to prevent sticking. They keep fresh in the refrigerator for up to 5 days and actually taste better after a day as flavors mellow and meld.
- Keep container sealed to prevent them from drying out
- Separate layers with parchment to avoid fusion
- Bring to room temperature before serving for softest texture
Freezer
Frozen mochi lasts up to 3 months when stored properly in an airtight container or freezer bag. Freezing actually preserves their texture wonderfully if you plan ahead.
- Layer with parchment paper before freezing
- Thaw at room temperature for 30 minutes before serving
- Don’t refrigerate after thawing; eat within a few hours
Reheating
Mochi doesn’t typically need reheating since they’re served at room temperature or chilled. If you prefer them warm, microwave a single piece for 5 to 10 seconds to soften without cooking it further.
- Microwave only individual pieces, not the whole batch
- Check after 5 seconds to avoid overheating
- Let cool for 10 seconds before biting to avoid burns
Nutrition Information
| Nutrient | Amount |
|---|---|
| Calories | 85 |
| Total Fat | 0.5g |
| Saturated Fat | 0g |
| Carbohydrates | 20g |
| Fiber | 0.5g |
| Sugar | 16g |
| Protein | 1g |
| Sodium | 2mg |
| Cholesterol | 0mg |
These values are estimates based on standard ingredients and serving size of one mochi piece. Actual nutrition varies depending on specific brands and any fill-ins or coatings you add.
Frequently Asked Questions
Can I make green tea mochi without a microwave?
Yes, you can cook the mixture in a heavy-bottomed saucepan over medium heat, stirring constantly for 5 to 8 minutes until it thickens and becomes translucent. The stovetop method gives you more control and works equally well, though it requires more active attention.
Why is my mochi tough instead of chewy?
Overheating is the main culprit; cooking it too long toughens the gluten network in the mochiko flour. Stick to the exact microwave time and stir halfway through for reliable chewy results.
Can I make these ahead of time for a party?
Absolutely, and they actually improve when made a day or two ahead. Store them in the refrigerator up to 5 days in advance, bringing them to room temperature just before serving.
What’s the difference between mochiko and regular rice flour?
Mochiko is made from short-grain sweet rice and has a much higher starch content, creating the signature chewy, bouncy texture. Regular rice flour produces a grainier, less cohesive result that won’t give you true mochi texture.
Can I use instant matcha packets instead of powder?
Instant matcha typically contains added sugars and fillers, which will throw off your sweetness balance and texture. Pure matcha powder works best, though you can use culinary-grade matcha if ceremonial grade isn’t available.
How do I prevent the mochi from sticking to my hands while shaping?
Keep a bowl of cool water nearby and occasionally dip your fingertips; this creates a thin water barrier that stops the sticky dough from clinging. Cornstarch on your work surface also helps tremendously.
Final Thoughts
Making green tea mochi at home proves that impressive Japanese desserts are within reach for any home cook. The short ingredient list and straightforward method mean you can master this recipe on your first attempt.
I encourage you to give this recipe a try and discover the joy of biting into homemade mochi that tastes infinitely better than store-bought versions. Once you taste what fresh, properly made green tea mochi can be, you’ll find yourself making it again and again.
Explore More Green Tea Desserts
If you loved this green tea mochi recipe, you might also enjoy other matcha-inspired treats that celebrate this beautiful ingredient. Check out our matcha coffee recipe for a morning beverage that brings the same earthy elegance to your cup, or try our Panera green tea recipe to recreate the popular cafe favorite at home.
Green Tea Mochi
Ingredients
Equipment
Method
- Sift together 1 cup mochiko, 2 tablespoons matcha powder, and 3/4 cup granulated sugar in a microwave-safe bowl to remove lumps and distribute matcha evenly.
- Pour 3/4 cup water into the dry mixture and stir vigorously with a rubber spatula until you have a smooth, lump-free batter.
- Microwave the mixture uncovered on high for 2 minutes, stirring halfway through after 1 minute, until the dough turns translucent and becomes very thick and sticky.
- Let the cooked mochi dough rest for 3 minutes to cool slightly and set, making it easier to handle.
- While the mochi rests, spread 2 tablespoons of cornstarch on parchment paper and in a shallow dish for dusting to prevent sticking.
- Use a damp spatula to transfer the mochi dough onto the cornstarch-dusted parchment paper and dust the top generously with cornstarch.
- Allow the mochi to cool for 15 minutes until firm enough to cut but still flexible, then cut into 12 equal pieces with a lightly oiled knife or cookie scoop, wiping the blade between cuts.
- Quickly roll each piece between your palms to form smooth balls, rolling in cornstarch to coat all sides, and transfer to a clean surface or storage container.
- Once cooled completely, dust the mochi balls with 1/4 cup powdered sugar for a sweet finish and to prevent sticking.