
The first spoonful of homemade goat milk yogurt hits differently than store-bought versions—creamier, tangier, and somehow more alive on your tongue. Goat milk yogurt is one of those recipes that looks intimidating but rewards you with cultured magic in just 24 hours, and once you taste what you can make in your own kitchen, you’ll wonder why you waited so long to try it.
What makes this recipe special is how forgiving goat milk is compared to cow milk, plus the probiotic benefits and naturally easier digestibility that comes with it. You get a tangy, sophisticated yogurt with a silky texture that works beautifully on its own, drizzled with honey, or blended into smoothies.
Why You’ll Love This Recipe
Making yogurt at home gives you complete control over ingredients, cultures, and flavor while costing a fraction of what you’d pay for quality goat yogurt at the market.
- Requires just two simple ingredients and basic equipment you likely already own.
- Transforms affordable goat milk into a probiotic-rich cultured product.
- Ready to eat in 24 hours with minimal hands-on time.
- Produces a thicker, tangier yogurt than most commercial brands.
- Makes an impressive homemade gift that shows real culinary skill.
My Experience Making This Recipe
I was skeptical about yogurt making until I inherited my grandmother’s yogurt maker and decided to experiment with goat milk from a local dairy. The first batch was a revelation: tangy but not harsh, creamy without any graininess, and so satisfying that I made three more batches within a month.
The magic moment comes when you open the yogurt maker and see that spoon-coatable consistency staring back at you. My partner started requesting it for breakfast, which meant I had to learn to batch-produce it to keep up with demand.
What surprised me most was how the tartness mellows and deepens over time in the refrigerator, and how different the flavor tastes when you add just a touch of vanilla or honey right after it finishes culturing. This recipe became my gateway to fermented foods and sparked a whole new cooking interest.
Recipe Overview
- Recipe Name: Goat Milk Yogurt
- Servings: 4 cups
- Prep Time: 15 minutes
- Cook Time: 0 minutes
- Culturing Time: 8 to 12 hours (or up to 24 hours for tangier yogurt)
- Course: Breakfast, Snack, Dessert Base
- Cuisine: Modern Fermented Dairy
- Calories per Serving: 150 (per 1-cup serving, unflavored)
Equipment You Will Need
- Yogurt maker or slow cooker with temperature control
- Instant-read thermometer (critical for success)
- Stainless steel pot or saucepan
- Whisk or spoon for stirring
- Glass or ceramic bowls (avoid metal for storing finished yogurt)
- Cheesecloth or fine mesh strainer (optional, for thicker yogurt)
- Kitchen towels for insulation
Ingredients for Goat Milk Yogurt
- 1 quart (4 cups) fresh goat milk, ideally at room temperature or slightly warm
- 1/4 cup plain goat milk yogurt with live cultures, or powdered yogurt starter culture
Ingredient Notes and Substitutions
- Fresh goat milk: This is the foundation of your yogurt and should be high quality and not ultra-pasteurized, which damages the proteins needed for proper culturing. If you can’t find goat milk, cow milk works but produces a less distinctive flavor, though the culturing process remains identical.
- Plain goat yogurt or starter culture: Live cultures are what transform milk into yogurt through fermentation. Use plain yogurt from a previous batch for subsequent batches, or purchase freeze-dried starter culture from health food stores or online retailers for more predictable results and longer shelf life than yogurt cultures.
How to Make Goat Milk Yogurt
Step 1: Heat the Goat Milk Slowly
Pour your quart of goat milk into a stainless steel pot and place it on medium-low heat. Attach your instant-read thermometer and watch it carefully, stirring occasionally, until the milk reaches exactly 180 degrees Fahrenheit, which should take about 10 to 15 minutes.
This gentle heating kills any unwanted bacteria and also helps the milk proteins denature slightly, which gives you that creamy, custard-like texture when it sets. Don’t rush this step or skip it, as it makes a real difference in the final consistency.
Step 2: Cool the Milk to 110 Degrees
Once your milk reaches 180 degrees, remove it from heat and let it cool naturally on the counter, checking the temperature every few minutes. Once it drops to around 110 degrees Fahrenheit (this is crucial for culturing), you’re ready for the next step, which typically takes 20 to 30 minutes.
This cooling phase is non-negotiable because adding your starter culture to milk that’s too hot will kill the beneficial bacteria you’re trying to encourage. Patience here pays off significantly in the final product.
Step 3: Prepare Your Starter Culture
While your milk cools, remove your yogurt or starter culture from the refrigerator and let it come closer to room temperature. If using plain goat yogurt, measure out your 1/4 cup into a small bowl.
Some yogurt makers prefer whisking their starter with a small amount of the cooled milk first to ensure it distributes evenly throughout the batch, which prevents clumpy textures. This extra step takes just a minute and sets you up for ultra-smooth results.
Step 4: Combine Milk and Cultures
Once your milk reaches 110 degrees, gently whisk in your prepared starter culture until it’s fully incorporated and you see no visible lumps or streaks. The slow, deliberate stirring ensures that the cultures distribute evenly throughout the milk.
Avoid aggressive mixing, which can break down the milk proteins you just carefully heated. A slow hand with a whisk for about one minute is the sweet spot.
Step 5: Transfer to Yogurt Maker or Incubator
Pour your milk and culture mixture into your yogurt maker, slow cooker, or an insulated container if you’re improvising. If using a yogurt maker, simply follow the manufacturer’s instructions for starting the incubation process.
If you don’t own a yogurt maker, you can use a slow cooker on the lowest setting or wrap heated jars in towels inside a cooler or oven turned off but with the light on. The goal is to maintain a steady temperature around 110 degrees for 8 to 12 hours.
Step 6: Culture for 8 to 12 Hours Without Disturbance
Once your yogurt milk is in the incubator, cover it and resist the urge to open it up and check on it. The cultures need undisturbed time to work their magic, transforming the milk into tangy yogurt.
Set a timer so you don’t lose track, and use this time to clean your pot and whisk rather than hovering over your yogurt maker. At 8 hours, you’ll have mild yogurt; at 12 hours, you’ll get tangier results; and up to 24 hours produces a super-tangy product reminiscent of Greek yogurt.
Step 7: Check for the Perfect Set
After 8 hours, carefully lift the lid and give the yogurt maker a gentle tilt to check the consistency. When you tilt the container and the yogurt moves as one cohesive mass rather than sloshing like milk, you know it’s ready.
If it still seems loose and liquid, give it another hour or two. The exact time depends on your specific culture, room temperature, and yogurt maker model.
Step 8: Cool and Refrigerate Your Finished Yogurt
Once set to your liking, turn off your yogurt maker or remove the yogurt from your incubation setup and let it cool for 15 to 30 minutes on the counter. Transfer your finished yogurt to glass containers and refrigerate for at least 4 hours before eating, which stops the culturing process and firms up the texture even more.
This chilling time also allows the flavors to set and mellow slightly, making the yogurt taste even better by morning. Store in the coldest part of your refrigerator and enjoy within 7 to 10 days.
Pro Tip: Save 1/4 cup of your finished yogurt from each batch as starter culture for your next batch, but only reuse the same starter for 5 to 7 batches before purchasing fresh starter, as the cultures weaken over successive generations.
Tips for the Best Goat Milk Yogurt
- Use a reliable instant-read thermometer throughout the entire process, as temperature control is the single biggest factor in successful yogurt making. Even five degrees off can affect culturing time or texture.
- Choose goat milk that is fresh and not ultra-pasteurized when possible, as ultra-high heat processing damages the milk proteins needed for proper yogurt set. Ask your local dairy or farmers market vendor about pasteurization levels.
- Don’t skip the heating step to 180 degrees, even though it seems counterintuitive. This denatures the whey proteins and helps trap water, creating that silky, custard-like mouthfeel you want.
- If your yogurt comes out too thin, strain it through cheesecloth for 1 to 4 hours to concentrate the solids and create a thicker, Greek-style yogurt.
- Keep your yogurt maker or incubation space away from drafty windows or doors, and avoid opening it unnecessarily during culturing, as temperature fluctuations can prevent proper setting.
- Experiment with culturing times starting at 8 hours and incrementally longer, noting your favorite tartness level so you can dial in your preferences over several batches.
Common Mistakes to Avoid
- Adding starter culture to milk that’s too hot will kill the beneficial bacteria, resulting in milk that never sets. Always let your milk cool to 110 degrees before adding cultures.
- Using ultra-pasteurized goat milk can result in thin, watery yogurt because the high heat destroys the proteins needed for proper gel formation. Look for regular or low-temperature pasteurized varieties.
- Disturbing the yogurt during culturing by opening the incubator or moving it around interrupts the culturing process and can result in grainy or broken texture. Resist checking it until you hit your target time.
- Forgetting to cool the finished yogurt in the refrigerator allows the cultures to keep fermenting, making it excessively sour and potentially creating separation or watery pockets. Chilling stops the culturing process.
- Reusing the same starter culture for more than seven consecutive batches weakens the live culture and results in progressively slower culturing times or incomplete sets. Purchase fresh starter periodically.
Serving Suggestions
Plain goat milk yogurt shines as a breakfast on its own, but it also works beautifully as a component in both sweet and savory dishes. Try it alongside fresh fruit, granola, or honey for a simple breakfast bowl, or use it as a cooling sauce for spiced foods.
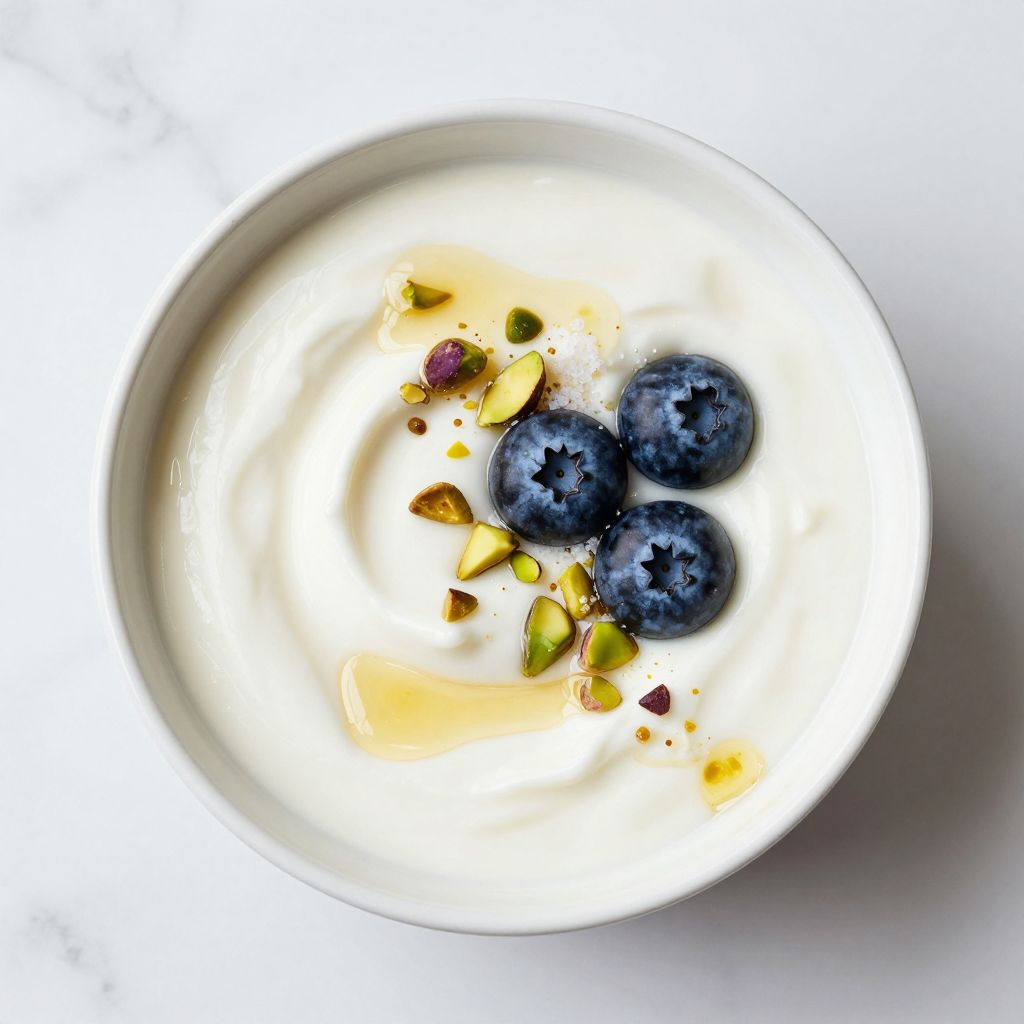
- Drizzled with raw honey, chopped pistachios, and a pinch of sea salt for an elegant breakfast or dessert.
- Topped with fresh berries, granola, and a touch of vanilla extract for a complete breakfast bowl.
- Swirled into soups like roasted beet or butternut squash as a cooling, tangy finishing element.
- Blended into smoothies with fruit and a touch of maple syrup for a protein-rich drink.
- Served alongside grilled lamb or spiced chicken as a cooling condiment, similar to tzatziki sauce.
Variations to Try
- Honey and Vanilla Yogurt: Stir in one tablespoon of raw honey and half a teaspoon of vanilla extract after culturing for a naturally sweetened version that tastes more dessert-like while retaining all the probiotic benefits.
- Labneh (Strained Yogurt Cheese): Line a colander with cheesecloth, pour in your finished yogurt, and let it strain in the refrigerator for 12 to 24 hours to create a thick, spreadable cheese that works beautifully on crackers or as a dip.
- Fruit Preserve Swirl: Layer your plain yogurt in glasses with homemade or quality store-bought fruit preserves and don’t fully mix them, allowing for pockets of fruit and tang throughout each spoonful.
- Herbed Yogurt Sauce: Fold fresh dill, parsley, minced garlic, and lemon juice into your plain yogurt immediately after culturing for a sauce that pairs beautifully with grilled vegetables or fish.
- Longer-Fermented Tangy Version: Allow your yogurt to culture for 20 to 24 hours for a deeply tangy, almost sour product that works wonderfully in baking or as a bold condiment.
Dietary Adaptations
- Gluten-Free: This recipe is naturally gluten-free since it contains only milk and cultures, making it safe for those with celiac disease or gluten sensitivity.
- Dairy-Free: Substitute goat milk with coconut milk or cashew milk and use a non-dairy yogurt starter, though the texture and tang will differ somewhat from traditional goat yogurt.
- Vegan: Use a plant-based milk like oat or coconut with vegan yogurt starter cultures to create a completely animal-free fermented product, though it won’t have the characteristic goat tang.
- Low-Carb/Keto: This recipe is already quite low in carbohydrates and fits keto diets perfectly, though you’ll want to skip sweetened variations and pair it with high-fat toppings like nuts or nut butters.
Storage and Reheating
Refrigerator
Store your finished goat milk yogurt in glass or ceramic containers with tight-fitting lids in the coldest part of your refrigerator. Your yogurt will keep for 7 to 10 days with proper storage.
- Avoid storing in metal containers, which can react with the acidic yogurt.
- Don’t store near the door where temperature fluctuates with opening.
- Keep separate from strong-smelling foods that yogurt can absorb odors from.
Freezer
While yogurt can be frozen for up to two months, the texture becomes grainy when thawed due to ice crystal formation breaking down the protein structure. Freezing works if you plan to blend the thawed yogurt into smoothies rather than eating it plain.
- Transfer to freezer-safe containers, leaving a bit of headspace for expansion.
- Thaw in the refrigerator overnight before using.
- Frozen yogurt works better blended than eaten as is.
Reheating
Do not reheat yogurt, as heat will kill the beneficial live cultures that make yogurt nutritionally valuable. Simply remove from the refrigerator and enjoy cold.
- Eat straight from the refrigerator for maximum probiotic benefit.
- Allow to sit at room temperature for 10 to 15 minutes if you prefer less chilled yogurt.
- Never heat above room temperature, as cultures die at 115 degrees Fahrenheit.
Nutrition Information
| Nutrient | Amount |
|---|---|
| Calories | 150 |
| Total Fat | 9g |
| Saturated Fat | 6g |
| Carbohydrates | 9g |
| Fiber | 0g |
| Sugar | 8g |
| Protein | 11g |
| Sodium | 180mg |
| Cholesterol | 25mg |
Nutritional values are based on one cup of unflavored goat milk yogurt and will vary depending on the specific goat milk used and any additions like honey or fruit.
Frequently Asked Questions
Can I use cow milk instead of goat milk?
Yes, cow milk works perfectly in this recipe and follows identical steps. The main difference is flavor: cow milk yogurt will taste milder and less tangy than goat milk yogurt, though it will still be delicious and probiotic-rich.
How long can I keep the same starter culture before buying fresh?
You can reuse yogurt from your own batches as starter for about 5 to 7 generations before the cultures weaken. After that point, use fresh commercial starter culture or plain yogurt from a commercial brand to ensure strong, consistent results.
What does it mean if my yogurt is too thin?
Thin yogurt usually results from using ultra-pasteurized milk, insufficient culturing time, or a weak starter culture. Try using low-temperature pasteurized goat milk, extending culturing time to 12 to 14 hours, or switching to fresh starter culture for your next batch.
Why did my yogurt separate into liquid on top (whey)?
Separation occurs when yogurt over-cultures, when it’s jostled too much during setting, or when it’s stored in a warm spot. To prevent this, watch your culturing time closely, avoid disturbing the yogurt, and refrigerate immediately when set.
Can I make yogurt without a yogurt maker?
Absolutely, you can use a slow cooker set to the lowest setting, an insulated cooler filled with warm water, or an oven with just the light on to maintain temperature around 110 degrees. The key is consistent, gentle warmth rather than any specific equipment.
Is homemade yogurt safe to eat?
Yes, when made with clean equipment and heated to proper temperatures, homemade yogurt is perfectly safe. The culturing process creates an acidic environment where harmful bacteria cannot survive, making fermented yogurt one of the safest foods you can make at home.
Final Thoughts
Making goat milk yogurt at home transforms you from a passive consumer of packaged dairy into an actual fermentation artist. The reward is yogurt that tastes better, costs less, and comes with the satisfaction of creating something alive and nourishing with your own hands.
Start with one batch and pay attention to how temperature, timing, and starter culture affect your results. Before long, you’ll develop an intuition for this process and create yogurt that tastes exactly how you like it, and you might even find yourself making multiple batches each week because homemade yogurt is just that good.
Goat Milk Yogurt
Ingredients
Equipment
Method
- Pour 1 quart (4 cups) fresh goat milk into a stainless steel pot and heat over medium-low heat, stirring occasionally, until it reaches 180°F (about 10–15 minutes).
- Remove the pot from heat and let the milk cool to 110°F (about 20–30 minutes).
- In a small bowl, whisk 1/4 cup plain goat milk yogurt with a little of the cooled milk to create a smooth starter mixture.
- Whisk the starter mixture into the cooled milk until fully incorporated without lumps.
- Pour the milk and culture mixture into the yogurt maker or incubator and maintain a steady 110°F for 8 to 12 hours without disturbance.
- After 8 hours, check the yogurt by gently tilting the container; it should move as a cohesive mass. If it is still loose, continue incubating up to 12 hours.
- Once set, remove the yogurt, let it cool for 15–30 minutes on the counter, then transfer to glass containers and refrigerate for at least 4 hours before serving.