
There’s something magical about watching sugar and ginger transform into a fizzy, spicy elixir over the course of a few days, and that’s exactly what happens when you make ginger beer with a ginger bug. This centuries-old fermentation method takes just a handful of ingredients and turns them into a complex, naturally carbonated beverage that tastes infinitely better than anything from a store shelf.
What makes this recipe special is that you’re not just mixing flavors, you’re cultivating a living culture that does the work for you. The result is a ginger beer that’s crisp, spicy, and genuinely good for your gut, with real depth that commercial versions can’t touch.
Why You’ll Love This Recipe
Making ginger beer with a ginger bug teaches you real fermentation skills while delivering a beverage that’s refreshing, customizable, and impressive to serve. You control every aspect, from spice level to sweetness, and you’ll save money compared to buying craft ginger beer regularly.
- Uses a live culture starter (the ginger bug) that develops naturally in your kitchen
- Creates natural carbonation without bottling equipment or added CO2
- Contains beneficial probiotics from the fermentation process
- Tastes complex and spicy, with real ginger bite and subtle sweetness
- Makes an excellent mixer for cocktails or a refreshing standalone drink
My Experience Making This Recipe
The first time I made this, I was skeptical that a jar of ginger scraps and sugar could actually turn into something drinkable. By day three, when I opened that jar and smelled the unmistakable yeasty-spicy aroma, I became a believer.
I remember the moment I first bottled my finished ginger beer and heard that satisfying hiss when I cracked it open the next day. The flavor was bright, genuinely spicy, with this underlying sweetness that made you want another sip immediately, unlike the cloying store-bought versions I’d tried.
What surprised me most was how forgiving the process is once you understand the basics. Even when I made small mistakes in timing or ratios, the ginger bug kept working, kept fermenting, and kept producing something delicious.
Recipe Overview
- Recipe Name: Ginger Beer with Ginger Bug
- Servings: Makes approximately 2 quarts
- Prep Time: 15 minutes
- Ginger Bug Fermentation Time: 5 days
- Secondary Fermentation (after bottling): 2-3 days
- Total Time: 7-8 days
- Course: Beverage
- Cuisine: British/Caribbean Traditional
- Calories per Serving (8 oz): 45
Equipment You Will Need
- One clean glass jar (at least 1-quart capacity) for the ginger bug
- Fine-mesh strainer or cheesecloth
- Large pot (2-3 quart capacity)
- Wooden spoon or non-metal stirring utensil
- Clean glass bottles with tight-sealing lids (for carbonation)
- Fine grater or microplane
- Measuring spoons and cups
- Thermometer (optional but helpful)
- Funnel (optional but useful)
Ingredients for Ginger Beer with Ginger Bug
For the Ginger Bug (Starter Culture)
- Fresh ginger, unpeeled: 2 tablespoons, finely minced or grated (about 1 ounce)
- Organic cane sugar: 2 tablespoons
- Filtered water: 1 cup, room temperature
- Fresh ginger, unpeeled: additional 2 tablespoons per day for 5 days (feeding schedule)
- Organic cane sugar: additional 2 tablespoons per day for 5 days (feeding schedule)
For the Ginger Beer
- Fresh ginger, unpeeled: 3 tablespoons, finely grated (about 1.5 ounces)
- Organic cane sugar: 1/2 cup
- Filtered water: 2 quarts
- Fresh lemon juice: 2 tablespoons (about 1 lemon)
- Cream of tartar: 1/4 teaspoon
- Ginger bug starter: 1/2 cup (strained)
- Salt: pinch of sea salt
Ingredient Notes and Substitutions
- Fresh ginger: Unpeeled ginger contains beneficial microorganisms on the skin, which feed the bug culture. If you only have peeled ginger, it will work but may ferment more slowly, and you might need to extend the fermentation by a day or two.
- Organic cane sugar: Refined sugar works, but organic sugar contains more trace minerals and microorganisms that support fermentation. White sugar will ferment but may produce a slightly less complex flavor.
- Filtered water: Chlorine in tap water can inhibit fermentation. If using tap water, let it sit uncovered for 24 hours to allow chlorine to evaporate.
- Cream of tartar: This stabilizes the drink and adds a subtle tartness that balances the spice. Tartaric acid powder works identically if you prefer.
- Lemon juice: Fresh lemon is important for flavor and acidity. Bottled lemon juice will work but lacks the brightness and contains preservatives that may slow fermentation.
How to Make Ginger Beer with Ginger Bug
Step 1: Start Your Ginger Bug Culture
In a clean glass jar, combine 1 cup of filtered water with 2 tablespoons of minced fresh ginger and 2 tablespoons of organic cane sugar. Stir well to dissolve the sugar completely.
This mixture becomes your fermentation vessel, where wild yeasts and beneficial bacteria will establish themselves. The ginger provides both flavor and natural microorganisms, while the sugar feeds the culture.
Step 2: Feed Your Ginger Bug Daily for Five Days
Starting on day two, add 2 tablespoons of grated ginger and 2 tablespoons of sugar to your jar every single day. Stir well each time you feed it, and never cover the jar tightly; use a cloth or coffee filter secured with a rubber band to keep debris out while allowing airflow.
You’ll notice the mixture becoming cloudy, developing bubbles, and releasing a yeasty smell. These are signs that fermentation is happening as the wild yeasts wake up and multiply.
Step 3: Watch for Signs of Active Fermentation
By day four or five, your ginger bug should be visibly bubbling when you stir it, with a slightly sweet, yeasty smell that’s appealing rather than off-putting. The bubbles mean your culture is active and ready to carbonate your ginger beer.
If you’re not seeing much activity by day five, give it another day or two. Cold kitchens slow fermentation, so if your home is under 65 degrees Fahrenheit, allow extra time.
Step 4: Strain Out the Ginger Solids
Using a fine-mesh strainer lined with cheesecloth, strain your ginger bug into a clean bowl, collecting the liquid and discarding the solids. You’ll use 1/2 cup of this strained liquid as your starter for the ginger beer, and you can start a new batch if you want continuous supply.
This separation is important because the solids can make your finished ginger beer gritty and cloudy. The liquid contains all the active yeast and bacteria you need.
Step 5: Prepare Your Ginger Beer Base
In a large pot, bring 2 quarts of filtered water to a boil. Add 1/2 cup of organic cane sugar, 3 tablespoons of freshly grated ginger, 2 tablespoons of fresh lemon juice, 1/4 teaspoon of cream of tartar, and a pinch of sea salt.
Stir well to dissolve the sugar completely. The ginger will infuse into the hot water, creating a flavorful base while the lemon juice adds brightness and the cream of tartar stabilizes the finished beverage.
Step 6: Cool the Mixture to Room Temperature
Remove the pot from heat and let the mixture cool completely to room temperature, about 1-2 hours. You can speed this up by placing the pot in an ice bath, but avoid using it while it’s still warm because heat kills the beneficial microorganisms in your ginger bug.
Cooling also allows the ginger flavors to fully infuse. Once cooled, you can taste it and adjust the spice level or sweetness if needed.
Step 7: Add Your Ginger Bug Starter
Strain the cooled ginger beer mixture if you prefer a cleaner appearance, then stir in your 1/2 cup of strained ginger bug starter. This live culture contains the yeasts and bacteria that will carbonate your ginger beer.
Gentle stirring ensures the starter is evenly distributed throughout. The microorganisms will immediately begin consuming the sugar and producing carbon dioxide.
Step 8: Bottle Your Ginger Beer for Secondary Fermentation
Pour your ginger beer into clean, dry glass bottles with tight-sealing lids (flip-top bottles or bottles with wire bail closures work best). Fill each bottle to about 1 inch from the top, leaving space for carbonation to build.
Seal the bottles tightly and leave them at room temperature, away from direct sunlight. This secondary fermentation is when carbonation develops as the yeasts continue eating the remaining sugar.
Step 9: Monitor Carbonation Over 2-3 Days
Check your bottles daily by gently squeezing one to gauge carbonation level. After two days, you should feel noticeable pressure, and by day three, the ginger beer should be well carbonated and ready to drink.
Once it reaches your desired carbonation level, refrigerate immediately to slow fermentation and prevent over-carbonation, which can lead to bottle explosions. Cold also improves the flavor and stops the yeast from producing more gas.
Pro Tip: The key to perfect carbonation is monitoring daily and refrigerating when you hit your preferred fizz level, usually between two and three days of secondary fermentation.
Tips for the Best Ginger Beer
- Use the highest quality fresh ginger you can find, as its flavor directly impacts your final beverage. Ginger with thin skin and a fresh smell will produce the best results.
- Never skip the cooling step before adding your ginger bug, as heat destroys the beneficial microorganisms that create carbonation. Even warm liquid will reduce fermentation speed significantly.
- Taste your ginger beer after bottling and refrigerating, then adjust future batches based on your preferences. You can increase ginger for more spice or adjust sugar for sweetness in the next round.
- Keep your ginger bug alive between batches by storing it in the refrigerator and feeding it weekly with 2 tablespoons of ginger and 2 tablespoons of sugar. This culture can last for years with proper care.
- Use filtered or dechlorinated water exclusively, as chlorine inhibits fermentation even in small amounts. This single change dramatically improves consistency and speed of fermentation.
- Avoid metal utensils and containers for fermentation, as the acidic environment can react with metal and impart off-flavors. Stick with glass, wood, and plastic exclusively.
Common Mistakes to Avoid
- Adding the ginger bug to warm liquid kills the yeasts and bacteria, stopping carbonation before it starts. Always cool your base mixture completely before stirring in the starter.
- Using chlorinated tap water directly prevents proper fermentation and slows down yeast activity. Boil and cool tap water first, or use filtered water exclusively.
- Covering your ginger bug jar too tightly during the fermentation stage blocks the airflow needed for wild yeasts to establish themselves. Use a cloth or coffee filter instead of a tight lid.
- Bottling before your ginger bug is actively fermenting produces flat, lifeless ginger beer with no carbonation. Make sure you see visible bubbles and smell the yeasty aroma before using it as starter.
- Over-fermenting the secondary fermentation can create over-carbonation and risk bottle explosions. Refrigerate by day three at the latest, even if you prefer less fizz.
Serving Suggestions
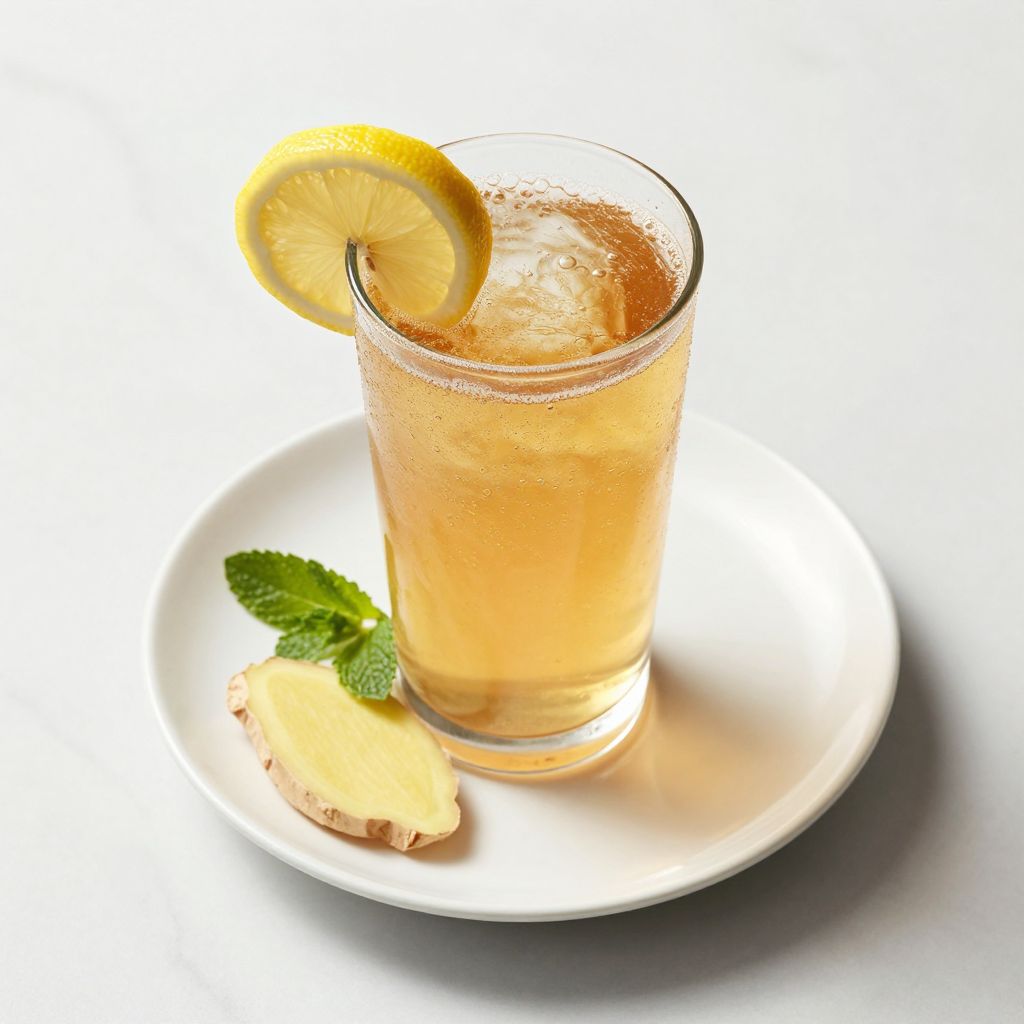
Serve your homemade ginger beer well-chilled in a tall glass over ice for the most refreshing experience. The crisp, spicy flavor shines when served cold, and ice prevents the drink from warming too quickly.
- Mix with dark rum and lime juice for a classic Dark and Stormy cocktail with real complexity
- Combine with vodka and fresh mint for a refreshing ginger beer mule that beats the standard version
- Serve straight as a non-alcoholic ginger tonic, perfect for settling an upset stomach or enjoying as a daily probiotic drink
- Mix with apple cider and cinnamon for a warming fall beverage that highlights the ginger spice
- Add to sparkling lemonade for a naturally sweet and spicy summer refresher
Variations to Try
- Turmeric Ginger Beer: Add 1 teaspoon of ground turmeric to your base mixture for an anti-inflammatory twist with earthy warmth. The turmeric adds color and deepens the spice profile without overpowering the ginger.
- Spiced Ginger Beer: Include 2-3 whole cloves, 1 cinnamon stick, and a few cardamom pods in your base mixture while it simmers. Remove before bottling for a more complex spice blend that feels festive and warming.
- Citrus-Forward Ginger Beer: Replace some of the lemon juice with fresh lime or orange juice to shift the brightness. Lime creates a more tropical feel while orange adds subtle sweetness.
- Extra Spicy Ginger Beer: Double the ginger to 6 tablespoons for a seriously fiery kick that dominates the palate. This version pairs beautifully with rum or whiskey cocktails.
- Honey-Sweetened Ginger Beer: Replace half the white sugar with raw honey for a deeper, more complex sweetness with subtle floral notes. Honey also supports fermentation with additional trace minerals.
Dietary Adaptations
- Gluten-Free: This recipe is naturally gluten-free as written, containing no grains or gluten-containing ingredients. All components are safe for celiac or gluten-sensitive diets.
- Dairy-Free: Ginger beer is completely dairy-free by nature and contains no milk products of any kind. It’s safe for vegan, dairy-free, and lactose-intolerant diets.
- Vegan: The recipe is fully vegan, using only plant-based ingredients with no animal products or byproducts. Organic cane sugar is the only ingredient to verify for vegan status at your brand.
- Low-Carb/Keto: Reduce the sugar in your base to 1/4 cup and use a sugar substitute like erythritol in its place, though this may reduce fermentation slightly. The fermentation process consumes some sugar naturally, making the final drink lower-carb than the base mixture.
Storage and Reheating
Refrigerator
Store finished, bottled ginger beer in the refrigerator for up to two weeks in sealed bottles. The cold temperature halts fermentation and preserves carbonation and flavor.
- Keep bottles upright to prevent leaking and maintain seal integrity
- Refrigeration slows flavor degradation and keeps the drink crisp and refreshing
- Check bottles weekly for any signs of over-carbonation or leaking
Freezer
You can freeze ginger beer in airtight containers, though carbonation will be lost and the bottle may crack from expansion. Freezing is not ideal for this beverage.
- Leave 1-2 inches of headspace if freezing to allow for liquid expansion
- Thaw in the refrigerator for 24 hours before opening
- Expect to lose carbonation completely after freezing
Reheating
Ginger beer is served cold and is not meant to be reheated. If your bottle has warmed to room temperature, simply chill it again in the refrigerator for a few hours.
- Never heat ginger beer directly, as this will destroy carbonation and beneficial probiotics
- For a warm ginger drink, make fresh ginger tea instead using steeped fresh ginger and hot water
Nutrition Information
| Nutrient | Amount |
|---|---|
| Calories | 45 |
| Total Fat | 0 g |
| Saturated Fat | 0 g |
| Carbohydrates | 11 g |
| Fiber | 0 g |
| Sugar | 10 g |
| Protein | 0 g |
| Sodium | 25 mg |
| Cholesterol | 0 mg |
Nutritional values are estimates based on a standard 8-ounce serving and can vary depending on fermentation time and individual ingredient brands. The fermentation process naturally reduces sugar content slightly as yeasts consume it for carbonation.
Frequently Asked Questions
Can I use ground ginger instead of fresh ginger?
Ground ginger will not ferment properly because it lacks the live microorganisms on the skin of fresh ginger that activate the culture. Fresh ginger is non-negotiable for creating an active ginger bug starter.
How long does a ginger bug last if I keep feeding it?
A ginger bug can stay alive indefinitely with weekly feedings, much like a sourdough starter. Some bakers have maintained the same culture for decades.
What if my ginger bug smells like vinegar?
A vinegary smell indicates acetobacter has colonized the culture, which creates vinegar instead of pleasant fermentation. You can still use it, but your ginger beer will taste slightly vinegary.
Can I adjust the ginger or sugar content while bottling?
You can add more ginger for spice by steeping it in the hot base, but adding sugar after adding the ginger bug will create over-carbonation. Always dissolve sugar adjustments in the hot base before cooling.
What’s the difference between ginger beer and ginger ale?
Ginger beer is fermented with a live culture and naturally carbonated, producing real spice and complex flavor. Ginger ale is non-fermented and typically made by mixing ginger syrup with carbonated water, creating a flatter, sweeter taste.
Why is my ginger beer not carbonating?
The most common cause is adding the ginger bug to warm liquid, which kills the yeasts. Ensure your base mixture cools completely before adding the starter, and use filtered water free of chlorine.
Can I use the same ginger bug for multiple batches?
Yes, you can divide your strained ginger bug and use part for ginger beer while keeping the rest to feed and maintain. A single ginger bug can produce dozens of batches of ginger beer.
Final Thoughts
Making ginger beer with a ginger bug is one of those kitchen projects that seems intimidating until you realize how forgiving and rewarding it actually is. Once you taste the difference between homemade and store-bought, you’ll never go back.
Start your ginger bug today, and in just over a week you’ll have fizzy, spicy, genuinely delicious ginger beer that you made with your own hands. If you love this recipe, explore our ginger beer mocktail recipe for creative ways to serve your creation, and check out our ginger drink recipe collection for more fermented beverages to master.
Ginger Beer with Ginger Bug
Ingredients
Equipment
Method
- In a clean glass jar, combine 2 tablespoons minced fresh ginger, 2 tablespoons organic cane sugar, and 1 cup filtered water; stir until sugar dissolves. (Day 1)
- For the next 4 days, feed the ginger bug each morning with 2 tablespoons grated ginger and 2 tablespoons sugar, stirring well and covering jar with a cloth. (Days 2–5)
- On day 5, strain the ginger bug through a fine-mesh strainer lined with cheesecloth into a clean bowl to collect 1/2 cup of liquid starter; discard solids.
- In a large pot, bring 2 quarts filtered water to a boil over medium-high heat, then add 1/2 cup sugar, 3 tablespoons grated ginger, 2 tablespoons lemon juice, 1/4 teaspoon cream of tartar, and a pinch of salt; stir and simmer for 5 minutes.
- Remove pot from heat and cool the mixture to room temperature (about 1–2 hours) before adding the ginger bug.
- Stir in 1/2 cup strained ginger bug starter until evenly distributed.
- Using a funnel, pour the mixture into clean glass bottles leaving 1 inch headspace; seal bottles tightly.
- Allow secondary fermentation at room temperature (around 70°F) for 2–3 days, checking bottles daily for carbonation by gently squeezing.
- Once desired carbonation is reached, refrigerate bottles to halt fermentation and enjoy chilled.