
There’s something almost magical about waking up to a jar of cold brew concentrate waiting in your fridge, ready to transform into a smooth, rich cup of coffee in seconds. Cold brew coffee concentrate is the ultimate game for anyone who drinks coffee daily, travels frequently, or simply refuses to wait for hot water to brew.
This recipe delivers concentrate so potent and flavorful that you’ll wonder why you ever bothered with instant coffee or rushed through a hot brew in the morning. The beauty of making your own concentrate at home is that you control the strength, the coffee-to-water ratio, and the final flavor profile.
Most store-bought concentrate costs a fortune for what amounts to ground coffee sitting in water overnight. You’ll spend less than five dollars making a batch that lasts two to three weeks.
Why You’ll Love This Recipe
Cold brew concentrate transforms your morning routine and saves you serious time and money. You’ll never run out of smooth, ready-to-drink coffee again.
- Smooth, less acidic coffee that won’t upset your stomach or stain your teeth as badly as hot brewed coffee
- Makes 10 to 15 servings from a single batch, so you brew once and enjoy for weeks
- Requires zero equipment beyond a jar and a strainer, making it foolproof and damage-proof
- Works hot, iced, or blended into smoothies, lattes, and desserts without any adjustment needed
- Tastes better and costs far less than coffee shop cold brew or bottled concentrate
My Experience Making This Recipe
I first made cold brew concentrate out of pure laziness during a particularly chaotic week when my espresso machine broke and I couldn’t face another day without decent coffee. I threw ground coffee and water into a jar, forgot about it for twelve hours, and discovered liquid gold waiting for me.
The concentrate was so smooth and naturally sweet that I actually reduced the amount of milk and sugar I normally add to my coffee. My partner noticed immediately and asked what I’d changed, then started stealing it straight from the jar before I could measure it out.
Now I make a fresh batch every two weeks without fail, and it’s become my secret weapon for hosting friends who claim they’re “picky about coffee.” Nobody can tell the difference between my concentrate and high-end cold brew from specialty cafes.
Recipe Overview
- Recipe Name: Cold Brew Coffee Concentrate
- Servings: 10 to 15 servings
- Prep Time: 10 minutes
- Steep Time: 12 to 24 hours
- Total Time: 12 to 24 hours plus 5 minutes straining
- Course: Beverage
- Cuisine: American
- Calories per Serving: 5 calories per 2-ounce serving of concentrate (before dilution)
Equipment You Will Need
- One large glass jar or container with a lid (at least 32 ounces, preferably 64 ounces or larger)
- A fine-mesh strainer or sieve
- Cheesecloth or a fine mesh coffee filter (optional but helpful)
- A measuring scale for accurate coffee weight
- A wooden spoon for stirring
- A small pitcher or bowl for collecting strained concentrate
- Coffee grinder if using whole beans
Ingredients for Cold Brew Coffee Concentrate
- 1 pound (approximately 450 grams) coarsely ground coffee beans
- 4 cups (32 ounces or 950 milliliters) filtered water
Ingredient Notes and Substitutions
- Coarsely ground coffee: The coarse grind prevents over-extraction and fine sediment in your final concentrate. A medium-coarse grind works if that’s all you have, but avoid anything finer than drip coffee grind to prevent a muddy texture.
- Filtered water: Tap water works fine if filtering is unavailable, but filtered water produces a cleaner final taste by removing chlorine and minerals that can compete with coffee flavor. Tap water won’t ruin your concentrate, just slightly diminish the clarity of taste.
- Coffee type: Any dark or medium roast produces excellent concentrate, though dark roasts yield a bolder, smokier flavor while medium roasts taste brighter and more acidic. Light roasts work but tend to taste thin and sour when concentrated this way.
How to Make Cold Brew Coffee Concentrate
Step 1: Measure and Grind Your Coffee
Weigh out one pound of whole coffee beans if you haven’t already purchased pre-ground coffee. Grind the beans on the coarsest setting your grinder allows, which prevents over-extraction and excessive sediment in your final concentrate.
Step 2: Combine Coffee and Water in Your Jar
Add the coarsely ground coffee to your large glass jar, then pour the four cups of filtered water directly over the grounds. The ratio of one pound of coffee to four cups of water creates a concentrated liquid that you’ll dilute later depending on how strong you prefer your coffee.
Step 3: Stir Thoroughly to Combine
Use a wooden spoon to stir the mixture well, making sure all the coffee grounds become fully submerged and wetted with water. Stirring ensures even contact between coffee and water, which promotes consistent extraction and prevents dry pockets of grounds that won’t fully release their flavor.
Step 4: Cover and Store in the Refrigerator
Place the lid on your jar and transfer it to the refrigerator or a cool, dark cabinet away from direct sunlight. Cold storage slows extraction compared to room temperature steeping, which allows you to control the brew strength and prevents the concentrate from becoming bitter.
Step 5: Steep for 12 to 24 Hours
Leave the jar undisturbed for a minimum of twelve hours, though twenty-four hours extracts deeper, fuller flavor. Most people find that twelve to eighteen hours hits the sweet spot between strong concentrate and smooth, balanced taste, but you can experiment to find your preference.
Step 6: Prepare Your Straining Setup
Place a fine-mesh strainer over a large pitcher or bowl to catch your strained concentrate. For extra clarity and to remove the finest sediment, line your strainer with cheesecloth or a fine coffee filter, which takes an extra minute but produces a crystal-clear concentrate.
Step 7: Strain the Concentrate
Pour the entire contents of your jar slowly through the strainer into your pitcher, working in batches if needed to avoid overflow. Gravity does most of the work here, so resist the urge to squeeze or press the grounds, which forces fine particles and bitter flavors into your concentrate.
Step 8: Compost the Used Grounds and Store Your Concentrate
Discard the wet grounds into your compost bin or trash, then transfer your finished concentrate to a clean glass jar with a tight lid. Your cold brew concentrate is now ready to store in the refrigerator for up to three weeks, or you can use it immediately.
Pro Tip: Don’t throw away those used grounds immediately if your strainer still holds them. Wet coffee grounds make an excellent body scrub, plant fertilizer, or odor eliminator for your refrigerator, so find a second use before composting.
Tips for the Best Cold Brew Coffee Concentrate
- Use freshly roasted beans that are no more than two to three weeks old at the time you brew, as older beans taste stale and flat even when concentrated. Check the roast date on your bag if available and buy from specialty coffee roasters rather than supermarket brands.
- Invest in a burr grinder instead of a blade grinder for consistent coarse grounds that extract evenly. Blade grinders produce uneven particle sizes that lead to both under-extraction and over-extraction in the same jar.
- Taste your concentrate at the twelve-hour mark to see how strong it’s becoming, then decide if you want to strain at twelve hours or continue to twenty-four. This hands-on approach teaches you your personal preference faster than guessing.
- Keep your jar in the coldest part of your refrigerator, typically the back of the lowest shelf, to maintain consistent temperature and prevent the concentrate from becoming bitter.
- Stir your concentrate gently before each use since some settling occurs naturally, and you want an even flavor profile throughout.
- Make concentrate in batches every two weeks rather than all at once, since the flavor gradually flattens after three weeks in storage no matter how well you seal the jar.
Common Mistakes to Avoid
- Using finely ground coffee instead of coarse grounds leads to over-extraction, bitterness, and excessive sediment that makes your concentrate gritty and unpleasant. Coarse grounds are non-negotiable for smooth, clean concentrate.
- Skipping the straining step or using too-loose a filter leaves sediment in your concentrate that settles at the bottom and ruins the texture of your final drink. Take the extra two minutes to strain properly through cheesecloth if needed.
- Storing concentrate at room temperature instead of the refrigerator speeds up oxidation and allows mold or bacteria to grow after a few days. Always refrigerate immediately after straining and keep the lid tightly sealed.
- Using tap water without filtering if you live in an area with heavily chlorinated or mineral-heavy water masks the coffee flavor and produces an off-taste. Filtered water costs almost nothing and makes a noticeable difference.
- Steeping for longer than twenty-four to thirty-six hours produces overly bitter concentrate that tastes astringent and harsh no matter how much water or milk you add. Set a timer and stick to it.
Serving Suggestions
Cold brew concentrate is versatile enough to work in nearly any coffee preparation you can imagine, from simple iced lattes to fancy desserts. The key is diluting it properly so you maintain smooth flavor instead of a harsh, over-extracted taste.
- Pour two ounces of concentrate into a tall glass filled with ice, then add six to eight ounces of cold milk and one to two teaspoons of sweetener for a classic iced latte
- Mix one ounce of concentrate with four to six ounces of hot water for a smooth hot cup of coffee that tastes richer than instant but brews in seconds
- Blend two ounces of concentrate with one cup of vanilla ice cream, one-half cup of milk, and a handful of ice for an instant coffee milkshake
- Drizzle concentrate over vanilla yogurt with granola and a pinch of sea salt for a coffee-flavored breakfast parfait
- Stir concentrate into chocolate frosting, brownie batter, or tiramisu to deepen chocolate flavor and add coffee complexity
Variations to Try
- Cold brew concentrate with cinnamon: Add one or two cinnamon sticks to the jar during steeping for warm spice notes that pair beautifully with cream and sugar. The concentrate will keep the cinnamon flavor for several days but tastes best used within a week.
- Chocolate cold brew concentrate: Add one-quarter cup of unsweetened cocoa powder mixed with the coffee grounds before steeping to create a concentrate that tastes like mocha without added chocolate syrup. Stir well before using since cocoa settles at the bottom.
- Vanilla or almond extract cold brew: Add one-half teaspoon of pure vanilla extract or almond extract after straining to create a flavored concentrate that works beautifully in milk-based drinks. Extract flavors are strong, so add in tiny increments until you reach your preferred strength.
- Cold brew concentrate with coconut: Steep the grounds with one-half cup of unsweetened shredded coconut wrapped in cheesecloth for a tropical twist that works especially well in iced lattes with coconut milk. Remove the coconut after steeping to prevent spoilage.
- Espresso-strength concentrate: Use a one-to-two ratio of coffee to water instead of one-to-four to create an ultra-concentrated liquid that tastes like liquid espresso and requires significant dilution. This works best for small servings or blended drinks.
Dietary Adaptations
- Gluten-free: Cold brew concentrate is naturally gluten-free as long as you use pure coffee beans with no additives. Check your coffee bag to confirm no flavoring agents or processing aids contain gluten if you have celiac disease.
- Dairy-free: Mix concentrate with any plant-based milk such as oat, almond, soy, or coconut milk instead of dairy cream or regular milk. The concentrate itself contains no dairy, so only your dilution method affects dietary restriction.
- Vegan: Cold brew concentrate contains no animal products, so it’s automatically vegan when diluted with plant-based milk and sweetened with agave, maple syrup, or brown sugar instead of honey. Most coffee beans are vegan unless processed with bone char, so look for vegan-certified brands if that matters to you.
- Low-carb and keto: Drink concentrate diluted with water and added fat such as MCT oil or grass-fed butter for a zero-carb or near-zero-carb coffee that keeps you in ketosis. Skip all sweeteners except monk fruit or stevia to maintain ketogenic ratios.
Storage and Reheating
Refrigerator
Cold brew concentrate stores in an airtight glass jar in the refrigerator for up to three weeks with no quality loss. Keep the jar sealed tightly to prevent oxidation and flavor degradation.
- Store in a glass jar with a plastic or metal lid rather than plastic containers, which absorb coffee smell and flavor
- Keep toward the back of the refrigerator away from the door to maintain consistent cool temperature
- Label your jar with the date you completed steeping so you know when it was made
Freezer
Cold brew concentrate freezes beautifully in ice cube trays for portion-controlled servings that last up to three months. This method works perfectly for busy mornings when you want instant coffee.
- Pour concentrate into silicone ice cube trays and freeze solid, then transfer cubes to a freezer bag for long-term storage
- Pop out one to three cubes as needed, let them thaw at room temperature for five minutes, then use as normal
- Thawed concentrate tastes identical to fresh concentrate with no flavor loss
Reheating
Cold brew concentrate doesn’t require reheating since you typically dilute it with hot or cold water depending on your preference. If you want hot coffee, simply pour concentrate into a mug and add hot water instead of heating the concentrate separately.
- For hot coffee, add four to six ounces of near-boiling water to one to two ounces of concentrate
- Stir gently and let cool for one minute before drinking to avoid mouth burns
- Never microwave or heat concentrate directly, as this can cause uneven heating and bitter flavors
Nutrition Information
| Nutrient | Amount |
|---|---|
| Calories | 5 |
| Total Fat | 0 grams |
| Saturated Fat | 0 grams |
| Carbohydrates | 1 gram |
| Fiber | 0 grams |
| Sugar | 0 grams |
| Protein | 1 gram |
| Sodium | 2 milligrams |
| Cholesterol | 0 milligrams |
Nutrition information reflects pure concentrate measured as a two-ounce serving before dilution. Once you add milk, water, or sweeteners, the nutritional profile changes based on what you add.
Frequently Asked Questions
Can I make cold brew concentrate with pre-ground coffee from the supermarket?
Yes, pre-ground coffee works fine for cold brew concentrate, though freshly ground beans produce noticeably better flavor. Make sure the pre-ground coffee is labeled as coarse or French press grind, since finely ground coffee creates sediment and bitterness.
How do I dilute cold brew concentrate to the strength I prefer?
Start with a one-to-three ratio of concentrate to liquid, meaning one ounce of concentrate to three ounces of water or milk, then adjust up or down based on taste. Some people prefer equal parts concentrate and milk for very strong coffee, while others use up to one ounce of concentrate to eight ounces of water.
Why does my cold brew concentrate taste bitter?
Bitterness usually comes from over-steeping beyond twenty-four hours, using finely ground coffee, or storing at room temperature rather than in the refrigerator. Try reducing steep time to twelve to eighteen hours and always refrigerate immediately after straining.
Can I make cold brew concentrate with a French press instead of a jar?
A French press works beautifully for cold brew concentrate and eliminates most of the straining work since the built-in filter does half the job. Simply add grounds and water, refrigerate for twelve to twenty-four hours, then press and pour into a clean container.
What’s the difference between cold brew concentrate and regular cold brew coffee?
Cold brew concentrate uses a much higher ratio of coffee to water, creating an intensely strong liquid that requires dilution before drinking. Regular cold brew uses a gentler ratio and is meant to be consumed as-is with just ice and milk, making it thinner and faster to brew.
Can I use a metal strainer instead of cheesecloth?
A metal strainer works fine for the initial straining, though you may notice fine sediment in your concentrate that settles at the bottom. If you mind sediment, line your metal strainer with cheesecloth or a thin coffee filter for an extra-clear result.
How much concentrate should I use per cup of coffee?
A standard serving uses one to two ounces of concentrate per cup, with most people preferring the one-and-a-half ounce middle ground. Adjust based on how strong you like your coffee and how much milk or water you’re adding.
Final Thoughts
Making your own cold brew concentrate transforms how you approach daily coffee consumption and saves you money without sacrificing quality or flavor. Once you taste smooth, homemade concentrate next to store-bought alternatives, you’ll never go back to paying premium prices for what amounts to coffee sitting in water.
The next time you’re standing in your kitchen wishing you had more time or better coffee options, remember that this recipe only requires two ingredients and about five minutes of hands-on work. Start your first batch tonight and enjoy two to three weeks of ready-to-drink coffee that tastes better than anything you’ve bought before.
Explore More Coffee Recipes
If you loved making cold brew concentrate at home, explore more cold brew variations and specialty coffee recipes to expand your brewing skills.
Try making pumpkin spice cold brew for seasonal flavor variations that work beautifully in fall and winter. You can also experiment with Toddy cold brew using specialty brewing equipment for even more control over your final concentrate.
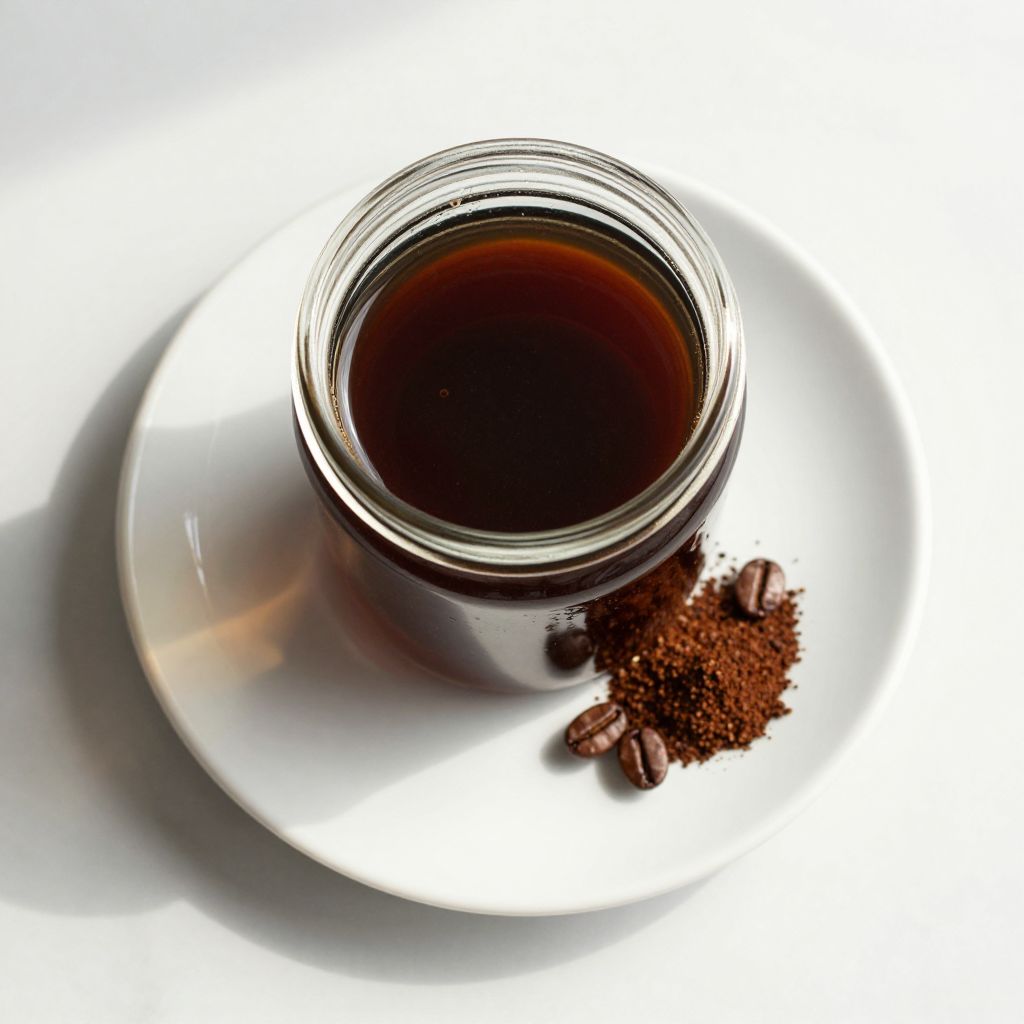
Cold Brew Coffee Concentrate
Ingredients
Equipment
Method
- Step 1: Weigh and grind the coffee beans on the coarsest setting your grinder allows.
- Step 2: Place the coarsely ground coffee in the glass jar and add 4 cups of filtered water.
- Step 3: Stir the mixture thoroughly with a wooden spoon until all grounds are fully submerged and wetted.
- Step 4: Cover the jar and refrigerate for at least 12 hours (up to 24 hours) to steep the concentrate.
- Step 5: Line a fine-mesh strainer with cheesecloth and set it over a pitcher or bowl.
- Step 6: Pour the steeped coffee through the strainer, allowing up to 5 minutes for the liquid to pass through.
- Step 7: Discard or compost the used coffee grounds.
- Step 8: Transfer the strained concentrate to a clean glass jar, seal tightly, and refrigerate for up to 3 weeks.