
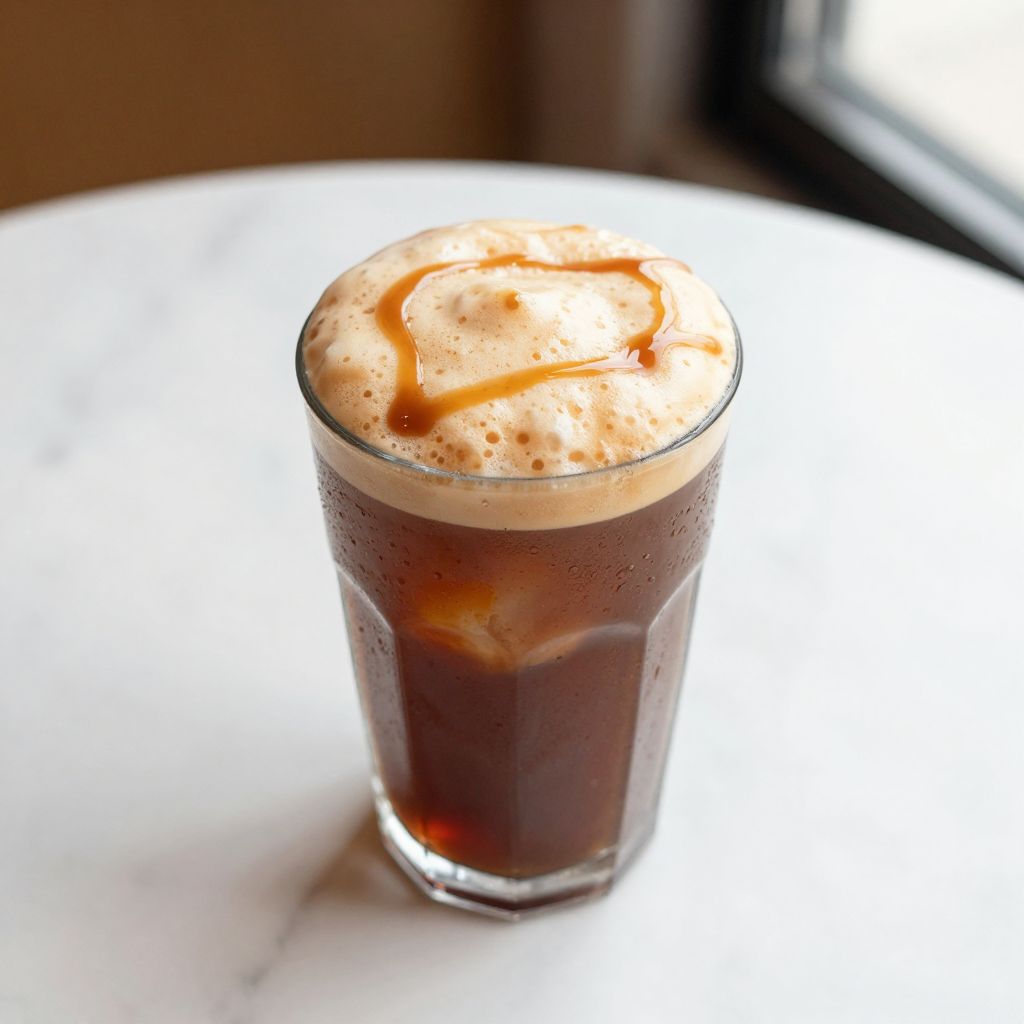
There’s something magical about that first sip of cold brew crowned with a cloud of silky caramel foam that melts on your tongue. Caramel cold foam transforms an ordinary coffee drink into a café-quality experience you can make at home in under five minutes.
This recipe stands out because it requires just three ingredients and no special equipment beyond what you already have in your kitchen. The foam is airy, stable, and tastes like liquid caramel without any artificial aftertaste.
Why You’ll Love This Recipe
Cold foam elevates your daily coffee routine from basic to memorable. Here’s what makes this version worth mastering:
- Requires only three pantry staples with no specialty ingredients or equipment needed
- Ready in under five minutes from start to sip
- Works perfectly on cold brew, iced lattes, or even plain milk for a dessert-like treat
- Stays fluffy and stable for up to two hours in your cup
- Infinitely customizable with different syrups, spices, or milk varieties
My Experience Making This Recipe
I first encountered cold foam at a specialty coffee shop in Portland and immediately knew I had to recreate it at home. The barista charged me five dollars extra for two ounces of foam, which seemed ridiculous until I tasted how genuinely delicious it was.
My first attempt using an electric mixer was a disaster—I over-whipped the foam into grainy, separated butter in about thirty seconds. After experimenting with different techniques and ratios, I discovered that a simple milk frother creates the perfect texture every single time.
Now my mornings start with cold brew poured over ice and topped with this caramel cloud. My partner literally asks me to make him a cup before he’s fully awake because the aroma alone makes the kitchen smell like a pastry shop.
Recipe Overview
- Recipe Name: Caramel Cold Foam
- Servings: 2 to 3 servings (makes about 1.5 cups of foam)
- Prep Time: 5 minutes
- Cook Time: 0 minutes
- Total Time: 5 minutes
- Course: Beverage
- Cuisine: American cafe style
- Calories per Serving: 45 to 60 calories
Equipment You Will Need
- Milk frother (handheld electric or aeroccino style)
- Small bowl or cup for frothing
- Measuring spoons
- Measuring cups
- Small whisk or spoon for stirring
- Glass or mug for serving
Ingredients for Caramel Cold Foam
- Heavy cream: 1/4 cup (60 ml)
- Caramel syrup: 2 tablespoons (30 ml)
- Whole milk: 1/4 cup (60 ml)
Ingredient Notes and Substitutions
- Heavy cream: Creates the fluffy texture and richness that makes the foam stable and luxurious. Substitute with half-and-half if you want a lighter foam, though it won’t hold its shape quite as long.
- Caramel syrup: Adds sweetness and depth without diluting the foam texture like liquid sweeteners might. Substitute with homemade caramel sauce, dulce de leche, or even butterscotch syrup for similar results.
- Whole milk: Adds volume while keeping the foam light and airy. Substitute with any milk alternative like oat, almond, or coconut milk for dietary preferences, though whole milk creates the best texture.
How to Make Caramel Cold Foam
Step 1: Gather Your Ingredients
Measure out 1/4 cup of heavy cream, 2 tablespoons of caramel syrup, and 1/4 cup of whole milk into small bowls or containers. Having everything ready before you start makes the process smoother and faster.
Step 2: Combine the Liquids
Pour the heavy cream, caramel syrup, and whole milk into your frother cup or small bowl. Stir gently with a spoon for about 30 seconds to distribute the caramel evenly throughout the mixture.
Step 3: Insert the Frother Whisk
Place your handheld milk frother whisk into the mixture, making sure the tiny wires are fully submerged. The whisk needs to be completely covered by liquid to create the proper aeration.
Step 4: Start Frothing at the Bottom
Position your frother so the whisk is at the very bottom of the cup, then press the power button. Keep the frother steady at the bottom for the first 10 to 15 seconds to create tiny bubbles throughout the mixture.
Step 5: Move the Frother Upward
After about 15 seconds, slowly move the frother toward the surface of the liquid while continuing to hold the power button. This technique, moving from bottom to top, incorporates air and creates the signature fluffy foam texture.
Step 6: Watch for Peak Formation
Keep frothing until you see soft peaks forming on the surface of the mixture, which takes about 30 to 45 seconds total. The foam should look thick and creamy, not watery or overly separated.
Step 7: Stop Before Over-Whipping
Release the power button as soon as your foam reaches a thick, cloud-like consistency. Over-frothing causes the mixture to separate and become grainy, which ruins the silky texture you’re after.
Step 8: Pour Over Your Coffee
Gently pour your cold brew or iced coffee into a glass filled with ice. Carefully spoon the caramel foam onto the surface of your coffee, letting it sit slightly proud of the rim of the glass.
Pro Tip: Let your foam sit in the frothing cup for 10 seconds after stopping the frother so the bubbles settle slightly and stabilize, making it easier to spoon onto your drink without deflating.
Tips for the Best Caramel Cold Foam
- Use chilled milk and cream straight from the refrigerator, as cold liquids froth better and faster than room temperature ingredients.
- Don’t skip the stirring step when combining the caramel syrup with the milk and cream, or you’ll end up with pockets of pure caramel at the bottom.
- Start your frother at the very bottom of the cup and move upward in one smooth motion for the most even foam distribution.
- The entire frothing process takes only about 45 seconds, so don’t walk away or get distracted once you press the power button.
- If your foam seems thin, your mixture was probably too warm or your frother needs new batteries, both of which reduce aeration efficiency.
- Store leftover caramel syrup in an airtight container in the refrigerator for up to three weeks for future batches.
Common Mistakes to Avoid
- Using room temperature ingredients creates weak, thin foam that collapses within minutes because cold liquids hold air better than warm ones.
- Skipping the initial stirring step leaves unmixed pockets of caramel syrup that taste overly sweet and gritty rather than evenly distributed.
- Over-frothing for more than one minute turns your mixture grainy and separated, making it impossible to get that silky texture.
- Pouring hot coffee directly into cold foam causes it to melt and disappear instantly, so always use cold brew or let hot coffee cool first.
- Using a regular blender instead of a milk frother creates bubbles that are too large and pop almost immediately after pouring.
Serving Suggestions
This foam pairs beautifully with cold brew, iced lattes, and even milk on its own for a dessert-like treat. Try it with different coffee styles and temperatures to find your favorite combination:
- Over chilled cold brew for a smooth, less acidic coffee experience
- On top of iced vanilla lattes for a sweet, creamy drink
- Over iced espresso for a strong coffee with a sweet foam finish
- On top of steamed milk for a caramel steamer without any coffee
- As a topping for iced mocha drinks for extra caramel richness
Variations to Try
- Salted Caramel Cold Foam: Add a tiny pinch of sea salt to your mixture before frothing for a sweet and salty combination that cuts through rich coffee flavors.
- Vanilla Caramel Cold Foam: Replace half the caramel syrup with vanilla syrup for a more delicate sweetness and a flavor profile closer to dessert-inspired drinks.
- Cinnamon Caramel Cold Foam: Sprinkle 1/8 teaspoon of ground cinnamon into your mixture before frothing for a warm spice note that complements the caramel perfectly.
- Maple Caramel Cold Foam: Use half caramel syrup and half maple syrup for an earthy, nutty flavor that works especially well with cold brew.
- Coconut Caramel Cold Foam: Replace the whole milk with full-fat coconut milk for a tropical twist that adds subtle coconut undertones.
Dietary Adaptations
- Dairy-free: Use oat cream or coconut cream instead of heavy cream, and unsweetened almond or oat milk instead of whole milk; the foam will be slightly less stable but still delicious.
- Vegan: Substitute aquafaba (liquid from canned chickpeas) for heavy cream and use plant-based milk; agave or maple syrup works well as the sweetener base.
- Lower-calorie: Use half-and-half instead of heavy cream and reduce the caramel syrup to one tablespoon; the trade-off is a slightly thinner foam.
- Keto-friendly: Replace caramel syrup with a keto-approved caramel or vanilla syrup with zero carbs, and use heavy cream with unsweetened almond milk for a low-carb version.
Storage and Reheating
Refrigerator
This foam is best enjoyed immediately after frothing, but you can store any leftover foam in a sealed container in the refrigerator for up to two days. The texture will become denser and less fluffy as it sits.
- Store in an airtight container to prevent it from absorbing refrigerator odors
- Stir gently before using leftovers, as separation may occur
- Use within 48 hours for the best texture and flavor
Freezer
Freezing this foam is not recommended, as the texture becomes watery and unpleasant when thawed due to ice crystal formation. Your caramel syrup and cream keep well frozen separately, so simply make a fresh batch when you’re ready to enjoy it.
- Store caramel syrup separately in the freezer for up to three months
- Keep heavy cream and milk in the refrigerator instead for best results
Reheating
This recipe is designed for cold drinks, so reheating is not applicable. If you want a warm caramel drink, simply heat your milk and skip the frothing step entirely.
- Stir caramel syrup directly into warm milk for a caramel steamer
- Top hot drinks with room temperature foam if desired, though it will melt quickly
Nutrition Information
| Nutrient | Amount |
|---|---|
| Calories | 50 |
| Total Fat | 3.5 g |
| Saturated Fat | 2.2 g |
| Carbohydrates | 4.8 g |
| Fiber | 0 g |
| Sugar | 4.5 g |
| Protein | 0.5 g |
| Sodium | 35 mg |
| Cholesterol | 12 mg |
These values are approximate and based on standard ingredient measurements. Nutritional content varies depending on your specific caramel syrup brand and milk choice.
Frequently Asked Questions
Can I make this without a milk frother?
Yes, you can use a small whisk or a mason jar with a tight-fitting lid and shake vigorously for about one minute. A hand-crank milk frother also works well, though it requires more manual effort than electric options.
Why is my foam not staying fluffy?
Your ingredients were probably too warm, or you didn’t froth long enough to properly incorporate air. Make sure your cream and milk are cold straight from the refrigerator and froth for the full 30 to 45 seconds.
Can I make a large batch and store it?
You can store leftovers in the refrigerator for up to two days, but the texture degrades significantly as it sits. It’s better to froth fresh foam each time you want to enjoy it for the best results.
What if I don’t have caramel syrup?
You can use caramel sauce, dulce de leche, butterscotch syrup, or even melted caramel candies thinned slightly with water. Stir well to ensure even distribution throughout the milk and cream mixture.
Can I use skim milk or low-fat milk instead?
Low-fat milk works but produces thinner, less stable foam that doesn’t hold up as well. Whole milk and heavy cream create the richest texture, but any dairy milk will work in a pinch.
How do I prevent the foam from separating?
Don’t over-froth, and use cold ingredients fresh from the refrigerator. Separation happens when the mixture gets too warm or is frothed for too long, so timing is everything.
Final Thoughts
Making caramel cold foam at home is honestly easier and cheaper than ordering it from a coffee shop, and you’ll impress anyone who tries it. This recipe proves that café-quality drinks don’t require fancy equipment or complicated techniques.
Start your morning tomorrow with this fluffy cloud of caramel goodness, and you’ll understand why I’m so obsessed with this simple recipe. Your daily coffee ritual is about to become something you actually look forward to.
If you’re interested in exploring more creative coffee topping recipes, check out our guide to making vanilla cold foam at home, or try pairing this foam with a homemade caramel coffee recipe for an even more indulgent experience. Happy frothing, and enjoy every delicious sip!
Caramel Cold Foam
Ingredients
Equipment
Method
- Measure out 1/4 cup (60 ml) heavy cream, 2 tablespoons (30 ml) caramel syrup, and 1/4 cup (60 ml) whole milk into your frothing container.
- Stir the heavy cream, caramel syrup, and whole milk gently for 30 seconds to evenly distribute the caramel.
- Insert the milk frother whisk into the mixture, ensuring the whisk is fully submerged.
- Froth the mixture at the bottom of the cup for 10 to 15 seconds to create fine bubbles.
- Slowly lift the frother toward the surface over the next 15 to 30 seconds while continuing to froth to incorporate air evenly.
- Continue frothing until soft peaks form, about 30 to 45 seconds total; the foam should be thick and cloud-like.
- Release the frother immediately to avoid over-whipping and grainy separation.
- Pour cold brew or iced coffee over ice and spoon the caramel cold foam on top, letting it sit slightly above the rim.