
There’s something almost magical about turning a simple handful of mulberries into a glass of deep, fruity wine that tastes like summer in liquid form. Making mulberry wine at home is easier than you might think, and the reward is a smooth, naturally sweet beverage that feels far more sophisticated than the effort it takes.
This recipe produces a wine with a gorgeous ruby color and subtle berry complexity that improves with age. Whether you’re a seasoned fermentation enthusiast or picking up a wine carboy for the first time, mulberry wine rewards your patience with results that rival store-bought versions at a fraction of the cost.
Why You’ll Love This Recipe
Mulberry wine is forgiving, affordable, and absolutely delicious. Here’s what makes it stand out from other homemade wines.
- Natural sweetness means you need less added sugar than many fruit wines
- The fermentation process is straightforward and takes about three to four months from start to finish
- Mulberries are inexpensive when in season, making this an economical project
- The final product tastes smooth and well-rounded without harsh tannins
- You’ll have enough to share with friends and still keep bottles for yourself
My Experience Making This Recipe
I made my first batch of mulberry wine on a whim after spotting fresh mulberries at the farmer’s market in late June. The fermentation bubbled away peacefully on my kitchen counter for weeks, filling the house with a faintly fruity aroma that made visitors ask what I was cooking.
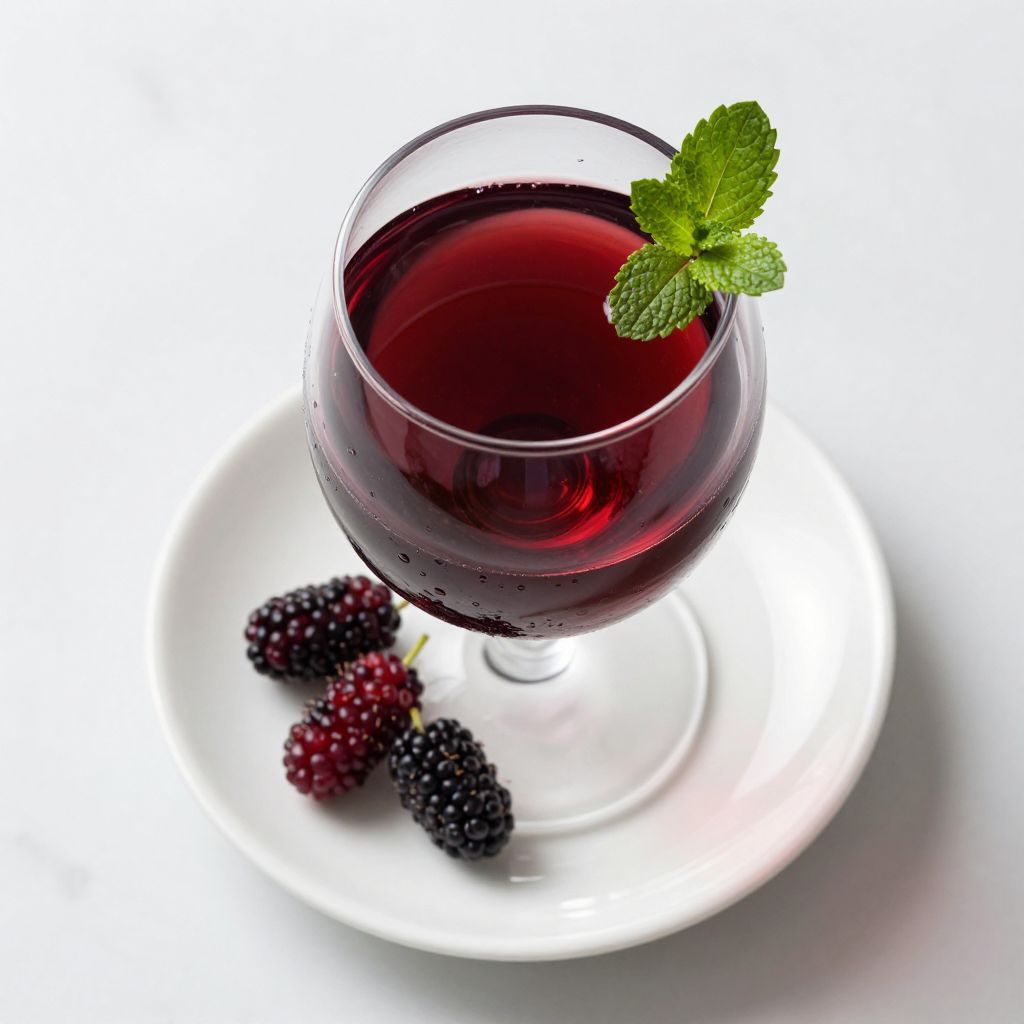
Bottling day came three months later, and I was genuinely surprised by how good it tasted. The wine had developed a beautiful garnet color and a flavor profile that was neither too dry nor cloyingly sweet, with just enough body to feel substantial in the glass.
Friends who tried it asked for the recipe, which is the ultimate validation. Now I make a batch every summer when mulberries are in season, and I actually have to hide bottles from my own pantry to make sure they last through winter.
Recipe Overview
- Recipe Name: Mulberry Wine
- Servings: Makes about 5 bottles (750ml each)
- Prep Time: 30 minutes
- Fermentation Time: 3 to 4 months
- Total Time: 3 to 4 months plus 2 weeks
- Course: Beverage
- Cuisine: Homemade
- Alcohol Content: Approximately 11 to 13 percent ABV
Equipment You Will Need
- One 5-gallon glass carboy or food-grade plastic bucket
- Airlock and rubber bung (or cheesecloth for initial fermentation)
- Large stainless steel pot
- Wooden spoon or stir rod
- Hydrometer (optional but helpful for tracking fermentation)
- Siphon or auto-siphon for racking
- Fine mesh strainer or cheesecloth
- Funnel
- Wine bottles and corks
- Bottle corker or alternative sealing method
- Sanitizer solution (such as potassium metabisulfite)
Ingredients for Mulberry Wine
- Fresh mulberries: 10 pounds, rinsed and crushed
- Sugar: 2 pounds, granulated white sugar
- Water: 1 gallon, preferably filtered or boiled and cooled
- Wine yeast: 1 packet, such as Lalvin K1-V1116 or EC-1118
- Yeast nutrient: 1 teaspoon
- Pectic enzyme: 1/2 teaspoon (helps break down fruit solids)
- Potassium metabisulfite: 1/4 teaspoon, optional (acts as preservative)
Ingredient Notes and Substitutions
- Fresh mulberries: They’re essential for natural flavor and color; frozen mulberries work perfectly if fresh ones aren’t available, and you can thaw them before crushing to release juices more easily.
- Sugar: White granulated sugar ferments cleanly and predictably; brown sugar or honey will change the flavor profile significantly and may create off-flavors.
- Wine yeast: This differs from bread yeast because it tolerates higher alcohol levels; if you can’t find wine yeast, skip the recipe because regular yeast will die before fermentation completes.
- Yeast nutrient: It provides nitrogen and minerals that help yeast stay healthy during fermentation; without it, you risk a stuck fermentation where yeast stops working mid-process.
- Pectic enzyme: This breaks down pectin that makes the wine cloudy; leaving it out means your wine will take longer to clear, but it will eventually settle on its own.
How to Make Mulberry Wine
Thoroughly clean and sanitize your carboy, airlock, siphon, and any other equipment that will touch the wine. Bacteria and wild yeast are your enemies here, so use a proper sanitizer solution and rinse well with boiled water.
Step 1: Sanitize All Equipment
Thoroughly clean and sanitize your carboy, airlock, siphon, and any other equipment that will touch the wine. Bacteria and wild yeast are your enemies here, so use a proper sanitizer solution and rinse well with boiled water.
Step 2: Crush the Mulberries
Place your rinsed mulberries in a large pot and crush them by hand or with a potato masher until they release their juices. You don’t need to pulverize them completely; breaking the skin is enough to extract the flavor and color during fermentation.
Step 3: Combine Fruit, Water, and Sugar
Pour the crushed mulberries and their juices into your sanitized carboy or fermentation vessel. Add the gallon of cool water and the sugar, stirring well to dissolve the sugar completely.
Step 4: Add Pectic Enzyme and Let Rest
Stir in the pectic enzyme and cover the carboy loosely with cheesecloth or a clean cloth. Let the mixture sit at room temperature for 24 hours; this resting period allows the enzyme to start breaking down the fruit solids and improves clarity.
Step 5: Activate and Add Yeast
Rehydrate your wine yeast according to the packet instructions, usually by mixing it with a small amount of warm water and letting it sit for 15 minutes. This gives the yeast a gentle start and improves its viability; pitching dry yeast directly into the must can shock it and reduce fermentation vigor.
Step 6: Pitch Yeast and Nutrient
Stir the yeast nutrient into your must, then gently pour the rehydrated yeast into the carboy and stir well. Cover loosely with cheesecloth for the first 24 hours to allow carbon dioxide to escape while keeping contaminants out.
Step 7: Install Airlock and Monitor Fermentation
After 24 hours, fit the airlock and rubber bung snugly onto the carboy. You should see vigorous bubbling within a few days; if you have a hydrometer, take a reading now to establish your starting gravity.
Step 8: Rack Off Fruit Solids
After about one week of active fermentation, when the bubbling slows noticeably, siphon the wine off the fruit solids into a clean, sanitized carboy. Leave the sediment behind; racking separates the clear wine from the pulp and dead yeast, preventing off-flavors from developing.
Step 9: Allow Secondary Fermentation
Reinstall the airlock and let the wine ferment quietly at cool room temperature for two to three months. Activity will slow considerably, but fermentation continues as yeast works through the remaining sugars.
Step 10: Rack Again and Prepare to Bottle
After two to three months, when fermentation appears completely stopped and sediment has settled on the bottom, rack the wine one more time into a clean carboy. Taste a small sample; the wine should be fully dry or just slightly sweet, depending on your preference.
Step 11: Bottle and Seal
Siphon the clear wine into sanitized bottles and seal with corks or caps. If you want to add potassium metabisulfite as a preservative, dissolve 1/4 teaspoon in a little water and stir it in before bottling for longer shelf life.
Step 12: Age and Enjoy
Store the bottles upright in a cool, dark place for at least two weeks before drinking, though the wine will continue improving for six months to a year. Patience pays off here; young wine tastes a bit raw, but given time it becomes smooth and well-integrated.
Pro Tip: Keep your fermentation area at a consistent temperature between 65 and 72 degrees Fahrenheit; temperature swings can stress yeast and produce off-flavors, so a basement corner or cool closet works better than a sunny kitchen counter.
Tips for the Best Mulberry Wine
- Start with the freshest mulberries you can find, ideally picked when fully ripe with deep color; underripe berries lack flavor and overripe ones can ferment too quickly.
- Use filtered or boiled water if your tap water is heavily chlorinated, since chlorine can interfere with yeast activity and create off-flavors.
- Keep detailed notes on dates, gravity readings, and tasting observations; this record helps you troubleshoot future batches and track how your wine evolves.
- Resist the urge to taste constantly during fermentation; every time you open the carboy, you risk introducing bacteria and letting carbon dioxide escape.
- When racking, siphon slowly and carefully to avoid stirring up sediment, which clouds the wine and can introduce off-flavors into your clear product.
- Store finished wine in a cool place away from direct sunlight; light breaks down color compounds and creates oxidized, stale flavors over time.
Common Mistakes to Avoid
- Using bread yeast instead of wine yeast results in a stuck fermentation and vinegar-like flavors because bread yeast dies at lower alcohol levels.
- Not sanitizing equipment properly introduces bacteria that spoil the wine or create vinegar instead of a pleasant beverage.
- Fermenting at temperatures above 75 degrees Fahrenheit produces fruity esters that smell more like nail polish than wine and makes yeast work too fast.
- Bottling before fermentation is completely finished creates explosive pressure inside the bottle, potentially breaking glass and creating a dangerous mess.
- Failing to rack off sediment at the right time leaves dead yeast cells in contact with the wine, creating sulfurous, musty flavors that ruin the final product.
Serving Suggestions
Mulberry wine shines on its own as an after-dinner sipper, but it also pairs beautifully with desserts and lighter meals. Serve it slightly chilled, around 50 to 55 degrees, to bring out the fruity notes without muting the complexity.
- Enjoy it alongside chocolate desserts, where the wine’s fruity undertones complement cocoa richness
- Pair with aged cheeses and cured meats for a sophisticated appetizer spread
- Serve with berry tarts or stone fruit desserts for a flavor harmony that feels elegant and natural
- Try it with spiced or cinnamon-forward baked goods for unexpected depth
- Sip it on its own after a meal as a contemplative nightcap
Variations to Try
- Add half a pound of honey instead of all granulated sugar for a rounder, more complex flavor profile and slightly higher alcohol content.
- Blend mulberries with blackberries at a one-to-one ratio for deeper color and more tannin structure, creating a wine that feels more substantial.
- Include one cinnamon stick and three whole cloves in the must during initial fermentation for subtle spice notes that enhance without overwhelming the fruit.
- Use only eight pounds of mulberries and increase water to one and a half gallons for a lighter, crisper wine that drinks more like a spritzer.
- Add one pound of raisins to the must for extra body and natural tannins that make the finished wine feel more age-worthy and structured.
Dietary Adaptations
- Gluten-free: This recipe is naturally gluten-free since it contains only fruit, sugar, water, and yeast; ensure your yeast packet is certified gluten-free if you have celiac disease.
- Dairy-free: Mulberry wine contains no dairy products, making it suitable for anyone avoiding milk or milk-based ingredients.
- Vegan: This recipe is vegan-friendly; just verify that your yeast and any additives don’t use animal-derived ingredients in their processing.
- Low-sugar or keto: This recipe won’t work for strict low-carb diets since fermentation requires significant sugar to create alcohol, though the final wine has minimal residual sugar.
Storage and Reheating
Refrigerator
Once opened, store mulberry wine upright in the refrigerator to slow oxidation. It keeps well for three to four weeks after opening if sealed tightly.
- Reseal bottles with corks or wine bottle caps between pours
- Keep the temperature consistent between 35 and 45 degrees Fahrenheit
- Expect the flavor to flatten slightly after a week; drink sooner rather than later
Freezer
Freezing wine changes its texture and flavor profile noticeably, so it’s not recommended for drinking straight. However, frozen wine works well in cooking applications where the texture matters less.
- Freeze in ice cube trays for easy portioning in recipes
- Transfer frozen cubes to freezer bags for long-term storage
- Use within six months for best results
Long-Term Storage
Store unopened bottles horizontally in a cool, dark place away from vibration and temperature fluctuations. Properly made and stored mulberry wine improves for at least one to two years, with some batches developing more complexity over time.
- Keep bottles in a wine rack or cabinet between 45 and 65 degrees Fahrenheit
- Avoid storing near heat sources, sunlight, or appliances that vibrate
- Check bottles occasionally for leaks or signs of spoilage
Nutrition Information
| Nutrient | Amount |
|---|---|
| Calories | 120 |
| Total Fat | 0g |
| Saturated Fat | 0g |
| Carbohydrates | 4g |
| Fiber | 0g |
| Sugar | 0g |
| Protein | 0g |
| Sodium | 10mg |
| Cholesterol | 0mg |
This nutrition information reflects a standard 5-ounce wine serving and assumes complete fermentation with minimal residual sugar. Actual values vary based on your fermentation method and how long you age the wine.
Frequently Asked Questions
Can I make mulberry wine with frozen mulberries?
Yes, frozen mulberries work perfectly and often produce even better results because freezing breaks down cell walls and makes juice extraction easier. Thaw them completely before crushing and adding to your must.
How do I know if my wine is spoiled?
Spoiled wine develops a vinegar smell, tastes sour or off, or shows white mold floating on the surface. If you’re uncertain, do not drink it; trust your nose and taste buds.
What if my fermentation stops before the wine tastes dry?
This stuck fermentation usually happens because yeast died from temperature stress, nutrient deficiency, or high alcohol. Try warming the carboy gently to 70 degrees and adding fresh yeast, or accept the residual sweetness as a feature rather than a flaw.
Why is my mulberry wine still cloudy after three months?
Cloudiness usually indicates suspended fruit particles or yeast haze, not spoilage. Rack the wine one more time, and it will clear over another month or two; patience works better than fining agents in most cases.
Can I use table sugar instead of granulated white sugar?
Granulated white sugar ferments more predictably and cleanly than table sugar, which often contains anti-caking agents that create off-flavors. Stick with granulated if possible.
How long before my mulberry wine tastes good?
Newly bottled wine tastes raw and unbalanced for at least two weeks, but noticeably improves after two months. The best flavor develops around six months to one year after bottling, as the wine rounds out and flavors integrate.
Do I need special equipment like a hydrometer?
A hydrometer helps track fermentation progress and predict final alcohol content, but it’s optional. You can monitor fermentation simply by watching airlock activity and tasting samples until the wine tastes fully dry.
Final Thoughts
Making mulberry wine at home transforms fresh fruit and patience into something truly special that you crafted with your own hands. The process teaches you about fermentation, flavor development, and the quiet satisfaction of creating something delicious from scratch.
Give this recipe a try this coming season, and you might find yourself making a batch every year. Your future self will thank you when you’re opening a bottle in December and tasting the pure essence of summer.
Ready to explore more homemade beverages and fermentation projects? Check out our guide to making mulled wine in a crock pot for a cozy variation, or dive deeper into fermentation with our comprehensive homemade wine recipe collection that covers everything from fruit wines to grain-based creations.
Mulberry Wine
Ingredients
Equipment
Method
- Thoroughly clean and sanitize the carboy, airlock, siphon, and any other equipment using a sanitizer solution, then rinse well with boiled water.
- Place 10 pounds of rinsed mulberries in a large stainless steel pot and crush by hand or with a potato masher until they release their juices.
- Pour the crushed mulberries and their juices into the sanitized carboy, add 1 gallon of cool water and 2 pounds of granulated white sugar, and stir well until the sugar is completely dissolved.
- Stir in 1/2 teaspoon of pectic enzyme, cover the carboy loosely with cheesecloth, and let the mixture rest at room temperature for 24 hours.
- In a small container, rehydrate 1 packet of wine yeast according to packet instructions by mixing with warm water and letting sit for 15 minutes.
- Stir 1 teaspoon of yeast nutrient into the must, then gently pour in the rehydrated yeast and stir well; cover loosely with cheesecloth for the first 24 hours.
- After 24 hours, fit the rubber bung and airlock onto the carboy and ferment at 65 to 72°F; expect vigorous bubbling within a few days.
- When bubbling slows after about one week, siphon the wine off the fruit solids into a clean, sanitized carboy, leaving sediment behind.
- Reinstall the airlock and allow the wine to ferment quietly at cool room temperature (65 to 72°F) for 3 months.
- After fermentation stops and sediment settles (approximately 3 months), rack the wine one more time into a clean carboy, then taste and adjust sweetness if desired.
- Siphon the clear wine into sanitized bottles, optionally dissolve 1/4 teaspoon of potassium metabisulfite in water and stir in for preservation, then seal with corks.
- Store bottles upright in a cool, dark place at 50 to 55°F for at least 2 weeks before drinking; wine will improve up to one year.