
There’s something magical about the aroma of root beer simmering on the stove, filling your kitchen with warm spice and vanilla notes that instantly transport you back to old-fashioned soda fountains and lazy summer afternoons. Making root beer extract at home lets you skip the artificial flavors and craft something authentically delicious that tastes miles better than anything from a bottle.
This recipe creates a concentrated, shelf-stable extract that you can use to flavor carbonated water, cream sodas, ice cream floats, or even baked goods. The beauty lies in its simplicity and versatility: you steep aromatic spices and botanicals in alcohol, strain, and store.
Why You’ll Love This Recipe
Homemade root beer extract gives you total control over flavor intensity and sweetness, and it makes an impressive homemade gift that feels far more thoughtful than store-bought options. You’ll impress friends and family with genuinely complex, layered flavors.
- Creates a concentrated flavoring that lasts months in your pantry
- Uses simple, recognizable botanicals and spices you can source easily
- Perfect for making custom sodas, floats, and desserts
- Makes an elegant homemade gift for food enthusiasts
- Costs far less than buying specialty root beer syrups repeatedly
My Experience Making This Recipe
The first time I made this extract, I was skeptical that blending anise, sassafras, wintergreen, and vanilla could actually taste like root beer. Within 48 hours of steeping, my kitchen smelled incredible, and the resulting liquid captured that nostalgic spice profile I remembered from childhood.
I bottled it in small glass jars and used it within a week to make carbonated root beer, and the result was genuinely better than several commercial brands I tested side by side. The flavor felt alive and complex rather than flat and one-dimensional.
What surprised me most was how flexible the recipe proved to be: tweaking spice amounts let me dial in exactly the flavor profile my family preferred, something impossible with pre-made syrups. Now I make a fresh batch every few months and gift smaller bottles to friends who’ve become obsessed with it.
Recipe Overview
- Recipe Name: Homemade Root Beer Extract
- Servings: Makes approximately 1 cup of extract
- Prep Time: 15 minutes
- Steeping Time: 7 to 14 days
- Total Time: 1 to 2 weeks plus straining
- Course: Condiment/Flavoring
- Cuisine: American
- Calories per Serving: 0 calories per tablespoon (used as a concentrate)
Equipment You Will Need
- One clean glass jar with a tight-fitting lid (1 quart or larger)
- Measuring spoons and measuring cups
- Cheesecloth or fine mesh strainer
- Small funnel
- Clean glass bottles for storage
- Coffee filter or paper towel (optional, for ultra-fine straining)
- Spoon or wooden stirrer for mixing
Ingredients for Root Beer Extract
- Vodka or high-proof alcohol: 2 cups (80 proof minimum; vodka, bourbon, or grain alcohol all work)
- Anise seed: 1 tablespoon, slightly crushed
- Sassafras bark: 1 tablespoon, chopped or broken
- Wintergreen leaves: 1 teaspoon, dried
- Sarsaparilla root: 1 tablespoon, chopped
- Dried vanilla bean: 1 whole bean, split lengthwise
- Star anise: 2 pods
- Cinnamon stick: One 3-inch stick, broken into pieces
- Whole cloves: 4 to 5 cloves
- Black peppercorns: 3 to 4 peppercorns
- Dried ginger root: 1 teaspoon, sliced thin
- Nutmeg: 1/4 teaspoon, freshly grated
Ingredient Notes and Substitutions
- Vodka or high-proof alcohol: This base extracts the botanical flavors efficiently while remaining neutral-tasting. You can substitute bourbon for a deeper, woodier flavor or use a neutral grain spirit if you prefer.
- Sassafras bark: This is the signature root beer ingredient, providing the earthy, slightly medicinal backbone. If unavailable, increase sarsaparilla root to 2 tablespoons, though the flavor will shift noticeably.
- Anise seed: Creates the licorice-forward sweetness that defines root beer’s profile. Fennel seed works as a substitute but tastes slightly more herbaceous and less sweet.
- Wintergreen leaves: Adds a cooling, minty brightness that rounds out harsh spice notes. Peppermint or spearmint dried leaves can substitute, though the flavor becomes more obviously minty.
- Vanilla bean: Contributes creamy sweetness and aromatics that soften the blend. You can substitute 1 teaspoon pure vanilla extract added near the end of steeping, though whole bean provides richer flavor depth.
- Cinnamon stick: Delivers warm spice without overwhelming other flavors. Ceylon cinnamon tastes slightly softer than cassia cinnamon; either works, though cassia provides bolder spice punch.
How to Make Root Beer Extract
Step 1: Gather and Prepare Your Botanicals
Collect all dried herbs, spices, and botanicals and lay them out on a clean surface so you can verify you have everything. This prevents the frustration of realizing halfway through steeping that you’re missing a key ingredient.
Step 2: Lightly Crush the Anise and Star Anise
Place the anise seed and star anise in a small bowl and gently crush them with the back of a spoon just enough to crack the outer layer. Crushing slightly opens up these seeds so the alcohol can extract their oils more effectively without pulverizing them into dust.
Step 3: Break the Cinnamon and Sassafras Into Smaller Pieces
Break the cinnamon stick into small fragments and chop the sassafras bark into roughly pea-sized pieces using a knife or your hands. Smaller pieces increase surface area and speed up flavor extraction significantly.
Step 4: Combine All Ingredients in the Glass Jar
Pour the vodka or high-proof alcohol into your clean glass jar, then add every ingredient: crushed anise, star anise, sassafras, wintergreen, sarsaparilla, vanilla bean, cinnamon pieces, cloves, peppercorns, ginger, and nutmeg. Stir well for about 30 seconds to combine everything evenly throughout the liquid.
Step 5: Seal the Jar Tightly and Label It
Screw the lid on tightly and make sure it’s secure, then write the date on the jar with a permanent marker so you know when you started steeping. A tight seal prevents the alcohol from evaporating and keeps your extract fresh.
Step 6: Store in a Cool, Dark Place for 7 to 14 Days
Place the sealed jar in a cupboard, pantry, or closet away from direct sunlight and heat for at least one week. The longer you steep (up to two weeks), the more pronounced and complex the flavor becomes, though most of the flavor extraction happens in the first week.
Step 7: Shake the Jar Daily
Every morning, take the jar out and shake it vigorously for 10 to 15 seconds, then return it to its dark storage spot. Daily shaking keeps the botanicals in contact with the alcohol and ensures even flavor distribution throughout the liquid.
Step 8: Strain Through Cheesecloth
After your desired steeping time has passed, place the cheesecloth or fine mesh strainer over a clean bowl and slowly pour the extract through it, catching all the liquid while filtering out the solids. Let it drip naturally without squeezing or pressing the botanicals, which would release bitter tannins and cloud your extract.
Step 9: Optional Fine Straining Through Coffee Filter
For ultra-clear extract, pour the strained liquid through a coffee filter or folded paper towel into another clean bowl, letting it drip slowly. This step removes tiny particles and sediment, creating a crystal-clear final product, though it takes patience.
Step 10: Bottle and Store
Use the small funnel to pour your finished extract into clean glass bottles with tight-sealing lids, leaving about half an inch of headspace at the top. Label each bottle with the contents and the date so you remember how old it is and what’s inside.
Pro Tip: Don’t squeeze the botanical solids when straining; patience yields a crystal-clear extract with pure, clean flavor rather than murky, bitter-tasting liquid.
Tips for the Best Root Beer Extract
- Use whole botanicals rather than pre-ground spices whenever possible, since whole spices maintain their oils and flavors far longer than ground versions. Ground spices often taste stale and contribute dusty, off-flavors to your extract.
- Keep your steeping jar in a consistently cool location away from temperature fluctuations and direct sunlight. Heat and light degrade the delicate flavors and can cause the alcohol to evaporate.
- Start tasting your extract after day 5 by mixing a small amount with sparkling water to check flavor development. This helps you dial in your preferred steeping time without over-extracting.
- Source your botanicals from reputable suppliers who specialize in herbal and culinary ingredients rather than general grocery stores. Specialty suppliers stock fresher, higher-quality materials that make a noticeable difference in the final flavor.
- Keep detailed notes on which botanicals you used and in what proportions so you can adjust future batches to your exact taste preferences. Small tweaks to spice amounts dramatically shift the flavor balance.
- Use high-proof alcohol with at least 80 proof strength to ensure proper extraction and food safety. Lower proof alcohols don’t extract flavors efficiently and may not preserve the extract as effectively.
Common Mistakes to Avoid
- Squeezing or pressing the botanicals during straining extracts bitter tannins and creates a cloudy, unpleasant-tasting final product. Always let the liquid drain naturally through the cheesecloth without pressure.
- Using pre-ground spices instead of whole botanicals results in dusty, stale flavors and requires much shorter steeping times. Whole spices stay fresh longer and extract more cleanly.
- Storing the steeping jar in direct sunlight or a warm location causes the alcohol to evaporate and damages the delicate botanical flavors. Keep your jar in a cool, dark cupboard for consistent results.
- Adding too much wintergreen or peppermint overpowers the other flavors and creates an extract that tastes more like toothpaste than root beer. Stick to the recipe amounts unless you prefer intensely minty flavor.
- Failing to label your jar with the start date means you can’t track steeping time and might accidentally over-extract or under-extract. Always date your batch immediately after adding ingredients.
Serving Suggestions
Root beer extract shines in countless applications beyond just making homemade soda, so get creative with how you use it. A single tablespoon transforms basic ingredients into something special.
- Mix 1 tablespoon extract with 12 ounces of chilled sparkling water and a touch of simple syrup for classic homemade root beer
- Stir 2 teaspoons extract into vanilla ice cream just before churning for rich, spiced root beer ice cream
- Add 1 teaspoon to brownie batter or cake batter for subtle spice complexity that deepens chocolate flavors
- Float a scoop of vanilla ice cream in a glass of root beer made from your extract for a nostalgic float
- Mix 1 teaspoon into cream cheese frosting for subtle root beer flavor on cupcakes or layer cakes
Variations to Try
- Spiced Root Beer Extract: Add 1 teaspoon of whole allspice berries and increase the dried ginger to 2 teaspoons for a warmer, more fall-spiced version perfect for autumn sodas and baked goods.
- Smoky Root Beer Extract: Include a small piece of smoked oak or hickory wood during steeping to add subtle smokiness that pairs beautifully with bourbon-based cream sodas and root beer floats.
- Lighter, Vanilla-Forward Extract: Reduce the sassafras to 1 teaspoon and add a second vanilla bean plus 1/2 teaspoon pure vanilla extract at the very end for a sweeter, creamier profile that works beautifully in desserts.
- Herbal Root Beer Extract: Add 1 teaspoon dried chamomile and 1 teaspoon dried mint to round out the spice blend with floral, soothing notes that create a more sophisticated flavor profile.
Dietary Adaptations
- Gluten-Free: This recipe is naturally gluten-free since it contains only alcohol and dried botanicals with no grain additives, making it safe for anyone following a gluten-free diet.
- Alcohol-Free: Substitute the vodka with vegetable glycerin and increase steeping time to 3 to 4 weeks, though the final flavor will taste slightly less intense and the extract won’t have the same preservative qualities.
- Vegan: This extract is naturally vegan; all ingredients are plant-based dried botanicals and alcohol, making it suitable for any dietary restriction.
- Low-Sugar: Use this extract to flavor plain sparkling water without added simple syrup, or sweeten with a sugar-free sweetener of your choice when making homemade root beer.
Storage and Reheating
Refrigerator
Store your sealed bottles of root beer extract in a cool pantry or cupboard at room temperature indefinitely, where they’ll keep for 1 to 2 years without any flavor loss. Refrigeration isn’t necessary since the high alcohol content preserves everything naturally.
- Keep bottles tightly sealed to prevent evaporation
- Store away from direct sunlight and heat
- Label bottles with the date so you track age
Freezer
Freezing is unnecessary for long-term storage, though you can freeze extract if desired and it will remain shelf-stable for several years. The alcohol content prevents freezing at typical freezer temperatures anyway.
- Freezing offers no additional benefit beyond room-temperature storage
- Thaw completely before opening to prevent condensation inside the bottle
Reheating
You don’t reheat extract; simply shake the bottle well and measure out what you need for your recipe or beverage. If separation or settling occurs after long storage, shake well and use normally.
- Shake before each use to ensure even ingredient distribution
- Use a measuring spoon or dropper for accurate portioning
- Return immediately to cool storage after use
Nutrition Information
| Nutrient | Amount |
|---|---|
| Calories | 0 |
| Total Fat | 0g |
| Saturated Fat | 0g |
| Carbohydrates | 0g |
| Fiber | 0g |
| Sugar | 0g |
| Protein | 0g |
| Sodium | 0mg |
| Cholesterol | 0mg |
This nutritional information reflects the extract as a flavoring concentrate used in small amounts, which contains negligible calories and nutrients from the botanicals themselves.
Frequently Asked Questions
Can I use dried herbs from my garden instead of store-bought botanicals?
Yes, but make sure your herbs are completely dry and mold-free before using them in alcohol. Garden herbs like mint and ginger work beautifully, though you may need to adjust amounts based on how potent your dried herbs are.
How long does the extract take to become ready for use?
Most flavor extraction happens within 7 days, though steeping for 10 to 14 days develops deeper, more complex flavors. You can start tasting after day 5 to find your preferred steeping time.
What alcohol should I use if I don’t want to use vodka?
Bourbon, rye, or grain alcohol all work beautifully and add their own flavor dimensions to the final extract. Just make sure whatever you choose is at least 80 proof for proper extraction and preservation.
Can I reduce the alcohol content or make this without alcohol?
You can substitute vegetable glycerin for the alcohol, though you’ll need to steep for 3 to 4 weeks and the final extract won’t preserve as long. Glycerin-based extracts keep about 6 months refrigerated rather than years at room temperature.
Should I use fresh or dried botanicals?
Use dried botanicals exclusively, as fresh herbs contain water that dilutes the alcohol and promotes mold growth. Dried botanicals are concentrated, flavorful, and shelf-stable.
What makes my extract cloudy instead of clear?
Pressing the botanicals during straining or using pre-ground spices instead of whole botanicals causes cloudiness and off-flavors. Always strain gently and use whole botanicals for crystal-clear results.
Can I reuse the strained botanicals to make a second batch?
You can steep the used botanicals a second time, though the flavor will be noticeably weaker than the first extraction. Most people simply compost the spent botanicals and start fresh with new ones.
Final Thoughts
Making root beer extract at home connects you to the flavors and traditions that made root beer a beloved American classic, and the process itself feels like creating something genuinely special. Once you taste the difference homemade extract makes in sodas, floats, and baked goods, you’ll never want to go back to commercial versions.
Try this recipe today and experience the satisfaction of crafting something delicious with your own hands, then experiment with variations and storage to find your perfect flavor profile. Share your homemade root beer extract with friends and family, and watch their faces light up when they taste the authentic, complex spice blend you created yourself.
If you enjoyed this root beer extract recipe, you might also love exploring the best homemade root beer recipe for a complete soda-making experience. For another classic homemade soda option, check out the birch beer recipe and expand your homemade beverage collection with equally delicious variations.
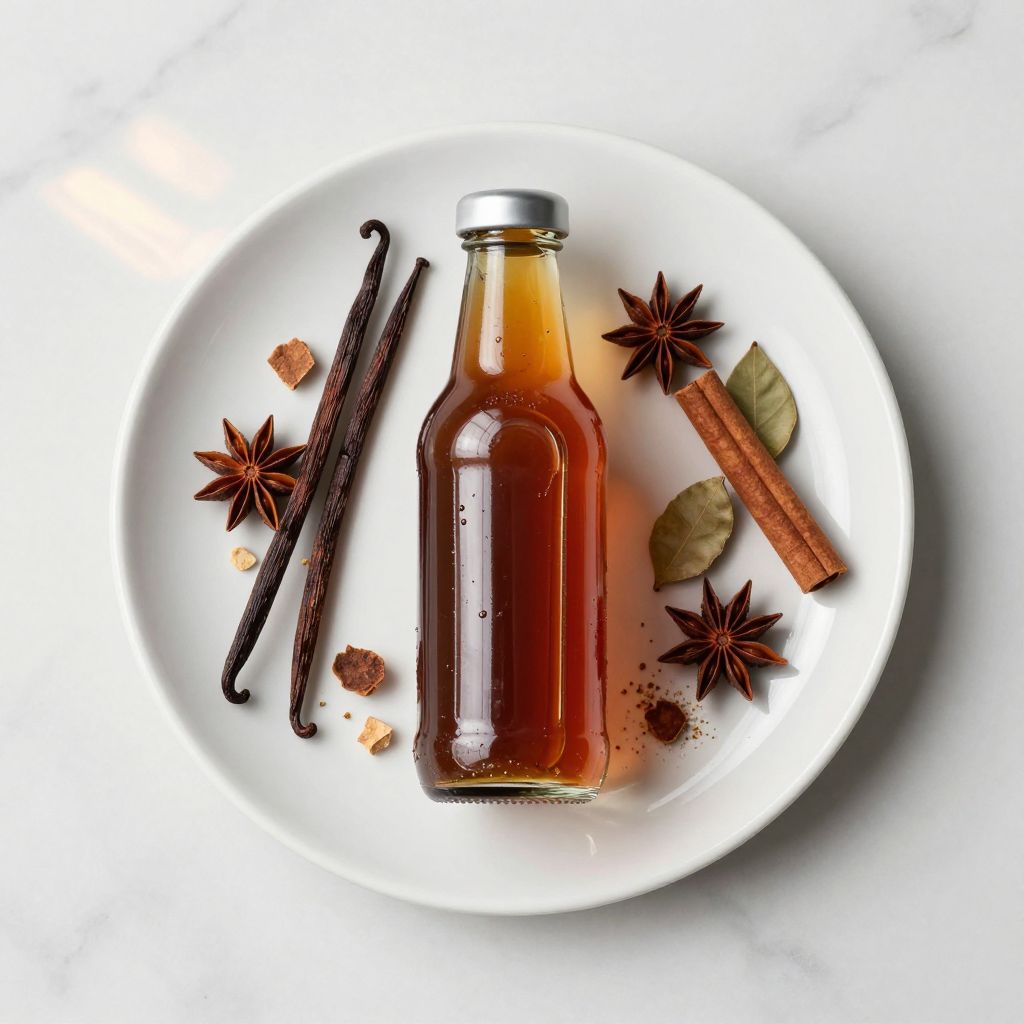
Homemade Root Beer Extract
Ingredients
Equipment
Method
- Gather all dried herbs, spices, and botanicals and verify quantities before beginning.
- Lightly crush the anise seed and star anise in a small bowl with the back of a spoon to crack the outer layers.
- Break the cinnamon stick into small fragments and chop the sassafras bark into pea-sized pieces.
- Pour the alcohol into a clean glass jar and add crushed anise, star anise, sassafras, wintergreen, sarsaparilla, vanilla bean, cinnamon pieces, cloves, peppercorns, ginger, and nutmeg.
- Stir the mixture for 30 seconds to evenly distribute botanicals.
- Seal the jar tightly and label it with the start date.
- Store the jar in a cool, dark place and steep for 7 to 14 days, shaking daily for 10 to 15 seconds.
- After steeping, strain the extract through cheesecloth or a fine mesh strainer into a clean bowl without pressing the solids.
- Optionally, filter the strained extract through a coffee filter or paper towel for a crystal-clear result.
- Using a funnel, bottle the clear extract into glass bottles, leaving 1/2 inch headspace, then label with contents and date.