
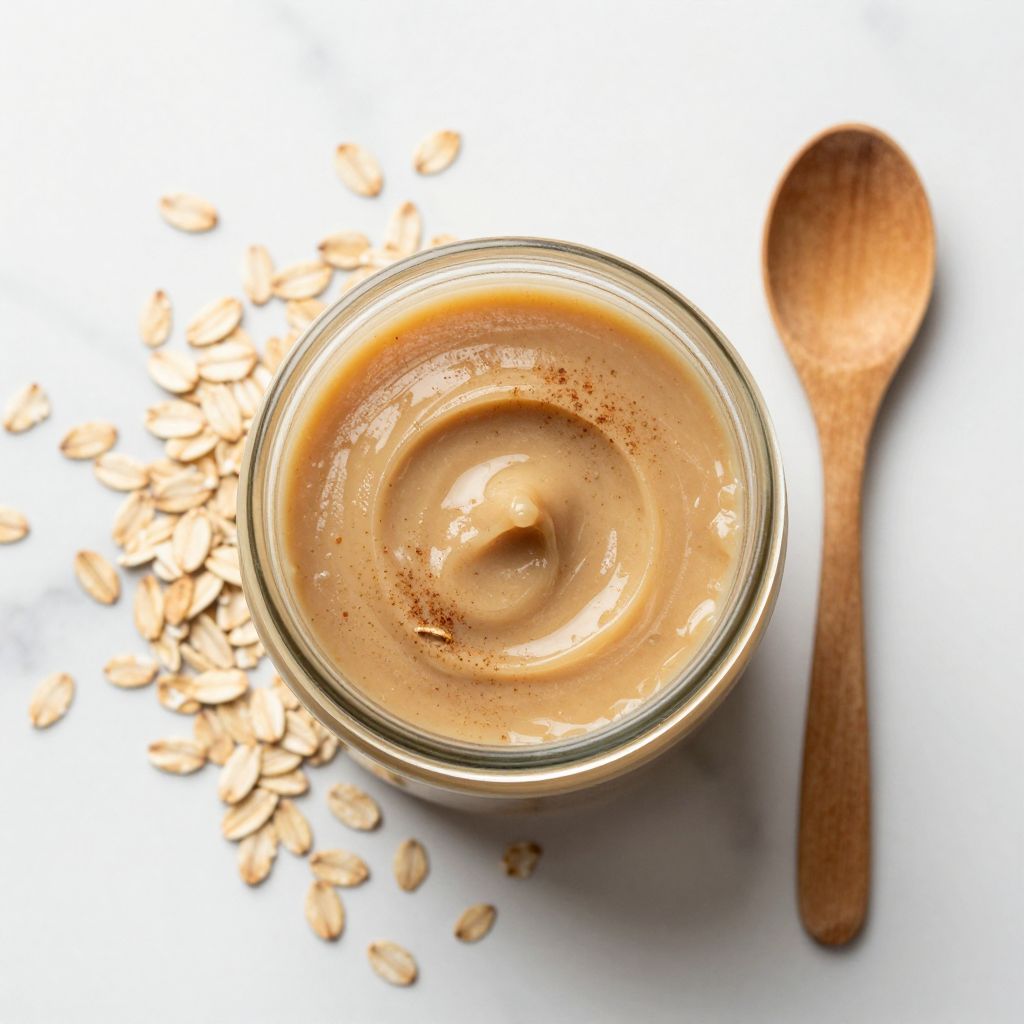
There’s something deeply satisfying about pouring homemade oat milk creamer into your morning coffee and watching it swirl into a perfect caramel hue. This recipe transforms simple ingredients into a silky, dairy-free creamer that tastes so much better than anything you’d grab from the store shelf.
Making your own creamer takes just minutes and costs a fraction of what you pay for bottled versions. You control every ingredient, which means no weird additives, no mystery thickeners, and no guilt about what you’re putting in your body.
The result is creamy, naturally slightly sweet, and endlessly customizable to match your taste preferences. Whether you’re vegan, lactose-intolerant, or simply curious about plant-based swaps, this creamer delivers café-quality richness to your daily cup.
Why You’ll Love This Recipe
This oat milk creamer hits every mark: it’s quick, affordable, and tastes genuinely delicious. You probably already have most ingredients in your pantry right now.
- Takes under 5 minutes from start to finish with zero cooking required
- Costs roughly one-third the price of store-bought dairy-free creamers
- Free from gums, preservatives, and artificial flavors you can’t pronounce
- Works beautifully in hot coffee, cold brew, and even smoothies
- Endlessly customizable with vanilla, spices, or maple syrup to match your mood
My Experience Making This Recipe
I started making this creamer on a random Tuesday when I realized I’d spent more on store-bought creamers that month than on actual coffee. The first batch was honestly a gamble because I wasn’t sure if blending oats with water and a pinch of salt could really taste like the real thing.
Spoiler alert: it absolutely does. The moment I tasted it, I understood why so many people swear by homemade versions. The oats create a naturally creamy texture that’s almost indistinguishable from dairy, without any chalky aftertaste I’d gotten used to.
Now I make a fresh batch every few days and keep it in a glass jar on my counter. My friends have started asking for the recipe after trying my coffee, which is honestly the highest compliment a food lover can receive.
Recipe Overview
- Recipe Name: Homemade Oat Milk Creamer
- Servings: Makes approximately 2 cups
- Prep Time: 5 minutes
- Cook Time: 0 minutes
- Total Time: 5 minutes
- Course: Beverage
- Cuisine: Plant-Based
- Calories per Serving: 35 calories per 2-tablespoon serving
Equipment You Will Need
- High-powered blender (Vitamix or similar recommended)
- Fine mesh strainer or nut milk bag
- Large mixing bowl
- Glass jar with lid for storage
- Measuring cups and spoons
- Wooden spoon or spatula
Ingredients for Oat Milk Creamer
- 1 cup old-fashioned rolled oats (not instant or steel-cut)
- 4 cups filtered water (cold or room temperature)
- 1 tablespoon maple syrup or agave nectar
- 1/2 teaspoon vanilla extract
- Pinch of sea salt
- Optional: 1/4 teaspoon cinnamon for warm spice notes
Ingredient Notes and Substitutions
- Rolled oats: They create the ideal creamy base without blending into flour. Steel-cut or instant oats will either be too thick or turn the creamer gritty.
- Filtered water: It ensures clean taste without chlorine or minerals that might affect flavor. Regular tap water works fine, but filtered tastes noticeably smoother.
- Maple syrup: It provides subtle sweetness and warmth that complements coffee. Honey, agave, or coconut sugar work equally well, though honey adds a floral note.
- Vanilla extract: It rounds out the flavor profile with depth and richness. Almond extract offers a different direction, or skip it entirely if you prefer neutral creaminess.
- Sea salt: It balances sweetness and brings out the oats’ natural flavor. Kosher salt works fine, though sea salt feels slightly more refined in taste tests.
How to Make Oat Milk Creamer
Step 1: Measure Your Oats
Scoop exactly 1 cup of old-fashioned rolled oats into your blender. Old-fashioned oats have the right texture to create creaminess without turning into flour, which is the key difference between this method and others that produce gritty results.
Step 2: Add Cold Water
Pour 4 cups of cold filtered water directly over the oats in your blender. Cold water prevents the oats from swelling too much before blending, which keeps the final texture smooth rather than pasty.
Step 3: Blend on High Speed
Secure the blender lid and blend on the highest speed for 30 seconds until the mixture turns milky white and the oats are completely broken down. You’ll notice the liquid becomes opaque almost immediately, which means the oat starches are releasing into the water.
Step 4: Add Sweetener and Flavor
Pour the blended mixture into a bowl, then pour it back into the empty blender. Add 1 tablespoon maple syrup, 1/2 teaspoon vanilla extract, and a pinch of sea salt to the blender.
Step 5: Blend Again
Blend on medium speed for 15 seconds until the sweetener and vanilla are fully incorporated. This second blend distributes the flavor evenly throughout the creamer so you don’t get sweet spots when you pour.
Step 6: Strain the Mixture
Pour the creamy mixture through a fine mesh strainer lined with cheesecloth or into a nut milk bag set over a large bowl. Let it drip for 2 to 3 minutes until most of the liquid has passed through.
The leftover oat pulp makes excellent face masks or additions to smoothies, so don’t toss it. Straining removes any grittiness from the oat particles that didn’t fully break down during blending.
Step 7: Taste and Adjust
Pour a small amount into a test cup of hot coffee and taste it. If you want it sweeter, add a touch more maple syrup and stir well; if you want more vanilla depth, add another quarter teaspoon and blend briefly.
Step 8: Transfer to Storage
Pour the finished creamer into a clean glass jar with a tight-fitting lid. Label it with the date so you remember when you made it and can track freshness.
Pro Tip: Shake the jar well before each use because the creamer naturally separates over time, with a slightly thicker layer settling at the bottom.
Tips for the Best Oat Milk Creamer
- Use a high-powered blender like a Vitamix or Ninja for the smoothest results. Regular blenders sometimes leave tiny oat particles that create a slightly grainy texture.
- Chill your water before blending if your kitchen is warm, which prevents the friction heat from affecting the final flavor.
- Don’t skip the straining step even if you’re tempted to save time. Those tiny oat particles make a noticeable difference in mouthfeel.
- Make a double batch and refrigerate it in glass jars to have creamer ready for several days of coffee.
- Taste the coffee creamer in your actual morning beverage rather than straight from the spoon. Cold coffee hits differently than hot.
- Keep the oat pulp in a separate container in your freezer to use in face masks, oatmeal, or baked goods throughout the week.
Common Mistakes to Avoid
- Using instant or steel-cut oats instead of rolled oats results in either a grainy texture or an overly thick paste that won’t pour properly into coffee.
- Blending for too long makes the oat starches release so much that the creamer becomes slimy instead of silky. Thirty seconds maximum is plenty.
- Forgetting to shake the jar before each use means your first few pours will be thin and the last pour will be thick, which gets frustrating fast.
- Adding sweetener to the first blend instead of the second makes distribution uneven. You get pockets of sweetness rather than balanced flavor.
- Skipping the salt makes the creamer taste flat and one-dimensional. Salt is invisible but absolutely transforms the depth of flavor.
Serving Suggestions
This creamer shines in virtually any hot or cold beverage, and it pairs beautifully with different coffee roasts and preparations. The mild, naturally creamy flavor complements everything from dark espresso to light pour-over brews.
- Stir into hot espresso for a latte that rivals your favorite café version
- Pour into cold brew concentrate over ice for a refreshing afternoon pick-me-up
- Add to herbal teas like chamomile or vanilla rooibos for a soothing creamy twist
- Blend into morning smoothies for natural creaminess without dairy
- Swirl into hot chocolate or matcha lattes for luxurious mouthfeel
Variations to Try
- Chocolate Creamer: Add 1 tablespoon unsweetened cocoa powder and increase maple syrup to 1.5 tablespoons for a rich mocha base that works in both hot and iced coffee.
- Chai Spiced Creamer: Add 1/4 teaspoon cinnamon, 1/8 teaspoon ginger, and a pinch of cardamom for a warming spiced version perfect for fall mornings.
- Salted Caramel Creamer: Use coconut sugar instead of maple syrup and add a generous pinch of fleur de sel for sweet-salty sophistication that elevates simple black coffee.
- Hazelnut Creamer: Blend in 2 tablespoons raw hazelnuts before straining, then strain through a nut milk bag for nuttier depth that feels more indulgent.
- Maple Pecan Creamer: Add 2 tablespoons toasted pecans and increase vanilla to 3/4 teaspoon for autumn richness that pairs perfectly with spiced coffee drinks.
Dietary Adaptations
- Gluten-Free: Certified gluten-free oats are widely available and work identically to regular rolled oats. The only trade-off is a slightly higher price point, but the results are identical.
- Dairy-Free: This recipe is naturally dairy-free, making it perfect for vegans, people with lactose intolerance, or anyone avoiding animal products.
- Vegan: The recipe contains only plant-based ingredients, so it’s entirely vegan with no substitutions needed.
- Low-Carb/Keto: Replace maple syrup with monk fruit sweetener or erythritol to keep net carbs under 1 gram per serving while maintaining creamy texture.
- Nut-Allergy Friendly: This recipe is naturally free from tree nuts and peanuts, making it safe for anyone with nut allergies to enjoy without worry.
Storage and Reheating
Refrigerator
Store your finished creamer in an airtight glass jar on a shelf in your refrigerator where it stays fresh for up to 5 days. Glass preserves flavor better than plastic and lets you see when separation occurs.
- Keep away from the door where temperature fluctuates
- Shake gently before each use to recombine any settled ingredients
- Use a clean spoon every time to prevent bacterial growth
Freezer
You can freeze oat milk creamer in ice cube trays for up to 3 months to have individual portions ready whenever you need them. Pop out a cube or two directly into your morning coffee without thawing.
- Freeze in silicone ice cube trays for easy removal
- Transfer frozen cubes to a labeled freezer bag after 24 hours to save space
- The texture after thawing is nearly identical to fresh creamer
Reheating
This creamer doesn’t require reheating since hot coffee naturally warms it when you pour it in. If you’ve frozen a portion, simply add the cube directly to your hot beverage and it will melt instantly.
- Never microwave creamer in a plastic container
- Glass mugs heat the creamer gently when you pour it in
- Thawed creamer behaves identically to freshly made batches
Nutrition Information
| Nutrient | Amount |
|---|---|
| Calories | 35 |
| Total Fat | 1.5 g |
| Saturated Fat | 0.2 g |
| Carbohydrates | 4 g |
| Fiber | 0.5 g |
| Sugar | 2 g |
| Protein | 0.7 g |
| Sodium | 45 mg |
| Cholesterol | 0 mg |
Nutrition values are approximate per 2-tablespoon serving and may vary based on the specific brands and types of ingredients you use. These figures were calculated using standard USDA nutritional data for rolled oats and filtered water.
Frequently Asked Questions
Can I use quick oats or instant oats instead of rolled oats?
Quick oats will work but produce a slightly thinner texture, while instant oats often create a grainy or pasty consistency. Old-fashioned rolled oats deliver the best balance of creaminess and smooth mouthfeel that mimics dairy creamer.
How long does homemade oat milk creamer last in the refrigerator?
Store it in an airtight glass container and use it within 5 days for the best flavor and freshness. After 5 days, it starts to separate more noticeably and may develop a sour smell, which means it’s time to toss it.
Why does my creamer look separated, and is it still safe to drink?
Separation is completely normal and happens within 24 hours as oat solids naturally settle to the bottom. Simply shake the jar well and the creamer recombines instantly, staying safe to drink for the full 5-day window.
Can I make this creamer without a high-powered blender?
A standard blender will work but may produce slightly grainier results since the oats won’t break down quite as finely. Blending for a full minute instead of 30 seconds helps compensate, though some extra-fine straining becomes even more important.
What should I do with the leftover oat pulp?
Mix it into face masks with honey for natural skincare, blend into smoothie bowls for added texture, or stir into homemade granola for bulk and nutrition. Refrigerate pulp in an airtight container for up to 3 days or freeze for later use.
Does this creamer work well in cold brew coffee?
Absolutely, and it works beautifully because the cold doesn’t reduce its natural creaminess the way it sometimes does with dairy milk. The oat base maintains that silky mouthfeel even when poured over ice.
Final Thoughts
Making your own oat milk creamer transforms your daily coffee routine into something special without any complicated steps or expensive equipment. Once you taste the difference between homemade and store-bought, there’s honestly no going back.
Give this recipe a try this week and watch how quickly it becomes your new kitchen staple. Your taste buds will thank you, and your wallet will feel noticeably lighter.
Ready to explore more dairy-free options for your kitchen? Check out my guide to making creamy oat milk from scratch, or discover how to create a luxurious sweet cream coffee creamer that rivals café versions.
Homemade Oat Milk Creamer
Ingredients
Equipment
Method
- Scoop exactly 1 cup of old-fashioned rolled oats into your blender.
- Pour 4 cups of cold filtered water over the oats in the blender.
- Secure the blender lid and blend on high speed for 30 seconds until the mixture turns milky white.
- Pour the blended oat mixture into a bowl, then return it to the empty blender and add 1 tablespoon maple syrup, 1/2 teaspoon vanilla extract, and a pinch of sea salt.
- Blend on medium speed for 15 seconds until the sweetener and vanilla are fully incorporated.
- Strain the mixture through a fine mesh strainer lined with cheesecloth or a nut milk bag over a large bowl, letting it drip for 2 to 3 minutes.
- Taste a small amount in hot coffee and adjust sweetness or vanilla as desired, then blend briefly if adding more.
- Pour the finished creamer into a clean glass jar with a tight-fitting lid, label with the date, and refrigerate.