
The smell of sugarcane and fruit fermentation wafting through a kitchen connects you instantly to Caribbean tradition and centuries of distilling craft. Pitorro is a homemade rum that Puerto Rican families have perfected for generations, requiring patience, quality ingredients, and a willingness to let time do the heavy lifting.
This recipe stands out because it produces a smooth, flavorful spirit using simple pantry staples and minimal equipment. You control every variable, from the molasses quality to the fermentation temperature, ensuring a final product that tastes exactly how you want it.
Making pitorro at home teaches you the science behind fermentation while delivering a potent spirit perfect for sharing or sipping neat. The process takes roughly two to three weeks, but your hands-on time amounts to just a few hours spread across multiple days.
Why You’ll Love This Recipe
Homemade pitorro offers control, authenticity, and the satisfaction of creating something your family will remember. You become a distiller in your own kitchen, producing a spirit that tastes infinitely better than most store-bought versions.
- Creates a smooth, aged spirit in your own home without expensive equipment
- Teaches you fermentation science through hands-on practice and observation
- Produces enough volume to share with friends and family for months
- Costs far less than purchasing premium rum bottles repeatedly
- Delivers a customizable flavor profile tailored to your taste preferences
My Experience Making This Recipe
I first made pitorro during a family visit to Puerto Rico, where my grandmother walked me through her decades-old process in her kitchen. She emphasized patience above all else, refusing to rush fermentation even when I grew impatient after the first week.
The result was transformative. What emerged from those glass jars tasted like nothing I had ever experienced, with a smoothness and depth that made commercial rum taste thin and harsh by comparison.
Since then, I have made pitorro three times in my home kitchen, tweaking variables each time. My second batch turned slightly sweeter because I added extra molasses, while my third batch developed a spicier edge from cinnamon sticks added during fermentation.
Recipe Overview
- Recipe Name: Homemade Pitorro
- Servings: Approximately 40 to 50 one-ounce shots
- Prep Time: 30 minutes
- Fermentation Time: 21 to 28 days
- Total Time: 3 to 4 weeks plus aging
- Course: Beverage
- Cuisine: Caribbean / Puerto Rican
- Alcohol Content: Approximately 40 to 50 percent ABV
Equipment You Will Need
- One large glass carboy or fermentation vessel (5 gallons or larger)
- One airlock or fermentation cap
- One rubber bung or stopper fitted to your vessel
- Cheesecloth for straining
- One large pot for heating water
- One long stirring spoon or paddle
- Hydrometer for measuring sugar content (optional but helpful)
- Thermometer for monitoring fermentation temperature
- Funnel for transferring liquids
- Glass bottles for storage and aging
- Clean, sanitized containers for each step
Ingredients for Homemade Pitorro
- Molasses or raw cane juice: 5 to 6 pounds (the sugar source for fermentation)
- Water: 3 gallons (filtered or spring water works best)
- Active dry yeast: 1 packet (or 2 teaspoons of distiller’s yeast)
- Brown sugar: 2 to 3 pounds (supplemental fermentable sugars)
- Raisins: 1 cup (adds flavor and nutrients for yeast)
- Spices: Optional additions including cinnamon sticks, cloves, and anise seeds
- Honey: 1 to 2 pounds optional (creates a smoother finish)
Ingredient Notes and Substitutions
- Molasses: Provides the base fermentable sugars and rich flavor that defines pitorro; substitute with dark cane syrup or blackstrap molasses if traditional molasses is unavailable, though the flavor profile shifts slightly toward earthiness.
- Distiller’s yeast: Ferments efficiently at higher alcohol levels and produces fewer off-flavors than baker’s yeast; standard baker’s yeast works but may create a funkier taste and slower fermentation.
- Brown sugar: Boosts fermentable sugars and adds molasses undertones; white granulated sugar ferments faster but produces a thinner final product.
- Raisins: Feed yeast with nitrogen and tannins while adding subtle fruit notes; omit them entirely if you prefer a cleaner flavor, though fermentation may stall slightly.
- Honey: Smooths the finish and adds complexity; skip it for a drier, sharper result or substitute with agave nectar for a slightly different flavor dimension.
How to Make Homemade Pitorro
Step 1: Sanitize Your Equipment
Sterilize your fermentation vessel, airlock, rubber bung, stirring spoon, and any other equipment that will contact your fermentation. Use hot water mixed with a sanitizing solution or diluted bleach, then rinse thoroughly until no chemical smell remains.
Contamination from wild bacteria or mold ruins batches instantly, so this step determines your success rate more than any other single action. Give yourself at least 30 minutes to complete this sanitization process completely.
Step 2: Prepare Your Base Liquid
Heat 3 gallons of water to approximately 160 degrees Fahrenheit in your large pot. This temperature kills any bacteria present without degrading the molasses or affecting yeast viability later.
Pour the molasses into your sanitized fermentation vessel, then slowly add the hot water while stirring constantly. This gradual mixing prevents the molasses from clumping and ensures even distribution throughout your base liquid.
Step 3: Add Secondary Sugars
Stir in your brown sugar and honey if using it, mixing until both ingredients dissolve completely into the liquid. These additions increase your final alcohol content while adding subtle flavor layers that distinguish your pitorro from simpler recipes.
Allow the mixture to cool to room temperature before proceeding to the next step. Yeast dies when exposed to temperatures above 120 degrees Fahrenheit, so patience here prevents wasting your yeast and losing weeks of fermentation time.
Step 4: Add Nutrients for Yeast
Toss in your raisins and any optional spices like cinnamon sticks or cloves into the cooled liquid. These ingredients provide nitrogen and trace minerals that yeast needs for vigorous fermentation while adding flavor complexity to your final spirit.
Stir well to distribute the raisins evenly throughout the liquid. You should see them floating at various depths, indicating good mixing.
Step 5: Activate and Pitch Your Yeast
Pour warm water (approximately 100 degrees Fahrenheit) into a clean cup and dissolve your yeast packet into it. Let this mixture sit for 10 minutes, allowing the yeast to activate and become fully hydrated before adding it to your base.
Pour the yeast slurry into your fermentation vessel and stir vigorously for about 2 minutes. This aeration gives yeast the oxygen it needs to multiply rapidly during the initial fermentation phase.
Step 6: Seal and Begin Fermentation
Insert your rubber bung into the top of your fermentation vessel, then fit your airlock into the bung. The airlock allows carbon dioxide to escape while preventing oxygen and contamination from entering your batch.
Place your vessel in a cool, dark location where temperatures remain between 65 and 75 degrees Fahrenheit. Check your thermometer daily because temperature fluctuations slow fermentation or produce off-flavors.
Step 7: Monitor Fermentation Progress
Watch your airlock for bubbling, which indicates active yeast fermentation. You should see steady bubbling within 24 to 48 hours, with the pace reaching a peak around day 5 or 6.
Use a hydrometer if you have one to track sugar consumption on days 3, 7, 14, and 21. This measurement confirms that yeast is converting sugar into alcohol as expected and helps you predict when fermentation will complete.
Step 8: Allow Complete Fermentation
Continue monitoring without disturbing your vessel for the next two to three weeks. The bubbling will gradually slow as yeast consumes available sugar and alcohol accumulates, eventually creating an environment where yeast cannot survive.
When airlock bubbling stops entirely for three consecutive days and the liquid appears clear rather than cloudy, fermentation has completed. This typically occurs between day 18 and day 28, depending on temperature and yeast type.
Step 9: Strain and Separate
Carefully pour your fermented liquid through cheesecloth into clean glass bottles, leaving the sediment and raisins behind in your fermentation vessel. This straining removes the bulk of solids while preserving your liquid spirit.
If your pitorro looks cloudy, let it sit undisturbed for several more days to allow remaining particles to settle before straining again. Crystal clarity develops with patience and improves the final product’s appearance and taste.
Step 10: Age Your Pitorro
Seal your bottles and store them in a cool, dark place for at least two weeks before drinking. This aging allows harsh alcohol notes to mellow and flavors to integrate into a smooth, complex spirit.
Many families age their pitorro for months or even years, with the result improving noticeably after each season passes. Patience transforms your homemade creation into something extraordinary.
Pro Tip: Monitor fermentation temperature obsessively because yeast performs best between 68 and 72 degrees Fahrenheit; even 5-degree fluctuations significantly impact your final flavor.
Tips for the Best Homemade Pitorro
- Use distiller’s yeast or champagne yeast instead of baker’s yeast because they ferment efficiently at higher alcohol levels and produce fewer unpleasant flavors in your final spirit.
- Maintain consistent fermentation temperatures by placing your vessel in a basement, closet, or insulated space away from direct sunlight and heating vents that cause daily temperature swings.
- Add extra molasses if you prefer a sweeter, heavier spirit, but recognize that increased sugar requires longer fermentation and may produce a denser final product.
- Keep detailed notes on dates, temperatures, and sugar readings so you can replicate successful batches exactly and identify what caused any problems in batches you dislike.
- Resist the urge to open your fermentation vessel out of curiosity because each opening introduces oxygen and contamination risk that damages your batch.
- Filter your finished pitorro through coffee filters if it remains slightly cloudy even after settling, which produces a crystal-clear spirit that looks professional and tastes clean.
Common Mistakes to Avoid
- Pitching yeast into liquid hotter than 120 degrees Fahrenheit kills your yeast before fermentation begins, resulting in no alcohol production and a worthless batch that spoils instead of fermenting.
- Skipping sanitization allows wild bacteria to colonize your batch, producing vinegar or off-flavors that make your spirit undrinkable despite weeks of waiting.
- Fermenting at temperatures below 60 degrees Fahrenheit or above 80 degrees Fahrenheit slows or stops yeast activity, extending fermentation time beyond four weeks and increasing contamination risk.
- Adding spices too early causes excessive bitterness as extraction continues throughout fermentation; add spices during the final week only if you want infused flavors.
- Opening your fermentation vessel repeatedly during the process introduces oxygen that kills yeast and allows mold to establish itself, ruining your batch after weeks of careful work.
Serving Suggestions
Serve your finished pitorro neat in small glasses to appreciate the full flavor complexity you created through months of careful fermentation. Your homemade spirit deserves attention rather than mixing into cocktails where its character disappears.
- Sip it slowly at room temperature to experience all the molasses, spice, and subtle fruit notes that develop during aging
- Serve it ice-cold to family gatherings where your friends will ask where you bought such smooth rum
- Mix it into hot water with lemon juice and honey for a warming winter drink that tastes worlds better than store-bought versions
- Pair it with Cuban cigars and good conversation to recreate authentic Caribbean traditions in your own home
- Gift bottles to close friends with handwritten labels explaining your fermentation process and the care you invested
Variations to Try
- Spiced Pitorro: Add cinnamon sticks, cloves, nutmeg, and star anise during the final week of fermentation for a warming spiced version that feels like autumn in a glass, though you sacrifice some of the smooth clarity that defines traditional pitorro.
- Fruit-Infused Pitorro: Replace half of your raisins with dried mango, pineapple, or passion fruit pieces to create a tropical variation that hints at Caribbean fruit without overwhelming the base spirit flavor.
- Honey-Heavy Pitorro: Increase honey to 3 or 4 pounds while reducing brown sugar to create an exceptionally smooth, slightly sweet version that appeals to those who find traditional pitorro too harsh.
- High-Proof Pitorro: Double your molasses and brown sugar quantities to push alcohol content toward 60 percent ABV, creating a fierce spirit suitable for sipping neat or mixing into coquito during holiday season.
- Quick Pitorro: Use turbo yeast designed to ferment in 7 to 10 days instead of three weeks, though the rushed fermentation produces a rougher spirit that requires longer aging to become palatable.
Dietary Adaptations
- Gluten-Free: All ingredients in this recipe are naturally gluten-free, making pitorro suitable for those with celiac disease or gluten sensitivity with no modifications required.
- Vegan: This recipe contains no animal products in any form, making it fully vegan as written; the honey is optional, so omitting it maintains complete vegan compliance.
- Lower Sugar: Reduce molasses and brown sugar by 30 percent to create a lower-alcohol, drier version around 25 percent ABV, though fermentation becomes unpredictable and may stall before completing fully.
- Allergen-Friendly: This recipe contains no tree nuts, peanuts, shellfish, or other major allergens; raisins are the only ingredient that commonly appears on allergen warnings in some facilities.
Storage and Reheating
Refrigerator
Store sealed bottles of finished pitorro in your refrigerator where they maintain optimal flavor for six to twelve months. The cool temperature slows any residual chemical reactions while protecting your spirit from temperature fluctuations.
- Keep bottles tightly sealed to prevent evaporation and oxidation
- Stand bottles upright rather than on their sides to minimize cork contact
- Check bottles monthly for any cloudiness indicating contamination
Freezer
Pitorro’s high alcohol content prevents freezing at home temperatures, so freezing storage offers no advantage over refrigeration. Your freezer space is better used for other items.
- Only freeze if you want to extend storage beyond one year
- Use only when absolutely certain your freezer maintains consistent temperatures
Reheating
Do not heat finished pitorro because warmth damages its flavor profile and allows alcohol to evaporate rapidly. Serve it at room temperature or chilled instead.
- For hot drinks, heat water or complementary liquids separately, then add room-temperature pitorro to avoid cooking off alcohol
- If bottles were refrigerated, remove them one hour before serving to reach optimal tasting temperature
Nutrition Information
| Nutrient | Amount |
|---|---|
| Calories | 120 per 1.5 ounce shot |
| Total Fat | 0 grams |
| Saturated Fat | 0 grams |
| Carbohydrates | 2 to 4 grams |
| Fiber | 0 grams |
| Sugar | 1 to 2 grams |
| Protein | 0 grams |
| Sodium | 0 to 5 milligrams |
| Cholesterol | 0 milligrams |
Nutritional values assume fermentation converts most sugars into alcohol, with minimal residual carbohydrates remaining in finished pitorro. Individual batches may vary slightly based on your specific ingredient ratios and fermentation completion.
Frequently Asked Questions
What if my pitorro doesn’t start fermenting after three days?
Check that your fermentation temperature stays between 65 and 75 degrees Fahrenheit because cold temperatures slow yeast to a crawl. If temperature is adequate, your yeast may have been dead upon purchase or stored improperly before use, so pitch a fresh yeast packet into your batch and wait another five days for activity.
Can I use baker’s yeast instead of distiller’s yeast?
Baker’s yeast ferments successfully at lower alcohol levels but produces funky flavors and stops working around 12 percent ABV, leaving your pitorro partially fermented with residual sweetness. Distiller’s yeast costs only slightly more and produces dramatically superior results worth the small extra expense.
How long can I keep finished pitorro before it goes bad?
Properly sealed pitorro stored in cool darkness lasts indefinitely because high alcohol content prevents spoilage. Many families age their batches for years, with flavor improving noticeably after six months of storage.
What does vinegar smell during fermentation mean?
Vinegar odors indicate acetic acid bacteria colonizing your batch, meaning contamination occurred and your pitorro will taste sour rather than smooth. Immediately cover your vessel and add sulfites to kill the bacteria, though complete recovery is unlikely after contamination establishes.
Can I adjust sweetness after fermentation finishes?
Yes, add small amounts of honey or simple syrup to your finished pitorro and taste between additions until you reach your preferred sweetness level. Keep records of what you added so you can replicate your perfect batch in future years.
Should I peel the raisins before fermentation?
No, leave raisins whole because their skins contain beneficial tannins and nutrients that support yeast fermentation. The skins strain out easily at the end, and you can compost the spent solids.
Final Thoughts
Making pitorro transforms you from a casual rum drinker into someone who understands fermentation science and appreciates the weeks of work hidden inside every sip. Your first batch may feel imperfect, but each subsequent batch improves as you refine your technique and learn what works in your specific kitchen environment.
Share your homemade pitorro with people you care about and watch their faces light up when they taste something so clearly superior to store-bought alternatives. You have created tradition, learning, and liquid memories in glass bottles that will make every sip worth the patience you invested.
Explore More Homemade Spirits
Now that you have mastered pitorro, consider exploring other traditional Caribbean spirits that teach similar fermentation principles and deliver equally impressive results for special occasions and family gatherings.
Try making ponche recipe to expand your fermentation portfolio with a warming Mexican tradition that shares many techniques with pitorro but offers distinct flavor characteristics and seasonal appeal.
You might also enjoy creating fruit moonshine mash recipe to experiment with faster fermentation methods and fruit-forward spirits that build on the foundational knowledge you developed making your first batch of pitorro.
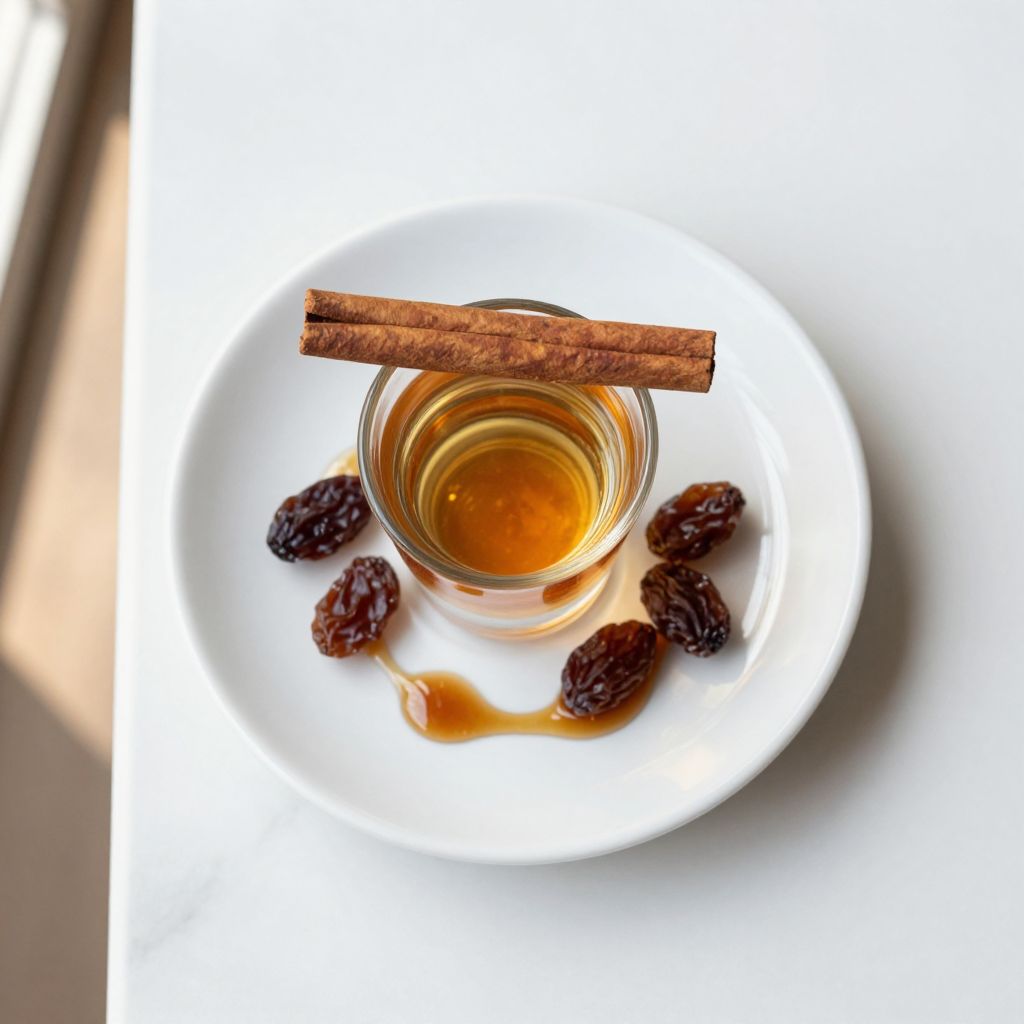
Homemade Pitorro
Ingredients
Equipment
Method
- Sanitize the fermentation vessel, airlock, rubber bung, stirring spoon, and other equipment with a sanitizing solution or diluted bleach for 30 minutes, then rinse thoroughly with clean water.
- Heat 3 gallons of water in a large pot to 160°F (71°C), then pour the heated water into the fermentation vessel and add the molasses while stirring continuously to dissolve completely.
- Stir in the brown sugar and honey until fully dissolved, then allow the mixture to cool to below 120°F (49°C) before proceeding.
- Add the raisins and optional spices (cinnamon sticks, cloves, anise seeds) to the cooled liquid and stir to distribute evenly.
- In a separate container, dissolve the yeast in warm water at 100°F (38°C) and let it activate for 10 minutes.
- Pour the activated yeast into the fermentation vessel and stir vigorously for 2 minutes to aerate the mixture.
- Seal the vessel with the rubber bung and airlock, then place it in a dark, cool area maintaining a temperature between 65°F and 75°F (18°C–24°C).
- Allow fermentation to proceed undisturbed for 21 to 28 days, monitoring airlock activity and temperature daily.
- When airlock bubbling has stopped for three consecutive days and the liquid is clear, strain the fermented liquid through cheesecloth into clean glass bottles, leaving sediment behind.
- Seal the bottles and age in a cool, dark place for at least 2 weeks before serving to allow flavors to mellow and integrate.