
Close your eyes and imagine the crisp, vanilla-tinged sweetness of an old-fashioned soda fountain drink hitting your tongue on a hot summer day. Homemade sarsaparilla brings that nostalgic magic straight to your kitchen, and the best part is you can make it from scratch without any mysterious additives or artificial flavors.
This recipe captures the warm spice notes and herbal complexity that made sarsaparilla a beloved beverage generations ago. You’ll blend a mix of roots, barks, and spices to create a syrup that tastes infinitely better than anything from a bottle, and the process is far simpler than you might expect.
Whether you’re mixing it into a classic float or sipping it straight over ice, homemade sarsaparilla delivers that distinctive flavor profile that keeps people coming back for more. Let’s walk through how to brew your own batch.
Why You’ll Love This Recipe
Making your own sarsaparilla lets you control every single ingredient and skip the artificial stuff entirely. You’ll end up with a syrup that tastes authentic, complex, and honestly tastes like something special.
- Full control over sweetness and spice levels to match your taste preferences
- Uses simple, natural ingredients you can pronounce and recognize
- Syrup keeps for weeks in the fridge, making multiple servings effortless
- Costs less per serving than buying bottled versions repeatedly
- Pairs perfectly with ice cream, sparkling water, or as a mixer in cocktails
My Experience Making This Recipe
The first time I brewed sarsaparilla at home, the aroma that filled my kitchen transported me back to childhood visits to old-fashioned ice cream parlors. The root and spice blend simmering on the stove created this incredible complexity that no store-bought version ever captured.
My family gathered around for taste tests, and even the skeptics became believers after their first sip over vanilla ice cream. The flavor was smooth, slightly herbal, with a hint of licorice and vanilla that made everything feel like a special occasion.
What surprised me most was how straightforward the process actually is. You’re essentially steeping ingredients like you would tea, then straining and mixing with sweetener, so even if you’ve never made homemade syrups before, you’ll nail this on your first try.
Recipe Overview
- Recipe Name: Homemade Sarsaparilla Syrup
- Servings: Makes about 2 cups syrup (8 to 12 servings depending on dilution)
- Prep Time: 15 minutes
- Cook Time: 45 minutes
- Total Time: 1 hour plus cooling
- Course: Beverage
- Cuisine: American
- Calories per Serving: 120 calories per 2-tablespoon serving (syrup only)
Equipment You Will Need
- Large pot or saucepan (at least 3 quarts)
- Fine mesh strainer or cheesecloth
- Measuring spoons and cups
- Wooden spoon for stirring
- Glass jars or bottles for storage
- Funnel (optional but helpful)
- Kitchen scale (optional but useful for precise measurements)
Ingredients for Homemade Sarsaparilla
- Sarsaparilla root: 2 tablespoons dried
- Sassafras root bark: 1 tablespoon dried
- Wintergreen leaves: 1 tablespoon dried
- Anise seed: 1 teaspoon whole
- Cinnamon stick: 1 piece (about 2 inches)
- Clove: 4 to 5 whole
- Nutmeg: 1/4 teaspoon freshly grated
- Vanilla extract: 1 teaspoon pure
- Water: 6 cups filtered
- Cane sugar: 1.5 cups
- Molasses: 2 tablespoons (optional, for deeper color and caramel notes)
- Salt: 1/8 teaspoon fine sea salt
Ingredient Notes and Substitutions
- Sarsaparilla root: The star ingredient that gives sarsaparilla its distinctive herbal, slightly sweet flavor with woody undertones. If unavailable, you can increase sassafras slightly, though the flavor will shift more toward licorice.
- Sassafras root bark: Adds earthy depth and that classic root beer adjacent warmth that makes sarsaparilla feel nostalgic. Omitting it is possible, but your syrup will lose some complexity and richness.
- Wintergreen leaves: Contributes a subtle minty, cool undertone that balances the spices beautifully. Spearmint or peppermint works as a substitute, though use slightly less since they’re stronger.
- Anise seed: Brings subtle licorice notes that echo through the final flavor. Star anise can replace whole anise seeds at a 1:1 ratio.
- Cinnamon stick: Provides warmth and sweetness without overpowering the other spices. Ground cinnamon works but use only 1/4 teaspoon to avoid cloudiness in your syrup.
- Vanilla extract: Rounds out the flavor and adds smoothness that ties everything together. Pure vanilla is worth the extra cost here, as imitation vanilla tastes thin by comparison.
- Cane sugar: Creates the sweet base for your syrup and helps with preservation. Honey can replace half the sugar for a slightly different texture and subtle honey notes.
How to Make Homemade Sarsaparilla
Step 1: Gather and Measure Your Spices
Lay out all your dried roots, barks, and spices on a clean surface and measure each ingredient carefully. Accurate measurements matter here because they determine your final flavor balance, so take time to measure properly rather than eyeballing.
Step 2: Prepare Your Aromatic Blend
Combine the sarsaparilla root, sassafras root bark, wintergreen leaves, anise seed, cinnamon stick, cloves, and nutmeg in a small bowl. Mixing everything together first makes it easier to add them all to your water at once without fumbling with multiple containers.
Step 3: Heat the Water
Pour 6 cups of filtered water into your large pot and bring it to a gentle boil over medium-high heat. Using filtered water prevents mineral flavors from interfering with your delicate spice blend, while a gentle boil rather than a rolling boil prevents over-extraction of bitter compounds.
Step 4: Add the Spices and Steep
Once the water reaches a boil, carefully add your entire spice blend and reduce the heat to medium-low to maintain a gentle simmer. Simmer uncovered for 35 to 40 minutes, allowing the roots, bark, and spices to infuse their flavors into the water while the liquid reduces slightly.
Step 5: Strain the Solids
Set your fine mesh strainer over a large bowl and carefully pour the simmering liquid through, allowing all the flavorful liquid to drain while the solids remain behind. You should end up with about 5 cups of richly flavored liquid, which is perfect for your syrup base.
Step 6: Return the Liquid to the Pot
Pour your strained infusion back into the pot and bring it back to a low simmer over medium heat. You’re about to add your sweetener and molasses, so having everything in one place makes the next steps smoother.
Step 7: Add Sweetener and Molasses
Stir in the cane sugar and molasses (if using) and continue stirring until completely dissolved, about 3 to 5 minutes. The molasses deepens the color and adds subtle caramel undertones that make your sarsaparilla taste richer and more complex.
Step 8: Season with Salt and Vanilla
Add the salt and vanilla extract, stirring to combine fully. Salt sounds odd here, but a tiny pinch actually heightens all the spice and vanilla flavors, making everything taste more pronounced without tasting salty.
Step 9: Cool and Store
Remove the pot from heat and let your syrup cool completely to room temperature before transferring it to clean glass jars. Cooling first prevents condensation that can promote mold growth during storage.
Pro Tip: Taste your finished syrup before storing it, and adjust sweetness or spice to your preference by adding a touch more sugar, vanilla, or even a dash of cinnamon if it needs tweaking.
Tips for the Best Homemade Sarsaparilla
- Use the freshest dried roots and spices you can find, preferably from a specialty spice shop rather than the grocery store, since fresher ingredients deliver brighter, more complex flavors.
- Don’t skip the straining step or try to speed it up, as pouring slowly through cheesecloth ensures clarity and prevents sediment in your finished syrup.
- Taste as you go during the final seasoning steps, since personal preference varies widely when it comes to sweetness and spice intensity.
- Keep your syrup in glass bottles rather than plastic, since the acidity and spices can interact with some plastics over time and affect flavor.
- Make a double batch while you’re at it, since the process is the same and you’ll have syrup ready to go for weeks of servings.
Common Mistakes to Avoid
- Boiling the infusion too aggressively extracts bitter tannins from the roots and spices, leaving your final syrup tasting harsh and astringent rather than smooth and balanced.
- Adding the vanilla extract during simmering instead of after causes the delicate vanilla flavors to boil away, leaving you with a flat taste.
- Skipping the salt makes your syrup taste one-dimensional and muted, since salt brings all the other flavors into sharper focus.
- Storing your syrup in clear plastic or metal containers can cause flavor changes over time, whereas glass keeps your sarsaparilla tasting fresh for weeks.
Serving Suggestions
Your homemade sarsaparilla syrup is incredibly versatile and works in dozens of ways once you’ve made it. Pour it over ice cream, mix it with sparkling water for a refreshing soda, or use it as a cocktail mixer to add dimension to drinks.
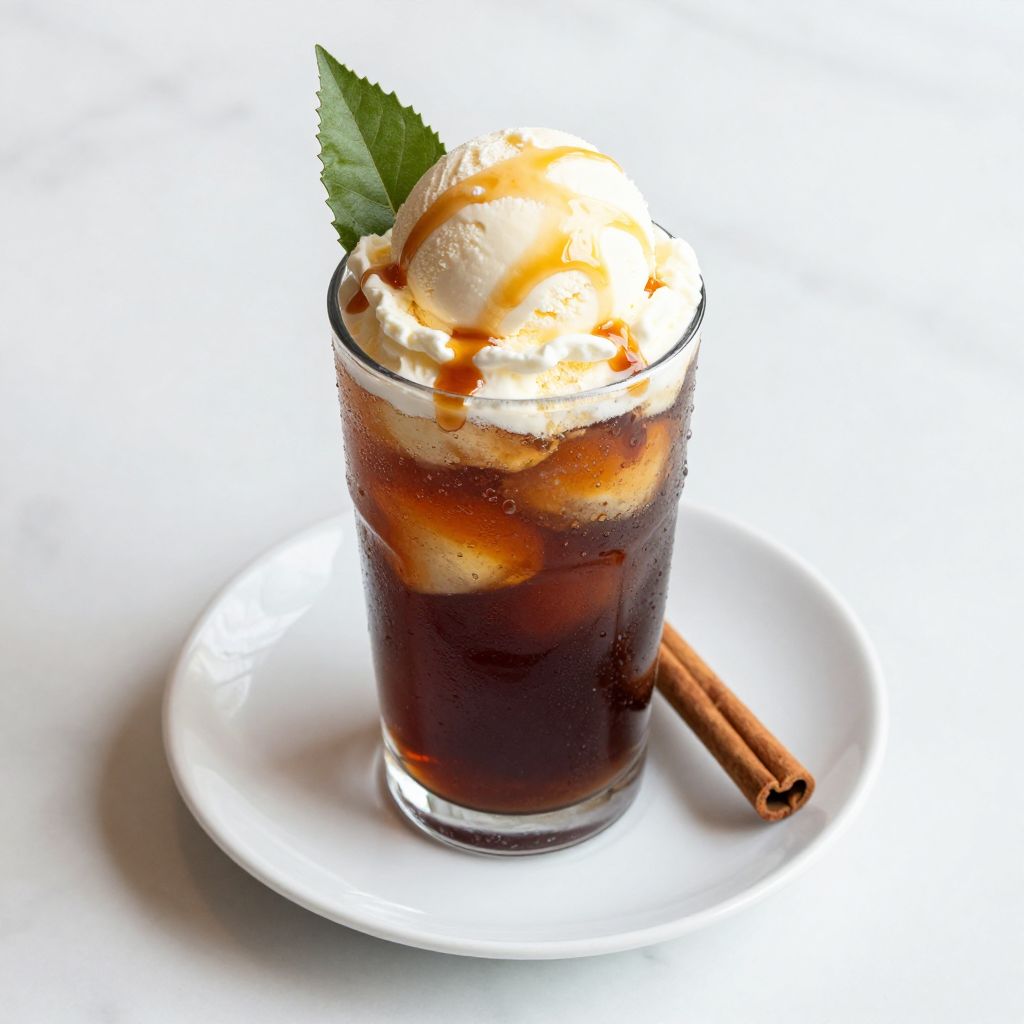
- Classic float made with two tablespoons syrup and a generous scoop of vanilla ice cream topped with cold sparkling water
- Mixed with club soda and fresh lime juice for a sophisticated mocktail served over crushed ice
- Drizzled over vanilla pudding or cheesecake for an unexpected flavor dimension that guests will ask about
- Stirred into cream soda or ginger ale for a custom blended flavor that’s more interesting than store-bought blends
- Used as a syrup for Italian cream sodas with a splash of heavy cream and fresh berries
Variations to Try
- Spicy Sarsaparilla: Add 1/4 teaspoon of cayenne pepper or a pinch of black pepper to the spice blend for a subtle heat that lingers on the finish and adds depth.
- Citrus Sarsaparilla: Zest one lemon and one orange before adding the spices, then strain those zests out with everything else for a brighter, more refreshing flavor profile.
- Dark Sarsaparilla: Increase the molasses to 3 to 4 tablespoons and add 1 tablespoon of blackstrap molasses for a deeper color and stronger caramel notes that work beautifully over ice cream.
- Herbal Sarsaparilla: Add 1 tablespoon of dried chamomile or 1 teaspoon of dried lavender to soften the spice blend and add floral undertones that feel more sophisticated.
- Concentrated Syrup: Reduce the water to 4 cups and simmer longer to create a more concentrated syrup that packs intense flavor in smaller quantities, perfect for travel or portioning.
Dietary Adaptations
- Gluten-Free: All ingredients in this recipe are naturally gluten-free, making it safe for celiac diets and gluten-sensitive individuals with no modifications needed.
- Dairy-Free: The syrup itself contains no dairy, so mix it with non-dairy ice cream or coconut milk to enjoy it as a float with no compromises.
- Vegan: This recipe is entirely plant-based and vegan-friendly, using no animal products in the syrup or suggested serving methods.
- Low-Sugar/Keto: Replace cane sugar with monk fruit sweetener or erythritol at a 1:1 ratio, though this changes the mouthfeel slightly and makes the syrup less syrupy in texture.
- Nut-Free: This recipe contains no tree nuts or peanuts, making it safe for nut-allergic individuals as written.
Storage and Reheating
Refrigerator
Your finished sarsaparilla syrup keeps in the refrigerator for up to 8 weeks when stored in clean glass jars with airtight lids. The cool temperature slows any oxidation or fermentation, keeping your syrup fresh and flavorful.
- Store in glass bottles or jars with tight-fitting lids
- Keep away from direct sunlight to preserve color and flavor
- Check for any signs of mold or off-smells before each use
Freezer
Sarsaparilla syrup freezes beautifully for up to 6 months in an airtight container or freezer-safe glass jar. Leave about an inch of headspace since the syrup expands slightly as it freezes.
- Use freezer-safe glass jars with at least one inch of headspace
- Label with the date so you remember how old your syrup is
- Thaw overnight in the refrigerator before using
Reheating
You don’t technically need to reheat sarsaparilla syrup since it’s already cooked and shelf-stable when stored properly. Simply pour it straight from the fridge over ice, or let it sit at room temperature for a few minutes if you prefer it less cold.
- Stir well before using in case any sediment has settled to the bottom
- Use a spoon to check consistency if it’s been in the freezer, as frozen syrup is thicker
- Never microwave the glass container, only the syrup if absolutely necessary
Nutrition Information
| Nutrient | Amount |
|---|---|
| Calories | 120 |
| Total Fat | 0g |
| Saturated Fat | 0g |
| Carbohydrates | 31g |
| Fiber | 0g |
| Sugar | 27g |
| Protein | 0g |
| Sodium | 35mg |
| Cholesterol | 0mg |
Nutritional values are estimates based on a 2-tablespoon serving of syrup before dilution. When mixed with sparkling water or used in beverages, the actual calories per serving will vary depending on how much syrup you use.
Frequently Asked Questions
Can I make this recipe without sassafras?
Yes, you can omit sassafras if you can’t find it or prefer to avoid it, though your syrup will taste less complex and more heavily spiced. Increasing the sarsaparilla root by another tablespoon helps compensate for the missing earthiness.
How much syrup should I use per serving?
Most people use 2 to 3 tablespoons of syrup mixed with 8 ounces of sparkling water for a refreshing drink, or 2 tablespoons over ice cream for a classic float. Start with 2 tablespoons and adjust to your sweetness preference.
Where can I buy sarsaparilla root and sassafras bark?
Most specialty spice shops carry these ingredients, and they’re widely available through online retailers like Mountain Rose Herbs or your local health food store. Ask the shop staff for recommendations on quality and freshness.
Can I use this syrup in cocktails?
Absolutely, your homemade sarsaparilla syrup makes an excellent addition to whiskey sours, root beer floats made with alcohol, or creative tiki drinks. Experiment with bourbon or rye whiskey first to find your favorite combination.
Why does my syrup taste bitter?
Bitterness usually comes from over-steeping the spices or boiling too aggressively, which extracts harsh tannins. Future batches will taste better if you keep the heat at a gentle simmer and stick to the recommended 35 to 40 minute steeping time.
Can I adjust the sweetness of finished syrup?
Yes, if your syrup tastes too sweet, dilute it slightly with water when serving, or add a teaspoon of fresh lemon juice to balance the sweetness. If it’s not sweet enough, stir in a bit more sugar when making your next batch.
Final Thoughts
Making homemade sarsaparilla is one of those special projects that feels fancy but turns out to be incredibly simple, and the reward for that minimal effort is a syrup that tastes a hundred times better than anything you’ll find in a bottle. Your friends and family will think you’re some kind of soda fountain wizard when you serve them homemade sarsaparilla floats.
Give this recipe a try this weekend, and you’ll find yourself making it again and again for gatherings, summer days, or just because you want something that tastes like pure nostalgia. The warmth, complexity, and smoothness of homemade sarsaparilla proves that some old-fashioned things really do deserve to make a comeback.
Ready to explore more homemade beverage options? Check out our best homemade root beer recipe for another classic soda you can make from scratch, or try our birch beer recipe for a slightly different flavor profile with the same satisfying homemade quality. Once you start making your own syrups and sodas, store-bought versions will never taste quite right again.
Homemade Sarsaparilla Syrup
Ingredients
Equipment
Method
- Measure and combine all dried roots, barks, and spices in a small bowl.
- Pour 6 cups filtered water into a large pot and bring to a gentle boil over medium-high heat.
- Add the spice blend to the boiling water, reduce heat to medium-low, and simmer uncovered for 35 minutes.
- Set a fine mesh strainer or cheesecloth over a bowl and strain the infusion, discarding solids.
- Return the strained liquid to the pot and heat over medium until simmering.
- Stir in cane sugar and molasses until fully dissolved, about 3 to 5 minutes.
- Add salt and vanilla extract, stirring to combine.
- Remove from heat and let the syrup cool to room temperature.
- Transfer cooled syrup to clean glass jars, seal, and refrigerate up to 8 weeks.