
There’s something magical about watching grape juice transform into wine over the course of a few weeks, knowing you created it with your own hands. Making wine at home is far more accessible than most people think, and it doesn’t require fancy equipment or years of experience to succeed. This homemade wine recipe will walk you through every step, from selecting your fruit to bottling your finished creation.
What makes homemade wine so rewarding is the combination of simplicity and science working together. You’ll learn the fundamentals of fermentation, develop patience as you wait for flavors to develop, and end up with a product that’s genuinely impressive to share with friends and family.
Why You’ll Love This Recipe
This homemade wine recipe strips away the intimidation and focuses on what actually matters: creating delicious, drinkable wine with straightforward techniques. You control every ingredient and can adjust sweetness, alcohol content, and flavor to your exact preferences.
- Makes a full 5-gallon batch, giving you roughly 25 bottles of finished wine
- Uses simple, food-grade equipment you can find online or at homebrew shops
- Works with many fruit types, from grapes to berries to stone fruits
- Takes about 6 to 8 weeks from start to bottling, with mostly hands-off waiting time
- Costs significantly less per bottle than comparable store-bought wine
My Experience Making This Recipe
The first time I fermented wine, I was convinced something would go wrong. Instead, I watched yeast do its job, the airlock bubbled steadily for weeks, and I ended up with something that actually tasted like wine, not like a science experiment gone sideways.
The sensory experience hooked me immediately. The aroma that fills your space during active fermentation is intoxicating in the best way, and opening the carboy weeks later to find clear, aged wine sitting above sediment felt genuinely thrilling.
My friends were skeptical until they tasted it. One person asked where I’d bought it, which felt better than any compliment I could have asked for.
Recipe Overview
- Recipe Name: Homemade Wine
- Servings: 25 (5-ounce glasses)
- Prep Time: 30 minutes
- Active Fermentation Time: 3 to 4 weeks
- Total Time: 6 to 8 weeks
- Course: Beverage
- Cuisine: Winemaking
- Alcohol Content: 10 to 12 percent ABV
Equipment You Will Need
- 5-gallon glass carboy or food-grade plastic carboy
- Airlock and rubber bung that fits your carboy
- Hydrometer and testing jar
- Large stainless steel pot or food-grade bucket for initial mixing
- Wooden spoon or long-handled stirrer
- Siphon tube and racking cane
- Funnel with strainer basket
- Wine bottles (750 ml) with corks or screw caps
- Bottle capper or corker
- Sanitizing solution (like potassium metabisulfite)
- Acid test kit or pH strips
- Cloth towels or coffee filters for filtering
Ingredients for Homemade Wine
- Fresh fruit juice or fruit: 5 gallons (this could be fresh grape juice, berry juice, or crushed fruit depending on your choice of wine style)
- Wine yeast: One packet (5 to 10 grams) of active wine yeast such as Lalvin EC-1118 or Red Star Premier Cuvee
- Yeast nutrient: 1 teaspoon, dissolved in water before adding
- Sugar (optional): 0 to 5 pounds, depending on the natural sugar content of your fruit
- Acid blend (optional): 1 to 2 teaspoons, if your juice lacks natural acidity
- Potassium metabisulfite: 1/4 teaspoon at the start to sanitize, and 1/8 teaspoon before bottling
- Potassium sorbate (optional): 1/2 teaspoon before bottling to stop fermentation
- Water: As needed for dilution or rehydrating yeast
Ingredient Notes and Substitutions
- Wine yeast: Wine yeast is specifically bred to ferment at the right pace and produce clean flavors. Bread yeast works but produces off-flavors and doesn’t settle cleanly; stick with wine yeast for better results.
- Yeast nutrient: This provides nitrogen and minerals the yeast needs to stay healthy during fermentation. You can skip it with high-quality juices, but it significantly improves fermentation speed and flavor.
- Sugar: Most juices contain enough natural sugar, but you may add more if your hydrometer reading is below 1.080. Honey or agave work as substitutes, though they add their own flavor characteristics.
- Acid blend: This balances pH and brings out fruit flavors. You can use fresh lemon juice as a substitute, adding it slowly until the wine tastes balanced.
- Potassium metabisulfite: This sanitizes equipment and prevents oxidation. Sodium metabisulfite works similarly but contains more sodium; use whichever you prefer.
How to Make Homemade Wine
Step 1: Sanitize All Equipment
Before you begin, sanitize every piece of equipment that will touch your wine or juice using a solution of potassium metabisulfite and water. Clean equipment prevents wild yeast contamination and off-flavors that can ruin an entire batch.
Mix one tablespoon of metabisulfite with one gallon of water, soak your carboy, airlock, spoon, and siphon tube for at least 15 minutes, then rinse thoroughly with clean water. Allow everything to air dry on clean cloth towels.
Step 2: Prepare Your Fruit Juice
Pour your 5 gallons of juice into a large, clean pot or food-grade bucket. If you’re using whole fruit, crush or blend it first to break down the cell walls and release the juice.
Take a hydrometer reading now to measure the starting gravity and estimate final alcohol content. The reading tells you whether you need to add sugar to reach your target alcohol level of 10 to 12 percent.
Step 3: Adjust Sugar and Acidity
If your hydrometer reading is below 1.080, dissolve sugar into the juice to raise the gravity. Heat a small amount of juice, dissolve the sugar in it, then stir this mixture back into the bulk juice to ensure even distribution.
Test the acidity with pH strips or an acid test kit. If the juice reads above pH 3.8, add acid blend gradually while stirring, testing as you go until the flavor tastes bright and balanced.
Step 4: Heat and Cool the Juice
Heat the juice to 170 degrees Fahrenheit to pasteurize it and kill any wild yeasts. This doesn’t require a full boil; maintaining this temperature for 10 minutes accomplishes sanitization without damaging delicate flavors.
Allow the juice to cool completely to room temperature before proceeding. This usually takes 2 to 4 hours, depending on room temperature and the size of your container.
Step 5: Rehydrate the Wine Yeast
While the juice cools, rehydrate your wine yeast according to package directions. Most wine yeasts need to be mixed with warm water (around 100 degrees Fahrenheit) and left for 15 minutes before pitching.
This rehydration step activates the yeast cells and significantly improves fermentation vigor. Pitching dry yeast directly into cold juice can shock the yeast and lead to sluggish or stuck fermentation.
Step 6: Add Yeast Nutrient and Pitch Yeast
Once your juice reaches room temperature, stir in the yeast nutrient dissolved in a small amount of water. Add the rehydrated yeast culture and stir gently but thoroughly to distribute the yeast evenly throughout the liquid.
This is your inoculation point. The yeast population will now multiply rapidly and begin converting sugar into alcohol and carbon dioxide.
Step 7: Transfer to Carboy and Fit Airlock
Carefully pour the inoculated juice into your sanitized carboy using a funnel. Fill the carboy to within 2 inches of the rim to allow room for foam during active fermentation.
Insert the rubber bung and airlock into the carboy’s opening. The airlock allows carbon dioxide to escape while preventing oxygen and contaminants from entering, which is critical for developing clean wine flavors.
Step 8: Monitor Active Fermentation
Place the carboy in a cool, dark location between 65 and 72 degrees Fahrenheit. You’ll see the airlock bubble within 24 hours as fermentation kicks into high gear.
Check on the carboy daily but don’t open it unless absolutely necessary. Active fermentation typically lasts 3 to 4 weeks, during which the airlock bubbles steadily and then slows to a stop.
Step 9: Rack the Wine Off Sediment
Once bubbling stops completely, let the wine sit undisturbed for another 3 to 5 days to allow sediment to settle to the bottom. Using a siphon tube and racking cane, carefully transfer the clear wine into a clean, sanitized carboy, leaving the sediment behind.
This racking process clarifies your wine and removes spent yeast and fruit particles that can create off-flavors if left too long in contact with the wine. This is also when you can add a small amount of metabisulfite to prevent oxidation.
Step 10: Age and Fine-Tune Flavor
Return the racked carboy to cool storage with the airlock refitted. Let the wine age undisturbed for 2 to 4 weeks, allowing flavors to meld and mature.
After aging, you can taste a small sample and decide if you want to rack again or proceed directly to bottling. Most homemade wines benefit from at least one racking and several weeks of aging.
Step 11: Final Racking and Preparation for Bottling
Perform a final racking into a clean carboy about one week before bottling. This ensures the wine is as clear as possible and removes any new sediment that may have formed during aging.
At this point, you can add potassium sorbate if you prefer a slightly sweeter wine or want to halt any residual fermentation. Without it, any remaining yeast may continue fermenting in the bottle.
Step 12: Bottle Your Wine
Using your siphon and racking cane, transfer the wine into sanitized wine bottles, filling each to within 1 inch of the rim. Cork or cap each bottle immediately after filling.
Store bottled wine upright if using screw caps, or on its side if using traditional corks to keep the cork moist. Your wine is now ready to enjoy immediately, though it will continue to improve over several months of bottle aging.
Pro Tip: Keep detailed notes during your fermentation: starting gravity, yeast strain, temperature, and tasting notes at each stage. This data becomes invaluable when you want to repeat a successful batch or troubleshoot a problem.
Tips for the Best Homemade Wine
- Maintain consistent temperature during fermentation, ideally between 65 and 72 degrees Fahrenheit. Temperature swings confuse yeast and can create off-flavors or stuck fermentation.
- Use the hydrometer multiple times throughout fermentation to track progress. When two consecutive readings show the same gravity, fermentation is complete.
- Never expose your wine to light during fermentation or aging. Ultraviolet light creates an unpleasant “lightstrike” flavor that’s impossible to remove.
- Taste your wine at each racking to monitor flavor development and catch any problems early. Early detection of oxidation or off-flavors allows you to make corrections.
- Be patient with aging. A wine that tastes harsh at bottling often becomes smooth and balanced after 3 to 6 months in the bottle.
- Keep your workspace clean and your materials organized. Chaotic fermentation setups lead to mistakes that compromise the final product.
Common Mistakes to Avoid
- Pitching yeast directly into cold juice without rehydration causes sluggish fermentation and can result in incomplete sugar conversion. Always rehydrate first.
- Neglecting to sanitize equipment allows wild yeast and bacteria to contaminate the batch, creating vinegar flavors or cloudiness that cannot be fixed. This is your most critical step.
- Opening the carboy repeatedly to check on fermentation introduces oxygen and risk of contamination. Use an airlock and trust the process instead.
- Skipping the racking step leaves wine sitting on sediment for weeks, creating musty, off-flavors that make the finished product undrinkable. Plan to rack at least once.
- Bottling too early before fermentation truly stops can result in exploding bottles as remaining yeast produces pressure. Wait until gravity readings stabilize for at least a week.
Serving Suggestions
Homemade wine tastes best when served at the proper temperature and paired thoughtfully with food or enjoyed on its own. Chill white wines to 45 to 50 degrees Fahrenheit and red wines to 60 to 65 degrees Fahrenheit for optimal flavor.
- Pair berry wines with desserts, chocolate, or aged cheeses
- Serve grape wines alongside pasta dishes, grilled meats, or rich sauces
- Enjoy lighter fruit wines as aperitifs or with seafood and white fish
- Chill sweet wines as dessert wines after a meal
- Share a bottle with friends and family at special occasions or casual gatherings
Variations to Try
- Sweeter Wine: Add potassium sorbate before bottling to halt fermentation while residual sugar remains. This creates a dessert-style wine with fruit-forward sweetness.
- Dry Wine: Allow fermentation to complete fully until gravity readings show no remaining sugar. Dry wines showcase tannins and acidity for a more sophisticated palate.
- Sparkling Wine: Bottle the wine before fermentation stops completely, allowing residual sugar and yeast to create carbonation. Use heavy champagne bottles and be extremely cautious due to high pressure.
- Fortified Wine: Add brandy or neutral spirits after fermentation to increase alcohol content and create a dessert wine with longer aging potential.
- Blended Wine: Combine two or three different fruit juices during the initial mixing stage to create complex flavor profiles with balanced acidity and fruit character.
Dietary Adaptations
- Gluten-Free: All wine made through fermentation is naturally gluten-free, as gluten proteins do not survive the fermentation process. No adaptations are needed.
- Vegan: Use vegan-friendly fining agents like pea protein or bentonite clay instead of gelatin or egg white if you choose to fine your wine for clarity.
- Lower Alcohol: Stop fermentation earlier by using potassium sorbate, or select a yeast strain with lower alcohol tolerance like Lalvin 71B.
- Lower Sugar: Skip any additional sugar additions and allow yeast to ferment all naturally occurring sugars completely, resulting in a fully dry wine.
Storage and Reheating
Refrigerator
Opened bottles keep in the refrigerator for 3 to 5 days if properly corked or sealed. The cold slows oxidation and preserves the remaining wine quality.
- Store upright to minimize surface area exposed to air
- Keep sealed away from strong odors that can permeate the wine
- Consume leftover wine within a week of opening for best flavor
Freezer
Wine can be frozen for up to 1 year in airtight bottles, though freezing slightly affects flavor and texture. It’s most useful for cooking with wine rather than serving neat.
- Leave headspace in the bottle as wine expands when frozen
- Label bottles with the date and wine type before freezing
- Thaw slowly in the refrigerator before use
Reheating
Wine should never be heated above 140 degrees Fahrenheit, as heat damages delicate flavors and evaporates alcohol. Use wine for cooking rather than reheating it.
- Add wine to soups or sauces at the end of cooking
- Simmer gently to allow alcohol to evaporate if desired
- Never boil wine vigorously
Nutrition Information
| Nutrient | Amount |
|---|---|
| Calories | 120 to 150 |
| Total Fat | 0 g |
| Saturated Fat | 0 g |
| Carbohydrates | 3 to 8 g |
| Fiber | 0 g |
| Sugar | 0 to 2 g |
| Protein | 0 g |
| Sodium | 10 mg |
| Cholesterol | 0 mg |
Nutritional values vary based on the fruit juice used and the final alcohol content. Drier wines contain less residual sugar and fewer calories, while sweeter wines contain more. All values are approximate for a standard 5-ounce serving.
Frequently Asked Questions
Can I use pasteurized juice instead of fresh juice?
Yes, pasteurized juice works perfectly well and often ferments more reliably than fresh juice. Avoid ultra-pasteurized juice, which has been heated so intensely that some yeast struggle to ferment it effectively.
What if fermentation never starts?
This usually means the yeast died or the juice was too cold. Pitch a fresh batch of rehydrated yeast and move the carboy to a warmer location between 68 and 72 degrees Fahrenheit.
How long can I keep finished wine in the bottle?
Most homemade wines reach peak flavor within 6 to 12 months of bottling and decline gradually afterward. Store bottles on their side in a cool, dark location to maximize shelf life up to 2 to 3 years.
Why did my wine turn cloudy after bottling?
Cloudiness usually indicates continued fermentation or incomplete racking. Next batch, rack the wine twice and ensure fermentation is completely done before bottling.
Can I make wine in a smaller batch size?
Absolutely. Scale all ingredients down proportionally to make a 1-gallon batch instead of 5 gallons, using a glass jug and smaller carboy. The process remains identical.
Final Thoughts
Making wine at home connects you to an ancient tradition while giving you complete control over what you’re creating. The process is forgiving, the results are rewarding, and you’ll be amazed at how quickly you improve with practice.
Start with this straightforward recipe, taste your progress along the way, and don’t hesitate to experiment with different fruit varieties or techniques once you’ve completed a successful batch. Your next batch of homemade wine is waiting.
If you’re interested in exploring specific fruit wines, check out our strawberry wine recipe and blueberry wine recipe for step-by-step guidance on fruit-specific variations. Each guide builds on the fundamentals you’ve learned here and shows you how to highlight the unique characteristics of different berries.
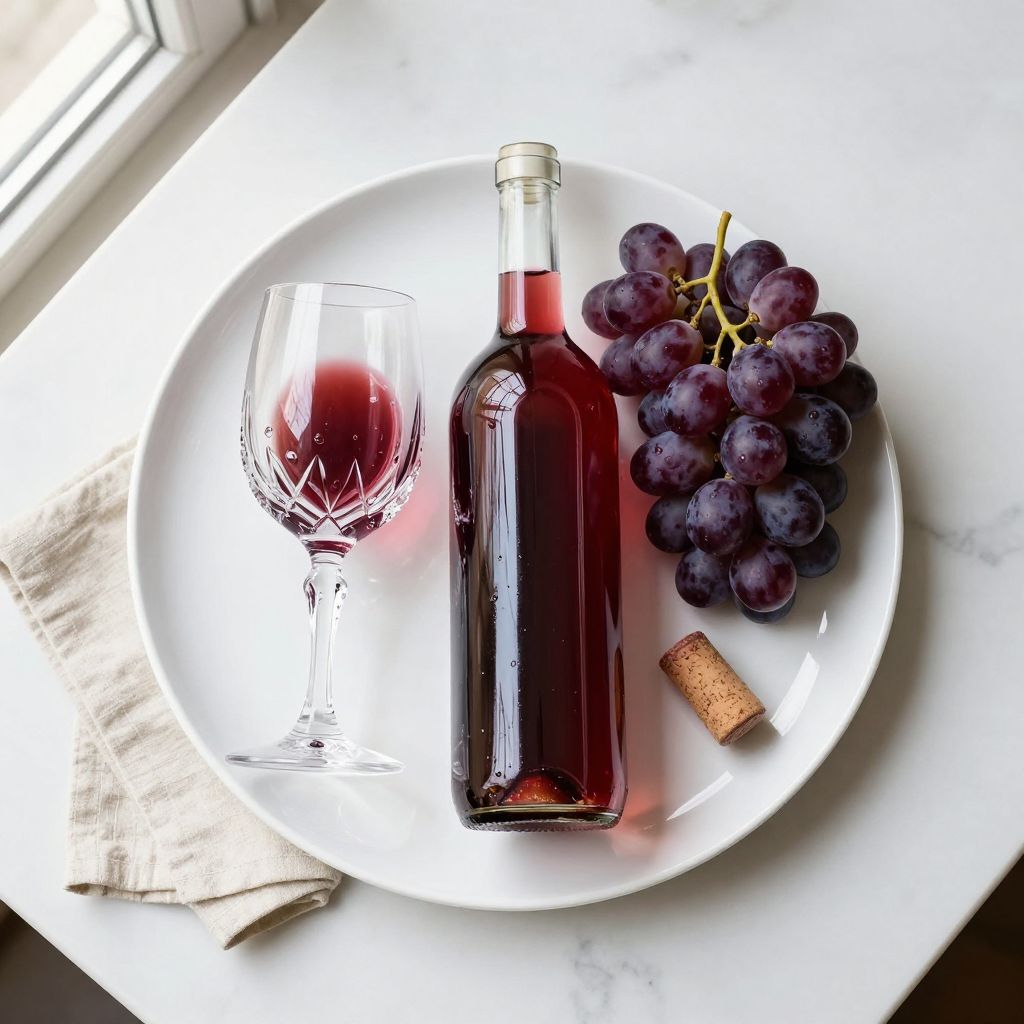
Homemade Wine
Ingredients
Equipment
Method
- Sanitize all equipment by soaking in a solution of 1 tablespoon potassium metabisulfite per gallon of water for 15 minutes, then rinse and air dry.
- Pour 5 gallons of juice into a large sanitized pot or food-grade bucket and take a hydrometer reading to check starting specific gravity.
- If SG is below 1.080, dissolve sugar in a small amount of warmed juice, stir back into the bulk juice, and adjust acidity with acid blend as needed.
- Heat the juice to 170°F and maintain for 10 minutes to pasteurize, then cool to room temperature (approx. 2 to 4 hours).
- Rehydrate wine yeast in warm water at 100°F for 15 minutes according to package directions.
- Stir in dissolved yeast nutrient, add the rehydrated yeast to the cooled juice, and mix gently.
- Transfer the must into a sanitized 5-gallon carboy using a funnel, leaving 2 inches of headspace, then fit the airlock.
- Place the carboy in a dark location at 65–72°F and allow to ferment for 3 to 4 weeks until bubbling stops.
- After fermentation ceases, let the wine settle for 3 to 5 days, then rack off the sediment into a clean carboy and add 1/8 teaspoon metabisulfite.
- Age the wine in the carboy for 2 to 4 weeks, tasting periodically and racking again if needed for clarity.
- One week before bottling, perform a final racking and add 1/2 teaspoon potassium sorbate if a sweeter wine is desired.
- Bottle the wine into sanitized 750 ml bottles, leaving 1 inch of headspace, then cork or cap and store upright or on its side as appropriate.