
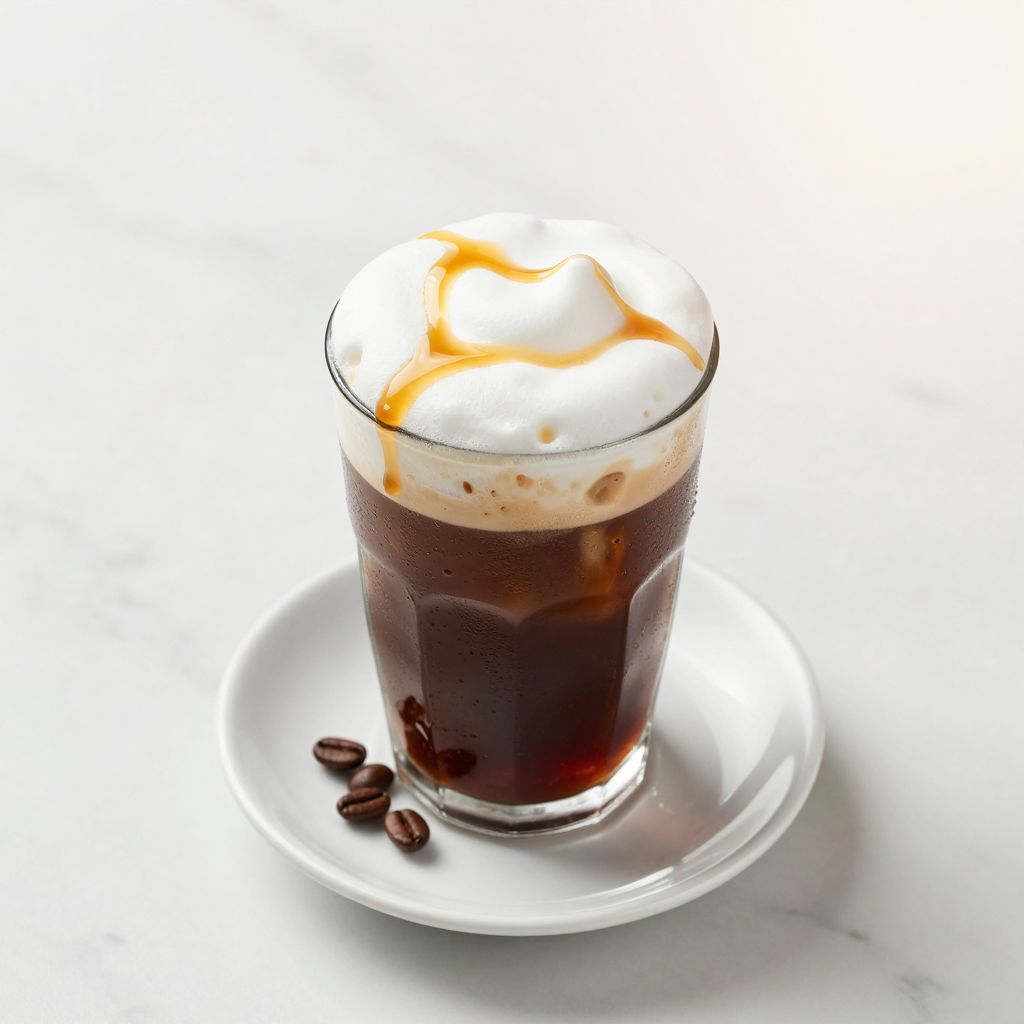
There’s something magical about that moment when cold foam cascades over iced coffee, creating a pillowy layer that transforms your drink into a café-quality experience at home.
The Starbucks vanilla cold foam recipe is a game-changer for coffee lovers who want that signature silky texture without the barista markup. This recipe takes just five minutes, uses ingredients you probably already have, and delivers results that taste identical to what you’d order at the counter.
What makes this foam special is its airy, dense texture that sits perfectly on top of cold beverages without deflating instantly. The vanilla adds subtle sweetness that complements any coffee drink without overpowering it.
Why You’ll Love This Recipe
You’ll wonder why you didn’t make this sooner once you taste that first sip. It’s quick, foolproof, and transforms ordinary iced coffee into something café-worthy.
- Ready in under 5 minutes with minimal cleanup
- Uses only 4 simple ingredients you likely have at home
- Works with any milk type, including dairy-free options
- Costs pennies compared to ordering at Starbucks
- Impresses guests and feels like a treat every time
My Experience Making This Recipe
I stumbled onto this recipe during the pandemic when my local Starbucks line stretched around the building. I was determined to recreate that vanilla cold foam I craved, so I started experimenting with my milk frother.
My first attempt was thin and disappeared within seconds, which was discouraging. After adjusting the milk-to-cream ratio and learning the right frothing technique, I nailed it on try number three.
Now I make this every morning, and honestly, my homemade version tastes better than the store version. The foam sits on my cold brew for minutes without collapsing, and that vanilla flavor is impossibly smooth.
Recipe Overview
- Recipe Name: Starbucks Vanilla Cold Foam
- Servings: 4 to 6 servings (enough for multiple drinks)
- Prep Time: 5 minutes
- Cook Time: 0 minutes
- Total Time: 5 minutes
- Course: Beverage
- Cuisine: American Café
- Calories per Serving: 35
Equipment You Will Need
- Electric milk frother or handheld frother
- Small mixing bowl or measuring cup
- Measuring spoons
- Measuring cups
- Whisk (if using handheld method)
Ingredients for Starbucks Vanilla Cold Foam
- Heavy whipping cream: 1/4 cup
- Whole milk: 3/4 cup
- Vanilla syrup: 1 to 2 teaspoons
- Sweetened condensed milk: 1 teaspoon
Ingredient Notes and Substitutions
- Heavy whipping cream creates the dense, stable foam texture that regular milk can’t achieve alone. Substitute with coconut cream for a dairy-free option, though the foam will be slightly less stable.
- Whole milk provides body and prevents the foam from being too heavy. Use 2% milk if that’s what you have, but whole milk produces superior results.
- Vanilla syrup adds that signature Starbucks flavor note. Substitute with vanilla extract (use 1/4 teaspoon) or omit it entirely for unflavored cold foam.
- Sweetened condensed milk acts as a stabilizer and adds subtle sweetness without using sugar directly. Substitute with 1/2 teaspoon of simple syrup or skip it if you prefer less sweetness.
How to Make Starbucks Vanilla Cold Foam
Step 1: Gather Your Ingredients
Measure out your cream, milk, vanilla syrup, and sweetened condensed milk before you start. Having everything ready means you won’t scramble while the frother is running.
Step 2: Pour Liquids Into the Frother Pitcher
Pour the 3/4 cup of whole milk into your frother pitcher first. Add the 1/4 cup of heavy whipping cream on top.
Step 3: Add Vanilla Syrup
Pour in 1 to 2 teaspoons of vanilla syrup depending on how strong you like the vanilla flavor. I use 1.5 teaspoons for a balanced taste.
Step 4: Stir in the Sweetened Condensed Milk
Add 1 teaspoon of sweetened condensed milk to your mixture. This ingredient stabilizes the foam and keeps it from deflating too quickly.
Step 5: Close the Frother and Start Frothing
Secure the lid on your electric frother and press the button for the cold foam setting. The cold setting is essential here; hot foam won’t work for iced drinks.
Step 6: Wait for the Cycle to Complete
Most electric frothers complete their cycle in about 1 minute. Resist the urge to open the lid early, as this disrupts the frothing process and releases the foam.
Step 7: Let It Rest for 30 Seconds
Once the cycle finishes, wait half a minute before opening the lid. This brief rest allows the foam to stabilize and reach its ideal consistency.
Step 8: Pour the Foam Over Your Iced Coffee
Carefully pour the foam onto your iced coffee or cold brew. Tilt your cup slightly and use a spoon to guide the denser foam onto the drink, leaving the liquid base in the pitcher.
Pro Tip: The denser foam sits at the bottom of the frother pitcher; pour slowly and tilt the pitcher to capture the thick foam first, saving the thinner liquid for your next batch or for stirring into another drink.
Tips for the Best Starbucks Vanilla Cold Foam
- Use a separate pitcher for cold foam frothing if your frother came with multiple attachments. This prevents any residual hot milk from contaminating your cold foam.
- Chill your pitcher and milk before frothing if your kitchen is warm. Cold ingredients froth more easily and produce denser foam.
- Don’t skip the sweetened condensed milk unless you want foam that deflates quickly. This ingredient makes a real difference in how long your foam lasts.
- If your frother doesn’t have a cold setting, use the regular setting but whisk in an ice cube before frothing to chill the mixture. Remove the ice before pouring.
- Make a batch in the morning and store it in the fridge for up to 8 hours. You can spoon it onto multiple drinks throughout the day, though it tastes best within the first 4 hours.
- Experiment with vanilla syrup amounts to match your personal sweetness preference. Some people prefer 1 teaspoon for a subtle flavor; others enjoy 2 teaspoons for a bolder taste.
Common Mistakes to Avoid
- Using skim milk produces weak, thin foam that collapses immediately. The fat in whole milk is what creates that luxurious, stable texture you’re after.
- Frothing hot milk instead of cold milk defeats the purpose of making cold foam. Always use the cold setting or ensure your milk is chilled before starting.
- Overfilling the frother pitcher causes ingredients to overflow when frothing starts. Leave about 1 inch of headspace at the top of the pitcher.
- Forgetting to include sweetened condensed milk results in foam that tastes flat and disappears too quickly. This ingredient is small but mighty for stabilization.
- Opening the lid too early stops the frothing cycle and wastes your ingredients. Patience pays off when it comes to cold foam.
Serving Suggestions
This cold foam transforms any cold beverage from ordinary to extraordinary. Pour it over your favorite iced coffee drinks for that café experience at home.
- Over cold brew coffee for a smooth, mellow drink
- On top of an iced vanilla latte for double vanilla flavor
- Over cold brew with a splash of chocolate syrup for mocha vibes
- On top of iced tea for an unexpected creamy twist
- Mixed into iced lattes instead of regular steamed milk for a lighter texture
Variations to Try
- Caramel Cold Foam: Replace vanilla syrup with caramel syrup for a rich, buttery flavor that pairs beautifully with dark roast coffee.
- Honey Cold Foam: Use 1 teaspoon of honey instead of vanilla syrup for a natural sweetness and subtle floral notes that complement any coffee.
- Cinnamon Cold Foam: Add 1/4 teaspoon of ground cinnamon along with the vanilla for a warm spice that makes cold drinks feel cozy.
- Brown Sugar Cold Foam: Replace the vanilla syrup with 1 teaspoon of brown sugar syrup for a deeper, molasses-forward sweetness.
- Chocolate Cold Foam: Whisk in 1/2 teaspoon of cocoa powder and reduce vanilla syrup to 1/2 teaspoon for a subtle chocolate flavor.
Dietary Adaptations
- Gluten-Free: This recipe is naturally gluten-free; just verify your vanilla syrup doesn’t contain gluten additives.
- Dairy-Free: Use coconut milk or oat milk in place of whole milk and coconut cream instead of heavy whipping cream, though stability decreases slightly.
- Vegan: Replace heavy cream with coconut cream and use dairy-free milk; the foam will be slightly less dense but still delicious.
- Low-Carb/Keto: Omit the sweetened condensed milk and vanilla syrup, using a sugar-free sweetener instead to keep carbs minimal.
Storage and Reheating
Refrigerator
Cold foam keeps in the fridge for up to 8 hours in a sealed container. The foam will gradually lose density, but it remains pourable and tasty for the first 4 to 5 hours.
- Store in an airtight container to prevent absorption of fridge odors
- Gently stir before using if separation occurs
- Spoon foam onto drinks rather than pouring to maintain texture
Freezer
Freezing cold foam isn’t recommended, as the foam structure breaks down when thawed. You’re better off making fresh batches as needed.
Reheating
Cold foam shouldn’t be reheated; it’s designed for cold beverages. If you accidentally warmed it, discard and make a new batch.
Nutrition Information
| Nutrient | Amount |
|---|---|
| Calories | 35 |
| Total Fat | 3g |
| Saturated Fat | 2g |
| Carbohydrates | 2g |
| Fiber | 0g |
| Sugar | 2g |
| Protein | 1g |
| Sodium | 15mg |
| Cholesterol | 10mg |
These values are approximate and based on standard ingredient measurements. Actual nutrition will vary based on specific brands and any ingredient substitutions you make.
Frequently Asked Questions
Can I make this without an electric frother?
Yes, use a handheld frother or even a whisk and bowl, though results won’t be quite as creamy. Pour your ingredients into a jar, seal it, and shake vigorously for 1 to 2 minutes, then let it rest before using.
How far in advance can I make cold foam?
Make it no more than 4 to 5 hours before you need it for best results. You can make it up to 8 hours ahead, but texture and stability decline over time.
What if my foam is too thin?
You likely used too much milk or not enough cream. Try increasing the heavy cream to 1/3 cup and reducing milk to 2/3 cup for denser foam.
Can I use almond milk instead of whole milk?
Almond milk produces thinner foam because it lacks the fat content of whole milk. Coconut milk works much better for a dairy-free option.
Why does my foam separate when sitting?
This is normal after a few hours. Give it a gentle stir before using, or try adding an extra teaspoon of sweetened condensed milk for better stabilization.
Is this recipe actually the same as Starbucks?
It’s incredibly close to the Starbucks version based on taste and texture. Starbucks uses similar ingredients, though their exact formula remains proprietary.
Final Thoughts
Making your own Starbucks vanilla cold foam recipe is one of those kitchen wins that pays dividends every single day. Once you’ve had this silky foam on your coffee, you’ll never want to go back to plain iced drinks.
Give this recipe a shot tomorrow morning and taste the difference that 5 minutes of effort makes. You’ve already saved enough money to buy ingredients for a month of homemade cold foam.
If you’re a Starbucks coffee fan, you might also enjoy making a Starbucks blonde vanilla latte recipe at home. Want to elevate your coffee even further? Try creating your own sweet cream coffee creamer recipe to pair with this foam for a completely customized café experience.
Starbucks Vanilla Cold Foam
Ingredients
Equipment
Method
- Step 1: Gather all ingredients and equipment.
- Step 2: Pour 3/4 cup whole milk into the frother pitcher, then add 1/4 cup heavy whipping cream.
- Step 3: Add 1 to 2 teaspoons vanilla syrup to the mixture.
- Step 4: Stir in 1 teaspoon sweetened condensed milk until combined.
- Step 5: Secure the frother lid and select the cold foam setting; froth for about 1 minute.
- Step 6: Let the foam rest in the closed frother for 30 seconds to stabilize.
- Step 7: Tilt your iced coffee cup and slowly pour the thick foam over the cold beverage, using a spoon if needed.