
The first time I tasted makgeolli, I was struck by its milky sweetness and the subtle fizz that tickled my nose like a gentle revelation. This traditional Korean rice wine has been brewed for centuries, and it’s experiencing a well-deserved revival among home enthusiasts and cocktail bars alike.
Makgeolli is special because it’s refreshingly easy to make at home with just a few ingredients and minimal equipment. The result is a naturally sweet, lightly carbonated beverage that tastes nothing like the commercial versions you might have tried.
What makes this recipe stand out is the balance of simplicity and flavor: you’ll end up with a drink that’s slightly effervescent, creamy on the palate, and genuinely alive with gentle funk. The process takes only a week or two, and the payoff is worth every moment of patience.
Why You’ll Love This Recipe
This recipe rewards curiosity with a genuinely different drinking experience that feels both ancient and modern at once. Making your own makgeolli connects you to Korean culinary tradition while producing something you can’t easily buy fresh.
- Requires only four basic ingredients and minimal hands-on time
- Ready to drink in 7 to 14 days, much faster than traditional wine fermentation
- Naturally sweet with a light fizz and creamy texture that improves with proper care
- Cost-effective compared to buying bottled versions at specialty shops
- A conversation starter that impresses guests and sparks questions about fermentation
My Experience Making This Recipe
I was nervous the first time I attempted makgeolli, wondering if I’d accidentally create something toxic instead of delicious. Within three days, the aroma from my fermentation jar shifted from grain to something floral and alive, and I knew I was on the right track.
Watching the yeast and koji do their work felt like magic, even though it’s pure chemistry and microbiology. The payoff came when I strained it and poured the milky liquid into glasses, and my partner’s eyes widened at the first sip.
The taste was cleaner and brighter than I expected, with a natural sweetness that didn’t feel heavy or cloying. I’ve now made batches three times, tweaking fermentation times and rice amounts, and each one teaches me something new about how patience and precision create flavor.
Recipe Overview
- Recipe Name: Homemade Makgeolli
- Servings: Makes approximately 1 liter (about 8 to 10 servings)
- Prep Time: 30 minutes
- Cook Time: 45 minutes (for rice steaming)
- Fermentation Time: 7 to 14 days
- Total Time: 8 to 15 days
- Course: Beverage
- Cuisine: Korean
- Calories per Serving: Approximately 90 calories
Equipment You Will Need
- One large glass jar (2 to 3 liters capacity)
- Cheesecloth or fine mesh strainer
- Rice cooker or pot for steaming rice
- Kitchen scale (optional but helpful for precision)
- Rubber bands or kitchen twine
- Thermometer (to monitor fermentation temperature)
- Spoon for stirring
- Bottles or containers for storage
- Funnel for straining and bottling
Ingredients for Makgeolli
- Short-grain rice: 2 cups (400 grams), uncooked
- Koji spores (koji-kin or koji powder): 1 teaspoon (about 5 grams)
- Water: 3 cups (750 milliliters), filtered or purified, divided
- Yeast (bread yeast or wine yeast): 1/4 teaspoon (or one packet of dry yeast)
Ingredient Notes and Substitutions
- Short-grain rice: This starch breaks down easily during fermentation, creating the creamy texture makgeolli is known for. Long-grain rice produces a thinner result; if using it, reduce the total amount by about 25 percent and expect a drier final product.
- Koji spores: Koji is the mold (Aspergillus oryzae) that breaks down rice starches into sugars for yeast to ferment. You can purchase koji powder online or in Asian grocery stores; there’s no true substitute without dramatically changing the fermentation process and final flavor.
- Filtered or purified water: Chlorine in tap water can inhibit fermentation and yeast activity. If you only have tap water, let it sit uncovered for 24 hours to allow chlorine to evaporate, or use bottled water instead.
- Bread yeast or wine yeast: Bread yeast works fine for home batches, though wine yeast (like Lalvin or Champagne yeast) produces a cleaner fermentation with fewer off-flavors. Do not use instant yeast or rapid-rise variants, as they’re too aggressive for this gentle process.
How to Make Makgeolli
Step 1: Rinse and Prepare Your Rice
Place your short-grain rice in a fine mesh strainer and rinse under cold running water for about one minute, stirring gently with your fingers. Rinsing removes surface starch that would cloud your final makgeolli, giving you a clearer, brighter liquid.
Step 2: Steam the Rice
Add the rinsed rice to your rice cooker with 2 cups of water and cook on the standard setting until fully cooked. The rice should be tender and slightly sticky; this texture breaks down more readily during fermentation than firmer, drier rice.
Step 3: Cool the Rice to Room Temperature
Spread the cooked rice on a clean plate or shallow bowl and let it cool for at least 30 minutes until it reaches room temperature. Warm rice can kill koji spores and yeast, so patience here is critical for successful fermentation.
Step 4: Prepare Your Fermentation Vessel
Wash your glass jar thoroughly with hot water and dry it completely with a clean cloth. Any residual moisture or soap can interfere with fermentation, so cleanliness is essential; you don’t need to sterilize aggressively, just clean well.
Step 5: Combine Rice, Water, and Koji Spores
Transfer the cooled rice to your jar and add 1 cup of filtered water, then sprinkle the koji spores over the mixture. Stir gently but thoroughly to distribute the koji evenly throughout the rice; this ensures the mold colonizes the entire batch uniformly.
Step 6: Cover and Start Koji Fermentation
Cover the jar with cheesecloth secured with a rubber band, allowing air exchange while keeping out dust and contaminants. Place it in a warm location (ideally 68 to 75 degrees Fahrenheit) and let it sit undisturbed for 2 to 3 days.
During this time, koji will grow and release enzymes that break down the rice starches into sugars. You should notice a slightly sweet aroma and possibly some white mold growth on the rice surface; both signs indicate successful koji colonization.
Step 7: Activate the Yeast and Add to Your Mixture
In a small bowl, combine 1/4 teaspoon of yeast with 1/4 cup of lukewarm water and let it sit for 5 to 10 minutes until foamy. This activation step wakes up the dormant yeast cells, making them more effective at converting sugars to alcohol.
Pour the yeast mixture into your jar with the koji-fermented rice and stir well. Add the remaining 2 cups of filtered water and stir again to combine everything evenly.
Step 8: Begin Main Fermentation
Re-cover the jar with cheesecloth and return it to your warm location for 7 to 10 days. Stir the mixture once daily, preferably at the same time each day, which helps distribute yeast and koji throughout the batch and prevents settling.
You’ll notice bubbling activity starting around day 2 or 3, with the liquid becoming cloudier and taking on a pleasant, slightly sweet aroma. This is yeast converting sugar to alcohol and carbon dioxide; the cloudiness is yeast cells suspended in the liquid, which is perfectly normal and desired.
Step 9: Taste Test and Determine Readiness
After 7 days, use a clean spoon to taste a small sample of the mixture. The flavor should be naturally sweet with a hint of tartness and a gentle fizz; if it tastes too sweet and not fizzy enough, continue fermenting for 2 to 3 more days.
When the taste satisfies you and the effervescence is noticeable, your makgeolli is ready to strain. Most batches reach perfect balance between days 8 and 10, but fermentation speed varies based on room temperature and yeast vigor.
Step 10: Strain and Bottle Your Makgeolli
Line your fine mesh strainer with several layers of cheesecloth and position it over a large bowl. Carefully pour the contents of your fermentation jar through the strainer, allowing the liquid to drip through while the rice solids collect in the cloth.
You can gently squeeze the cloth to extract more liquid, though doing this gently keeps sediment minimal. Pour the strained makgeolli into bottles using a funnel, leaving about 1 inch of headspace to account for carbonation expansion.
Pro Tip: The sediment at the bottom of your jar contains beneficial yeast and koji compounds; don’t discard it carelessly, as a small amount stirred back into the liquid enhances flavor and probiotic content.
Tips for the Best Makgeolli
- Keep your fermentation jar in a consistent, warm location away from direct sunlight. Fermentation slows dramatically in temperatures below 65 degrees, and direct sunlight can damage yeast and alter flavor unpredictably.
- Stir daily during the main fermentation phase to prevent settling and promote even yeast distribution. A quick stir takes 30 seconds and dramatically improves consistency and flavor development.
- Use filtered or purified water throughout the process, as chlorine and other tap water chemicals inhibit microbial activity. Boiling water removes chlorine but may also remove beneficial minerals, so filtering is preferable.
- Taste your batch starting on day 7 to catch it at peak flavor. Over-fermentation creates excessive tartness and alcohol content, reducing the delicate balance makgeolli is prized for.
- Save a small amount of your koji-fermented rice mixture before adding yeast; you can use this as a starter for your next batch, reducing the fermentation timeline by 2 to 3 days.
- Store finished makgeolli in the refrigerator, where cold temperatures dramatically slow fermentation and preserve the flavor you worked to develop. Room temperature storage continues fermentation, creating more funk and higher alcohol content over time.
Common Mistakes to Avoid
- Using tap water without treatment: Chlorine kills beneficial microbes and creates off-flavors. Always filter or boil and cool your water first.
- Skipping the koji fermentation phase: Some recipes combine everything at once, but skipping koji development produces a thin, sour result instead of the creamy sweetness makgeolli should have.
- Fermenting in too-cold temperatures: Below 65 degrees, fermentation stalls, and your batch develops off-flavors instead of the pleasant funk you’re seeking. Move your jar to a warmer spot or use a heating pad set to low.
- Failing to stir daily: Yeast sinks and concentrates, creating uneven fermentation and flavor dead zones. Daily stirring is quick and essential for consistent results.
- Bottling too early: Straining on day 4 or 5 produces a sweet, flat drink lacking the subtle fizz that defines makgeolli. Patience for 7 to 10 days is worth the wait.
Serving Suggestions
Makgeolli tastes best served well-chilled in small glass cups or bowls, which lets you appreciate its creamy color and enjoy the slight fizz. The sweetness and low alcohol content make it perfect for casual gatherings, and it pairs beautifully with rich, savory foods that balance its mild sweetness.
- Serve alongside Korean pajeon (vegetable pancakes) or hotteok (sweet red bean pancakes) for a traditional pairing
- Pair with grilled or fried foods like Korean fried chicken or gyeran mari (rolled egg) to cut through richness
- Enjoy with aged cheeses or charcuterie for a sophisticated tasting experience
- Mix into cocktails or mocktails for subtle sweetness without overpowering other flavors
- Serve as a palate cleanser between courses at a Korean-inspired dinner party
Variations to Try
- Chestnut Makgeolli: Add 1/4 cup roasted chestnuts (chopped fine) during the koji fermentation phase for a nutty, slightly deeper flavor that develops over the 7 to 10 day fermentation period.
- Citrus-Infused Makgeolli: After straining, add the zest of one lemon or yuzu and let it infuse for 24 hours in the refrigerator, then strain again; the result is brighter and more refreshing without losing the creamy base.
- Brown Rice Makgeolli: Substitute half the short-grain white rice with short-grain brown rice for an earthier flavor and slightly higher fiber content; expect a nuttier, less creamy final product.
- Higher Alcohol Version: Add an additional 1/8 teaspoon of yeast and ferment for 12 to 14 days instead of 7 to 10; the result will be drier and contain 2 to 3 percent more alcohol, suitable for more adventurous palates.
- Ginger-Sweetened Makgeolli: Infuse thin slices of fresh ginger into your finished makgeolli for 2 to 3 days, then strain; the gentle spice complements the sweetness and adds warmth without overwhelming the delicate base.
Dietary Adaptations
- Gluten-Free: Makgeolli is naturally gluten-free if you use pure short-grain rice and verify that your koji spores and yeast haven’t been cross-contaminated during processing; check supplier labels for explicit gluten-free certification.
- Vegan and Vegetarian: This recipe is already vegan and vegetarian, containing no animal products of any kind; the fermentation process uses only plant-based microbes and grains.
- Lower Alcohol: Reduce yeast by half and ferment for only 5 to 7 days instead of 7 to 10; you’ll produce a sweeter drink with 2 to 3 percent alcohol instead of the standard 5 to 8 percent.
- Lower Sugar: Extend fermentation to 12 to 14 days, allowing yeast to consume more of the available sugars; the result will be drier and more vinous, with less residual sweetness.
Storage and Reheating
Refrigerator
Store finished makgeolli in sealed glass bottles in the refrigerator, where it keeps for 3 to 4 weeks with minimal quality loss. The cold temperature dramatically slows remaining fermentation, preserving the flavor and carbonation you developed.
- Check bottles weekly and gently open them to release excess pressure if they become very tight
- Expect slight separation over time, with sediment settling to the bottom; stir gently before serving if desired
- Flavor mellows slightly after one week refrigeration, with rough edges smoothing out
Freezer
Makgeolli can be frozen for up to 3 months, though freezing damages the delicate carbonation and affects texture slightly. Use freezer storage only if you have excess batch and plan to consume it thawed rather than freshly chilled.
- Leave 1 to 2 inches of headspace in bottles, as the liquid expands during freezing
- Thaw in the refrigerator overnight rather than at room temperature to minimize quality loss
- Thawed makgeolli loses most of its fizz; stir before drinking to redistribute remaining carbonation
Reheating
Makgeolli is never reheated; it’s consumed chilled as a cold beverage. Heating destroys the delicate flavor compounds and beneficial microbes that make the drink special.
- Serve directly from the refrigerator in chilled glasses for the best experience
- If a batch has warmed to room temperature, briefly chill it in the freezer for 10 to 15 minutes before serving
Nutrition Information
| Nutrient | Amount |
|---|---|
| Calories | 90 |
| Total Fat | 0.3 grams |
| Saturated Fat | 0.1 grams |
| Carbohydrates | 18 grams |
| Fiber | 0 grams |
| Sugar | 12 grams |
| Protein | 1 gram |
| Sodium | 5 milligrams |
| Cholesterol | 0 milligrams |
Nutritional values are approximate and calculated for a standard batch divided into 8 servings. Values vary based on fermentation length, yeast efficiency, and individual batch characteristics; longer fermentation produces slightly lower sugar content and higher alcohol content.
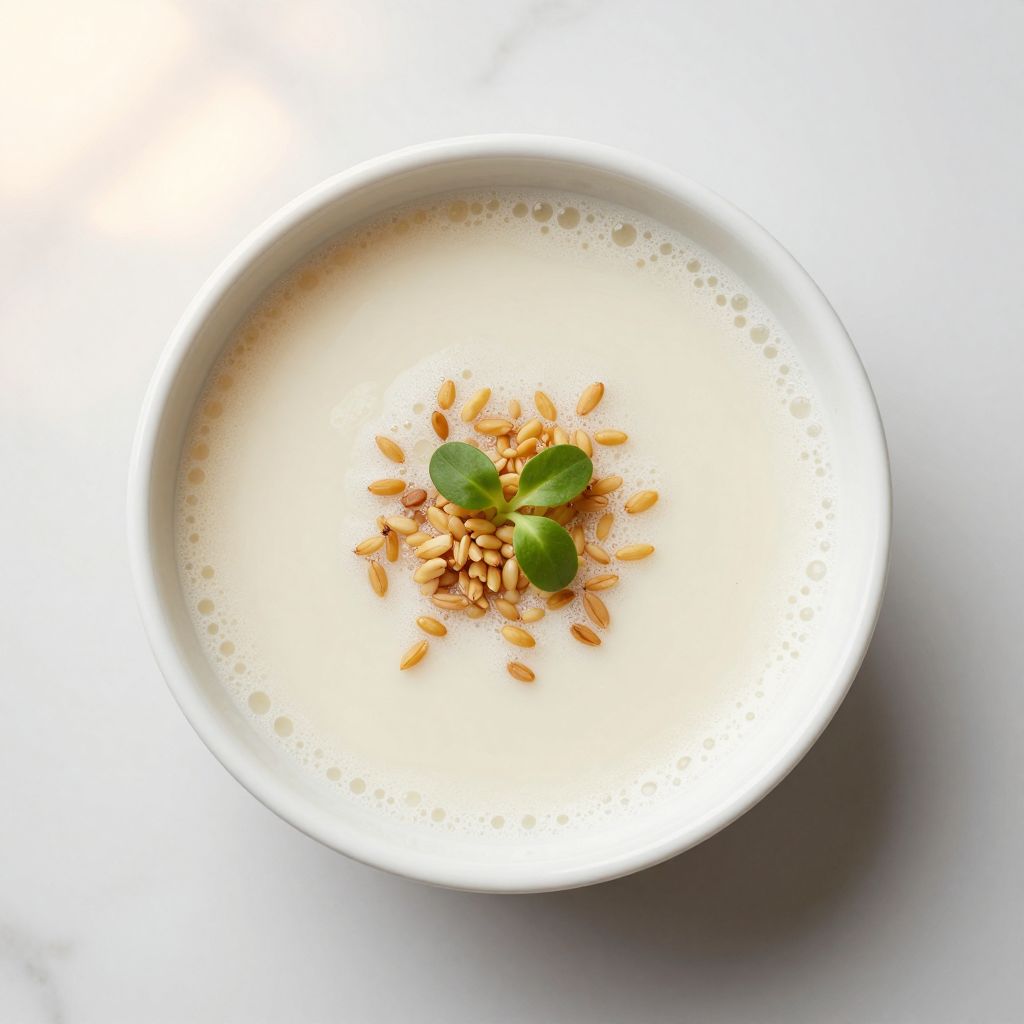
Homemade Makgeolli
Ingredients
Equipment
Method
- Rinse 2 cups (400 g) of short-grain rice under cold running water for 1 minute to remove surface starch.
- Steam the rinsed rice with 2 cups of water for 45 minutes, using a rice cooker or pot, until tender and slightly sticky.
- Spread the cooked rice on a clean plate and cool to room temperature for 30 minutes.
- Clean a 2 to 3 liter glass jar with hot water and dry completely.
- Transfer the cooled rice to the jar, add 1 cup of filtered water, and sprinkle 1 teaspoon of koji spores evenly over the rice. Stir to combine.
- Cover the jar with cheesecloth secured by a rubber band and let stand at 68–75°F (20–24°C) for 2 to 3 days without disturbing.
- In a small bowl, activate 1/4 teaspoon yeast in 1/4 cup lukewarm water for 5 to 10 minutes until foamy.
- Add the yeast mixture and the remaining 2 cups of water to the jar, stir thoroughly, and cover again with cheesecloth.
- Ferment at 68–75°F (20–24°C) for 7 to 10 days, stirring once daily.
- Starting on day 7, taste daily until you achieve a natural sweetness, gentle fizz, and slight tartness.
- Line a strainer with cheesecloth over a bowl and strain the fermented mixture, gently squeezing out the liquid.
- Using a funnel, bottle the makgeolli, leaving 1 inch of headspace for carbonation.
- Refrigerate bottles to slow fermentation and store for up to 3 weeks, gently stirring or shaking before serving to redistribute sediment.
Notes
Can I use active dry yeast instead of wine yeast?
Yes, active dry yeast works fine and produces makgeolli with acceptable flavor, though wine yeast creates a slightly cleaner, less bready result. If using active dry yeast, activate it first in warm water for 5 to 10 minutes before adding to your batch.
What does koji look like during fermentation?
Koji typically appears as white, powdery or fuzzy growth on the rice surface, sometimes with a sweet or chestnut-like aroma. The growth is normal and desired; it means the mold is actively producing enzymes that break down rice starches into fermentable sugars.
Can I make makgeolli without koji spores?
True makgeolli cannot be made without koji because the mold provides the enzymes that convert rice starch to sugar; yeast alone cannot ferment solid rice. If you skip koji, you’ll end up with a thin, sour, and unpleasant result rather than the creamy, sweet beverage makgeolli should be.
How do I know if my batch has gone bad?
Watch for pink or orange discoloration, a vinegar smell that overwhelms the pleasant fermentation aroma, or visible mold growth below the surface. A slightly sour or funky aroma is normal and acceptable; discoloration or overpowering vinegar notes indicate contamination and the batch should be discarded.
Can I reduce the fermentation time to 3 or 4 days?
No, fermentation faster than 5 to 7 days produces a very sweet, flat, non-carbonated drink that lacks the pleasant tartness and fizz makgeolli is known for. The koji needs 2 to 3 days to fully colonize and develop enzymes, and yeast needs 4 to 7 days minimum to produce adequate carbonation and alcohol.
Why is my makgeolli cloudy?
Cloudiness is normal and desired; it indicates yeast cells suspended in the liquid and koji particles in suspension. This sediment contains beneficial probiotics and contributes to the creamy mouthfeel; it’s not a sign of failure or contamination.
Can I speed up fermentation by using more yeast?
Adding extra yeast produces faster fermentation but can create harsh, off-flavors and excessive alcohol, throwing off the balance that makes makgeolli special. Stick to the specified amount and allow the natural timeline to produce the best flavor.
Final Thoughts
Making makgeolli at home is easier and more rewarding than most people expect, and the first taste of your own batch justifies every moment of patience. You’re not just creating a beverage; you’re tapping into centuries of Korean brewing tradition and discovering something uniquely yours in the process.
If you love exploring fermentation, try your hand at amazake, another sweet fermented rice drink, or expand into herbals like sekanjabin, a Persian mint and vinegar syrup. Each teaches different lessons about how time, temperature, and microbes transform simple ingredients into something extraordinary.