
Imagine the crisp bite of autumn in a glass, the kind of drink that makes you want to curl up on the porch and forget about your responsibilities for a while.
Apple cider slushies capture that seasonal magic without any of the fuss, and they’re cold enough to feel like a treat on a warm day or just indulgent enough to satisfy cravings on a cool one. This recipe delivers that perfect balance of sweet apple flavor, gentle spice, and icy texture that keeps you coming back for sip after sip.
Best of all, you can make a batch in under 20 minutes and have a drink that tastes like it took serious effort.
Why You’ll Love This Recipe
This apple cider slushie hits all the marks for a crowd-pleasing frozen drink. It’s fast to make, naturally sweetened, and packed with flavor that feels special without requiring a fancy blender or complicated technique.
- Ready in under 20 minutes from start to sip
- Uses just five core ingredients, most of which you likely have on hand
- No ice cream or dairy needed, making it naturally refreshing and light
- Works perfectly for fall gatherings, casual weeknight treats, or meal prep for the week ahead
- Can be spiked with liquor or kept completely alcohol-free for family-friendly entertaining
My Experience Making This Recipe
I first tried freezing apple cider on a whim after buying too much at a farmers market last October. The result was so good that I immediately made three more batches and served it at a dinner party the following weekend.
Everyone asked for the recipe, which told me something special was happening here. The texture hits somewhere between a frozen drink and a slushy, with just enough body to feel substantial but light enough to not leave you feeling weighed down.
What surprised me most was how the spices like cinnamon and nutmeg actually intensify when frozen, creating this deeper, more complex flavor profile than the fresh cider alone. Now I make these every few weeks during apple season and keep bags of frozen cider in my freezer year-round.
Recipe Overview
- Recipe Name: Apple Cider Slushie
- Servings: 4
- Prep Time: 10 minutes
- Freeze Time: 6 hours or overnight
- Total Time: 6 hours 10 minutes (plus active mixing time)
- Course: Beverage
- Cuisine: American
- Calories per Serving: 180
Equipment You Will Need
- Large shallow baking dish or 9×13 inch casserole pan
- Fork or whisk
- Blender or food processor
- Tall drinking glasses
- Measuring cups and spoons
- Freezer with space for a large flat pan
Ingredients for Apple Cider Slushie
- 64 ounces apple cider (one half-gallon carton, fresh or shelf-stable)
- 1/2 cup orange juice (freshly squeezed or quality store-bought)
- 2 tablespoons honey or maple syrup
- 1 teaspoon ground cinnamon
- 1/4 teaspoon ground nutmeg
- 2 whole star anise (optional but recommended)
- 4 whole cloves (optional)
- Fresh cinnamon sticks for serving (optional)
Ingredient Notes and Substitutions
- Apple cider: Fresh pressed cider from a farm stand delivers the richest flavor, but shelf-stable cider works just fine and lasts longer in the pantry. If you can only find apple juice, use it, though the taste will be slightly less complex.
- Orange juice: Orange juice brightens the cider and adds a citrus note that prevents the drink from tasting one-dimensional. Lemon juice works as a substitute if you prefer a sharper tang, but reduce it to 3 tablespoons since it’s more potent.
- Honey or maple syrup: Both add subtle sweetness and body to the slushie without tasting artificial. If you prefer a vegan option or want zero added sugar, skip this step entirely, the cider has enough natural sugars.
- Spices: Ground cinnamon and nutmeg are non-negotiable for that classic fall flavor profile. Star anise and cloves push the flavor deeper and more sophisticated, but they’re optional if you want to keep things simple.
How to Make Apple Cider Slushie
Step 1: Combine Your Base Liquids
Pour the apple cider and orange juice into a large shallow baking dish and stir them together gently. Combining these two liquids creates a flavor base that’s more dynamic than cider alone.
Step 2: Dissolve the Sweetener
Drizzle the honey or maple syrup over the liquid and stir well until it dissolves completely. Dissolving the sweetener now prevents it from settling at the bottom of your slushie later.
Step 3: Add Ground Spices
Sprinkle the ground cinnamon and nutmeg over the liquid and whisk thoroughly to distribute them evenly. These spices will infuse the entire batch as it freezes, creating a more cohesive flavor.
Step 4: Include Optional Whole Spices
If you’re using star anise and cloves, add them now and stir them in. These whole spices float through the mixture and intensify the flavor without adding any grittiness.
Step 5: Place the Pan in the Freezer
Transfer the baking dish to the freezer and set a timer for 2 hours. The shallow pan freezes faster and more evenly than a deeper container.
Step 6: Begin the First Scraping
After 2 hours, remove the pan and use a fork to break up any ice crystals that have formed around the edges and bottom. Scraping the freezing liquid prevents large ice chunks from forming and creates that perfect slushy texture.
Step 7: Return and Repeat
Put the pan back in the freezer and scrape it again every 45 minutes to an hour, continuing this process until the mixture reaches a thick, slushy consistency that holds together but isn’t completely solid. This usually takes about 4 to 6 hours total, depending on your freezer’s temperature.
Step 8: Prepare for Serving
Once the slushie reaches the right consistency, use a spoon or small ice cream scoop to portion it into chilled glasses. If it has frozen solid, let it sit on the counter for 5 minutes before scooping to make serving easier.
Pro Tip: Freeze your drinking glasses for 30 minutes before serving so the slushie stays at the perfect temperature longer and melts more slowly.
Tips for the Best Apple Cider Slushie
- Use a shallow, wide baking dish rather than a tall container, the larger surface area freezes more evenly and requires fewer scrapings.
- Set phone reminders for your scraping schedule so you don’t forget and end up with an ice block instead of a slushie.
- Chill your glasses in the freezer for at least 30 minutes before serving to keep the slushie from melting too quickly.
- Taste the mixture before freezing and adjust the spices or sweetness if needed, adjusting flavors after freezing is much harder.
- Make a double batch and store extra frozen mixture in a freezer-safe container, you’ll have slushies ready to go for days.
- For a firmer slushie, skip the scraping step after hour 4 and let it freeze solid, then thaw slightly before serving.
Common Mistakes to Avoid
- Forgetting to scrape the mixture regularly leads to large, unpleasant ice crystals instead of a smooth, drinkable slushie texture.
- Using a deep container instead of a shallow baking dish causes uneven freezing and requires constant monitoring.
- Skipping the orange juice makes the drink taste flat and one-note, the citrus is crucial for brightness and balance.
- Adding too many whole spices can overwhelm the drink and create an overwhelming, medicinal flavor.
- Serving in room-temperature glasses causes the slushie to melt almost immediately, eliminating that refreshing icy texture.
Serving Suggestions
Serve your apple cider slushie as a standalone drink or pair it with simple snacks for a light, refreshing treat. The drink’s natural sweetness and bright flavors work well alongside both sweet and savory foods.
- Serve alongside a warm apple cinnamon donut or cinnamon roll for a contrast of cold and warm temperatures
- Pair with a charcuterie board featuring aged cheddar, pecans, and dried apricots for a sophisticated fall gathering
- Accompany with soft pretzels or cinnamon sugar toast for a casual snack pairing
- Serve as the drink during a fall-themed brunch with roasted vegetables and warm cornbread
- Offer alongside pumpkin bread or spiced cake for a seasonal dessert accompaniment
Variations to Try
- Spiced Apple Slushie: Add a pinch of cardamom or a dash of ginger powder for deeper, more complex spice notes that elevate the flavor.
- Cranberry Apple Slushie: Replace half the cider with cranberry juice for a tartness that balances the sweetness and adds beautiful color.
- Adult Apple Cider Slushie: Stir in 1/4 cup bourbon or spiced rum before freezing for a boozy version perfect for adult gatherings.
- Vanilla Bean Slushie: Scrape the insides of a vanilla bean into the mixture for a subtle sweetness and aromatic quality that feels fancy.
- Apple Pear Slushie: Use 32 ounces apple cider and 32 ounces pear cider or juice for a softer, more delicate flavor profile.
Dietary Adaptations
- Vegan: This recipe is naturally vegan when made with maple syrup instead of honey, all other ingredients are plant-based.
- Gluten-Free: Apple cider slushies are naturally gluten-free, just verify that any store-bought cider hasn’t been cross-contaminated during processing.
- Sugar-Free: Omit the honey entirely or replace it with a monk fruit sweetener or erythritol, the cider contains enough natural sugars to taste sweet.
- Alcohol-Free: This recipe makes no alcohol, so it’s safe for all ages and can be enjoyed by anyone avoiding alcohol.
Storage and Reheating
Refrigerator
Frozen slushie will begin to melt within a few hours once removed from the freezer. Store any leftover slushie back in the freezer in an airtight container for up to two weeks.
- Keep frozen mixture in the original baking dish covered with plastic wrap or aluminum foil
- Transfer to a freezer-safe container if you need the baking dish for other cooking
Freezer
The slushie mixture stays fresh in the freezer for up to three weeks, though flavors are brightest in the first two weeks. Make sure your freezer maintains a steady temperature of 0 degrees Fahrenheit or lower.
- Store in an airtight container to prevent freezer burn and flavor loss
- Label the container with the date so you know how long it’s been frozen
Reheating
This drink doesn’t need reheating since it’s meant to be served frozen. If the slushie has frozen solid and become difficult to scoop, let it sit on the counter for 5 to 10 minutes to soften slightly.
- Thaw at room temperature for 10 minutes if the mixture is too hard to serve easily
- Do not microwave, as this will destroy the slushy texture and create a regular drink
Nutrition Information
| Nutrient | Amount |
|---|---|
| Calories | 180 |
| Total Fat | 0 g |
| Saturated Fat | 0 g |
| Carbohydrates | 46 g |
| Fiber | 0 g |
| Sugar | 42 g |
| Protein | 0 g |
| Sodium | 25 mg |
| Cholesterol | 0 mg |
These values are estimates based on standard USDA data for apple cider and orange juice. Actual nutrition varies depending on the specific brands and products you use.
Frequently Asked Questions
Can I make this without scraping it every hour?
You can skip the scraping step and let it freeze solid, then blend the entire frozen block in a food processor until slushy, but hand-scraping creates a more pleasant texture. The manual scraping method produces finer ice crystals than blending a solid block.
How long does this actually take to freeze?
Total freezing time ranges from 4 to 8 hours depending on your freezer’s temperature and how often you scrape. Most people find that scraping every 45 minutes to an hour for 5 to 6 hours yields perfect slushies.
Can I use store-bought frozen apple cider?
Absolutely, thaw it completely first, then add orange juice and spices before freezing using the same method. This saves prep time but make sure you’re buying pure cider and not a juice blend with added sugars.
What if my slushie tastes too sweet?
Add more orange juice or a splash of water to dilute it, you can also mix in a squeeze of fresh lemon juice. Next time, reduce the honey by half or skip it entirely since the cider is already naturally sweet.
Can I make this ahead for a party?
Yes, freeze the mixture completely the day before, then let it soften for 5 to 10 minutes before serving so you can scoop it easily. Your guests will be impressed that you made something this special without last-minute fussing.
Is there a way to make this without a freezer?
You can make a chilled version by combining all ingredients in a pitcher and refrigerating for at least 4 hours, then serving over ice. The texture won’t be slushy, but the flavor will still be delicious and refreshing.
Final Thoughts
Making apple cider slushies at home proves that you don’t need fancy equipment or complicated techniques to create something restaurant-quality and impressive. The recipe is forgiving, flexible, and delivers consistent results every single time.
Try making a batch this week and discover why this simple frozen drink becomes a seasonal favorite year after year. Your friends will be asking for the recipe before you finish pouring the second glass.
If you love seasonal apple drinks, explore our apple cider mocktail recipe for another creative way to enjoy fresh cider. You might also love our apple cider vinegar spritz recipe for a tangy twist on traditional apple beverages.
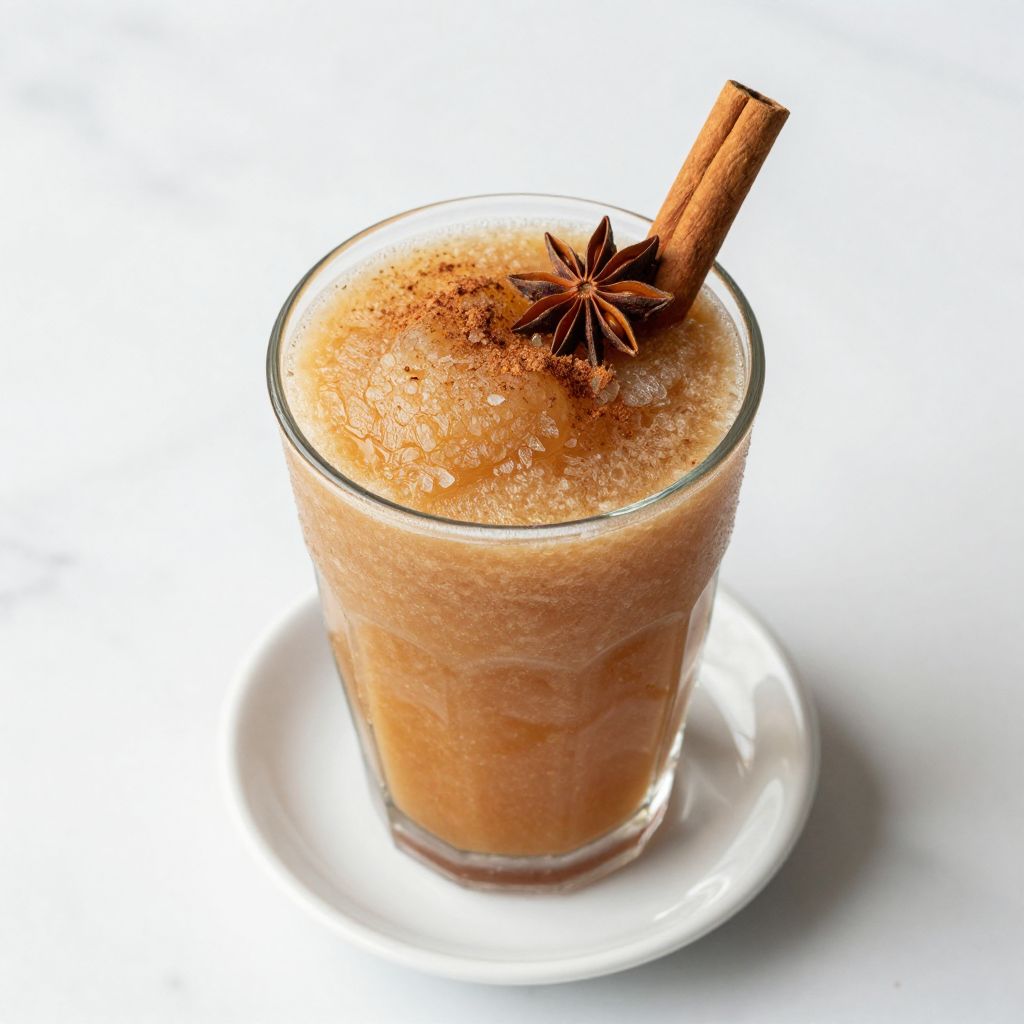
Apple Cider Slushie
Ingredients
Equipment
Method
- Pour the apple cider and orange juice into a large shallow baking dish and stir gently to combine.
- Drizzle the honey or maple syrup over the liquid and stir until completely dissolved.
- Sprinkle ground cinnamon and nutmeg over the mixture and whisk thoroughly to distribute evenly.
- Add star anise and cloves if using, stirring them into the mixture.
- Place the baking dish in the freezer and freeze for 2 hours.
- Remove the dish and use a fork to scrape and break up ice crystals around the edges and bottom, then return to the freezer.
- Repeat scraping every 45 minutes to 1 hour for about 4 to 6 hours total, until the slushie reaches a thick, slushy consistency.
- Scoop the slushie into chilled glasses, letting it sit at room temperature for 5 minutes if frozen solid, and garnish with cinnamon sticks before serving.