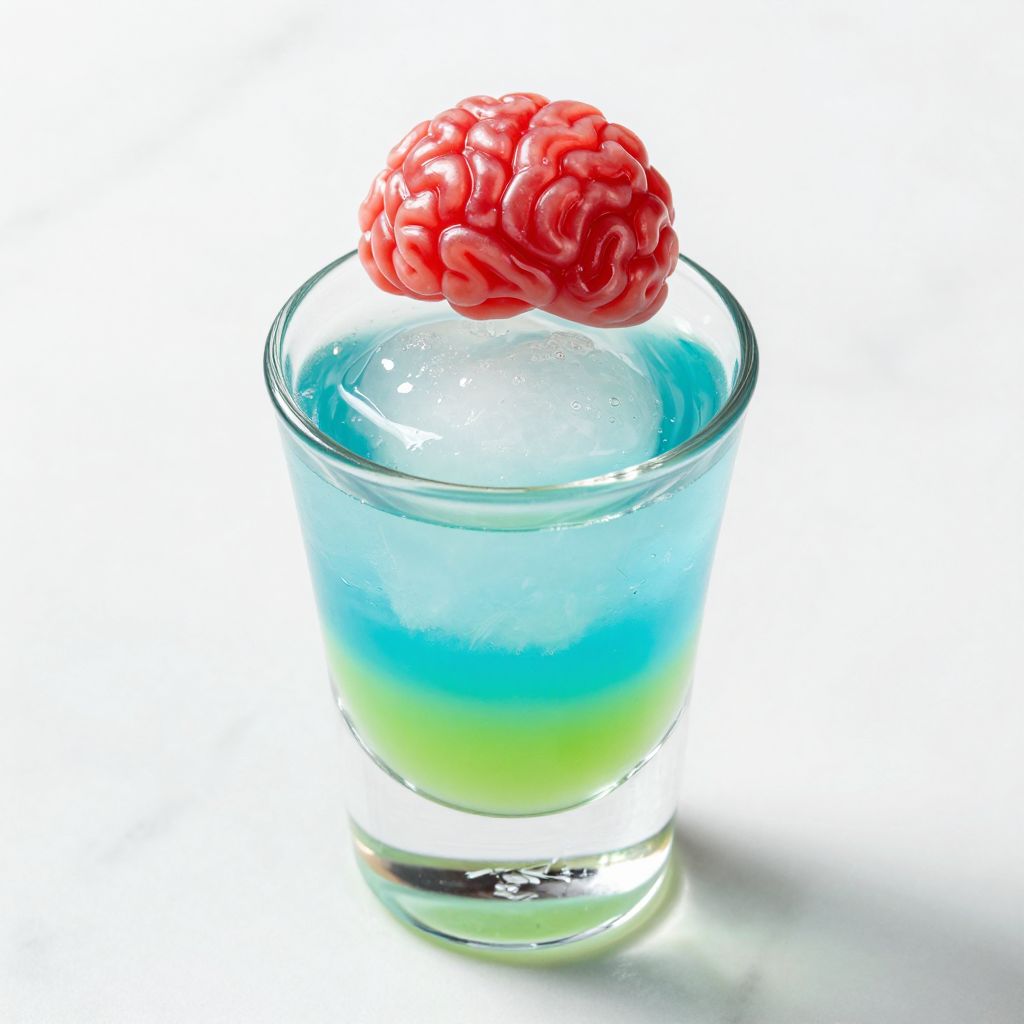
Picture a Halloween party where everyone’s gathered around the bar, and you slide over a neon-green shot glass with what looks like a gummy brain floating in bright liqueur: that’s the moment the Zombie Brain Shot steals the show.
This recipe is special because it combines simple ingredients with dramatic presentation that makes people actually want to take the shot instead of leaving it on the table. The layered colors, the gummy brain garnish, and the sweet-sour flavor combo make it perfect for themed parties, Halloween celebrations, or any gathering where you want to impress without spending hours at the bar.
Why You’ll Love This Recipe
The Zombie Brain Shot delivers on every front: it looks scary, tastes delicious, and comes together in under five minutes.
- Visually striking with neon colors that photograph beautifully
- Uses only 3 to 4 common liqueurs, so most bars stock everything you need
- Perfect for batch-making at parties or serving one at a time
- The gummy brain garnish adds playful fun without being complicated
- Sweet flavor profile that appeals to shot-takers of all experience levels
My Experience Making This Recipe
I first made these for a Halloween party at a friend’s house, and I’ll be honest: I was skeptical that a shot could actually look that good without professional bartending skills. Within two minutes of layering my first one, I realized the trick was just patience and a steady hand with the pour.
The real magic happened when guests arrived and saw the line of neon-green shots lined up on the counter with gummy brains perched on top. People who usually skip shots asked for them, and I ended up making batches of five or six at a time for the rest of the night.
The flavor surprised everyone too: it’s not harsh or overly boozy, just sweet with a bright citrus kick that makes you actually enjoy the experience instead of grimacing. That night taught me that presentation and flavor working together create something memorable.
Recipe Overview
- Recipe Name: Zombie Brain Shot
- Servings: 1 shot
- Prep Time: 2 minutes
- Cook Time: 0 minutes
- Total Time: 2 minutes
- Course: Cocktail / Shot
- Cuisine: American
- Calories per Serving: 110
Equipment You Will Need
- 1 shot glass (1.5 ounce)
- Bar spoon or long cocktail spoon
- Jigger for measuring (0.5 ounce and 1 ounce)
- Small plate or napkin for the gummy brain
Ingredients for Zombie Brain Shot
- 0.5 ounce Melon Liqueur (such as Midori)
- 0.5 ounce Blue Curacao
- 0.5 ounce Coconut Rum (such as Malibu)
- 1 gummy brain candy (any color, but red or pink works best for contrast)
Ingredient Notes and Substitutions
- Melon Liqueur: Creates the signature neon-green base that makes this shot instantly recognizable. If unavailable, use another bright green liqueur or apple-flavored liqueur, though the color won’t be quite as striking.
- Blue Curacao: Adds the blue layer that creates the visual separation and contributes a subtle orange flavor. You can swap it for another blue liqueur like blue raspberry schnapps, though the taste profile will shift slightly sweeter.
- Coconut Rum: Brings tropical sweetness and helps create the final layer. White rum mixed with a splash of coconut syrup works as a substitute, but coconut rum is easier and gives consistent results.
- Gummy Brain: The garnish that makes this shot recognizable and fun. Any gummy brain works, but red or pink stands out best against the green and blue liqueurs.
How to Make Zombie Brain Shot
Step 1: Gather and Chill Your Glass
Place your shot glass on a flat, stable surface where you’ll be making the shot. If you have time, chill the glass in the freezer for five minutes beforehand, as cold liqueurs layer more cleanly and improve the drinking experience.
Step 2: Pour the Melon Liqueur Base
Measure 0.5 ounce of melon liqueur using your jigger and pour it slowly into the bottom of the shot glass. This bright green layer forms the foundation of your drink and should fill the glass about one-third of the way.
Step 3: Layer the Blue Curacao
Hold your bar spoon upside down just above the surface of the melon liqueur so the back of the spoon barely touches the green layer. Pour 0.5 ounce of blue curacao slowly over the back of the spoon, allowing it to gently flow onto the melon liqueur below without mixing.
Why the spoon? It breaks the pour and slows the liquid, preventing it from sinking straight through to the bottom and mixing with the green layer. This is the technique that separates a beautiful layered shot from a muddy-looking mess.
Step 4: Create the Coconut Rum Top Layer
Using the same back-of-the-spoon technique, slowly pour 0.5 ounce of coconut rum over the bar spoon onto the blue layer. Pour even more slowly this time, as coconut rum is less dense and more prone to mixing if poured too quickly.
You should now see three distinct color layers: bright green on the bottom, blue in the middle, and a clear or slightly cloudy layer on top. The layering is complete.
Step 5: Prepare the Gummy Brain Garnish
Take your gummy brain and position it on the rim of the shot glass or place it in a small dish beside the shot. The gummy brain should be visible and inviting, setting up the visual joke of the drink.
Step 6: Double-Check the Layers
Hold the shot glass up to light and verify that you can see three distinct color bands. If the colors have blended together, the shot still tastes fine, but it won’t have the striking appearance that makes this drink special.
Step 7: Serve Immediately
Deliver the shot to the drinker right away while the layers are still crisp and defined. The longer a layered shot sits, the more the liqueurs naturally blend together at their boundaries.
Step 8: Eat the Gummy Brain
Instruct your guest to eat the gummy brain before or after taking the shot (or chase with it if they prefer). The gummy adds sweetness and flavor that makes the entire experience feel intentional and fun rather than just knocking back liquor.
Pro Tip: The key to perfect layers is pouring slowly over the back of a bar spoon and using liqueurs that are at room temperature, not too cold, as extreme temperatures can make layering unreliable.
Tips for the Best Zombie Brain Shot
- Make sure your shot glass is clean and dry before starting; any residue or moisture interferes with layering and creates a cloudy appearance.
- Pour each layer slowly and deliberately: rushing any layer ruins the visual effect that makes this shot special in the first place.
- Use a proper bar spoon or long cocktail spoon; a regular spoon is too shallow and won’t prevent mixing as effectively.
- Keep liqueurs at room temperature for the cleanest layers; cold liqueurs can be too dense and don’t layer as smoothly.
- If you’re making multiple shots for a party, set up an assembly line with ingredients pre-measured in small glasses to speed up production.
- Practice layering with just two liqueurs first if you’re new to the technique, then add the third layer once you get comfortable.
Common Mistakes to Avoid
- Pouring too fast: Rushing any layer causes it to sink straight to the bottom and mix with the layer below, destroying the visual effect.
- Using cold or chilled liqueurs: Very cold liqueurs are denser and harder to layer cleanly, so room temperature works better.
- Forgetting the bar spoon technique: Pouring directly into the glass without the spoon breaking the fall almost always results in mixing.
- Using the wrong liqueurs: Substituting unfamiliar brands without checking their density and color can result in a shot that doesn’t look green and blue.
- Pouring unequal amounts: If one layer is too thick or thin, the visual impact suffers and the flavor balance feels off when drinking.
Serving Suggestions
The Zombie Brain Shot shines at Halloween parties, themed celebrations, and any gathering where presentation matters as much as taste. Serve these in a group setting where guests can gather around and enjoy the visual spectacle together.
- Pair with horror-themed snacks like candy corn, chocolate-covered pretzels, or spiced popcorn for a complete party setup
- Serve alongside a signature non-alcoholic drink so guests who don’t want shots still feel included in the fun
- Create a shot station where guests can watch you layer shots or even try making their own
- Combine with other themed shots for a flight experience at Halloween or costume parties
Variations to Try
- Zombie Brain Punch Variation: Scale up to a full-size cocktail by tripling the ingredients and serving in a coupe glass over ice with a gummy brain floating inside; the flavor profile stays similar but the experience feels more elevated.
- Tropical Zombie Brain: Replace the blue curacao with pineapple schnapps to create yellow and green layers with a more tropical flavor; the color scheme shifts to sunshine tones instead of classic Halloween.
- Spicy Zombie Brain: Add a tiny splash of hot sauce or jalapeño bitters to the coconut rum layer for guests who like heat; the spice contrasts nicely with the sweet liqueurs.
- Creamy Zombie Brain: Top with 0.25 ounce of Irish cream instead of the coconut rum for a layered effect with creamier texture; this version tastes like a dessert shot.
Dietary Adaptations
- Gluten-Free: All standard liqueurs used here are naturally gluten-free, so this shot is already safe for gluten-free diets.
- Vegan: Most commercial liqueurs are vegan, but check your specific brands to confirm no animal products are used in production or clarification.
- Sugar-Conscious: All liqueurs contain sugar, so there’s no low-sugar version of this shot; however, the small serving size keeps total sugar intake minimal.
- Non-Alcoholic Version: Substitute liqueurs with colored syrups, fruit juices, or craft syrups to create a virgin zombie brain shot that’s still visually impressive.
Storage and Reheating
Refrigerator
Zombie Brain Shots are best consumed immediately after preparation, but you can prepare ingredients ahead of time and store them separately in the refrigerator.
- Store opened bottles of liqueur in a cool, dark cabinet or refrigerator with caps tightly sealed
- Keep gummy brains in an airtight container away from heat and sunlight
- Pre-measured liqueurs can be chilled in small glasses, ready to layer when needed
Freezer
Freezing mixed shots is not recommended, as layered drinks lose their visual appeal when frozen and thawed.
- Liqueurs can be stored in the freezer long-term, but remove them 10 minutes before layering for best results
Reheating
No reheating is necessary for shots, which are served at room temperature or slightly chilled.
- If you prefer colder shots, chill the glasses in the freezer and use room-temperature liqueurs for clean layering
Nutrition Information
| Nutrient | Amount |
|---|---|
| Calories | 110 |
| Total Fat | 0g |
| Saturated Fat | 0g |
| Carbohydrates | 11g |
| Fiber | 0g |
| Sugar | 10g |
| Protein | 0g |
| Sodium | 5mg |
| Cholesterol | 0mg |
Nutrition information is estimated based on standard liqueur nutritional data and does not include the gummy brain garnish, which adds negligible calories. Actual values may vary depending on specific brands used.
Frequently Asked Questions
Can I make Zombie Brain Shots without a bar spoon?
A bar spoon makes layering much easier, but you can carefully pour over the back of a regular teaspoon if necessary. The technique is less reliable, so practice layering a few shots before serving to guests.
How far in advance can I prepare these shots?
Measure and chill liqueurs ahead of time, then layer them just before serving to maintain the beautiful color separation. Layered shots start blending after about 10 minutes, so timing matters for visual impact.
What if my layers mix together?
The shot still tastes great, just not visually striking. Pour more slowly next time and make sure liqueurs are room temperature, not too cold.
Can I use different gummy candies instead of a gummy brain?
Absolutely; any Halloween-themed gummy or even a regular gummy bear works fine. The gummy brain is just the most fun and on-brand option for the zombie theme.
How many of these shots should I make for a party of 10 people?
Plan on 1 to 2 shots per person if this is your signature drink, so prepare 10 to 20 shots total. Set up an assembly line with pre-measured liqueurs to speed up production.
Is this shot sweet enough for people who don’t usually enjoy shots?
Yes, this is one of the sweeter shot options available, making it accessible to people who typically avoid shots. The coconut rum and fruit liqueurs create a candy-like flavor that masks the alcohol taste.
Final Thoughts
The Zombie Brain Shot proves that bar drinks don’t need to be complicated or time-consuming to impress people. Three liqueurs, a gummy brain, and a bit of technique create something memorable enough that guests will ask you to make them again.
Try these at your next Halloween party or themed celebration, and watch how quickly they become the highlight of the night. The combination of fun presentation, delicious flavor, and ease of preparation makes this recipe worth having in your bartending toolkit all year round.
Zombie Brain Shot
Ingredients
Equipment
Method
- Place your shot glass on a flat, stable surface. If you have time, chill the glass in the freezer for 5 minutes beforehand for cleaner layering.
- Measure 0.5 ounce of melon liqueur using your jigger and pour it slowly into the bottom of the shot glass to create the bright green base layer.
- Hold your bar spoon upside down just above the surface of the melon liqueur. Pour 0.5 ounce of blue curacao slowly over the back of the spoon, allowing it to gently flow onto the green layer without mixing.
- Using the same back-of-the-spoon technique, slowly pour 0.5 ounce of coconut rum over the bar spoon onto the blue layer. Pour even more slowly to prevent mixing. You should now see three distinct color layers.
- Take your gummy brain and position it on the rim of the shot glass or place it in a small dish beside the shot.
- Hold the shot glass up to light and verify that you can see three distinct color bands: bright green on bottom, blue in the middle, and clear on top.
- Serve immediately while the layers are still crisp and defined.
- Instruct your guest to eat the gummy brain before or after taking the shot.