
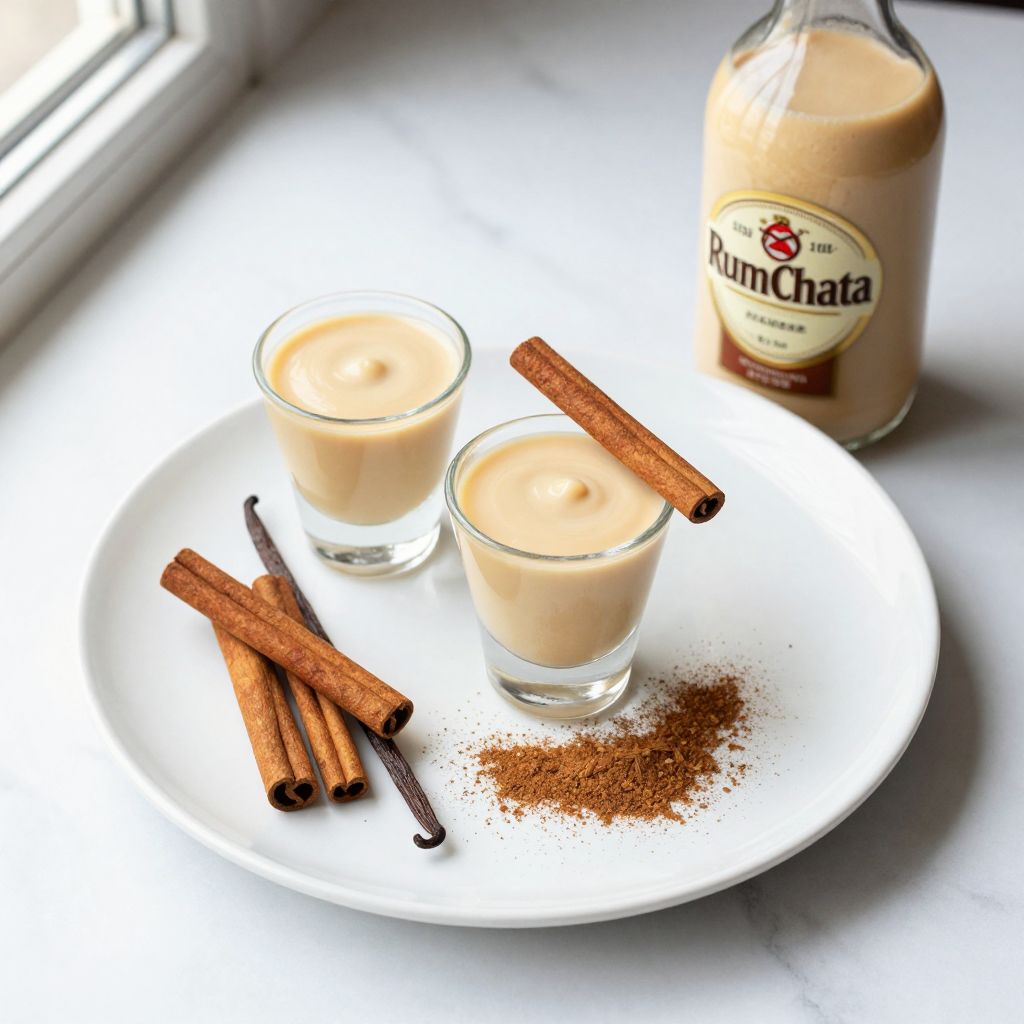
There’s something magical about a creamy cocktail that tastes like liquid dessert, and RumChata does exactly that with minimal effort and maximum flavor.
This beloved cinnamon rum cream liqueur has become a bartender’s secret weapon for crafting drinks that feel indulgent without requiring fancy techniques or hard-to-find ingredients. Whether you’re shaking up a quick after-dinner drink or impressing guests at your next gathering, homemade RumChata delivers that signature spiced vanilla warmth that makes people ask for the recipe.
The beauty of making your own lies in controlling the sweetness, adjusting the spice level to your taste, and knowing exactly what goes into every sip. Best of all, this recipe takes just 15 minutes of hands-on time and rewards you with a bottle that tastes even better than the store-bought version.
Why You’ll Love This Recipe
Homemade RumChata beats the commercial stuff in every way that matters to a home bartender.
- Costs a fraction of the retail price while tasting richer and smoother.
- Lets you dial in sweetness and spice exactly how you prefer it.
- Uses simple pantry ingredients with no weird additives or stabilizers.
- Ready to drink in just 48 hours, though it improves for weeks.
- Makes an impressive homemade gift that lasts for months when stored properly.
My Experience Making This Recipe
I made my first batch of homemade RumChata on a quiet Sunday afternoon, expecting it to be serviceable at best. What arrived after two days of steeping was a revelation: smooth, creamy, and bursting with cinnamon and vanilla notes that somehow tasted fresher than the bottled versions I’d used in bars.
The real shock came when I made a Cinnamon Toast Crunch shot with it. The texture was silkier, the spice more nuanced, and the whole thing felt less cloying than I remembered from using the commercial brand.
Friends have consistently asked if I’m serving them something special when I offer it neat over ice. Every batch has been consistent, and I’ve experimented enough to know exactly where to adjust if you prefer things less sweet or more intensely spiced.
Recipe Overview
- Recipe Name: Homemade RumChata
- Servings: Makes approximately 750 mL (25 ounces)
- Prep Time: 15 minutes
- Steep Time: 48 hours (minimum)
- Total Time: 2 days, 15 minutes active
- Course: Beverages
- Cuisine: Caribbean-inspired
- Calories per Serving (1.5 ounces): 140
Equipment You Will Need
- One clean glass jar or bottle (750 mL capacity minimum)
- Fine mesh strainer or cheesecloth
- Coffee filters
- Measuring cups and spoons
- Whisk or stirring spoon
- Funnel (optional but helpful)
- Sealed storage bottle for the finished liqueur
Ingredients for Homemade RumChata
- 1 cup white rum (preferably 80 proof, a lighter style works best)
- 1 can (14 ounces) sweetened condensed milk
- 1 cup heavy cream (or full-fat coconut cream for dairy-free)
- 1 teaspoon ground cinnamon
- 1/2 teaspoon vanilla extract (pure vanilla, not imitation)
- 1/4 teaspoon ground nutmeg
- 1/8 teaspoon ground cloves
- 1/8 teaspoon ground allspice
- Pinch of sea salt
Ingredient Notes and Substitutions
- White Rum: The base spirit carries the drink; white rum is chosen because it’s neutral enough not to overpower the spices, while dark rum would muddy the flavor profile. Substitute with light or silver rum, or use coconut rum if you want a more tropical lean.
- Sweetened Condensed Milk: This creates the signature creamy, rich body and provides the sweet backbone without adding graininess. If you prefer less sweetness, replace half with evaporated milk and add 2 tablespoons of honey instead.
- Heavy Cream: Delivers that luxurious mouthfeel and ensures the drink stays smooth when mixed with alcohol. Use full-fat coconut cream for a dairy-free version, though the flavor shifts slightly toward coconut.
- Ground Cinnamon: The hero spice that defines RumChata’s character; Ceylon cinnamon is slightly milder and sweeter than cassia. Cassia works fine if it’s all you have, just use 3/4 teaspoon to avoid overwhelming bitterness.
- Vanilla Extract: Adds depth and warmth; pure vanilla is non-negotiable because imitation extract tastes chemical in a creamy spirit. If you only have imitation, reduce to 1/4 teaspoon.
How to Make Homemade RumChata
Step 1: Prepare Your Mixing Vessel
Choose a clean glass jar or bottle with a capacity of at least 750 mL and ensure it’s completely dry inside. A dry vessel prevents water from diluting your liqueur and keeps spoilage at bay.
Step 2: Measure and Add the Rum
Pour the 1 cup of white rum into your prepared jar. Good quality rum makes a noticeable difference in the final taste, so reach for something you’d actually drink on its own rather than a bottom-shelf option.
Step 3: Combine the Sweetened Condensed Milk
Add the entire can of sweetened condensed milk to the rum and stir vigorously for about 30 seconds. The milk may seem to separate slightly at first, but that’s completely normal and will blend fully as you continue.
Step 4: Add the Heavy Cream
Pour in the full cup of heavy cream while stirring constantly in one direction to prevent curdling. The alcohol in the rum helps stabilize the cream, but gentle, consistent stirring ensures everything integrates smoothly.
Step 5: Mix In the Ground Spices
Add the cinnamon, nutmeg, cloves, and allspice to the mixture and whisk thoroughly for about 1 minute. These spices are the signature flavor profile, so make sure they’re evenly distributed throughout the liquid.
Step 6: Add Vanilla and Salt
Stir in the vanilla extract and a small pinch of sea salt, mixing well for another 30 seconds. The salt enhances the spice notes and rounds out the overall flavor without making the drink taste salty.
Step 7: Seal and Steep
Cover the jar tightly with a lid or plastic wrap and store it in a cool, dark cabinet away from direct sunlight. Let it sit undisturbed for at least 48 hours; the flavors will continue to meld and improve for up to two weeks before the spices begin to fade.
Step 8: Strain the Liqueur
After the minimum steeping time, place a fine mesh strainer lined with cheesecloth or coffee filters over a clean bottle and slowly pour the mixture through it. This removes any settled spice particles and gives the finished liqueur a crystal-clear appearance.
Step 9: Bottle for Storage
Transfer the strained RumChata into sealed bottles and label them with the date you made them. Proper sealing keeps the liqueur fresh and prevents evaporation, so use airtight bottles rather than open containers.
Pro Tip: Shake the jar gently every 12 hours during steeping instead of leaving it completely untouched; this helps the spices extract more evenly and builds better flavor in less time.
Tips for the Best Homemade RumChata
- Chill your finished RumChata in the freezer for at least 2 hours before serving neat; the cold temperature makes it even silkier and smoother on the palate.
- If your finished liqueur tastes too sweet, add a tablespoon of rum or a squeeze of lemon juice to balance the flavor and brighten the spice notes.
- Store your RumChata in glass bottles away from heat and light to preserve the flavor; it will keep for 6 months at room temperature or up to a year in a cool cabinet.
- Test the flavor after 48 hours, and if you prefer stronger cinnamon, steep for another 24 hours before straining to intensify the spice.
- Make a double batch if you plan to use it in multiple cocktails; having extra on hand means you can experiment without running out.
- Keep a small tasting sample from your first batch to compare with future batches, so you can dial in your preferred spice level over time.
Common Mistakes to Avoid
- Using hot water to clean your mixing jar and not drying it completely; any moisture will dilute your liqueur and promote spoilage over time.
- Whisking too aggressively when combining the cream and alcohol; overly vigorous mixing can cause the cream to break and curdle, creating an unpleasant texture.
- Steeping for longer than 3 weeks; the spices will eventually over-extract and develop harsh, bitter flavors that overwhelm the smooth creaminess.
- Using imitation vanilla extract instead of pure vanilla; the chemical notes become prominent in a creamy spirit and ruin the sophisticated flavor profile.
- Storing your finished RumChata in direct sunlight or above the stove; heat and light cause the color to fade and the alcohol to evaporate, concentrating unwanted flavors.
Serving Suggestions
Homemade RumChata shines in countless ways, from sipped neat over ice to mixed into creative cocktails that transform simple ingredients into restaurant-quality drinks.
- Serve it straight from the freezer in a shot glass for a dessert-like after-dinner treat that requires zero mixing.
- Mix equal parts RumChata and coffee liqueur over ice for a creamy Espresso Martini variation that feels decadent.
- Layer it over vanilla ice cream for an instant affogato-style dessert that tastes sophisticated but takes seconds to assemble.
- Combine with cold brew coffee and a splash of vanilla syrup for a spiced coffee drink that rivals any cafe version.
- Pair with dark chocolate or cinnamon cookies as an after-dinner digestif that complements dessert flavors perfectly.
Variations to Try
- Extra Spiced Version: Increase cinnamon to 1.5 teaspoons and add 1/4 teaspoon of ground ginger for a warming kick that works beautifully in fall cocktails.
- Coconut RumChata: Replace half the heavy cream with full-fat coconut milk and add 1/4 teaspoon of coconut extract for a tropical twist that pairs well with pineapple and lime drinks.
- Brown Butter Variant: Toast 2 tablespoons of butter in a pan until golden, strain out the solids, let it cool, then whisk it into the mixture for a richer, nuttier flavor that feels more indulgent.
- Spiced Rum Version: Replace white rum with aged or spiced rum to add oak and caramel notes that give the liqueur more complexity and depth.
- Less Sweet Blend: Use evaporated milk instead of sweetened condensed milk and add 3 tablespoons of honey or maple syrup for a drink that feels less syrupy and more balanced in flavor.
Dietary Adaptations
- Dairy-Free: Replace heavy cream with full-fat coconut cream or oat cream and use dairy-free sweetened condensed milk substitute; the texture will be slightly thinner but the flavor remains excellent.
- Vegan: Use coconut cream, dairy-free condensed milk, and ensure your vanilla extract contains no animal products; the result tastes nearly identical to the traditional version.
- Low-Carb/Keto: Replace sweetened condensed milk with heavy cream mixed with a keto sweetener like erythritol or monk fruit, adjusting sweetness to taste; this reduces carbs significantly but requires taste-testing.
- Gluten-Free: All ingredients in this recipe are naturally gluten-free, but verify that your rum and vanilla extract carry gluten-free certifications if you have celiac disease.
Storage and Reheating
Refrigerator
Store sealed bottles of RumChata in the refrigerator for up to 3 months for the best flavor and texture. The cold keeps the cream fresh and prevents separation that can occur at room temperature.
- Check the seal before storing to ensure no air can enter the bottle.
- If you notice separation or a sour smell, discard the batch immediately.
Freezer
RumChata can be frozen for up to 6 months because the alcohol prevents it from solidifying completely. The liquid will become thick and syrupy when frozen, which actually works beautifully for serving as a chilled shot.
- Use freezer-safe glass bottles only, as plastic can leach chemicals into alcohol over time.
- Leave 1 inch of headspace in the bottle to allow for slight expansion.
Reheating
You don’t need to reheat RumChata, but if it has thickened in the refrigerator, let it sit at room temperature for 20 minutes before using. Never microwave or heat it directly, as high temperatures can damage the flavor and cause separation.
- If you want warm spiced drinks, mix RumChata into hot coffee or cocoa rather than heating the liqueur itself.
Nutrition Information
| Nutrient | Amount |
|---|---|
| Calories | 140 |
| Total Fat | 7g |
| Saturated Fat | 4.5g |
| Carbohydrates | 14g |
| Fiber | 0g |
| Sugar | 13g |
| Protein | 0g |
| Sodium | 20mg |
| Cholesterol | 25mg |
Nutrition values are based on a 1.5-ounce serving size and calculated using standard USDA data for ingredients. Individual batches may vary slightly depending on the exact brands and fat content of dairy products used.
Frequently Asked Questions
Can I use dark rum instead of white rum?
You can, but the flavor profile shifts significantly as dark rum brings molasses, oak, and caramel notes that compete with the cinnamon and vanilla. White or light rum stays in the background and lets the spices shine, which is why it’s the classic choice.
How long does homemade RumChata actually last?
Stored in a sealed bottle at room temperature away from direct light, it lasts 6 months easily. In the refrigerator, it stays fresh for up to 3 months, and freezing extends that to 6 months without quality loss.
Why does my RumChata taste separated or grainy?
This usually happens from whisking too vigorously when mixing the cream, which causes it to break. To fix it, strain the batch through several layers of cheesecloth and stir in a tablespoon of additional heavy cream to help re-emulsify.
Can I make this without alcohol for a coffee creamer version?
You can substitute the rum with water or milk, though it won’t have the same shelf life and will need to be refrigerated immediately. The alcohol actually acts as a preservative, so a non-alcoholic version should be used within 2 weeks.
What’s the difference between steep time and aging, and do I need to wait longer for better flavor?
Steeping is when the spices extract into the liquid; aging happens after you strain it and the flavors marry together. After straining, the liqueur actually improves for another week or two before leveling off, so patience does pay dividends.
Can I adjust the spice level after I’ve already steeped it?
If you steeped it 48 hours and the spice flavor is too mild, steep for another 12 to 24 hours before straining. If it’s already strained and too spicy, add a splash of rum or cream to dilute the intensity.
Final Thoughts
Making RumChata at home transforms you from a cocktail consumer into a home bartender with a signature spirit on the shelf. The process is simple enough that anyone can succeed, yet thoughtful enough that you’ll feel genuinely proud serving it to guests.
Your first batch will taste excellent, but by your third or fourth attempt, you’ll have dialed in the exact spice balance and steeping time that matches your personal taste perfectly. That’s when homemade RumChata stops being a recipe and becomes your drink.
Explore More Homemade Spirit Recipes
If you enjoyed crafting your own RumChata, explore more delicious homemade liqueur and cocktail recipes in our collection.
Try your hand at creating a rum-based cream liqueur with multiple spice variations to see how small tweaks transform the entire flavor profile. You might also love making spiked horchata for a lighter, rice-based alternative that offers a completely different but equally delicious drinking experience.
Homemade RumChata
Ingredients
Equipment
Method
- Choose a clean, completely dry glass jar or bottle (750 mL capacity minimum).
- Pour 1 cup white rum into the prepared jar.
- Add 1 can (14 ounces) sweetened condensed milk and stir vigorously for about 30 seconds.
- Pour in 1 cup heavy cream while stirring constantly in one direction to prevent curdling.
- Add 1 teaspoon ground cinnamon, 1/4 teaspoon ground nutmeg, 1/8 teaspoon ground cloves, and 1/8 teaspoon ground allspice; whisk thoroughly for 1 minute.
- Stir in 1/2 teaspoon vanilla extract and a pinch of sea salt, mixing well for 30 seconds.
- Cover the jar tightly and store in a cool, dark cabinet for at least 48 hours to steep.
- After steeping, line a fine mesh strainer with cheesecloth or coffee filters and slowly pour the mixture through it into a clean bottle.
- Transfer the strained RumChata into a sealed storage bottle and label with the date.