
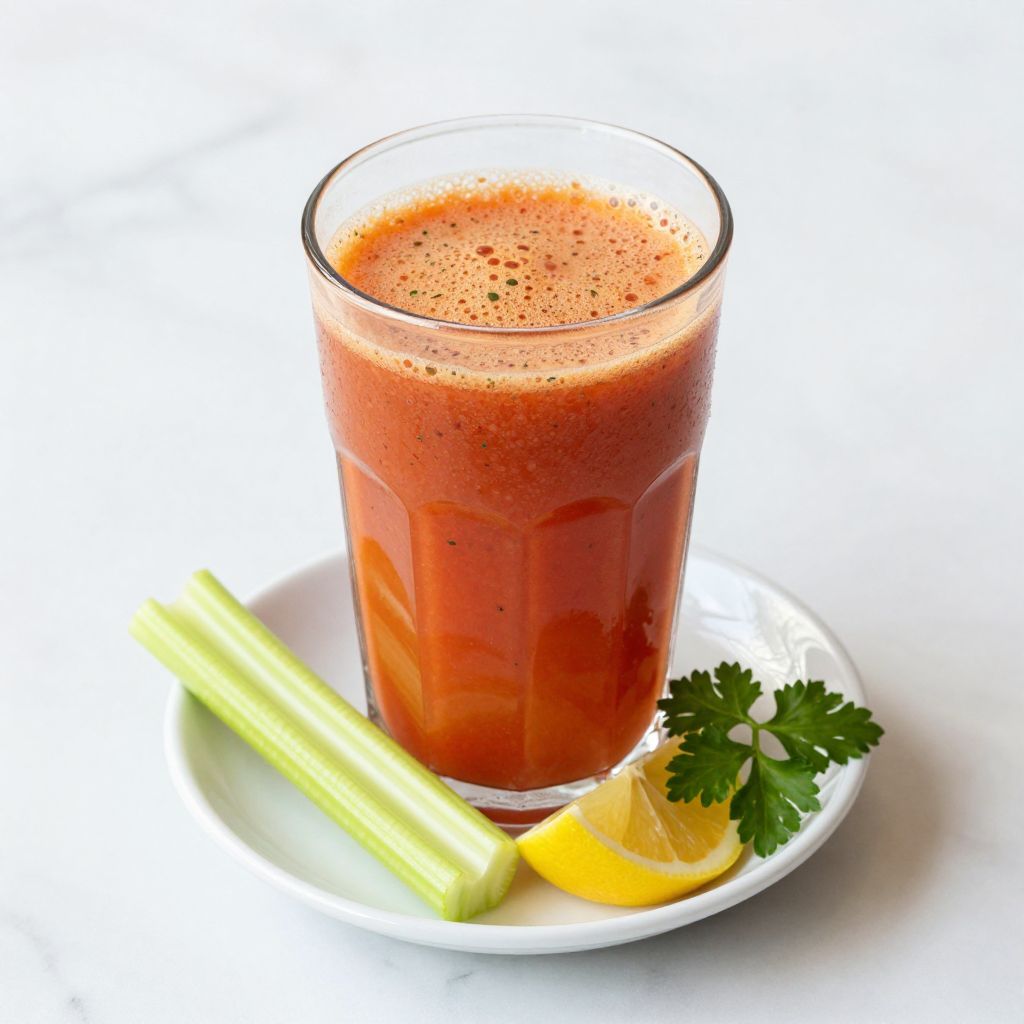
There’s something deeply satisfying about drinking a glass of homemade V8 juice on a quiet morning, knowing exactly what went into it. This classic vegetable juice blend combines eight wholesome vegetables into one nutrient-packed drink that tastes nothing like the processed versions gathering dust on supermarket shelves.
Making V8 at home takes about thirty minutes and delivers a fresher, brighter flavor than store-bought options. You control the sodium level, adjust the spice to your liking, and skip the preservatives entirely.
Why You’ll Love This Recipe
Homemade V8 gives you complete control over ingredients and flavor intensity. This recipe delivers restaurant-quality taste in your own kitchen.
- Fresh, vibrant taste that store-bought juice cannot match
- Packed with eight vegetables for maximum nutrition
- Low sodium compared to commercial versions
- Customizable spice level to suit your preferences
- Makes enough for several servings at once
My Experience Making This Recipe
I first attempted homemade V8 on a lazy Sunday after reading the ingredient label on a store-bought bottle and wincing at the sodium content. The aroma that filled my kitchen while the vegetables simmered was absolutely intoxicating, nothing like the metallic smell of canned juice.
The first sip proved me right instantly. The flavor was brighter, more complex, with a natural sweetness from the carrots and tomatoes that didn’t rely on added sugar. My partner took one taste and asked why we’d ever bought the bottled version again.
I’ve now made this recipe dozens of times, tweaking the proportions based on what vegetables look good at the market. Some batches skew more peppery, others more earthy, but they’re always fresher and more satisfying than anything from a shelf.
Recipe Overview
- Recipe Name: Homemade V8 Vegetable Juice
- Servings: 4 servings
- Prep Time: 15 minutes
- Cook Time: 15 minutes
- Total Time: 30 minutes
- Course: Beverage
- Cuisine: American
- Calories per Serving: 85
Equipment You Will Need
- Large pot or Dutch oven
- Cutting board and sharp chef’s knife
- Fine-mesh strainer or cheesecloth
- Blender or immersion blender
- Wooden spoon for stirring
- Measuring cups and spoons
- Large bowl for catching strained juice
- Glass bottles or containers for storage
Ingredients for Homemade V8 Vegetable Juice
- 4 large tomatoes, roughly chopped
- 3 medium carrots, peeled and chopped
- 2 celery stalks, chopped
- 1 small red bell pepper, seeded and chopped
- 1 small cucumber, peeled and chopped
- 2 cups spinach, loosely packed
- 1/2 small beet, peeled and chopped
- 4 green onions or 1/4 small onion, chopped
- 4 cups low-sodium vegetable broth or water
- 1 tablespoon fresh lemon juice
- 1 tablespoon Worcestershire sauce
- 1/2 teaspoon hot sauce, adjust to taste
- 1/2 teaspoon sea salt, plus more to taste
- 1/4 teaspoon black pepper
- 1/4 teaspoon garlic powder
- Pinch of celery seed, optional
Ingredient Notes and Substitutions
- Tomatoes: Fresh tomatoes provide the juice’s body and natural sweetness. Canned San Marzano tomatoes work well if fresh tomatoes are out of season, though you’ll want to drain excess liquid.
- Carrots: These add sweetness and a bright orange color. Sweet potatoes create a deeper, earthier flavor if you prefer less sugar.
- Celery: This vegetable brings a savory depth and slightly salty note. Skip it if you’re sensitive to sodium, or add more water to compensate.
- Red bell pepper: It contributes mild sweetness and vitamin C. Yellow or orange peppers offer similar benefits with slightly different flavor notes.
- Spinach: This green adds nutrients without overwhelming the flavor. Kale or other leafy greens work but may taste slightly more bitter.
- Beet: A small amount adds earthy sweetness and striking color. Omit it entirely if you dislike the earthy taste.
- Worcestershire sauce: This ingredient adds umami and complexity. Use vegetarian Worcestershire if needed.
How to Make Homemade V8 Vegetable Juice
Step 1: Prepare Your Vegetables
Wash all vegetables thoroughly under running water to remove dirt and residue. Cut everything into roughly equal-sized chunks, about 2 inches, so they cook evenly and blend smoothly afterward.
Step 2: Add Vegetables to Your Pot
Place your chopped tomatoes, carrots, celery, bell pepper, cucumber, spinach, beet, and green onions into a large pot. Cooking the vegetables softens them, making them easier to blend and helping extract maximum flavor and nutrients.
Step 3: Pour in the Broth
Add four cups of low-sodium vegetable broth or water to the pot. The liquid creates the right consistency and provides a neutral base that lets the vegetable flavors shine without diluting them too much.
Step 4: Bring to a Boil
Place the pot over medium-high heat and bring the mixture to a boil. You’ll see steam rising and active bubbles breaking the surface, which typically takes about 5 to 7 minutes depending on your stovetop.
Step 5: Reduce Heat and Simmer
Lower the heat to medium-low and let the vegetables simmer for 10 to 12 minutes until they’re very soft and easily pierced with a fork. Simmering gently breaks down the vegetable cell walls, releasing their natural juices and flavors into the broth.
Step 6: Add Seasonings
Stir in the lemon juice, Worcestershire sauce, hot sauce, sea salt, black pepper, garlic powder, and celery seed if using. Taste as you go and adjust seasonings since salt levels vary based on your broth choice and personal preference.
Step 7: Blend the Mixture
Remove the pot from heat and let it cool for about 3 minutes until it’s safe to handle. Using an immersion blender, blend the vegetables and broth until smooth, working in batches if needed, or carefully transfer to a regular blender and process until completely smooth.
Step 8: Strain the Juice
Pour the blended mixture through a fine-mesh strainer lined with cheesecloth into a large bowl. Press gently on the solids with the back of a spoon to extract as much juice as possible, but don’t force it through aggressively or you’ll get pulp in the final product.
Step 9: Final Taste and Storage
Pour the strained juice into glass bottles or containers and taste once more for seasoning adjustments. Store in the refrigerator for up to 5 days, shaking before each use since natural separation may occur.
Pro Tip: Freeze your V8 juice in ice cube trays for quick single-serving portions that thaw in minutes, perfect for busy mornings when fresh juice sounds ideal but time is tight.
Tips for the Best Homemade V8 Vegetable Juice
- Use the freshest vegetables you can find, since they deliver brighter flavor and better nutrition than older produce that’s been sitting in your crisper for a week.
- Don’t skip straining even if it feels like extra work, as it creates the smooth, refined texture you expect from quality vegetable juice.
- Add lemon juice last and taste before finalizing the batch, adjusting acid and salt to match your preference since vegetables vary seasonally.
- Invest in a quality immersion blender if you make this regularly, as it saves the cleanup burden of transferring hot liquid to a standard blender.
- Make a double batch and freeze half for busy weeks when you want fresh juice without the preparation time.
- Drink your V8 within two days of making it for peak flavor and maximum nutrient content.
Common Mistakes to Avoid
- Using too much water: This dilutes the vegetable flavor and creates a thin, unsatisfying juice that tastes like vegetable broth instead.
- Skipping the straining step: Unstrained juice has a grainy texture that feels unpleasant in your mouth and looks unappealing in a glass.
- Adding hot sauce before blending: This can cause uneven heat distribution, resulting in some sips being blazingly spicy while others taste mild.
- Not adjusting seasonings to your broth: Low-sodium broths need more salt than regular ones, and failing to account for this creates bland juice.
- Overcooking the vegetables: Boiling them longer than 12 minutes breaks down beneficial nutrients and can create a dull, muddy flavor.
Serving Suggestions
Serve your homemade V8 juice chilled in a tall glass over ice, either straight or mixed with other beverages for variety. It pairs beautifully with breakfast, works as a midday energy boost, and even serves as a mixer for creative cocktails.
- Drink it plain as a morning energizer with a squeeze of fresh lime
- Serve it alongside a hearty breakfast with scrambled eggs and toast
- Mix it with vodka and spices for a homemade Bloody Mary
- Combine equal parts V8 and ginger beer for a spicy mocktail
- Use it as a base for vegetable soups or gazpacho
Variations to Try
- Spicy Version: Double the hot sauce and add 1/4 teaspoon cayenne pepper for a juice with real kick that pairs perfectly with brunch.
- Herb-Infused: Add 2 tablespoons fresh basil or cilantro during blending for a garden-fresh twist that feels lighter and more sophisticated.
- Beet-Forward: Increase beet to half a large beet for a deeper earthy flavor and stunning deep red color that looks restaurant-quality in a glass.
- Green Power: Replace spinach with kale and add 1 cup fresh parsley for a more nutrient-dense green vegetable juice with assertive flavor.
- Apple-Enhanced: Add 2 cored apples during cooking for natural sweetness that balances savory vegetables beautifully.
Dietary Adaptations
- Gluten-Free: This recipe is naturally gluten-free, but verify your Worcestershire sauce label since some brands contain gluten.
- Dairy-Free: The recipe contains no dairy, making it completely suitable for those avoiding milk products.
- Vegan: Use vegetarian Worcestershire sauce instead of traditional versions to keep the recipe fully plant-based.
- Low-Sodium: Omit salt and Worcestershire sauce, using only low-sodium vegetable broth and adjusting seasonings with lemon juice and hot sauce instead.
- Low-Carb: Reduce carrots to one and eliminate the beet to lower sugar content, though this impacts both flavor and color slightly.
Storage and Reheating
Refrigerator
Pour your finished juice into clean glass bottles or containers and seal tightly. Homemade V8 keeps for up to 5 days in the refrigerator.
- Store in glass rather than plastic for best flavor preservation
- Keep bottles toward the back of the fridge where it’s coldest
- Shake well before drinking since separation naturally occurs
Freezer
Freeze your V8 juice in ice cube trays for portioned servings that last up to 3 months. Once frozen solid, transfer cubes to a freezer bag for easy organization.
- Leave about 1/2 inch headspace if freezing in bottles to allow for expansion
- Label containers with the date made
- Frozen juice cubes add refreshing coldness to smoothies
Reheating
While this juice is best served cold, you can gently warm it for sipping on cold mornings. Heat it in a saucepan over low heat without boiling, or microwave a serving for 30 to 45 seconds.
- Never boil juice as heat destroys nutrients and alters flavor
- Warm juice works wonderfully mixed with vegetable broth for a light soup
Nutrition Information
| Nutrient | Amount |
|---|---|
| Calories | 85 |
| Total Fat | 0.5g |
| Saturated Fat | 0.1g |
| Carbohydrates | 19g |
| Fiber | 3.5g |
| Sugar | 12g |
| Protein | 2.5g |
| Sodium | 450mg |
| Cholesterol | 0mg |
Nutritional values are approximate and vary based on specific vegetables used and sodium level of your broth choice. This information is meant as a general guide rather than a precise nutritional statement.
[hprm-recipe id=”6286″]
Frequently Asked Questions
Can I use frozen vegetables instead of fresh ones?
Frozen vegetables work perfectly well and sometimes offer better nutrition since they’re frozen at peak ripeness. Thaw them completely and drain excess moisture before adding to the pot to avoid diluting your final juice.
How do I make this recipe less spicy?
Simply reduce or omit the hot sauce entirely and skip the Worcestershire sauce if you find it too strong. You can always add spice gradually while tasting, but removing it once added is impossible.
Is the pulp I’m straining away wasteful?
Not at all. Save the strained vegetable pulp and use it in soups, stews, or even bake it into vegetable bread for zero waste and maximum nutrition. Some people freeze it for later use in cooking.
Why does my homemade juice taste different each time I make it?
Vegetables vary in sweetness and flavor based on growing conditions, harvest time, and storage duration. This variation is completely normal and actually means you’re getting true vegetable juice rather than standardized processed juice.
Can I use a juicer instead of a blender?
A traditional cold-press juicer would work but removes valuable fiber from the final product. A blender creates a thicker, more filling juice that retains all the vegetable’s nutrients.
What if I don’t have Worcestershire sauce?
Use a splash of soy sauce or tamari for umami depth, or simply add extra salt and garlic powder. The juice works fine without it, though the flavor will be slightly less complex.
How many vegetables actually go in this V8 juice?
The traditional V8 contains tomato, celery, beet, carrot, lettuce, parsley, spinach, and watercress. This recipe uses a similar blend that achieves the classic flavor and nutritional profile at home.
Final Thoughts
Making your own V8 vegetable juice transforms breakfast and gives you complete control over ingredients and flavor. Once you taste the vibrant freshness of homemade juice compared to shelf-stable versions, you’ll find it hard to go back.
Start with this recipe as written, then experiment with variations based on what looks beautiful at your market and what your taste buds crave. Your kitchen will fill with the most inviting aroma, and you’ll feel genuinely proud of what you’ve created.
Explore More Refreshing Beverages
If you enjoyed making this homemade vegetable juice, you might love discovering other creative drink recipes. Explore our collection of delicious beverage options to expand your drink-making skills and surprise your guests with unique flavors.
Check out our boozy butterbeer recipe for a decadent holiday drink that impresses at festive gatherings. For something cold and frozen, try our frozen butterbeer recipe that delivers creamy vanilla charm in every sip.