
The smell of corn, rye, and barley mashing together in hot water is pure alchemy, the kind that makes a bourbon lover’s heart skip a beat.
Bourbon mash is the foundation of every bottle of American bourbon whiskey, and while home distillation isn’t legal in most places, understanding how to make authentic mash gives you genuine insight into what goes into your favorite spirit.
This recipe walks you through the traditional process that distilleries use, scaled down for educational purposes and keen home fermentation enthusiasts. You’ll learn the exact techniques that transform simple grains into the liquid that becomes bourbon, from mashing to fermentation.
Whether you’re a spirit fanatic curious about the craft or someone interested in grain fermentation, this deep dive into mash-making reveals why bourbon tastes the way it does.
Why You’ll Love This Recipe
Making mash connects you directly to bourbon craftsmanship and teaches you something real about fermentation science. You’ll understand the “why” behind every step distillers take.
- Learn the authentic process used by professional distilleries worldwide.
- Discover how grain selection and temperatures create different flavor profiles.
- Gain insight into fermentation science and yeast behavior.
- Create a foundation for other grain fermentation projects like moonshine or whiskey-style spirits.
- Perfect your technique with detailed temperature and timing guidance.
My Experience Making This Recipe
The first time I walked through a bourbon distillery, I watched the mashing process and realized I’d been drinking bourbon without ever understanding what made it happen. That curiosity led me to study the process myself.
I started with small batches in my kitchen, measuring temperatures obsessively and taking notes on fermentation rates. The transformation from raw grain to a bubbling, yeasty liquid still feels like controlled magic.
My biggest surprise was how much the mashing temperature affected the final liquid’s character. Just a five-degree difference changed everything about how the yeast performed and what flavors developed.
Recipe Overview
- Recipe Name: Bourbon Mash
- Servings: Makes approximately 5 gallons of mash
- Prep Time: 30 minutes
- Cook Time: 2 hours (mashing stage)
- Fermentation Time: 5 to 7 days
- Total Time: 7 to 8 days
- Course: Fermentation Project
- Cuisine: American Whiskey Craft
- Alcohol Content: Approximately 10 to 12% ABV after fermentation
Equipment You Will Need
- Large stainless steel pot (10-gallon capacity minimum)
- Grain thermometer or digital probe thermometer
- Long wooden spoon or grain mash paddle
- Cheesecloth or fine mesh strainer
- Food-grade plastic bucket (5-gallon capacity)
- Airlock or fermentation lock
- Measuring cups and spoons
- Hydrometer (to measure sugar content and fermentation progress)
- pH strips or pH meter
- Sanitizing solution (diluted bleach or commercial sanitizer)
- Rubber tubing or siphon
Ingredients for Bourbon Mash
- Corn: 8 pounds (flaked or cracked cornmeal)
- Rye: 2 pounds (flaked or cracked rye grain)
- Barley: 1 pound (flaked or malted barley)
- Water: 5 gallons (filtered or distilled, not chlorinated tap water)
- Yeast: 1 packet of distiller’s yeast (Fleischmann’s or equivalent) or turbo yeast
- Yeast nutrient: 1 teaspoon (to support fermentation)
- Salt: 1/2 teaspoon (food-grade, optional)
Ingredient Notes and Substitutions
- Corn: Corn makes up 70 percent of traditional bourbon mash, providing fermentable sugars and smooth body. Substitute with sorghum grain or additional barley if corn isn’t available, though the flavor profile will shift toward earthiness.
- Rye: Rye adds spice and complexity to the mash, creating sharper notes. Replace with wheat for a softer, sweeter character, but expect less depth.
- Malted barley: The enzymes in malted barley convert starches into fermentable sugars, making fermentation possible. Without it, add commercial amylase enzyme to break down starches, though the process becomes less traditional.
- Distiller’s yeast: Distiller’s yeast handles high alcohol content and temperature fluctuations better than bread yeast. Standard bread yeast works but produces more off-flavors and dies at lower alcohol levels.
- Water: Chlorine inhibits yeast activity and kills beneficial microbes. Chlorine-free water is essential; boil and cool tap water if filtered water isn’t available.
How to Make Bourbon Mash
Step 1: Sanitize All Equipment
Cleanliness is everything in fermentation because unwanted bacteria or mold will spoil your entire batch. Wash every piece of equipment with hot soapy water, then soak or spray with sanitizing solution and allow to air dry.
Step 2: Heat Your Water to 165 Degrees Fahrenheit
This temperature is hot enough to help grains release their starches and enzymes without killing the beneficial compounds in malted barley. Use your thermometer to monitor the water carefully as it heats.
Step 3: Add Your Grains to the Hot Water
Pour your cracked or flaked corn, rye, and malted barley into the 165-degree water slowly while stirring constantly. Adding grains gradually prevents them from clumping together and ensures even hydration and enzyme activation.
Step 4: Maintain the Mash Temperature Between 149 and 158 Degrees Fahrenheit
This temperature range, called the conversion range, allows the enzymes in malted barley to break down starches into fermentable sugars. Stir every 10 to 15 minutes and adjust your heat to keep the temperature stable within this window.
If the temperature drops below 149 degrees, increase heat slightly. If it exceeds 158 degrees, add small amounts of cool water to bring it back down.
Step 5: Mash for 90 Minutes
The longer the grain sits in this temperature range, the more starch converts to sugar, which feeds your yeast during fermentation. Continue stirring every 15 minutes and monitoring temperature throughout the entire 90-minute period.
Step 6: Cool the Mash to 68 to 72 Degrees Fahrenheit
After mashing is complete, you need to cool the liquid quickly to a temperature where yeast can thrive without being stressed. Set your pot in an ice bath or run cool water over the outside of the pot, stirring frequently until the temperature drops to the target range.
Step 7: Strain the Solids and Transfer the Liquid
Pour the mash through cheesecloth or a fine mesh strainer into your sanitized food-grade bucket, leaving the grain solids behind. The clear or slightly cloudy liquid in the bucket is your “wort,” which is ready for fermentation.
Step 8: Check the Sugar Content with Your Hydrometer
Float your hydrometer in the cooled wort and record the reading, called the original gravity. This number tells you how much sugar is in the liquid and helps you predict final alcohol content (approximately 1.4 percent ABV per point of gravity difference).
Step 9: Add Yeast and Yeast Nutrient
Sprinkle your packet of distiller’s yeast and yeast nutrient over the surface of the cooled wort and let it sit for 5 minutes to rehydrate. Stir gently to distribute the yeast evenly throughout the liquid without introducing excessive oxygen.
Step 10: Seal with an Airlock and Ferment for 5 to 7 Days
Place the bucket in a warm location between 68 and 75 degrees Fahrenheit and cover with an airlock that allows carbon dioxide to escape while preventing contamination from entering. The yeast will begin producing bubbles within 12 to 24 hours.
Fermentation is complete when the bubbling slows to one bubble every 10 to 15 seconds and the wort becomes clear. Take a final gravity reading with your hydrometer to confirm fermentation has finished.
Pro Tip: Temperature control is more important than speed; keeping your mash and fermentation within their target temperature ranges produces clean, smooth flavor and prevents off-flavors that develop when yeast is stressed by cold or heat.
Tips for the Best Bourbon Mash
- Use a reliable grain thermometer and check temperatures frequently during mashing to keep the conversion range stable. Even small fluctuations affect enzyme activity and final sugar content.
- Invest in distiller’s yeast rather than bread yeast because it’s specifically bred to handle high alcohol levels and temperature variation without producing harsh flavors.
- Keep your fermentation vessel in a dark location away from direct sunlight because light exposure can create off-flavors and stress the yeast.
- Stir your mash every 15 minutes during the conversion stage rather than once or twice, because consistent stirring ensures all grains contact the hot water evenly.
- Add your yeast only after the wort has cooled to below 75 degrees because hot water kills yeast instantly.
- Take detailed notes on temperatures, timings, and gravity readings so you can identify what worked and adjust future batches accordingly.
Common Mistakes to Avoid
- Skipping the sanitization step introduces bacteria that compete with your yeast and create vinegary or off-flavored results. Every piece of equipment must be sanitized before contact with your mash.
- Adding yeast to hot wort kills the yeast cells immediately and wastes your ingredient. Always cool the wort to at least 68 degrees first.
- Using chlorinated tap water inhibits yeast activity and prevents proper fermentation. Filtered, boiled, or distilled water is necessary for clean fermentation.
- Neglecting temperature control during mashing stops enzyme activity and leaves starches unconverted, resulting in a mash with low fermentable sugar and weak final alcohol content.
- Packing grains too densely prevents even hydration and enzyme contact, leaving some starch unfermented and creating a thick, difficult mash to strain.
Serving Suggestions
Once fermentation is complete, your mash can be used for several purposes that showcase its character. The liquid is ready for distillation, continued fermentation experiments, or studying as an educational project.
- Use the fermented mash as a base for grain-based spirits projects or further refinement through additional fermentation.
- Taste the finished mash to understand the raw character before distillation, noting the sweetness, spice, and grain flavors present.
- Save a sample to compare against future batches and track how your technique improves over time.
- Share the fermentation process with other enthusiasts to discuss yeast performance, temperature control, and grain sourcing.
- Use the spent grain solids left after straining as animal feed or compost material rather than discarding them.
Variations to Try
- High-rye mash: Increase rye to 3 or 4 pounds and reduce corn slightly to create sharper, spicier notes reminiscent of rye whiskeys. This variation ferments more slowly because rye has fewer fermentable sugars than corn.
- Wheated mash: Replace rye with 2 pounds of malted wheat to produce a softer, sweeter character with less spice. Wheated mashes ferment quickly and produce a cleaner, lighter flavor profile.
- High-proof mash: Add 1 pound of table sugar to increase the starting gravity and push final alcohol content toward 13 to 15 percent ABV. Higher alcohol requires more yeast nutrient and longer fermentation time.
- Smoked grain mash: Use 1 pound of smoked malted barley instead of regular malted barley to introduce campfire and bacon notes into the fermented liquid. Smoked grains create bold, distinctive character that’s perfect for experimental batches.
- Honey-sweetened mash: Add 2 pounds of honey to the cooled wort before pitching yeast to create complex, floral undertones and increase alcohol content slightly without altering grain flavors.
Dietary Adaptations
- Gluten-free: Replace barley and rye with sorghum grain or millet to create a naturally gluten-free mash, though the enzymatic conversion process becomes less efficient and requires added amylase enzyme.
- Low-sugar: Use only malted grains without added table sugar and ferment to completion to minimize residual sweetness, though alcohol content will drop below 10 percent ABV.
- Vegan: Bourbon mash is naturally vegan because it uses only grains, water, and yeast with no animal products. Confirm your yeast and nutrient sources avoid bone char filtering.
- Low-carb: This recipe is not suitable for low-carb diets because grains are inherently carbohydrate-rich and fermentation doesn’t eliminate all carbs. Save this project for times when carbs aren’t a concern.
Storage and Reheating
Refrigerator
Once fermentation is complete, your mash keeps in the refrigerator for up to two weeks before off-flavors develop from bacterial activity. Store the sealed bucket with the airlock still attached to prevent oxidation.
- Keep the temperature between 35 and 40 degrees Fahrenheit.
- Monitor for any signs of mold or cloudiness on the surface, which indicates contamination.
- Cover the top if you remove the airlock to keep dust and insects out.
Freezer
Freezing mash is possible but not ideal because the liquid expands when frozen and can crack your container. If you must freeze, leave 3 inches of headspace in your bucket and accept that thawing may separate the liquid slightly from any sediment.
- Transfer to a freezer-safe container with room to expand.
- Label with the date and original gravity reading for reference.
- Plan to use frozen mash within three months before quality degrades.
Reheating
Reheating fermented mash is not recommended because heat reintroduction can stress any remaining yeast and create off-flavors. If you need to warm it for processing, use gentle heat below 100 degrees Fahrenheit.
- Warm in a water bath rather than direct heat to prevent scorching the grain solids.
- Stir gently to avoid aeration, which introduces unwanted oxygen.
- Use the warmed mash immediately rather than storing it at a warm temperature.
Nutrition Information
| Nutrient | Amount |
|---|---|
| Calories | 120 per 8 fl oz serving |
| Total Fat | 0.5g |
| Saturated Fat | 0.1g |
| Carbohydrates | 8g |
| Fiber | 0.3g |
| Sugar | 0.5g |
| Protein | 2g |
| Sodium | 5mg |
| Cholesterol | 0mg |
Nutrition values are approximate and based on 5 gallons of finished mash divided into 64 servings of 8 fluid ounces each. Individual batches may vary based on grain type, water content, and fermentation completeness.
Frequently Asked Questions
Can I use regular bread yeast instead of distiller’s yeast?
Bread yeast works but produces sulfur and other off-flavors, and it dies at alcohol levels above 10 percent ABV. Distiller’s yeast is worth the extra cost because it creates clean flavor and ferments your entire batch completely.
What if my mash doesn’t smell like fermentation after 24 hours?
Some batches take 36 to 48 hours to show visible bubbling, especially in cooler environments. Wait another day before worrying; if there’s still no activity after 48 hours and no smell of yeast, your yeast may have been dead and you’ll need to re-pitch with fresh yeast.
How do I know when fermentation is truly finished?
Take a hydrometer reading after five days of fermentation and again two days later. If both readings are identical, fermentation is complete; the yeast has consumed all available sugar and stopped working.
Can I use tap water directly from my sink?
Chlorinated tap water inhibits yeast and creates off-flavors, so you should avoid it. If tap water is your only option, boil it for ten minutes and cool it completely before using to allow chlorine to evaporate.
What temperature is too cold or too hot for fermentation?
Below 65 degrees Fahrenheit, fermentation slows dramatically or stops. Above 80 degrees, yeast produces excessive heat stress compounds and unpleasant flavors, and the risk of contamination increases.
Why does my mash smell like rotten eggs or sulfur?
Sulfur smells are normal early in fermentation as yeast metabolizes nutrients, but the smell should fade after three days as the yeast settles. If the smell persists after five days, your fermentation may have stalled or contamination is present.
Final Thoughts
Making bourbon mash from scratch connects you to bourbon’s history and reveals the science behind spirits you’ve enjoyed for years. The process is straightforward once you understand temperature control and yeast behavior, and every batch teaches you something new about fermentation.
Start your first batch this week, keep detailed notes, and taste the finished product to understand what bourbon makers work with before distillation. You’ll never think about your favorite bottle the same way again.
If you’re exploring fermented grain projects, check out our bourbon milk punch recipe for a finished spirit application, or try a bourbon highball recipe to taste quality bourbon properly alongside your mash-making journey.
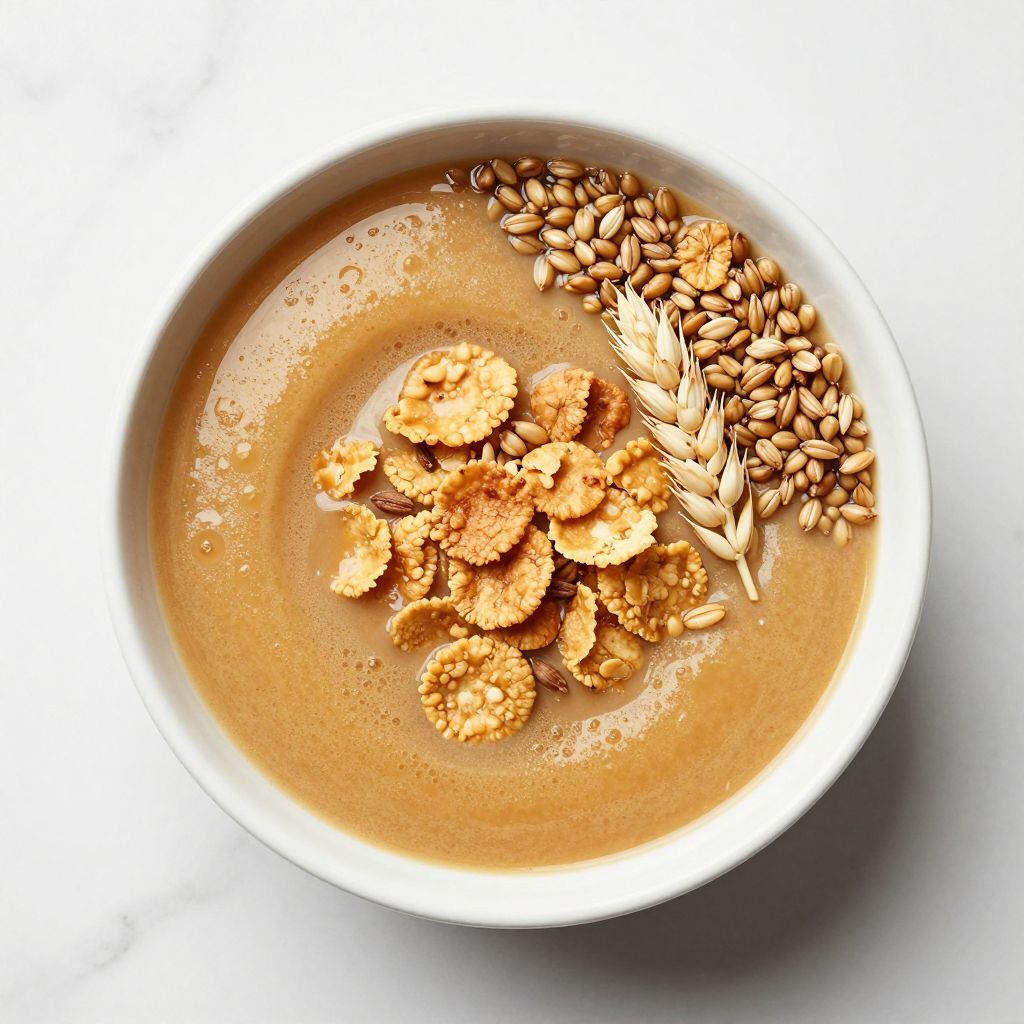
Bourbon Mash
Ingredients
Equipment
Method
- Sanitize all equipment by washing with hot soapy water and soaking or spraying with sanitizing solution, then air dry.
- Heat 5 gallons of water to 165°F in the large stainless steel pot, monitoring with a grain thermometer.
- Slowly add the cornmeal, rye, and malted barley to the 165°F water while stirring constantly to prevent clumps.
- Maintain mash temperature between 149°F and 158°F for 90 minutes, stirring every 10 to 15 minutes and adjusting heat or adding cool water as needed.
- After 90 minutes of mashing, remove the pot from heat and cool the mash to 68°F–72°F using a cold water bath or ice bath, stirring frequently.
- Strain the mash through cheesecloth or a fine mesh strainer into the sanitized food-grade bucket, leaving solids behind.
- Take an original gravity reading with a hydrometer in the cooled wort and record the value.
- Sprinkle the distiller's yeast and yeast nutrient on the surface of the cooled wort, let stand for 5 minutes to rehydrate, then stir gently.
- Seal the bucket with an airlock and ferment at 68°F–75°F for 5 to 7 days, until bubbling slows to one bubble every 10–15 seconds.
- Take a final gravity reading with the hydrometer to confirm fermentation is complete before using or distilling the mash.