
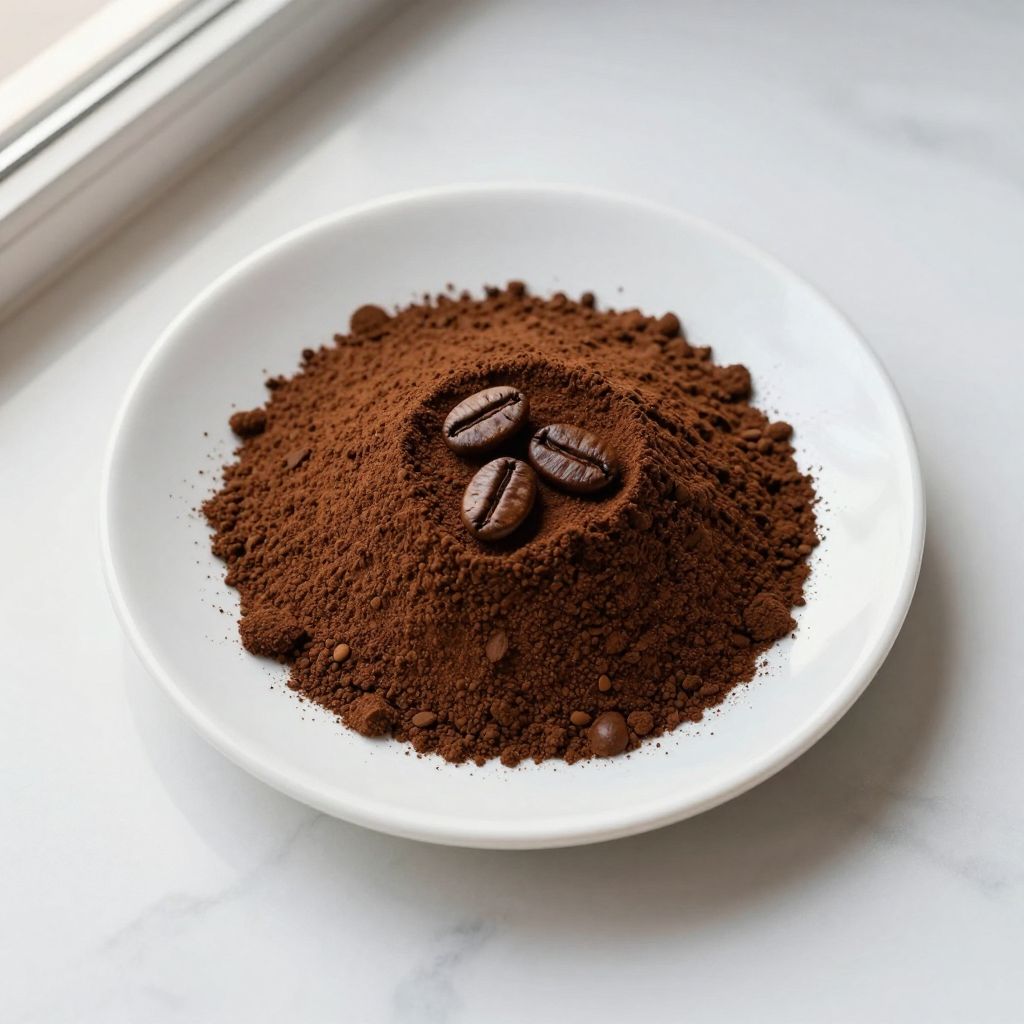
The rich, concentrated aroma of espresso powder hits you instantly when you open the jar, and suddenly your morning coffee routine feels like a trip to a professional café. Homemade espresso powder is one of those game-shifting ingredients that transforms baked goods, beverages, and desserts with deep, authentic coffee flavor without adding liquid.
Making your own espresso powder is cheaper than buying pre-made versions, takes just minutes, and gives you total control over the roast level and intensity. The result is a shelf-stable ingredient that stays potent for months and works in everything from brownies to martinis.
If you love bold coffee flavor and want to level up your cooking and baking, this recipe delivers pure, concentrated espresso in powder form that outshines store-bought options every single time.
Why You’ll Love This Recipe
This recipe is straightforward, requires minimal equipment, and produces a pantry staple that costs a fraction of commercial espresso powder.
- Pure ingredient control: you know exactly what goes into your powder.
- Longer shelf life: homemade espresso powder lasts 3 to 6 months in an airtight container.
- Cost effective: bulk espresso beans are affordable compared to pre-ground espresso powder.
- Versatile uses: works in desserts, savory dishes, coffee drinks, and rubs.
- Customizable strength: choose your bean roast to match your preferred intensity.
My Experience Making This Recipe
I started making espresso powder at home after realizing how often I reached for it while baking tiramisu and brownies. The smell when I first ground the espresso beans into a fine powder was absolutely intoxicating, and I knew I was onto something better than the store-bought version.
My family noticed the difference immediately when I used the homemade powder in a batch of chocolate cookies. The coffee flavor tasted more vivid and present, without any of the stale, dusty notes I sometimes got from jarred options.
Now I make a batch every three months and store it in a small glass jar in my pantry where it stays fresh and potent. The whole process takes less than ten minutes from start to finish, and the payoff shows up in every recipe I use it in.
Recipe Overview
- Recipe Name: Homemade Espresso Powder
- Servings: Makes about 1/2 cup espresso powder
- Prep Time: 5 minutes
- Cook Time: 0 minutes
- Total Time: 5 minutes
- Course: Pantry Staple
- Cuisine: Italian
- Calories per Serving: Not applicable (used in small amounts)
Equipment You Will Need
- Coffee grinder (burr grinder works best)
- Fine-mesh sieve or strainer
- Airtight glass jar or container
- Measuring spoon
- Small spoon or spatula for stirring
- Paper towels or cloth
- Scale (optional but helpful for accuracy)
Ingredients for Homemade Espresso Powder
- 8 ounces whole espresso beans (medium to dark roast preferred)
Ingredient Notes and Substitutions
- Whole espresso beans: Espresso beans are roasted longer and darker than regular coffee beans, creating a more concentrated, bitter flavor profile that translates perfectly into powder form. If you cannot find espresso beans, use high-quality dark roast coffee beans as a substitute, though the flavor will be slightly less intense.
How to Make Homemade Espresso Powder
Step 1: Select Quality Espresso Beans
Start with whole espresso beans that have a glossy, dark appearance. Fresh beans make a noticeable difference in the final powder’s flavor and aroma, so look for beans roasted within the last two to four weeks.
Step 2: Measure Your Beans
Weigh or measure out 8 ounces of whole espresso beans using a kitchen scale or by the cup. Working with this amount gives you a manageable batch that’s easy to process and grind to the right consistency.
Step 3: Clean Your Grinder
Run your burr grinder empty for a few seconds to remove any lingering grounds or debris from previous use. A clean grinder ensures your espresso powder stays pure and uncontaminated by old coffee residue.
Step 4: Grind the Espresso Beans
Pour the espresso beans into your grinder and pulse on the finest setting available, grinding in short bursts of 2 to 3 seconds. The goal is a texture finer than sand but not quite powder yet, which takes roughly 30 to 45 seconds total of pulsing.
Step 5: Check the Consistency
Open the grinder and inspect the grounds with your fingers by rubbing a small amount between your thumb and forefinger. The grounds should feel smooth and uniform with no visible chunks or whole bean pieces remaining.
Step 6: Create Fine Espresso Powder
If chunks remain, pulse the grinder again in short bursts until all pieces are reduced to a consistent powder. Continue until you reach the finest possible texture, which may require two or three grinding sessions depending on your grinder’s power.
Step 7: Sift Through Fine Mesh
Pour the ground espresso into a fine-mesh sieve and gently shake it over a clean bowl or jar, letting the finest particles fall through. This step removes any larger bits and creates a uniform, professional-quality powder.
Step 8: Store in an Airtight Container
Transfer your finished espresso powder into a clean, dry, airtight glass jar with a tight-fitting lid. Label the jar with the date so you know when to make your next batch, and store it in a cool, dark pantry away from direct sunlight and heat.
Pro Tip: If your espresso powder clumps slightly during storage, place it back in the grinder for a quick 5 to 10 second pulse to break up the clumps and restore its fine texture.
Tips for the Best Homemade Espresso Powder
- Use a burr grinder rather than a blade grinder, since burr grinders create a more uniform, fine powder that blends seamlessly into recipes.
- Grind in short pulses rather than holding the button down continuously, which helps prevent overheating the beans and preserves the flavor.
- Invest in fresh espresso beans from a local roaster or specialty coffee shop, since fresher beans produce more vibrant powder.
- Keep your grinder completely dry before starting, since any moisture can cause the powder to clump.
- Sift your final powder through a fine mesh to remove large particles and achieve a professional texture.
- Store your powder away from heat, light, and air, which degrade the flavor over time.
Common Mistakes to Avoid
- Grinding too coarsely: if your powder is too grainy, it won’t dissolve smoothly into beverages or batter, resulting in a gritty texture in your finished dish.
- Using old or stale beans: expired espresso beans lose their potency and flavor intensity, producing flat, weak powder that doesn’t deliver the bold coffee taste you’re after.
- Skipping the sifting step: without sifting, larger particles remain in your powder and create an uneven texture that’s harder to measure and use accurately.
- Grinding in one long session: continuous grinding generates heat that damages the delicate flavor compounds in espresso, resulting in a burnt or bitter-tasting powder.
- Storing in clear containers: light exposure degrades the powder’s flavor and aroma over weeks, so opaque or dark glass jars protect your finished product better.
Serving Suggestions
Homemade espresso powder works beautifully in both sweet and savory applications, adding depth and complexity to dozens of recipes. Use it straight or stir it into hot beverages for an instant flavor boost.
- Dust over tiramisu filling or mascarpone whipped cream for authentic Italian dessert flavor.
- Whisk into hot milk or water for instant espresso, or mix into coffee drinks for extra strength.
- Stir into chocolate brownie batter, chocolate cake, or chocolate mousse to amplify the cocoa flavor.
- Mix into coffee rubs for beef or lamb before grilling or roasting for savory depth.
- Blend into homemade ice cream or coffee-flavored buttercream frosting for desserts.
Variations to Try
- Light roast espresso powder: grind light roast espresso beans instead for a brighter, more acidic flavor with less bitterness, perfect for delicate desserts or morning beverages.
- Extra fine powder: sift your finished powder a second time through ultra-fine mesh for a silky texture that dissolves instantly into liquids without any grittiness.
- Flavored espresso powder: add a small pinch of ground cinnamon, cardamom, or cocoa powder to your finished espresso powder for custom flavor blends.
- Single-origin espresso powder: source espresso beans from a specific region or farm to highlight unique flavor notes and create a signature homemade powder.
Dietary Adaptations
- Gluten-free: espresso powder is naturally gluten-free, making it safe for anyone avoiding gluten.
- Dairy-free: this ingredient contains no dairy and works perfectly in vegan recipes and dairy-free baking.
- Vegan: pure espresso powder is entirely plant-based and appropriate for all vegan cooking and baking.
- Low-carb and keto: espresso powder is carb-free and fits seamlessly into low-carb or keto diets without any adjustments needed.
Storage and Reheating
Refrigerator
Store your espresso powder in an airtight glass jar on a pantry shelf rather than in the refrigerator, where moisture can seep in and cause clumping.
- Cool, dark pantry is ideal for espresso powder storage.
- Keep away from heat sources, direct sunlight, and humid areas.
Freezer
Freezing espresso powder is unnecessary and can introduce moisture when thawing, so pantry storage is your best option for long-term freshness.
- Do not freeze espresso powder.
- Pantry storage maintains quality better than any cold storage method.
Reheating
Espresso powder does not require reheating since it is used as an ingredient rather than a finished dish.
- Mix directly into hot beverages or dry ingredients as recipes call for.
- Stir well when adding to liquids to ensure even distribution.
Nutrition Information
| Nutrient | Amount |
|---|---|
| Calories | 0 |
| Total Fat | 0g |
| Saturated Fat | 0g |
| Carbohydrates | 0g |
| Fiber | 0g |
| Sugar | 0g |
| Protein | 0g |
| Sodium | 0mg |
| Cholesterol | 0mg |
Espresso powder contains minimal calories and no significant nutrients on its own, making it a calorie-free flavoring ingredient used in small quantities throughout recipes.
Frequently Asked Questions
Can I use regular coffee beans instead of espresso beans?
Yes, you can use dark roast coffee beans as a substitute, though the flavor will be slightly less intense and concentrated than true espresso powder. For the best results, look for beans labeled as espresso roast from a specialty coffee shop.
How long does homemade espresso powder last?
Properly stored in an airtight container in a cool, dark pantry, homemade espresso powder stays fresh and potent for 3 to 6 months. After six months, the flavor begins to fade, so make a fresh batch for the best results.
What is the difference between espresso powder and instant coffee?
Espresso powder is made from whole roasted espresso beans that are ground into a fine powder, delivering authentic espresso flavor and intensity. Instant coffee is a processed product with added chemicals and fillers that create a weaker, more artificial taste.
Can I grind espresso beans with a blade grinder?
A blade grinder will work but produces inconsistent texture with some fine particles and some larger chunks. A burr grinder creates the uniform, fine powder you need for professional results in baking and beverages.
Should I grind the espresso beans all at once or in batches?
Grind in multiple short bursts rather than one long session, since continuous grinding generates heat that damages the delicate flavor compounds. Each burst should last only 2 to 3 seconds, with breaks in between.
Can I use espresso powder in savory dishes?
Absolutely! Espresso powder works beautifully in coffee rubs for meat, in dark sauces, and even in chili or beef stew, where it adds depth and complexity without tasting overtly like coffee. Start with a small pinch and taste as you go.
Final Thoughts
Making your own espresso powder is one of those simple kitchen skills that pays dividends every single time you bake or cook. The quality difference between homemade and store-bought versions is immediately obvious in every recipe you use it in.
Give this recipe a try with fresh beans from a local roaster, and you will wonder why you ever bought pre-made espresso powder again. Once you have a jar sitting in your pantry, you will find yourself reaching for it constantly.
If you loved making homemade espresso powder, explore more coffee-forward recipes in your kitchen. Try making a hazelnut shaken espresso recipe for an elegant coffee drink, or whip up an espresso con panna recipe for a classic Italian coffee experience. Your homemade espresso powder will shine in both of these preparations and countless other culinary creations.
Homemade Espresso Powder
Ingredients
Equipment
Method
- Select quality espresso beans with a glossy, dark appearance.
- Weigh or measure out 8 ounces of whole espresso beans using a kitchen scale or measuring cup.
- Clean your grinder by running it empty for a few seconds to remove any residual grounds.
- Grind the espresso beans in short 2 to 3 second pulses on the finest setting for a total of 30 to 45 seconds, aiming for a texture finer than sand.
- Inspect the grounds and pulse again as needed until you achieve a smooth, uniform powder with no visible chunks.
- Sift the ground espresso through a fine-mesh sieve into a clean bowl or jar, shaking gently to remove larger particles.
- Transfer the sifted espresso powder into a clean, dry, airtight glass jar and label with the date.
- Store the jar in a cool, dark pantry for up to 3 to 6 months, re-pulsing clumps for 5 to 10 seconds if needed before use.