
Picture yourself on a lazy summer afternoon, standing in a kitchen that smells like fermenting fruit and possibility, knowing you’re about to create something that’ll be the talk of your next gathering. Fruit moonshine mash is the gateway recipe to home distilling, combining fresh fruit, sugar, and yeast into a potent, smooth spirit that tastes nothing like the harsh industrial stuff of legend.
This recipe excels because it’s forgiving, customizable, and genuinely fun to make, turning your kitchen into a small-batch distillery without any scary equipment or chemistry knowledge. The result is a clean, fruit-forward moonshine that ages beautifully and makes incredible gifts for the adventurous folks on your list.
Why You’ll Love This Recipe
Fruit moonshine mash rewards patience with flavor that commercial spirits can’t match. Here’s what makes this recipe a winner:
- Full control over fruit selection and flavor intensity, from berry-forward to tropical and complex
- Surprisingly forgiving process that tolerates minor mistakes without ruining your batch
- Ages gracefully, improving over weeks and months as flavors meld and mellow
- Cheaper per bottle than quality store-bought spirits, especially if you grow your own fruit
- Conversation starter that feels like a genuine accomplishment when served to friends
My Experience Making This Recipe
I started with peaches from a local orchard, following a basic recipe and honestly expecting disaster. What I got instead was a crystal-clear spirit that tasted like concentrated peach candy without the harshness of typical moonshine, and I was hooked.
My first batch took about three weeks from mash to drinkable product, and watching the transformation from chunky fruit pulp to clear liquid felt like actual alchemy. The smell during fermentation was wild: fruity, yeasty, and oddly inviting, filling my kitchen with this warm, boozy perfume that made everyone curious about what I was cooking.
What surprised me most was how smooth the final spirit tasted when chilled and mixed with fruit juice or sipped neat over ice. Friends assumed I’d bought it from some obscure craft distillery, and the look on their faces when I said I made it at home was absolutely worth the three weeks of waiting.
Recipe Overview
- Recipe Name: Fruit Moonshine Mash
- Servings: Makes approximately 1 liter of finished moonshine
- Prep Time: 30 minutes
- Fermentation Time: 21 to 28 days
- Total Time: 3 to 4 weeks plus aging time
- Course: Spirits and Liqueurs
- Cuisine: American Homesteading
- Alcohol Content: Approximately 20 to 30 percent ABV depending on fermentation
Equipment You Will Need
- Large glass carboy or fermentation vessel with airlock (5 to 10 liter capacity)
- Rubber tubing for siphoning (food-grade silicone, 3/8 inch diameter)
- Hydrometer to measure sugar content and fermentation progress
- Thermometer to monitor fermentation temperature
- Cheesecloth or fine mesh strainer for filtering pulp
- Large stainless steel pot for heating and mixing
- Wooden spoon or long stirring rod
- Glass bottles for storage with tight-sealing caps
- Funnel for transferring liquid
- Scale for precise ingredient measurement
Ingredients for Fruit Moonshine Mash
- Fresh fruit (peaches, apples, berries, or stone fruits): 5 to 6 pounds, chopped or crushed
- Granulated sugar: 3 to 4 pounds (depending on fruit sweetness)
- Water: 1 gallon, filtered or distilled
- Champagne yeast or turbo yeast: 1 packet (5 grams)
- Yeast nutrient: 1 teaspoon
- Acid blend (citric acid or tartaric acid): 1/2 teaspoon
- Pectic enzyme (optional but recommended): 1/2 teaspoon
Ingredient Notes and Substitutions
- Fresh fruit: Fresh or frozen fruit works equally well; frozen actually breaks down faster during fermentation. Avoid canned fruit packed in syrup, which throws off sugar calculations and introduces unwanted additives.
- Granulated sugar: Standard white sugar is essential for consistent fermentation and clean flavor. Brown sugar or honey create muddier, heavier spirits and ferment unpredictably.
- Champagne yeast: This strain produces clean, dry spirits and handles high alcohol content without stalling. Bread yeast or baker’s yeast will ferment but produces off-flavors and sediment.
- Yeast nutrient: This boosts fermentation speed and prevents stuck fermentation midway through. Skip it and you risk a batch that stops fermenting before reaching target alcohol content.
- Acid blend: This lowers pH and prevents spoilage while brightening fruit flavor. Lemon juice works in a pinch at roughly 2 tablespoons per gallon, though results vary.
- Pectic enzyme: This breaks down fruit pectin and creates clearer final product. Omit it and your moonshine may appear slightly cloudy, though the flavor remains unchanged.
How to Make Fruit Moonshine Mash
Step 1: Sanitize Your Equipment
Sterilize every piece of equipment that will touch your mash using hot water or a commercial sanitizer like Star San. Bacteria or wild yeast contamination ruins entire batches, so this step isn’t optional no matter how tempting it is to skip.
Step 2: Prepare Your Fruit
Chop or crush your fresh fruit into 1/2 inch to 1 inch pieces, removing any moldy or damaged sections. Smaller pieces ferment faster and extract more flavor, so don’t be shy about breaking everything down thoroughly.
Step 3: Create Your Base Mixture
Pour your filtered water into a large pot and heat to 170 degrees Fahrenheit, then remove from heat and add your chopped fruit. This warm temperature kills wild microbes on the fruit surface while preserving delicate flavors better than boiling does.
Step 4: Add Sugar and Acids
Stir in your granulated sugar, yeast nutrient, acid blend, and pectic enzyme once the mixture cools to room temperature. These additions create the perfect environment for yeast to thrive while preventing spoilage and clarifying your final spirit.
Step 5: Check Your Starting Gravity
Use your hydrometer to measure the specific gravity of your mixture, recording the number for reference. This tells you exactly how much sugar you have and predicts your final alcohol content once fermentation completes.
Step 6: Pitch Your Yeast
Once your mixture reaches room temperature around 70 degrees Fahrenheit, rehydrate your champagne yeast in a small cup of warm water for 15 minutes, then pour it into your carboy. Temperature control matters here: cold yeast takes forever to activate, while overheated yeast dies and ruins the batch.
Step 7: Install Your Airlock and Ferment
Pour your fruit mixture into your sanitized carboy, leaving 2 to 3 inches of headspace, then attach your airlock to the top. The airlock lets carbon dioxide escape while preventing oxygen and bacteria from entering, so fill it halfway with water and check it daily for bubbling activity.
Step 8: Monitor Fermentation Progress
Watch your airlock bubble actively for the first week as yeast consumes sugar and produces alcohol. Bubbling typically slows by week two and nearly stops by week three, which signals that fermentation is wrapping up.
Step 9: Strain and Rack Your Moonshine
Once bubbling stops completely after three to four weeks, use your siphon tube to carefully transfer the clear liquid into a clean carboy, leaving fruit pulp and sediment behind. This racking step removes dead yeast and solids that would make your final spirit taste bitter and harsh.
Step 10: Rest and Clear
Let your spirit sit undisturbed for another 5 to 7 days to allow remaining particles to settle at the bottom. Crystal clarity takes time, so resist the urge to bottle immediately even though your moonshine looks mostly transparent.
Step 11: Final Filtering and Bottling
Siphon your clear moonshine into sterilized glass bottles, leaving behind any sediment in the bottom of your carboy. Use cheesecloth or a coffee filter if your spirit still appears slightly hazy, and seal your bottles tightly with caps to prevent evaporation.
Step 12: Age and Enjoy
Store your finished moonshine in a cool, dark place away from direct sunlight for at least two weeks before drinking. Aging smooths harsh edges and allows flavors to marry, creating a noticeably better spirit than fresh moonshine tastes.
Pro Tip: Use a hydrometer before and after fermentation to calculate your actual alcohol content: multiply the difference in gravity points by 131 for a reasonably accurate ABV reading.
Tips for the Best Fruit Moonshine Mash
- Keep your fermentation temperature steady between 65 and 75 degrees Fahrenheit for best results, as temperature swings stress yeast and create off-flavors. Use a temperature strip on your carboy to monitor conditions throughout fermentation.
- Don’t open your carboy or fiddle with your airlock during active fermentation, as oxygen exposure invites contamination and disrupts the yeast’s work. Curiosity costs you a few weeks, so practice patience.
- Use ripe but not overripe fruit for the best balance of sugar and acid, as overripe fruit ferments too quickly and underripe fruit lacks flavor depth. Squeeze a piece gently to check: it should yield slightly without being mushy.
- Buy champagne yeast specifically rather than generic brewer’s yeast, as it’s engineered to handle high alcohol content and stays active longer. Your final spirit’s smoothness depends on using the right strain.
- Record your starting gravity and final gravity measurements so you understand exactly how much alcohol your batch contains and can adjust future batches accordingly. This data makes you a better home distiller over time.
- Invest in a quality siphon tube and practice your siphoning technique before your batch finishes, as sloppy transfers waste product and introduce sediment into your clear spirit. A few practice runs with water prevent expensive mistakes.
Common Mistakes to Avoid
- Skipping sanitation and watching your batch develop mold or off-flavors from contamination, making the entire 3 to 4 week investment worthless. This single step determines success or failure more than anything else.
- Using regular baker’s yeast instead of champagne yeast, resulting in a spirit that tastes medicinal and harsh rather than smooth and drinkable. The yeast strain directly impacts your final product’s quality.
- Fermenting in temperatures above 80 degrees Fahrenheit or below 60 degrees, either stressing your yeast into producing bad flavors or killing fermentation entirely. Temperature control is non-negotiable for quality moonshine.
- Bottling too early before sediment fully settles, resulting in cloudy, bitter-tasting spirit that improves only marginally with age. Patience during the final resting phase transforms your product.
- Overloading your carboy with fruit and sugar, causing foam to overflow through your airlock and make a terrible mess while contaminating your batch. Measure ingredients carefully and leave proper headspace.
Serving Suggestions
Fruit moonshine tastes best ice-cold and straight, served in small glasses so the full flavor complexity shines without overwhelming your palate. It also plays beautifully in creative cocktails or mixed with sparkling water and fresh fruit juice for something refreshing yet spirited.
- Serve neat in a shot glass, chilled to just below freezing, to showcase the pure fruit flavor and smooth finish
- Mix with sparkling lemonade and fresh berries for a light, summery cocktail that’s perfect for outdoor gatherings
- Combine with ginger beer and fresh lime juice over ice for a moonshine mule with unexpected depth
- Layer over vanilla ice cream for a boozy dessert that feels fancy and indulgent
- Mix half moonshine with half cranberry juice and a splash of lime for a spirit-forward punch that works for parties
Variations to Try
- Berry Moonshine: Substitute raspberries, blackberries, or blueberries for stone fruit, creating a darker, more tannic spirit with earthy complexity. Berry batches typically need an extra 1/2 teaspoon of acid blend to balance their natural tartness.
- Tropical Moonshine: Use pineapple, mango, and passion fruit for an exotic spirit that tastes like vacation in a glass. Tropical fruit ferments slightly faster, so monitor your airlock activity closely to catch completion earlier than stone fruit batches.
- Apple Pie Moonshine: Combine apples with cinnamon sticks, nutmeg, and a touch of vanilla extract added after fermentation to create a spiced spirit reminiscent of fall. This variation benefits from extended aging, improving noticeably after two to three months.
- Honey Infused Moonshine: Replace 1 pound of sugar with 2 pounds of raw honey for a smoother, slightly sweet spirit with floral undertones. Honey ferments more slowly than sugar, so expect your batch to take an extra 7 to 10 days to complete.
- Mixed Fruit Moonshine: Combine 2 pounds peaches, 2 pounds apples, and 1 pound berries for a complex, layered spirit that’s more interesting than single-fruit versions. Mixing fruits allows each flavor to shine while creating something greater than the sum of its parts.
Dietary Adaptations
- Gluten-Free: This recipe is naturally gluten-free, as fermentation converts all sugars to alcohol and champagne yeast contains no gluten. Your finished moonshine works perfectly for anyone avoiding gluten.
- Dairy-Free: Fruit moonshine mash contains no dairy products whatsoever, making it safe for vegans and those with lactose intolerance. The entire process relies only on fruit, sugar, water, and yeast.
- Low-Carb/Keto: Your finished moonshine contains virtually no carbohydrates since fermentation converts all sugar to alcohol, making it keto-friendly when consumed neat or mixed with zero-carb beverages. Avoid sugary juice mixers that would spike carb content.
- Sugar-Free Alternative: Replace granulated sugar with a fermentable alternative like honey or agave nectar, though your alcohol content and fermentation timeline will shift accordingly. These alternatives produce drier finished spirits with different flavor profiles than standard sugar-based batches.
Storage and Reheating
Refrigerator
Sealed glass bottles of finished moonshine last indefinitely in your refrigerator, though the cold temperature actually slows the aging process. Keep bottles upright in a cool, dark shelf away from light exposure to preserve both flavor and alcohol content long-term.
- Store in sealed glass bottles with airtight caps to prevent evaporation and oxidation
- Keep away from direct sunlight and heat sources that accelerate flavor degradation
- Expect shelf life of several years when stored properly, with flavor actually improving over time
Freezer
Moonshine’s high alcohol content prevents it from fully freezing at standard freezer temperatures, keeping it pourable and ready to serve straight from the freezer. This makes freezer storage ideal if you want ice-cold moonshine ready on demand without extra preparation steps.
- Store in the back of your freezer where temperature stays most consistent
- Use freezer-safe bottles with secure caps to prevent any leakage
- Expect no degradation over months or years when frozen properly
Reheating
Moonshine requires no reheating and tastes best served cold or at room temperature depending on your preference. Never heat moonshine intentionally, as high alcohol content makes it flammable and heating degrades delicate fruit flavors that make your spirit special.
- Serve chilled directly from your refrigerator or freezer for maximum smoothness
- Allow room temperature aging in sealed bottles to deepen flavor complexity over weeks and months
- Never expose to heat above room temperature, as this damages the spirit and creates fire hazards
Nutrition Information
| Nutrient | Amount per 1.5 oz serving |
|---|---|
| Calories | 110 |
| Total Fat | 0g |
| Saturated Fat | 0g |
| Carbohydrates | 0g |
| Fiber | 0g |
| Sugar | 0g |
| Protein | 0g |
| Sodium | 5mg |
| Cholesterol | 0mg |
These values represent typical moonshine with approximately 25 percent ABV and assume complete fermentation with zero residual sugar. Actual values vary depending on your specific fruit selection, fermentation completion, and how much fruit solids remain in your finished spirit.
Frequently Asked Questions
Can I use frozen fruit instead of fresh fruit?
Absolutely, and frozen fruit actually works better since freezing breaks down cell walls and extracts flavor faster. Thaw your fruit completely before using and drain excess liquid to keep your gravity readings accurate.
What happens if my fermentation stalls midway through?
Temperature drops or bad yeast are common culprits; try slowly warming your carboy to 75 degrees Fahrenheit and waiting three days. If nothing happens, you may need to repitch with fresh yeast, though this adds time and complexity.
How do I know when fermentation is actually complete?
Your airlock stops bubbling entirely for at least 48 hours, and your hydrometer reading stays stable for multiple days without dropping further. Taking gravity readings every few days tells you precisely when fermentation ends rather than guessing based on airlock activity.
Can I distill my moonshine to increase alcohol content?
Home distillation is illegal in most jurisdictions without proper permits, so I recommend enjoying your batch as-is or consulting local laws before attempting it. The fermented product you create through this recipe is legal and delicious without distillation.
Why does my moonshine taste harsh or medicinal?
This typically means you used regular yeast instead of champagne yeast or your fermentation temperature fluctuated too much during the process. Some harshness mellows with age, so store your batch for several months and try it again before deciding it’s ruined.
How does store-bought moonshine compare to homemade?
Homemade fruit moonshine tastes smoother and more nuanced than commercial versions, which often rely on neutral grain spirits and added flavorings rather than actual fermentation. Once you taste your own batch, commercial alternatives feel flat and one-dimensional by comparison.
Can I make moonshine without a hydrometer?
Yes, though you lose precision in predicting alcohol content and knowing exactly when fermentation finishes. Track fermentation by airlock activity and rely on taste tests to judge completion, understanding that your ABV estimate becomes educated guessing rather than measured fact.
Final Thoughts
Making fruit moonshine mash transforms you from a casual home cook into someone who actually creates spirits, which carries a surprising amount of satisfaction that commercial shopping just doesn’t offer. The process teaches patience, precision, and respect for fermentation, skills that improve your cooking and brewing across the board.
Your first batch might not be perfect, and that’s completely fine because the learning experience makes the next batch better and the batch after that even more refined. Start with this recipe, taste your results, adjust based on what you learned, and soon you’ll be crafting moonshine that rivals anything you can buy while impressing everyone at your gatherings.
Explore More Moonshine Recipes
If you enjoyed making fruit moonshine mash, you’ll love exploring other spirit variations that expand your home distilling skills and palate.
Try our cherry moonshine recipe for a deep, rich variation that captures summer stone fruit at its peak, or explore our pineapple moonshine recipe for a tropical spirit that brings vacation vibes to every sip.
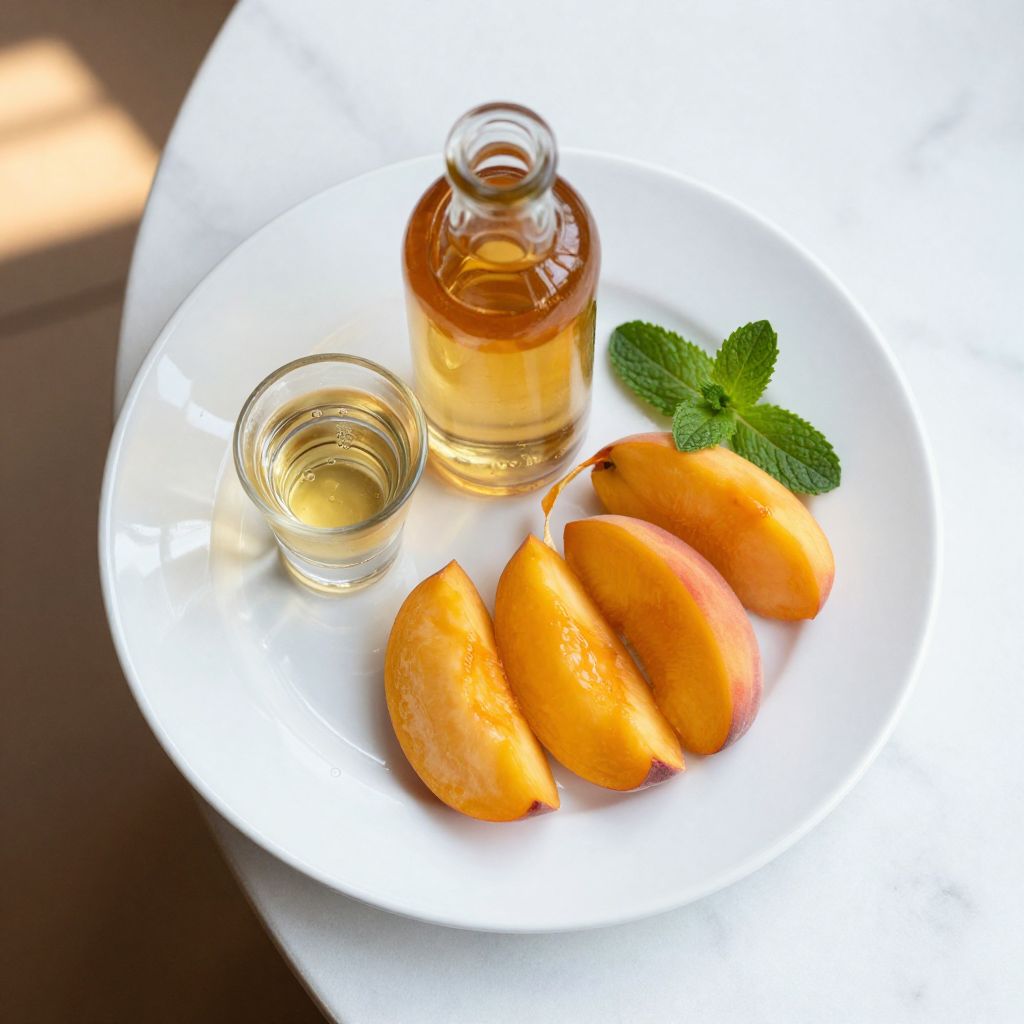
Fruit Moonshine Mash
Ingredients
Equipment
Method
- Sanitize every piece of equipment that will touch the mash using hot water or a commercial sanitizer before starting.
- Chop or crush 5 to 6 pounds of fresh fruit into 1/2 to 1 inch pieces, discarding any damaged parts.
- Heat 1 gallon of filtered water to 170°F (77°C) in a large pot, then remove from heat and add the prepared fruit.
- Let the mixture cool to room temperature (70°F/21°C), then stir in 3 to 4 pounds of granulated sugar, 1 teaspoon yeast nutrient, 1/2 teaspoon acid blend, and 1/2 teaspoon pectic enzyme.
- Measure the specific gravity of the cooled mixture with a hydrometer and record the starting gravity.
- Rehydrate the yeast in warm water at around 70°F (21°C) for 15 minutes, then pitch it into the mash.
- Transfer the mash to the sanitized carboy, leaving 2 to 3 inches of headspace, install the airlock half-filled with water, and let ferment.
- Allow primary fermentation at 65–75°F (18–24°C) for 3 to 4 weeks, monitoring airlock activity until bubbling stops.
- Once fermentation is complete, use sanitized tubing to rack clear liquid off sediment into a clean carboy.
- Let the racked spirit rest undisturbed for 5 to 7 days to allow remaining particles to settle.
- Filter the clear moonshine through cheesecloth or a coffee filter into sterilized glass bottles and seal tightly.
- Age the bottled moonshine in a cool, dark place for at least two weeks before serving for best flavor.