
There’s something magical about watching yeast bubble and foam, transforming simple ingredients into liquid gold. Making a Yeast Starter is essential for any homebrewer wanting to kickstart fermentation and enhance the flavor of their beer. This process not only ensures a healthy fermentation but also helps develop complex flavors that make your brew truly special. So, let’s roll up our sleeves and dive into this rewarding brewing step!
Why You’ll Love This Recipe
This yeast starter recipe is a game changer for homebrewers.
- Boosts yeast vitality and health for better fermentation.
- Enhances the flavor profile of your beer.
- Easy to make with just a few ingredients.
- Perfect for any beer style, from ales to lagers.
- Reduces the risk of fermentation problems.
My Experience Making This Recipe
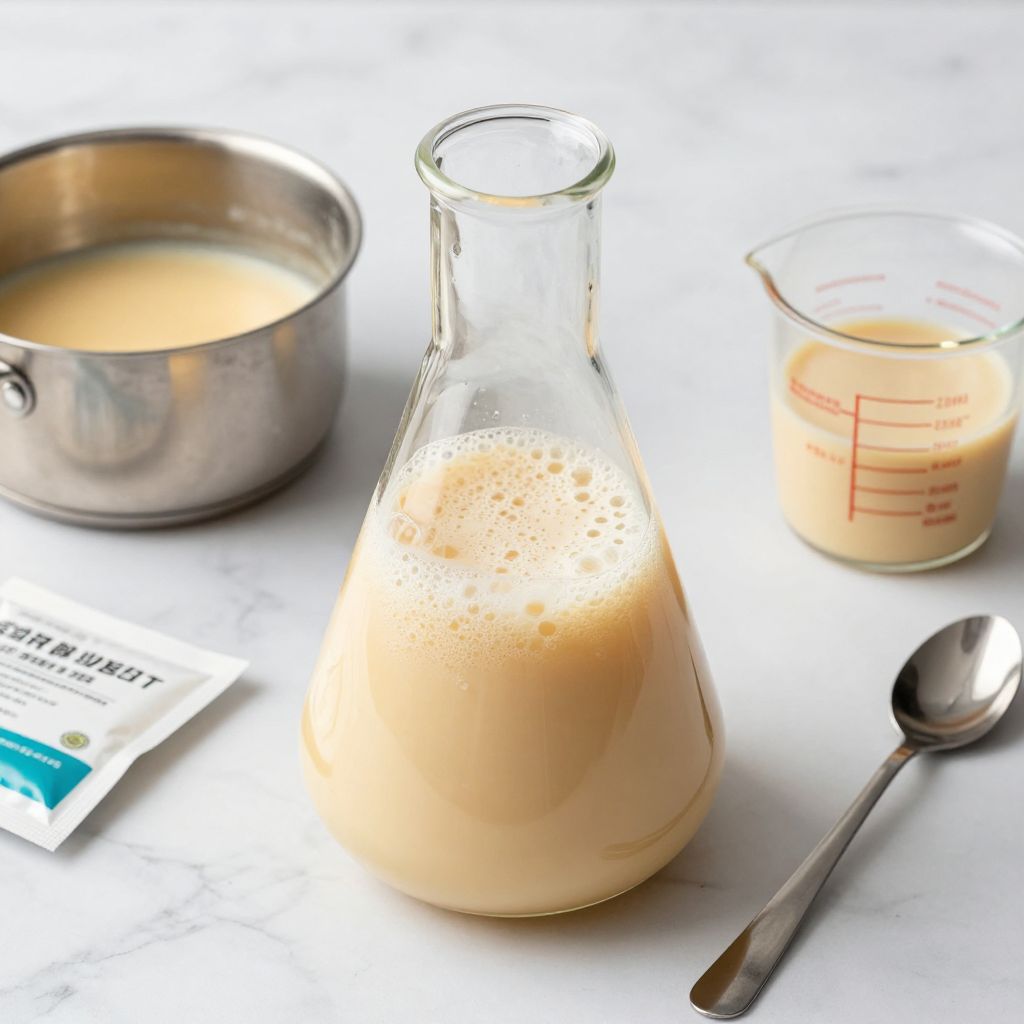
When I first tried making a yeast starter, I was amazed at how lively the yeast became. Within hours, my starter was bubbling away, and I could already smell the delightful aromas wafting from the flask.
Not only did my beer ferment more vigorously, but the final product was richer and more flavorful than ever before. I was hooked and have made it a staple in my brewing process.
Recipe Overview
- Recipe Name: Yeast Starter Recipe Beer
- Servings: 5 gallons
- Prep Time: 10 minutes
- Cook Time: 24 hours (inactive fermentation time)
- Total Time: 24 hours 10 minutes
- Course: Beverage
- Cuisine: Craft Beer
- Calories per Serving: 50
Equipment You Will Need
- Small saucepan
- Stirring spoon
- Glass or plastic fermentation flask
- Measuring cup
- Thermometer
- Sanitizer
Ingredients for Yeast Starter Recipe Beer
- 1 cup light dry malt extract (DME)
- 2 cups water
- 1/4 tsp yeast nutrient (optional)
- 1 packet of brewing yeast (liquid or dry)
Ingredient Notes and Substitutions
- Light dry malt extract (DME): This provides the sugars needed for yeast growth. You can substitute with liquid malt extract if needed.
- Yeast nutrient: Helps yeast thrive, especially if your wort is lacking nutrients. If you don’t have it, you can skip it, but your yeast may take longer to activate.
How to Make Yeast Starter Recipe Beer
Step 1: Sanitize Your Equipment
Start by sanitizing all your equipment, including the flask and stirring spoon. This helps prevent any unwanted bacteria from ruining your starter.
Step 2: Boil the Water
In a small saucepan, bring 2 cups of water to a boil. Boiling water helps dissolve the DME and kills any potential contaminants.
Step 3: Add the Malt Extract
Once boiling, remove the saucepan from heat and stir in the 1 cup of DME until fully dissolved. This creates a concentrated wort for your yeast starter.
Step 4: Optional Nutrient Addition
If using yeast nutrient, add it to the wort now and stir well. This step can help ensure your yeast has everything it needs to thrive.
Step 5: Cool the Wort
Allow the wort to cool to room temperature. This is crucial to prevent killing your yeast when you pitch it.
Step 6: Transfer to Flask
Once cooled, pour the wort into your sanitized fermentation flask. Make sure to leave some space at the top for foaming.
Step 7: Pitch the Yeast
Add your packet of yeast to the flask and gently swirl to mix. This helps distribute the yeast evenly in the wort.
Step 8: Ferment the Starter
Cover the flask with a sanitized lid or cloth and place it in a warm, dark area. Allow it to ferment for 24 hours, checking for activity.
Pro Tip: A good yeast starter should exhibit visible bubbling within a few hours. If not, the yeast may be too old or inactive.
Tips for the Best Yeast Starter
- Use fresh yeast for best results; old yeast can lead to sluggish fermentation.
- Keep the starter at a stable, warm temperature around 70°F to encourage fermentation.
- Swirl the flask gently during fermentation to help oxygenate the wort.
- Make your starter a day or two before brewing for maximum yeast activity.
- Monitor for signs of fermentation, like bubbles and foaming, to know when it’s ready.
Common Mistakes to Avoid
- Skipping sanitation can lead to contamination and spoilage.
- Using too hot or too cold water can kill the yeast.
- Not giving the starter enough time can result in under-pitched yeast.
- Using old yeast packets can lead to poor fermentation.
Serving Suggestions
Enjoy your freshly brewed beer with friends or during a cozy night in. Here are some great pairings:
- Grilled meats
- Spicy foods
- Cheeses
- Light salads
- Chocolate desserts
Variations to Try
- Use different types of malt extract for varied flavors, like amber or dark malt.
- Add hops during the boiling process for a hoppy starter.
- Experiment with different yeast strains to influence the final beer style.
- Try adding fruits or spices to the wort for unique flavor characteristics.
Dietary Adaptations
- Gluten-free: Use gluten-free malt extract or grains.
- Dairy-free: This recipe is already dairy-free.
- Vegan: All ingredients are plant-based.
- Low-carb/keto: A starter may not fit strict low-carb diets due to malt sugars.
Storage and Reheating
Refrigerator
Store any leftover starter in the fridge for up to a week. Make sure to re-sanitize the container before use.
- Transfer to a sanitized jar.
- Seal tightly and refrigerate.
Freezer
For longer storage, freeze the starter in ice cube trays. This allows you to use it in smaller portions later.
- Pour the cooled starter into ice cube trays.
- Once frozen, transfer to a labeled freezer bag.
Reheating
Thaw frozen starter in the fridge overnight before using. Always check for any off-smells before pitching.
- Let it come to room temperature before adding to your wort.
Nutrition Information
| Nutrient | Amount |
|---|---|
| Calories | 50 |
| Total Fat | 0g |
| Saturated Fat | 0g |
| Carbohydrates | 12g |
| Fiber | 0g |
| Sugar | 0g |
| Protein | 1g |
| Sodium | 0mg |
| Cholesterol | 0mg |
This information is approximate and can vary based on ingredients used.
Frequently Asked Questions
Can I use regular baker’s yeast instead of brewing yeast?
Baker’s yeast can work, but it won’t produce the same flavors and aromas as brewing yeast specifically designed for beer.
How long can I store the yeast starter?
You can store the yeast starter in the fridge for up to a week, but it’s best to use it fresh.
Can I make a larger yeast starter?
Absolutely! Just scale up the ingredients proportionally for larger batches.
What if my starter doesn’t bubble?
This could indicate old yeast or an issue with temperature. Check the yeast’s expiration date and ensure the starter is at a suitable temperature.
Can I use this starter for lagers?
Yes, this starter works well for both ales and lagers, helping ensure a healthy fermentation for either style.
Final Thoughts
Making a Yeast Starter Recipe Beer is a small investment of time that pays off big in flavor and fermentation health. I encourage you to give it a try and see how it transforms your homebrewing experience.
For more brewing inspiration, check out this stout recipe or explore a refreshing saison recipe to expand your brewing repertoire.
Yeast Starter Recipe Beer
Ingredients
Equipment
Method
- Sanitize all your equipment, including the flask and stirring spoon.
- In a small saucepan, bring 2 cups of water to a boil.
- Remove the saucepan from heat and stir in 1 cup of DME until fully dissolved.
- If using yeast nutrient, add it to the wort now and stir well.
- Allow the wort to cool to room temperature.
- Pour the wort into your sanitized fermentation flask.
- Add your packet of yeast to the flask and gently swirl to mix.
- Cover the flask with a sanitized lid or cloth and place it in a warm, dark area.
- Allow it to ferment for 24 hours.